
Are you tired of having to deal with a clogged washer drain? Don’t worry; you’re not alone. It’s a common household problem that can be easily solved by following simple steps.
A clogged washer drain can disrupt your laundry routine and potentially lead to water damage if not addressed promptly. Over time, lint, detergent buildup, and debris can accumulate in the drain, restricting the flow of water and causing backups. Fortunately, unclogging a washer drain is a straightforward task that you can often handle without professional assistance.
This guide on how to unclog washer drain will provide you with step-by-step instructions to identify, access, and remove clogs, ensuring your washer operates efficiently once again. Let’s get started with washer drain ideas!
What Are the Causes of a Clogged Washer Drain?
Before we dive into the steps to unclog a washer drain, it’s essential to understand what can cause this issue in the first place. The most common causes of a clogged washer drain include:
- Lint buildup from clothing and towels
- Detergent and soap scum accumulation
- Hair and debris from dirty laundry
These materials can get trapped in the drain pipe or pump filter, causing blockages that prevent water from draining properly. Additionally, clogs from those sources can also contribute to a blocked washer drain if your washing machine is connected to a shared drain with other appliances, such as a sink or dishwasher.
What Will You Need?
Before attempting to unclog your washer drain, gathering the necessary materials is essential. These may include:
- A plunger
- A plumber’s snake or auger
- Baking soda and vinegar
- Hot water
- Rubber gloves and a face mask (optional)
Once you have gathered your materials, you can unclog your washer drain.
8 Easy Steps on How to Unclog Washer Drain
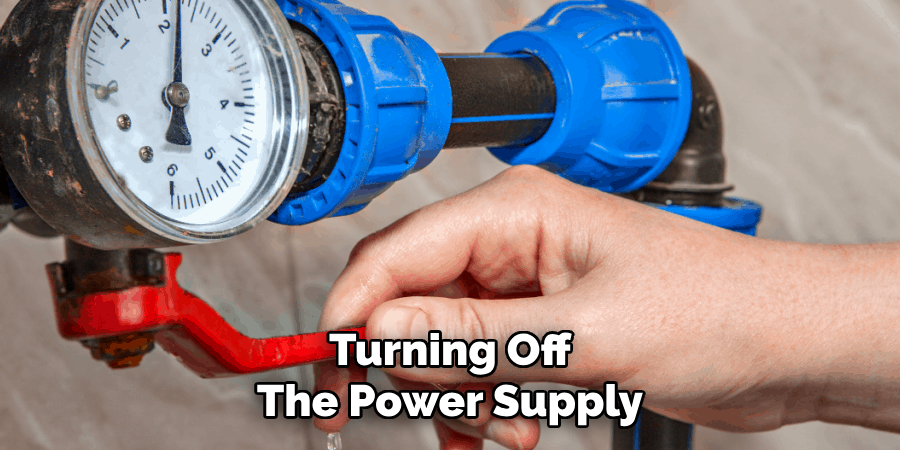
Step 1: Turn Off the Washer
The first and most crucial step in unclogging your washer drain is to turn off the washer completely. Ensure the appliance is not running by switching it off from the control panel and unplugging it from the electrical outlet. This is a crucial safety measure to prevent accidental shocks or injuries while working on the machine.
Additionally, turning off the washer stops any water flow, minimizing the risk of further leaks or spills during the unclogging process. It’s always a good idea to double-check that the washer is powered off before proceeding to the next step.
Step 2: Locate the Drain Filter
The drain filter is typically located at the bottom front of the washing machine, behind a small access panel or cover. Depending on your washer’s make and model, you might need a flathead screwdriver or another tool to open this panel. Once the drain filter is exposed, you will often notice a small hose or plug alongside it, designed for draining residual water.
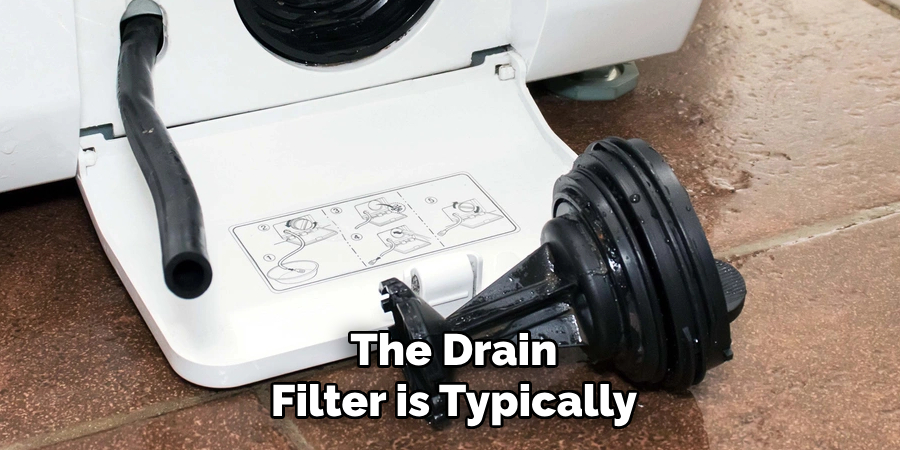
Before proceeding, place a shallow dish, tray, or towel under the filter area to catch any water that may spill out. Slowly release the plug or drain hose to empty out excess water. This step is essential to prevent a mess and smooth the unclogging process.
Carefully examine the drain filter to identify and remove obstructions like lint, coins, buttons, or other debris that may have accumulated over time. Regular cleaning of the drain filter not only fixes clogs but also ensures the optimal performance of your washing machine.
Step 3: Reassemble and Test the Washing Machine
Once the drain filter is clean and debris-free, reattach it to its original position. Ensure that it is securely tightened to prevent leaks. If your washing machine has a drain hose, ensure it is also correctly reconnected. After reassembling, run a short wash cycle without laundry to test for any issues.
This will help confirm that the clog has been successfully cleared and that the machine functions correctly. Regular maintenance like this will help extend the lifespan of your washing machine and avoid future complications.
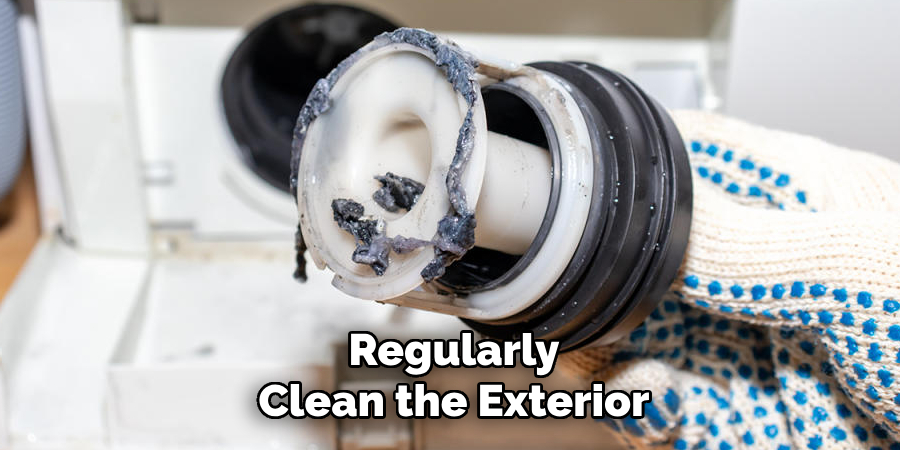
Step 4: Clean the Exterior and Surrounding Area
Once you’ve verified that your washing machine is functioning correctly, take some time to clean the exterior and the surrounding area. Wipe down the machine with a damp cloth to remove dust, detergent residue, or grime.
Check underneath and behind the machine to ensure no water has spilled during the process, as standing water can lead to mold or damage to the flooring. Keeping the area clean and dry will help maintain a pleasant and hygienic laundry space.
Step 5: Regular Maintenance
To keep your washing machine running smoothly, incorporate regular maintenance into your routine. This includes cleaning the detergent dispenser to remove buildup, checking the hoses for any signs of wear or leaks, and running an empty hot water cycle with vinegar or a washing machine cleaner once a month to eliminate odors and residue.
Regularly inspect the machine for any unusual noises or changes in performance, as addressing minor issues promptly can prevent larger problems. Proper maintenance will prolong the lifespan of your appliance and ensure optimal performance.
Step 6: Keep the Exterior Clean
Regularly clean the exterior surface to maintain your washing machine’s appearance and functionality. Use a damp cloth with mild soap to wipe down the machine, removing dust, grime, or detergent spills.
Pay special attention to the control panel as residue buildup can affect the buttons and dials over time. Keeping the exterior clean not only enhances the overall hygiene of your laundry area but also preserves the machine’s aesthetic and makes spotting potential issues, such as rust or damage, easier.
Step 7: Inspect the Water Hoses
Regularly check the water hoses connected to your washing machine for signs of wear, cracks, or leaks. It is recommended that these hoses be inspected every few months to ensure they are in good condition. Replace hoses that show any signs of damage or are older than five years to prevent potential leaks or water damage.
Additionally, ensure the connections are secure and not overly tight to avoid unnecessary strain on the fittings. Taking this precaution helps maintain the efficiency and safety of your washing machine.
Step 8: Clean the Washing Machine Drum
Over time, residue from detergent, fabric softener, and dirt can build up inside the drum of your washing machine. To keep it clean and running efficiently, run an empty cycle with hot water and add a cup of white vinegar or a washing machine cleaner.
This helps to eliminate odors, remove buildup, and prevent mold growth. Regular drum cleaning at least once a month ensures your clothes come out fresh and your machine remains in optimal condition.
By following these simple maintenance tips, you can prolong the lifespan of your washing machine and keep it working efficiently for years to come.
5 Things You Should Avoid
- Using Harsh Chemicals
Avoid pouring strong chemical drain cleaners into your washer’s drain, as they can corrode pipes and damage the machine’s internal components. Instead, opt for safer cleaning solutions like baking soda and vinegar.
- Forcing the Clog with Excess Water
Do not keep running water or operating the washer in hopes of pushing the clog out. This can lead to flooding and may cause water damage to your home.
- Neglecting to Turn Off Power
Always disconnect your washing machine from the power supply before attempting to unclog the drain. Working on the machine while it is powered poses a serious risk of electrical shock.

- Ignoring Blockage in the Drain Hose
Many people overlook the drain hose when unclogging their washer. Avoid this mistake by inspecting and cleaning the hose, as clogs often accumulate there.
- Using Improper Tools
Avoid using random or inappropriate tools that can damage delicate parts of the washer. Stick to recommended tools like a drain snake or a plumber’s auger to safely remove blockages.
What are the Signs of a Blocked Washer Drain?
- Water Backing Up in the Sink or Tub: One of the first signs of a blocked washer drain is water backing up in your sink, tub, or shower while using the washing machine. This happens when the water cannot flow through the pipe freely and instead finds its way back up into another outlet.
- Foul Odors Coming from the Washer: A clogged drain can cause foul odors to emanate from your washing machine due to stagnant water and debris buildup. If you notice a musty smell coming from your washer, it may be a sign that you must clear the drain.
- Slow Draining or Standing Water: Another indicator of a clogged washer drain is slow draining or standing water in the washing machine. This can be caused by a blockage restricting water flow through the drain pipe.
- Mold and Mildew Growth: When water cannot correctly drain from the washing machine, it creates a damp environment ideal for mold and mildew growth. If you notice dark spots, discoloration, or an unpleasant smell coming from your washer, it could be a sign of mold and mildew buildup.
- Water Leaks: A clogged washer drain can also lead to leaks in your laundry room or basement. As water backs up and overflows from the drain pipe, it can seep into cracks and crevices in your flooring or walls, causing damage over time.
- Pest Infestation: Stagnant water from a clogged washer drain can attract pests such as insects and rodents. These unwanted guests can not only cause damage to your home but also pose health risks for you and your family.
Conclusion
How to unclog washer drain, start by turning off the power supply to your washer to ensure safety.
Next, locate and clean the drain filter, which can become clogged with lint, debris, or foreign objects. Use a plumber’s snake or a similar tool to remove blockages within the drainpipe. Flushing the drain with hot water and vinegar or a commercial drain cleaner can also help dissolve accumulated residue. If the issue persists, consider consulting a professional plumber to address the problem thoroughly.
Regular maintenance of your washer and its drainage system can help prevent future clogs and extend the life of your appliance.
About the Author
Adrian Green is a passionate woodworking enthusiast who has dedicated his life to the craft of woodworking. From his early days working alongside his father in the family woodworking shop, Adrian has honed his skills and developed a deep love for creating beautiful, functional pieces with his hands. As the voice behind The Woodenify Blog, he shares his knowledge, tips, and inspiration with fellow woodworkers of all skill levels, helping them build confidence in their abilities while learning new techniques.
Professional Focus
- Specializes in DIY woodworking projects, from furniture making to home décor.
- Provides step-by-step guides, tips, and practical tutorials for woodworkers at any skill level.
- Focused on empowering readers with confidence and knowledge through easy-to-follow instructions and hands-on techniques.
- Passionate about building a community where makers can share, learn, and grow together in the world of woodworking.
Education History
University of Craft and Design – Bachelor of Fine Arts (BFA) in Woodworking and Furniture Design
Woodworking Apprenticeships – Gained extensive hands-on experience through various workshops and mentorships with seasoned craftsmen, refining carpentry and furniture-making skills.
Expertise
- DIY woodworking, carpentry, furniture making, and home décor projects.
- Creating clear, accessible tutorials and guides for beginner to advanced woodworkers.
- Helping readers experience the satisfaction and fulfillment of turning raw materials into stunning finished products.