
Are you planning a long vacation or renovating your home and needing to turn off the hot water? Whatever the reason, knowing how to turn off the hot water in your house is an essential skill every homeowner should have.
When faced with a plumbing issue, such as a leaking water heater or a malfunctioning faucet, knowing how to turn off the hot water in your house is essential to prevent water damage and minimize waste. While it may seem intimidating, shutting off the hot water is a straightforward process that requires locating the appropriate valves or controls in your plumbing system.
This guide on how to turn off hot water in house will walk you through the steps needed to safely and efficiently turn off the hot water supply in your home.
What are the Benefits of Turning Off Hot Water
Turning off the hot water in your house has several benefits, including:
- Preventing Water Damage: If there is a leak or burst pipe, turning off the hot water supply can prevent further damage to your home.
- Saving Energy and Money: By turning off the hot water when not in use, you can save on energy costs and reduce your environmental impact.
- Protecting Against Accidents: In case of a malfunction or repair work, turning the hot water off can prevent accidental scalding or burns.
- Maintaining Your Plumbing System: Regularly turning off the hot water can help extend the lifespan of your plumbing fixtures and appliances.
What Will You Need?
Before you get started, make sure you have these items on hand to turn off the hot water supply in your house effectively:
- Plumbing Basics: Familiarize yourself with the layout of your plumbing system and locate the main shutoff valve for your hot water.
- Protective Gear: Wear protective gear such as gloves and safety glasses to avoid accidental burns or injuries.
- Flashlight: In case the valves or controls are located in a dark or cramped space, a flashlight will come in handy.
10 Easy Steps on How to Turn Off Hot Water in House
Step 1. Locate the Main Water Shutoff Valve:
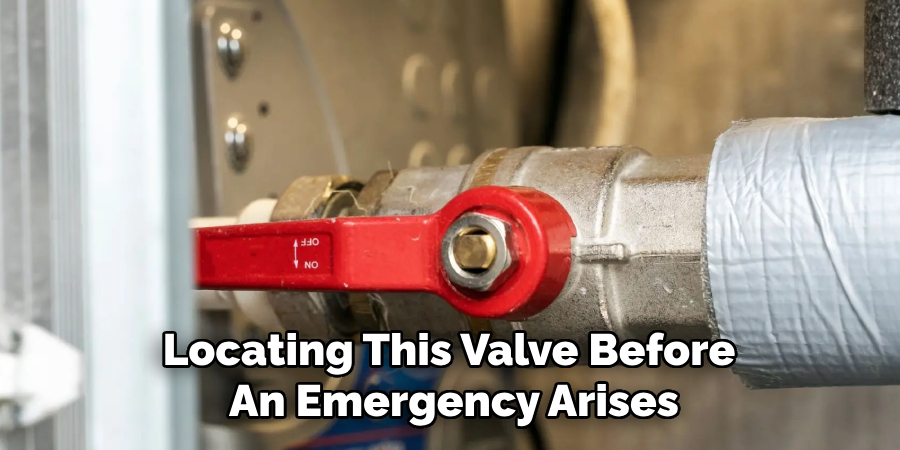
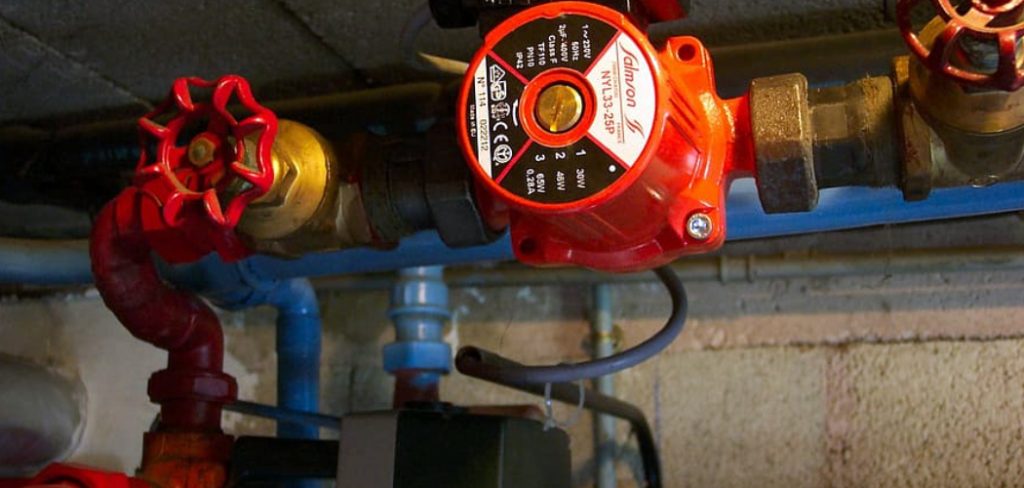
The main water shutoff valve is typically found where the water supply enters the house. This is often in a basement, utility room, or an exterior wall near the front of your home. Look for a valve on a pipe, which may be a wheel-shaped handle that you turn or a lever handle that you rotate. If you’re uncertain of its location, check your home inspection report or contact your water utility provider. Locating this valve before an emergency arises is crucial to ensure you can act quickly when needed. Ensure the valve is accessible and not obstructed by storage items or debris.
Step 2. Turn Off the Main Water Shutoff Valve:
Once you have located the main shutoff valve, turn it clockwise to close it. This will stop the overall water supply to your house, including the hot water. Ensure the valve is completely closed by checking for any remaining water flow from your faucets. If the valve is hard to turn, use a wrench or pliers for assistance, but be careful not to damage it.
Step 3. Open a Faucet to Release Pressure:
After turning off the main shutoff valve, it is crucial to relieve the pressure in the pipes. Open the faucet nearest to the valve’s location, preferably on the ground floor or the lowest point in your home. Allow any trapped water to flow out until the stream completely stops. This step ensures that the pipes are empty and reduces the risk of spills or leaks while you work.
Opening a faucet also prevents potential water damage from unexpected pressure releases when working on plumbing repairs or maintenance tasks if you plan to work on a specific fixture, such as replacing a faucet or repairing a pipe, open additional faucets in that area as needed to prevent backflow or water buildup further.
Step 4. Inspect for Leaks or Damage Before Proceeding:
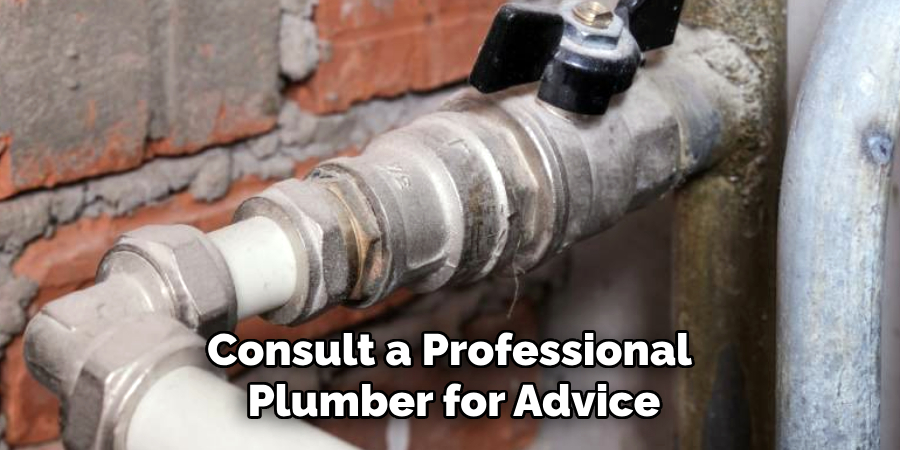
Once the water pressure is released, take a moment to inspect the pipes and fittings around the area where you plan to work. Look for any signs of leaks, corrosion, or damage to the plumbing system. Addressing these issues beforehand can help prevent further complications during your repairs. Consult a professional plumber for advice or assistance if you notice any significant concerns. Ensuring the integrity of the pipes at this stage is crucial for a successful and efficient repair process.
Step 5. Gather the Necessary Tools and Materials:
Before beginning your repair or maintenance work, ensure you have all the tools and materials needed. Standard tools for plumbing jobs include adjustable wrenches, pliers, pipe cutters, and plumbers’ tape. Depending on the repair, you may need replacement parts such as washers, pipes, or fittings.
Having all the necessary items within reach can help streamline the process and prevent unnecessary interruptions. Double-check the compatibility of replacement components to avoid any mismatches that could compromise the repair.
Step 6. Turn Off the Water Supply:
Before any plumbing repair, always turn off the water supply to prevent leaks or flooding. Locate the main or specific shut-off valve for the area you’re working on and turn it off completely. After shutting off the water, open a faucet nearby to relieve any residual pressure in the system. This ensures a safer working environment and minimizes the risk of water damage during the repair process.
Step 7. Inspect the Area of Repair:

Carefully examine the area that needs repair to identify the root cause of the issue. Look for visible signs of damage, such as cracks, leaks, or corrosion on the pipes or fittings. Assess whether the problem can be fixed with minor adjustments or if a complete replacement is necessary. If the issue involves hidden components, you may need tools like a flashlight or a mirror for better visibility. Taking the time to inspect thoroughly will help ensure an effective and lasting repair.
Step 8. Follow Safety Precautions:
Before beginning any repair work, follow safety precautions such as wearing protective gear and using tools correctly. If you’re unsure how to use a specific tool or perform a particular task safely, seek guidance from a professional plumber or consult instructional materials. It’s always better to err on the side of caution when dealing with potentially hazardous tasks.
Step 9. Complete the Repair Work:
With safety measures in place, proceed with the necessary repairs or maintenance tasks. Follow proper techniques for each specific job and take your time to ensure accuracy and thoroughness. If you encounter any unexpected challenges or difficulties, it’s best to pause and reassess before continuing. Having a backup plan is also helpful if the initial repair method does not work as intended.
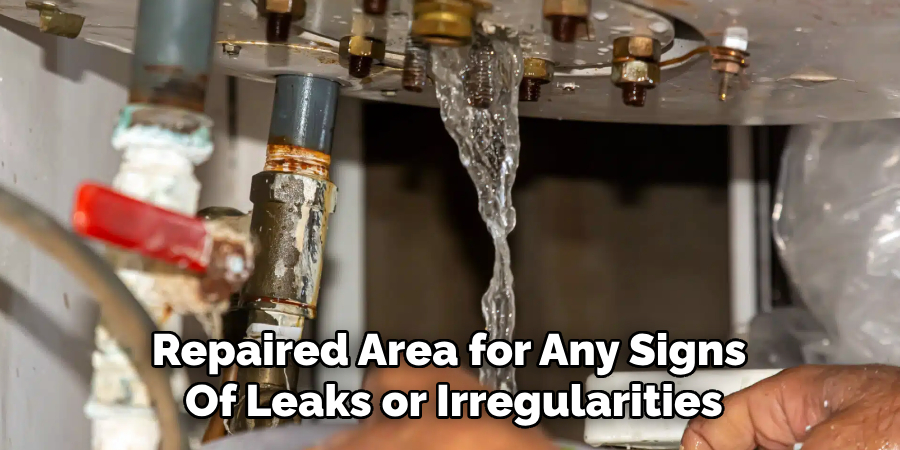
Step 10. Turn the Water Supply Back On and Test for Leaks:
Once the repair work is complete, turn the water supply back on to check your work. Start by slowly opening the valve to allow water to flow and observe the repaired area for any signs of leaks or irregularities. If you notice water seeping or dripping, immediately turn the water supply off and reassess the repair to identify any issues.
It’s important to double-check all connections, seals, and tightened fittings to ensure everything has been securely fastened. If no leaks are present, run water through the system for a few minutes to confirm the repair’s stability under regular use. Testing thoroughly at this stage helps prevent future problems and ensures the repair is reliable and long-lasting.
You can complete a plumbing repair or maintenance task in your home by following these steps.
5 Things You Should Avoid
- Forgetting to Locate the Shut-Off Valve: Before attempting any maintenance or repair, ensure you know the exact location of the hot water shut-off valve. Failing to locate it can lead to unnecessary delays and potential flooding while searching for it during an emergency.
- Turning Off the Wrong Valve: Double-check that you are turning off the correct valve connected to the hot water supply. Mistakenly turning off a different valve can disrupt the cold water supply or other unrelated systems, causing additional inconvenience.
- Applying Excessive Force to the Valve: Avoid using too much force when turning the valve. Over-tightening or forcing a stuck valve can cause damage to the valve itself or the surrounding plumbing, potentially resulting in costly repairs.
- Skipping Safety Precautions: Always take necessary safety precautions, such as wearing gloves and ensuring the hot water system is not actively heating or under high pressure. Neglecting safety measures can lead to burns or other injuries during the process.
- Neglecting to Test After Turning Off the Valve: Once the valve is turned off, verify that the hot water has stopped flowing by checking a faucet or fixture. Failing to test could leave you unaware of an incomplete shut-off, creating issues during repairs or maintenance.
Conclusion
How to turn off hot water in house is an essential skill for handling maintenance, repairs, or emergencies effectively.
By understanding the location of your shut-off valve, taking necessary safety precautions, and avoiding common mistakes, you can ensure a smooth process and prevent unintended damage or inconvenience. Always double-check that the water flow has stopped before proceeding with any further work.
Following these steps will save time, reduce stress, and help maintain the integrity of your plumbing system.
About the Author
Adrian Green is a passionate woodworking enthusiast who has dedicated his life to the craft of woodworking. From his early days working alongside his father in the family woodworking shop, Adrian has honed his skills and developed a deep love for creating beautiful, functional pieces with his hands. As the voice behind The Woodenify Blog, he shares his knowledge, tips, and inspiration with fellow woodworkers of all skill levels, helping them build confidence in their abilities while learning new techniques.
Professional Focus
- Specializes in DIY woodworking projects, from furniture making to home décor.
- Provides step-by-step guides, tips, and practical tutorials for woodworkers at any skill level.
- Focused on empowering readers with confidence and knowledge through easy-to-follow instructions and hands-on techniques.
- Passionate about building a community where makers can share, learn, and grow together in the world of woodworking.
Education History
University of Craft and Design – Bachelor of Fine Arts (BFA) in Woodworking and Furniture Design
Woodworking Apprenticeships – Gained extensive hands-on experience through various workshops and mentorships with seasoned craftsmen, refining carpentry and furniture-making skills.
Expertise
- DIY woodworking, carpentry, furniture making, and home décor projects.
- Creating clear, accessible tutorials and guides for beginner to advanced woodworkers.
- Helping readers experience the satisfaction and fulfillment of turning raw materials into stunning finished products.