
Are you planning to move and want to take your water heater with you? You’re not alone! Many homeowners choose to transport their water heaters during a move, either because they don’t want to invest in a new one or because they have a specific model that they prefer.
How to transport water heater may seem like a daunting task, but with proper preparation and the right techniques, it can be done safely and efficiently. Whether you’re moving to a new home or replacing an old unit, handling a water heater requires care to prevent damage to the appliance and avoid potential safety hazards.
This guide will walk you through the essential steps to ensure the water heater is securely disconnected, transported, and reinstalled without any complications.
What Are the Benefits of Transporting a Water Heater?
Some homeowners may wonder why they should go through the trouble of transporting a water heater instead of buying a new one at their new location. There are several benefits to taking your water heater with you, including:
- Cost Savings: Buying a new water heater can be expensive, especially if you have a high-quality unit in good condition. By transporting it, you can avoid purchasing a new one.
- Familiarity: If you’re attached to your current water heater and know how to operate and maintain it properly, it may make more sense to take it with you rather than having to get used to a different model.
- Energy Efficiency: Newer models of water heaters are more energy-efficient, but if you have an older one that is still in good working condition, it may be more cost-effective to transport it rather than buy a new one.
What Do You Need to Transport a Water Heater?
Before you start the process of moving your water heater, make sure you have the necessary equipment and tools. Here’s what you’ll need:
- Wrenches: You’ll need different sizes of wrenches to disconnect the pipes and fittings from the water heater.
- Straps or Pope: These will secure the water heater during transportation.
- Moving Dolly: A dolly with straps or a hand truck can help move the water heater safely.
- Blankets or Padding: To protect the water heater from damage during transportation, you’ll need to wrap it with blankets or padding.
- Tape: Masking tape can secure loose fittings and prevent them from getting damaged during transit.
Make sure to gather all these items before moving your water heater to avoid any delays or accidents.
9 Easy Steps on How to Transport Water Heater
Step 1: Turn Off the Power Supply
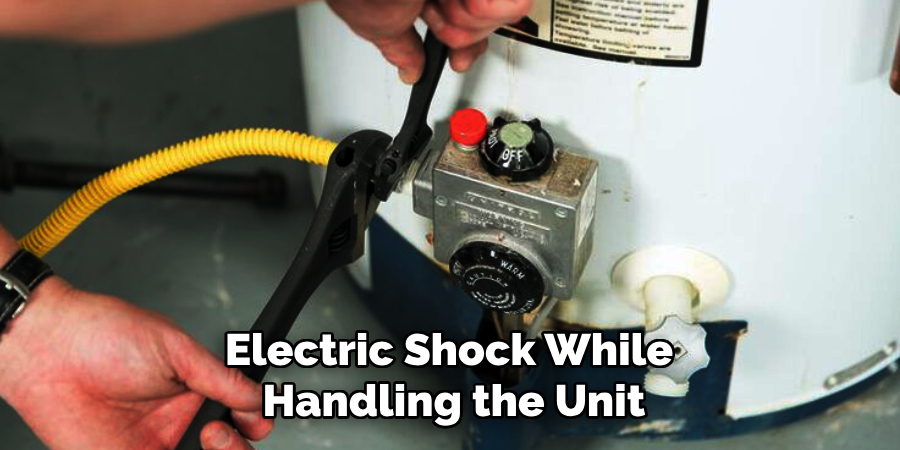
Before doing anything else, ensure the power supply to your water heater is completely turned off. For electric water heaters, locate your home’s circuit breaker panel and switch off the breaker corresponding to your water heater. This eliminates any risk of electric shock while handling the unit. If you have a gas water heater, turn the gas valve to the “Off” position to stop the gas flow. This step is crucial for your safety and for preventing accidents during disconnection and transportation. Take a moment to double-check that the power or gas supply is fully shut down before moving on to the next step.
Step 2: Shut Off the Water Supply
Next, you need to shut off the water supply to your water heater. Locate the cold water supply valve, usually found at the top of the unit. Turn this valve clockwise until it is fully closed to stop the water flow into the heater. This prevents additional water from entering the tank while you disconnect and prepare it for transportation. Ensure the valve is tightly shut to avoid any leaks or spills.
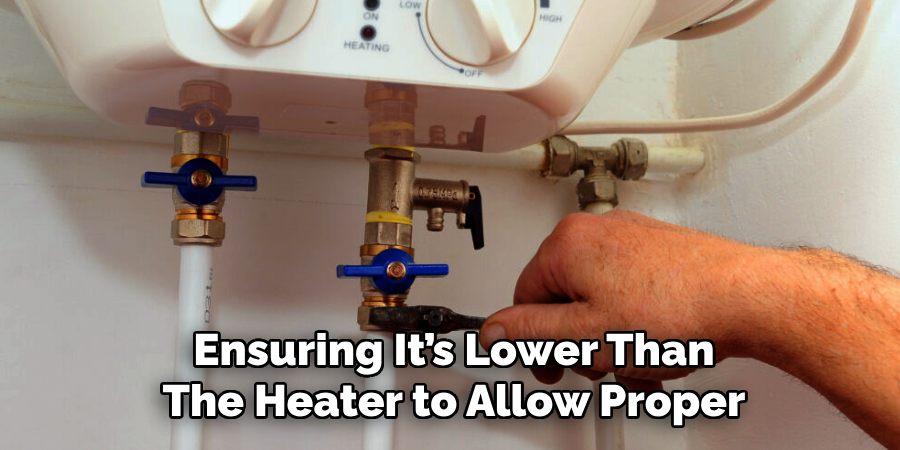
Step 3: Drain the Water Heater
Once the water supply is shut off, the next step is to drain the water heater. Attach a garden hose to the drain valve near the water heater’s bottom. Lead the other end of the hose to a suitable drainage area, such as an outdoor drain or driveway, ensuring it’s lower than the heater to allow proper flow. Open the drain valve by turning it counterclockwise, and this will enable the water to flow out ultimately. To expedite the process, you can open the pressure relief valve or a nearby hot water faucet to release any vacuum in the system. Be cautious, as the water may still be hot, and carefully handle the hose and valve.
Step 4: Disconnect the Power Supply
Before removing the water heater, ensure the power supply is completely disconnected. For electric water heaters, locate the circuit breaker and switch it off. If you have a gas water heater, turn the gas control valve to the “off” position and close the gas supply valve. Additionally, detach any electrical wiring or gas lines connected to the unit, following manufacturer instructions and safety precautions. If unsure, consider consulting a professional to handle the disconnection safely.
Step 5: Disconnect the Water Supply
To fully remove the water heater, disconnect the water supply lines. Start by turning off the cold water supply valve to stop water from entering the tank. Carefully loosen and detach the cold and hot water connections using a wrench or pliers. Be prepared for some residual water to spill out during this process, so place a bucket or towel underneath the connections to catch any dripping water. Ensure all connections are fully detached before proceeding to extract the unit.
Step 6: Remove the Old Water Heater
Once all connections are safely disconnected, carefully remove the old water heater from its location. If the unit is heavy or bulky, enlist the help of another person to avoid injury. Use a dolly or hand truck to safely transport the water heater. Ensure the path to the disposal area is clear of obstacles to prevent accidents. Dispose of the old unit according to local regulations and recycling guidelines.

Step 7: Prepare the Installation Area
Before installing the new water heater, take the time to inspect and prepare the installation area. Clean up any debris or remaining water from the previous unit. Check the flooring or platform for damage and ensure it can support the weight of the new water heater. Examine the water supply and electrical or gas connections to confirm they are in good condition and compliant with current safety codes. Make any necessary repairs or upgrades before proceeding to ensure a smooth installation process.
Step 8: Position the New Water Heater
Carefully move the new water heater into the installation area. Position it so that it is level and stable on the floor or platform. Use a level to ensure the unit is not tilted, as an uneven placement can cause operational issues over time. Align the water heater with the existing water supply lines and ensure there is sufficient clearance around the unit for maintenance and ventilation, following the manufacturer’s guidelines.
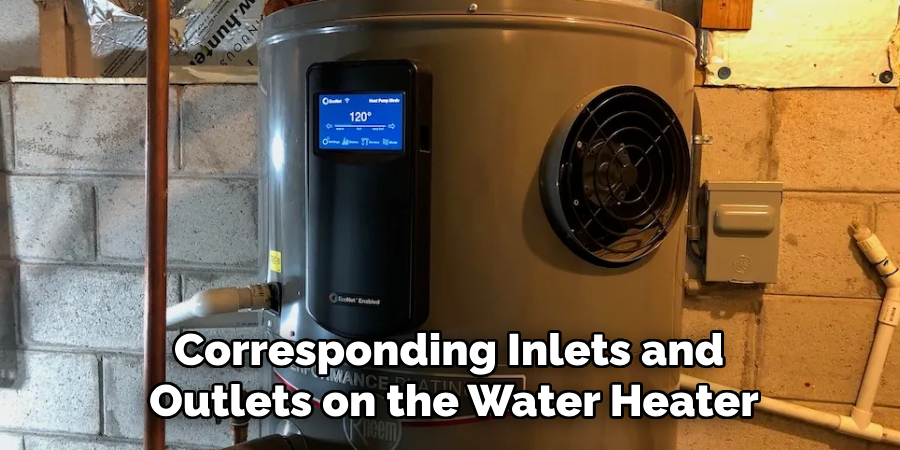
Step 9: Connect the Water Supply Lines
Securely attach the cold and hot water supply lines to the corresponding inlets and outlets on the water heater. Use Teflon tape or pipe joint compound to ensure a watertight seal on threaded connections. Tighten the fittings carefully to avoid over-tightening, which could damage the connections. Once connected, double-check that the lines are firmly attached and aligned properly to prevent leaks during operation.
By following these steps, you can easily transport and install a new water heater in your home.
5 Things You Should Avoid
1. Transporting it While Full: Never attempt to transport a water heater while it is still full of water. This can make the unit dangerous and increase the risk of damage to the tank or vehicle during transit. Always drain the water heater entirely before moving it.
2. Ignoring Proper Securing: Failing to fasten the water heater securely can tip over or shift during transportation. Use straps, ropes, or appropriate securing materials to stabilize and maintain the unit.
3. Placing it on its Side: Laying a water heater on its side can cause internal components, such as the dip tube or anode rod, to shift or break. Always keep the water heater upright during transport to protect its internal structure.
4. Skipping the Manual Instructions: Each water heater may have unique specifications or recommendations for safe transport provided by the manufacturer. Ignoring these guidelines can result in unnecessary damage. Always refer to the user manual before moving the unit.
5. Neglecting Protective Measures: Transporting a water heater without proper padding or protection increases the chances of dents, scratches, or other damages. Use blankets, foam, or other cushioning materials to protect the unit from impacts during transit.
Conclusion
How to transport water heater requires careful planning and adherence to safety guidelines to avoid damage to the unit and ensure its proper functioning after installation.
Keep the water heater upright, secure it firmly during transit, and use sufficient protective padding to guard against physical damage. Refer to the manufacturer’s manual for specific instructions, and handle the unit carefully to protect internal components.
By following these steps, you can successfully and safely transport your water heater to its destination.
About the Author
Adrian Green is a passionate woodworking enthusiast who has dedicated his life to the craft of woodworking. From his early days working alongside his father in the family woodworking shop, Adrian has honed his skills and developed a deep love for creating beautiful, functional pieces with his hands. As the voice behind The Woodenify Blog, he shares his knowledge, tips, and inspiration with fellow woodworkers of all skill levels, helping them build confidence in their abilities while learning new techniques.
Professional Focus
- Specializes in DIY woodworking projects, from furniture making to home décor.
- Provides step-by-step guides, tips, and practical tutorials for woodworkers at any skill level.
- Focused on empowering readers with confidence and knowledge through easy-to-follow instructions and hands-on techniques.
- Passionate about building a community where makers can share, learn, and grow together in the world of woodworking.
Education History
University of Craft and Design – Bachelor of Fine Arts (BFA) in Woodworking and Furniture Design
Woodworking Apprenticeships – Gained extensive hands-on experience through various workshops and mentorships with seasoned craftsmen, refining carpentry and furniture-making skills.
Expertise
- DIY woodworking, carpentry, furniture making, and home décor projects.
- Creating clear, accessible tutorials and guides for beginner to advanced woodworkers.
- Helping readers experience the satisfaction and fulfillment of turning raw materials into stunning finished products.