
Are you interested in installing a gas line for your fireplace? This can be a great addition to your home, providing warmth and ambiance during the colder months.
Running a gas line for a fireplace is an essential task that requires careful planning and proper execution to ensure safety and efficiency. Whether installing a new gas fireplace or upgrading your existing system, understanding the steps involved is crucial.
This guide on how to run gas line for fireplace will walk you through the process, highlight the tools and materials needed, and emphasize important safety precautions. By following these instructions, you can create a safe and functional gas line setup for your fireplace, keeping your home warm and cozy for years to come.
What Are the Benefits of Installing a Gas Line for Fireplace?
Before we dive into the steps for running a gas line for a fireplace, let’s first discuss the benefits of this installation.
- Convenience: With a gas line set up, you will no longer have to deal with storing and hauling firewood or cleaning up ashes. You can quickly turn on your fireplace with the flip of a switch whenever you want.
- Cost-effective: Gas is generally less expensive than wood or electricity, making it a cost-effective option in the long run.
- Efficiency: Gas fireplaces produce more heat compared to traditional wood-burning fireplaces. Plus, they don’t lose heat through chimneys like wood fireplaces do.
- Versatility: Gas fireplaces come in various styles and designs, allowing you to choose the perfect one for your home decor.
What Will You Need?
Before starting the gas line installation, ensure you have all the necessary tools and materials. These include:
- Gas Lines: You will need a flexible gas line to connect from your fireplace to the main gas supply. Make sure to check with local codes for approved types of gas lines.
- Shut-off Valve: This will be installed on the main gas supply line near the fireplace and used to turn off the gas in an emergency.
- Pipe Cutter: This tool will help you cut through pipes quickly and easily.
- Wrenches: You’ll need an adjustable or pipe wrench to tighten fittings.
- Teflon Tape or Pipe Thread Sealant: These will help create a gas-tight seal on threaded connections.
- Pipe Fittings: Depending on the type of gas line and fireplace, you may need various fittings, such as elbows or connector,s to make the necessary connections.
Once you have gathered all the necessary tools and materials, it’s time to start the installation process.
9 Easy Steps on How to Run Gas Line for Fireplace
Step 1: Turn Off the Gas Supply
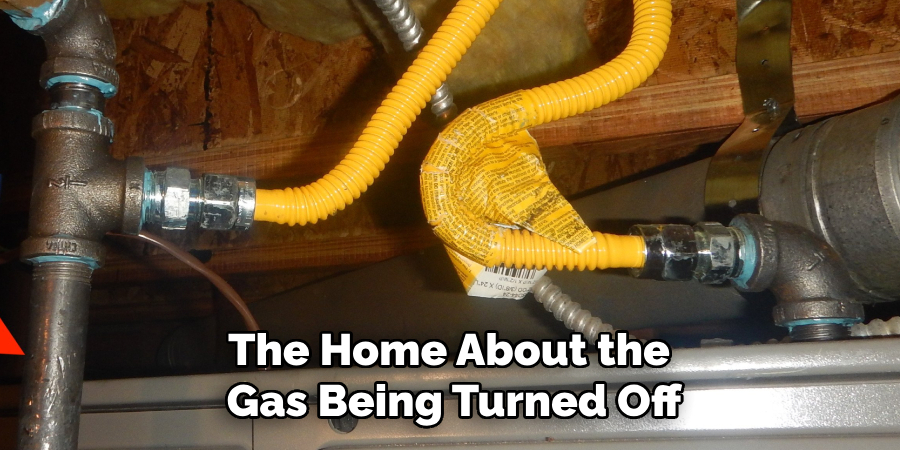
Before beginning any work, locate your home’s main gas shut-off valve and turn it off. This critical safety step ensures no gas flows while you work on the installation. To turn off the valve, rotate it 90 degrees perpendicular to the gas line. Once the gas is shut off, double-check by testing a nearby appliance to ensure no gas is running. Additionally, notify anyone in the home about the gas being turned off to avoid confusion or unintended gas appliance use during the project. Ensure the work area is well-ventilated and free of open flames or potential ignition sources.
Step 2: Gather the Necessary Tools and Materials
Before starting the installation, collect all the tools and materials needed to complete the job efficiently. Some essential items include a pipe cutter, wrench set, pipe sealant or Teflon tape, a gas-rated flexible pipe or black iron pipe, and the fittings required for your specific fireplace connection. All the tools and components will help you avoid unnecessary delays and ensure a smoother installation process. Double-check that all materials meet the safety standards for gas lines and are appropriate for your installation requirements.
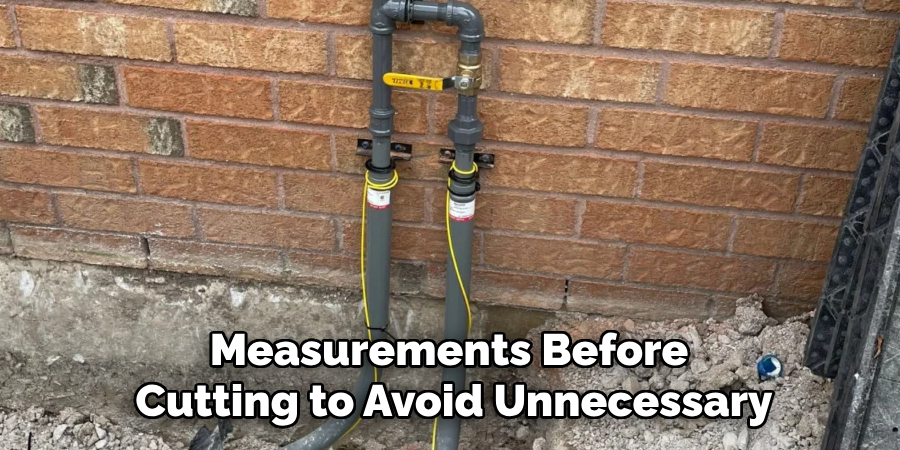
Step 3: Measure and Cut the Pipe
Accurately measure the distance between the gas supply and the fireplace to determine the required length of pipe. Use a pipe cutter to cut the pipe to the correct length, ensuring a clean, straight edge for a secure connection. Double-check your measurements before cutting to avoid unnecessary material waste. If using a flexible gas pipe, ensure the bends are smooth and not overly tight to prevent strain or damage to the pipe. Always follow manufacturer guidelines while handling and cutting the pipe to maintain safety and reliability.
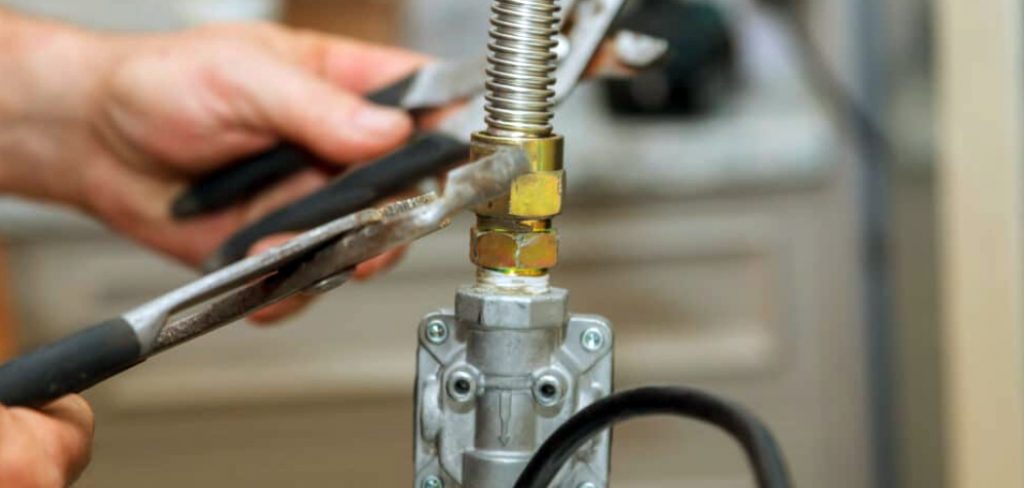
Step 4: Connect the Gas Line
Begin connecting the gas line by attaching the fittings to the pipe per your installation plan. Apply thread sealant or pipe joint compound rated for gas lines to the threaded ends of the pipe to ensure a tight, leak-free connection. Carefully attach the pipe to the gas supply and the fireplace connection, tightening each fitting securely with a wrench. Avoid overtightening, which could damage the threads or fittings. Once all connections are complete, double-check for alignment and stability, ensuring the gas line is adequately supported and stress-free. Always adhere to local building codes and manufacturer instructions during this process.
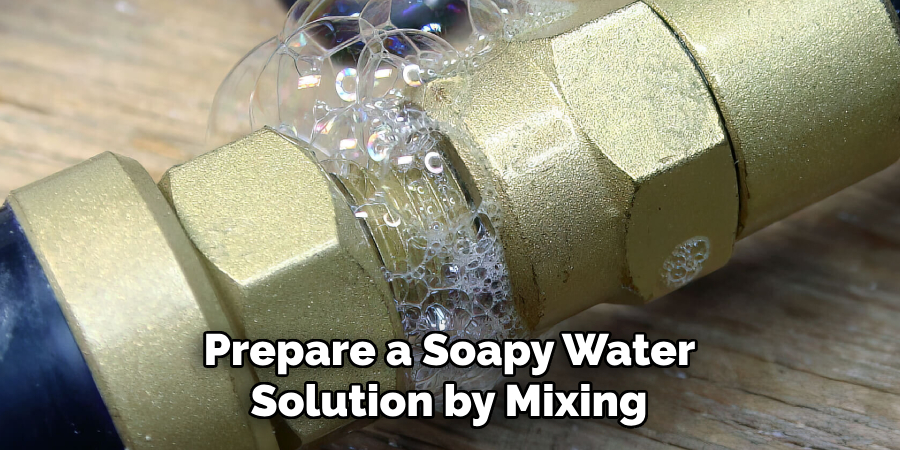
Step 5: Test for Leaks
After completing the connections, testing the gas line for leaks is critical before using the fireplace. First, ensure the gas supply is turned off. Prepare a soapy water solution by mixing a small amount of dish soap with water. Turn the gas supply on and apply the soapy solution to each joint and connection using a brush or sponge. Observe for any bubbles that form, as this indicates a gas leak. If a leak is detected, turn off the gas supply immediately, tighten the fittings, or reapply thread sealant as necessary. Retest the connections until no leaks are present. Consider using a gas leak detector or consulting a licensed professional to inspect the system for additional safety.
Step 6: Final Installation and Cleanup
Install the gas fireplace once the gas line has been tested and confirmed to be leak-free. Secure any remaining components, such as the decorative trim or glass panels, according to the manufacturer’s instructions. Ensure all connections are correctly aligned and that the fireplace unit is stable. Clean up the work area by removing tools, debris, and any leftover materials. Turn on the gas supply and final check the fireplace’s operation, including ignition and flame settings. Always refer to the user manual for guidance on proper use and maintenance to ensure safe and efficient operation.
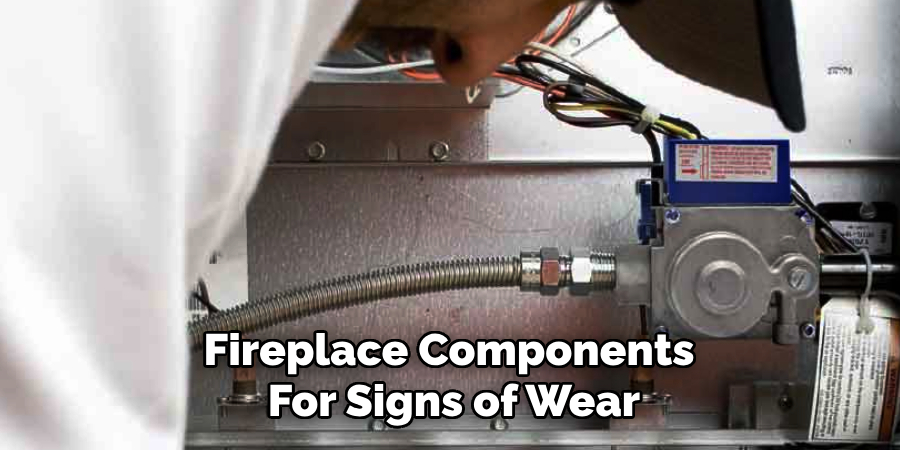
Step 7: Regular Maintenance and Safety Checks
Establish a routine maintenance schedule to ensure your gas fireplace’s continued safety and efficiency. Regularly inspect the gas line, connections, and fireplace components for signs of wear, damage, or debris buildup. Clean the glass panels and decorative elements as recommended in the user manual. Check the pilot light and ignition system to confirm proper functionality. Schedule a professional inspection annually to address potential issues and ensure safety standards compliance. Always prioritize safety by promptly addressing any abnormalities or concerns with the system.
Step 8: Troubleshooting Common Issues
Even with proper installation and maintenance, occasional issues may arise with your gas fireplace. Familiarize yourself with common problems such as the pilot light not staying lit, uneven flames, or unusual odors. Consult the troubleshooting section of the user manual for guidance on resolving these issues. If the problem persists or if you detect a gas leak, immediately turn off the gas supply and contact a licensed technician for assistance. Never attempt to repair complex issues independently to avoid potential safety hazards.
Step 9: Enhancing Energy Efficiency
To maximize the energy efficiency of your gas fireplace, consider implementing a few practical strategies. Use a thermostat to maintain a consistent temperature and prevent overheating the space unnecessarily. Ensure your fireplace is properly sealed to minimize heat loss through gaps or drafts. Additionally, using a fireplace fan or blower can help distribute heat more effectively throughout the room. Regularly clean and maintain your fireplace to ensure it operates at peak performance, reducing energy waste while keeping your home warm and comfortable.
Following these steps and prioritizing safety, you can install a gas fireplace in your home.
5 Things You Should Avoid
- Skipping Permits and Inspections: Never bypass obtaining local permits and scheduling inspections. Running a gas line improperly or without approval can lead to fines, legal repercussions, or potential safety hazards.
- Improper Sizing of Gas Lines: Avoid using gas lines that are too small or too large for your fireplace. Incorrect sizing can lead to insufficient gas flow, performance issues, or increased risk of leaks.
- Using the Wrong Materials: Do not use materials not rated or certified for gas lines. Substandard materials might corrode, crack, or fail, leading to dangerous leaks.
- Incorrectly Sealing Connections: Avoid using the wrong thread sealant or failing to seal the connections correctly. Leaky connections increase the likelihood of gas leaks and safety risks.
- Neglecting Professional Help: Do not attempt to install or run a gas line if you lack the expertise or tools. Always consult or hire a licensed professional to ensure the installation meets safety and building code standards.
Conclusion
How to run gas line for fireplace requires careful planning, adherence to safety standards, and attention to detail.
You can avoid potential hazards and ensure a safe and efficient installation by ensuring proper permits, using correctly sized and certified materials, and sealing connections properly. Most importantly, consulting or hiring a licensed professional is essential to guarantee compliance with building codes and prevent costly mistakes.
Following these guidelines will help you enjoy the warmth and ambiance of your fireplace with peace of mind.
About the Author
Adrian Green is a passionate woodworking enthusiast who has dedicated his life to the craft of woodworking. From his early days working alongside his father in the family woodworking shop, Adrian has honed his skills and developed a deep love for creating beautiful, functional pieces with his hands. As the voice behind The Woodenify Blog, he shares his knowledge, tips, and inspiration with fellow woodworkers of all skill levels, helping them build confidence in their abilities while learning new techniques.
Professional Focus
- Specializes in DIY woodworking projects, from furniture making to home décor.
- Provides step-by-step guides, tips, and practical tutorials for woodworkers at any skill level.
- Focused on empowering readers with confidence and knowledge through easy-to-follow instructions and hands-on techniques.
- Passionate about building a community where makers can share, learn, and grow together in the world of woodworking.
Education History
University of Craft and Design – Bachelor of Fine Arts (BFA) in Woodworking and Furniture Design
Woodworking Apprenticeships – Gained extensive hands-on experience through various workshops and mentorships with seasoned craftsmen, refining carpentry and furniture-making skills.
Expertise
- DIY woodworking, carpentry, furniture making, and home décor projects.
- Creating clear, accessible tutorials and guides for beginner to advanced woodworkers.
- Helping readers experience the satisfaction and fulfillment of turning raw materials into stunning finished products.