
Are you tired of that old, leaky tub faucet? Or maybe you want to update the look of your bathroom?
How to replace tub faucet may seem like a daunting task, but with the right tools and a little guidance, it is a project that can be tackled by most homeowners. Whether upgrading to a new design, fixing a leak, or addressing wear and tear, understanding the process can save you time and money. Additionally, it can be a rewarding experience to do a DIY and see the improvement in your bathroom.
This guide on wall mount tub faucet will walk you through the essential steps to replace your tub faucet, ensuring a smooth and successful installation. With proper preparation and careful execution, you can quickly refresh your bathroom and give it a functional look.
What Are the Benefits of Replacing Your Tub Faucet?
Replacing your tub faucet has numerous benefits, including:
- Improved Functionality and Water Flow: Over time, faucets can become clogged with mineral deposits and buildup, reducing water flow. By replacing your tub faucet, you can improve the efficiency and effectiveness of your bathroom fixtures.
- Enhanced Aesthetics: A new tub faucet can give your bathroom a modern and updated look. You can choose from various styles, finishes, and designs to match your taste and existing decor.
- Cost Savings: By replacing a faulty or leaky faucet, you can save money on future repairs or potential water damage. Upgrading to a more energy-efficient model can save you money on your water bill.
- Improved Functionality: Newer tub faucets come with advanced features such as adjustable water flow and temperature control, making finding the perfect balance for your comfort easier. Some models even have additional spray settings for a more luxurious bathing experience.
- Increased Safety: Older faucets may have worn-out components or loose handles, which can lead to accidents and potential injuries. By installing a new tub faucet, you can ensure your bathroom is safe for everyone in your household.
What Will You Need?
- Wrench
- Screwdriver
- Plumber’s tape
- New tub faucet and accompanying parts (handles, spout, valve)
- Cleaning supplies (such as a cloth and mild cleaning solution)
Before you start the installation process, gather all the necessary tools and materials. It is also important to shut off the water supply leading to your bathtub before beginning any work. This will prevent any potential leaks or water damage.
8 Easy Steps on How to Replace Tub Faucet
Step 1. Remove the Old Faucet:
To begin, use a screwdriver or wrench to carefully remove the screws or bolts securing the old faucet handles, spout, and other components. If the faucet has been in place for a long time, it might require additional effort to loosen. Gently pry off any decorative caps or covers concealing screws, taking care not to damage surrounding surfaces. Once the screws are removed, pull the faucet pieces away from the wall or tub.
If there is any caulking or sealant around the edges, use a utility knife to cut through it for easier removal. After the old faucet is detached, clean the area thoroughly with a cloth and mild cleaning solution to remove any residue, grime, or old plumbing tape, ensuring a smooth surface for the new installation.
Step 2. Clean the Area
Cleaning the area thoroughly is crucial to ensure a proper fit and seal for the new faucet. Using a putty knife or scraper, remove any leftover adhesive, caulking, or sealant. Be careful not to scratch or damage the surface during this process. Use a mild cleaning solution or a mixture of water and vinegar to scrub away stubborn stains, mineral deposits, or grime that may have accumulated over time.
Once the surface is clean and debris-free, wipe it dry with a soft cloth to prevent moisture from interfering with the installation. This careful preparation will help create a secure and long-lasting connection for the new faucet and ensure a professional and polished final result.
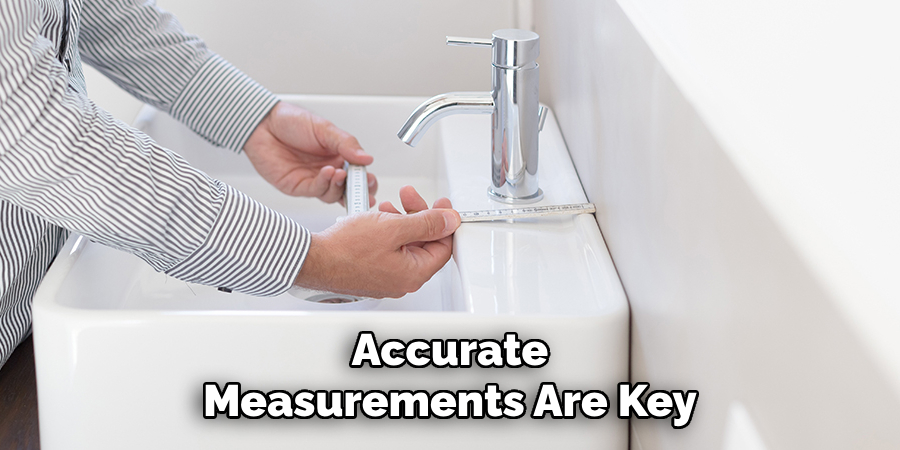
Step 3. Measure for New Parts
Accurate measurements are key to ensuring that the new faucet fits seamlessly into your sink or countertop. Begin by measuring the diameter and spacing of the existing holes in your sink, as these will determine whether the new faucet is compatible. Most faucets are designed to fit standard configurations, such as single-hole or three-hole setups, but confirming these details is necessary before making a purchase.
Additionally, measure the depth and distance of the connections underneath the sink to ensure the supply lines align correctly with the plumbing system. It’s also a good idea to take note of the height and reach of the existing faucet, especially if you’re upgrading to a different style, such as a high-arc or pull-down model.
Proper measurements and planning will save time and effort during the installation process while also helping you select components that will provide functionality and aesthetic cohesion.
Step 4. Apply Plumber’s Tape
Plumber’s tape, also known as Teflon tape, is an essential tool for ensuring a watertight seal between threaded connections. Start by wrapping the tape snugly around the threads of the faucet’s tailpiece or any other connection points that will link to the water supply lines. Be sure to wrap the tape in the same direction as the threads to ensure it doesn’t unravel when attaching the connections.
Generally, two to three layers of plumber’s tape should suffice for most applications, but you can add more if needed to ensure a secure fit. This step helps to prevent leaks and creates a tight seal, even under water pressure. Applying plumber’s tape correctly will save you from leaks and water damage in the long run, offering extra peace of mind and durability in your faucet installation.
Step 5. Install New Valve
To install the new valve, start by carefully positioning it within the valve opening, ensuring the alignment matches the water supply lines. Before securing it, double-check the fit to ensure there are no obstructions and that the valve aligns flush with the fixture. Once positioned, use the appropriate tools, such as a wrench or pliers, to tighten the valve. Be careful not to overtighten, as this could damage the valve or surrounding components.
If applicable, use the plumber’s tape on the threaded connections to reinforce the seal and prevent potential leaks. After installation, test the valve by gradually turning on the water supply to check for leaks or irregularities. Proper installation will ensure smooth operation and longevity of the new valve, contributing to the overall functionality of your plumbing system.
Step 6: Final Inspection and Cleanup
Once the valve has been tested and confirmed to function correctly, a final inspection of the entire installation will be performed. Check all connections for tightness and ensure no visible signs of leaks.
Wipe away any excess water or debris around the work area. Proper cleanup keeps the area tidy and helps identify any overlooked issues. Discard old components and materials responsibly. With the installation process complete, your plumbing system should now operate efficiently with the newly installed valve.
Step 7: Monitor the System
After completing the installation and cleanup, monitoring the system for at least 24 hours is crucial. Keep an eye on the valve and surrounding components to ensure there are no signs of leaks or malfunction.
Regularly check the water pressure and observe if the system operates smoothly. If any issues arise during this period, address them promptly to prevent further complications. Ongoing maintenance will help extend the lifespan of your new valve and ensure optimal performance.
Step 8: Final Inspection and Documentation
Once the monitoring period is complete and the system functions as expected, all components are inspected. Ensure all connections are secure, no persistent leaks, and the system performs within the desired parameters. Document the installation details, any observed issues, and the corrective actions. Maintaining accurate records will be invaluable for future reference and servicing.
By following these steps, you can ensure an irrigation system’s successful and efficient installation.
5 Things You Should Avoid
- Skipping the Water Shutoff Step: One of the most common mistakes is failing to shut off the water supply before starting the replacement. This can lead to flooding or water damage, so always locate and turn off the water valve beforehand.
- Using the Wrong Tools: Attempting to replace a tub faucet without the proper tools can damage the fixture or surrounding plumbing. Ensure you have tools like a wrench, plumber’s tape, and an adjustable plier.
- Forgetting to Check for Proper Fit: Not all faucets are universally compatible. Make sure to measure the existing connections and verify the compatibility of the new faucet before installation to avoid unnecessary hassle.
- Overtightening Connections: While ensuring a secure fit is essential, overtightening nuts or screws can strip threads or crack fittings. Use appropriate force and avoid overdoing it to keep components intact.
- Neglecting to Inspect for Leaks: Failing to check for leaks after the installation is complete can result in long-term damage. Always test the faucet and inspect for any drips or issues before marking the job as done.

Conclusion
How to replace tub faucet can seem like a daunting task, but with the proper preparation and attention to detail, it is entirely manageable.
By following the outlined steps, avoiding common mistakes, and double-checking your work for leaks or loose connections, you can successfully install a new faucet and restore functionality to your bathroom. Gather all necessary tools, turn off the water supply, and take your time.
With patience and care, you’ll achieve a professional-looking result and enjoy the satisfaction of completing the project yourself.
About the Author
Adrian Green is a passionate woodworking enthusiast who has dedicated his life to the craft of woodworking. From his early days working alongside his father in the family woodworking shop, Adrian has honed his skills and developed a deep love for creating beautiful, functional pieces with his hands. As the voice behind The Woodenify Blog, he shares his knowledge, tips, and inspiration with fellow woodworkers of all skill levels, helping them build confidence in their abilities while learning new techniques.
Professional Focus
- Specializes in DIY woodworking projects, from furniture making to home décor.
- Provides step-by-step guides, tips, and practical tutorials for woodworkers at any skill level.
- Focused on empowering readers with confidence and knowledge through easy-to-follow instructions and hands-on techniques.
- Passionate about building a community where makers can share, learn, and grow together in the world of woodworking.
Education History
University of Craft and Design – Bachelor of Fine Arts (BFA) in Woodworking and Furniture Design
Woodworking Apprenticeships – Gained extensive hands-on experience through various workshops and mentorships with seasoned craftsmen, refining carpentry and furniture-making skills.
Expertise
- DIY woodworking, carpentry, furniture making, and home décor projects.
- Creating clear, accessible tutorials and guides for beginner to advanced woodworkers.
- Helping readers experience the satisfaction and fulfillment of turning raw materials into stunning finished products.