
Replacing a wall mount bathroom faucet may seem like a challenging task, but with the right tools and guidance, it can be accomplished efficiently. Whether you’re upgrading the style of your bathroom or fixing a leaking faucet, this step-by-step process will help you complete the job with confidence.
By following these instructions on how to replace a wall mount bathroom faucet, you’ll save time and money while achieving a professional-looking result. A wall mounted faucet bathroom setup not only saves counter space but also adds a sleek, modern touch to your bathroom design.
Why Replace a Wall Mount Bathroom Faucet?
There are several reasons why you might want to replace a wall mount bathroom faucet. Over time, faucets can develop leaks or corrosion that impact their functionality and lead to water wastage. Upgrading to a new faucet can also enhance the aesthetic appeal of your bathroom, aligning it with modern design trends or your personal style.
Additionally, newer faucet models often come with improved water efficiency and advanced features, making them more eco-friendly and cost-effective in the long run. Whether it’s for practical or decorative purposes, replacing a wall mount faucet can significantly improve both the appearance and functionality of your bathroom.
Needed Materials:
- New Faucet
- Wrench or Pliers
- Putty Knife
- Plumber’s Tape
- Silicone Caulk
8 Steps on How to Replace a Wall Mount Bathroom Faucet
Step 1: Turn Off the Water Supply
Before beginning the replacement process, locate the water shut-off valves for your bathroom. These are usually found beneath the sink or near the main water connection in your home. Turn the valves clockwise to completely shut off the water supply.
If individual shut-off valves aren’t present, you may need to turn off the main water supply to your house. Once the water is off, open the faucet to release any remaining water in the pipes and ensure the system is fully drained. This step prevents potential leaks or water damage during the replacement process.
Step 2: Disconnect Water Supply Lines
Using an adjustable wrench, carefully loosen the nuts connecting the water supply lines to the faucet. Be sure to place a bucket or towel beneath the connections to catch any residual water that may drain out during this step.

Once the nuts are fully loosened, remove the water supply lines from the faucet and set them aside. Take care not to damage the lines or surrounding areas to ensure they can be reattached or replaced later without issue.
Step 3: Remove Old Faucet
Begin by checking underneath the sink for the mounting nuts or clips securing the faucet to the sink. Using a basin wrench or a screwdriver, depending on the type of fasteners, carefully loosen and remove these fixtures. If the fasteners are corroded or difficult to loosen, applying a penetrating oil can help make the process easier.
Once the mounting hardware is removed, lift the old faucet straight up and out from the sink. Clean the area around the faucet hole to remove any residue, ensuring a smooth surface for the installation of the new faucet.
Step 4: Install New Faucet
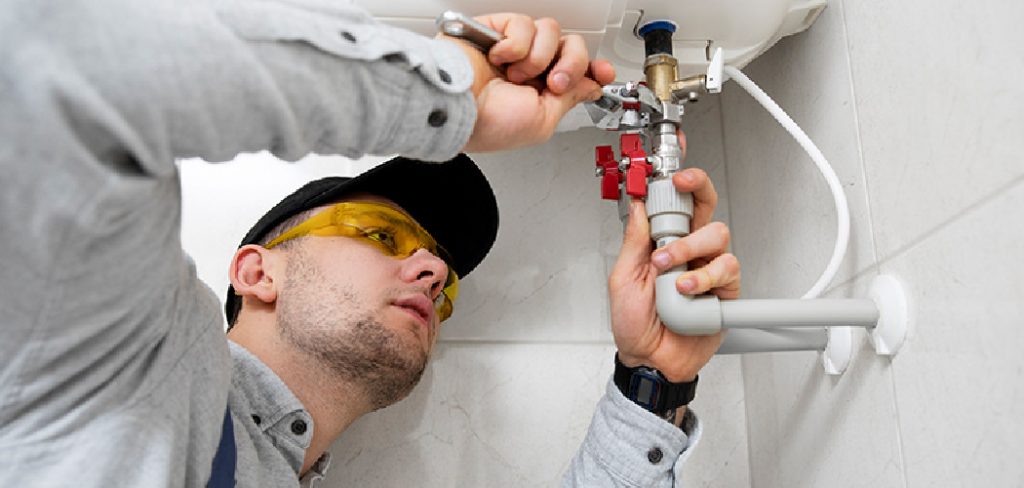
Begin by placing the gasket or rubber seal (if included) onto the base of the new faucet. Align the faucet with the mounting holes on the sink and carefully insert the faucet’s tailpieces through these holes. Ensure that the faucet is centered and sits firmly in place. Underneath the sink, secure the faucet by attaching the provided mounting hardware, tightening it evenly to avoid any tilting.
Use a basin wrench to ensure the connections are firm, but be cautious not to overtighten, as this could damage the components. Once the faucet is securely mounted, proceed to connect the water supply lines to the corresponding hot and cold inlets, ensuring a snug fit. Double-check all connections before testing.
Step 5: Reconnect Water Supply Lines
Slowly turn the water supply valves back on by twisting them counterclockwise. Check for any leaks at the connections by observing for drips or moisture around the fittings. If a leak is detected, tighten the connection slightly with a wrench, but avoid overtightening.
Once you’ve confirmed there are no leaks, run both the hot and cold water through the faucet to ensure proper water flow and functionality. Allow the water to run for a few moments to clear out any debris that may have entered the lines during installation.
Step 6: Test New Faucet
With the installation complete, it’s time to test your new faucet. Begin by slowly turning the faucet handles (or the single handle, if applicable) to check the water pressure and temperature range. Verify that both hot and cold water mix properly and flow smoothly without any sputtering or interruptions.
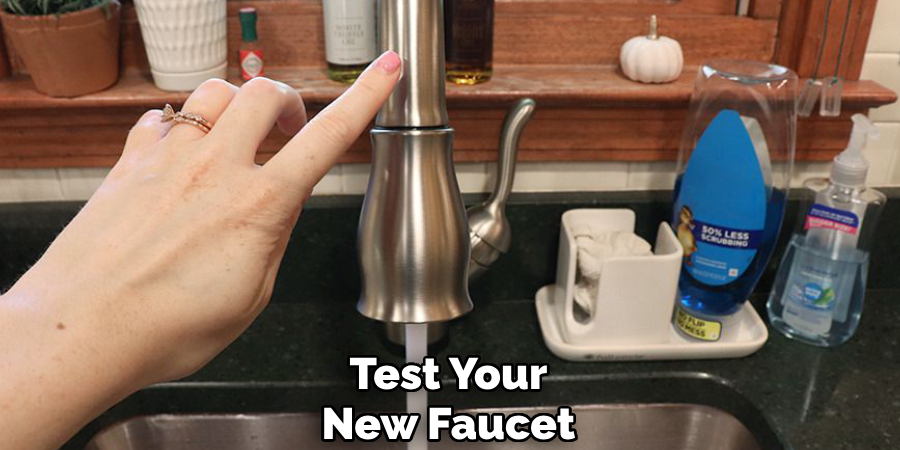
Inspect the area around the base of the faucet and under the sink for any signs of leaks while the water is running. If everything works as expected and no leaks are visible, your new faucet is successfully installed and ready for use. Clean up your workspace by removing any tools or debris, and enjoy the functionality and aesthetic improvement of your new faucet!
Step 7: Clean Up
After ensuring everything is installed correctly and functioning as it should, take a few moments to clean up your workspace. Gather all tools, packaging materials, and any leftover parts or debris from the installation. Safely dispose of packaging and unwanted materials in accordance with local recycling guidelines.
Wipe down the sink and surrounding area to remove any dust, fingerprints, or water spots left behind during the process. By taking this step, you’ll leave your space tidy and ready to enjoy your newly installed faucet!
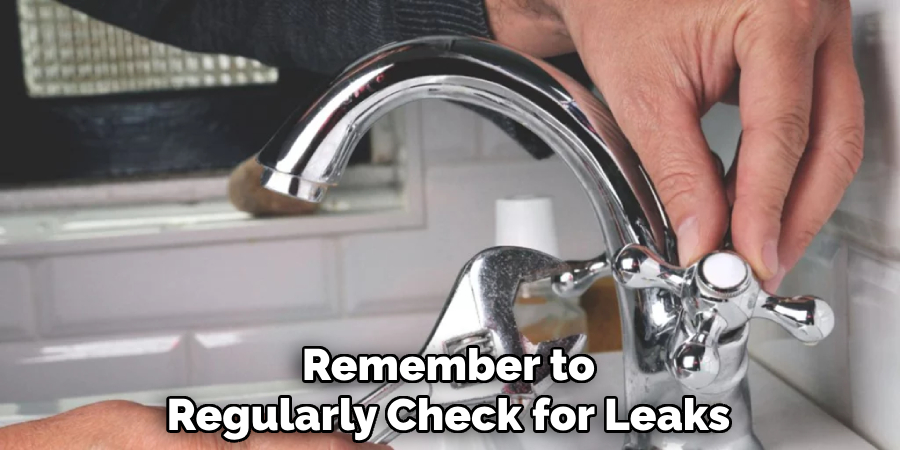
Step 8: Enjoy Your New Faucet
Congratulations, you have successfully installed a new faucet! Enjoy using your updated and functional kitchen or bathroom fixture. Remember to regularly check for leaks or drips and address them promptly to avoid any potential damage.
Following these steps on how to replace a wall mount bathroom faucet will save you time and money compared to hiring a professional plumber. Plus, you’ll have the satisfaction of completing a DIY project in your home.
Additional Tips
- Before beginning the installation process, make sure to read through the manufacturer’s instructions carefully.
- If you are unsure about any steps in the installation process, it may be helpful to consult a professional plumber.
- When purchasing a new faucet, make sure to also purchase any necessary supplies such as Teflon tape and plumber’s putty.
- If you are replacing an old faucet, it may be helpful to take pictures or notes of how the previous faucet was installed in case you need to refer back to them during installation.
- Remember to turn off the water supply before beginning the installation process and have a bucket or towel nearby in case of any leaks.
- After completing the installation, run water through the faucet for several minutes to flush out any debris that may have accumulated during installation.
- Regularly cleaning your bathroom faucet will help maintain its longevity and prevent buildup from affecting its performance. Using mild soap and water, gently scrub the faucet and dry it thoroughly with a soft cloth.
- In addition to regular cleaning, it is important to address any leaks or drips from your bathroom faucet immediately. This will not only save you money on your water bill but also prevent any potential damage to your fixtures or surrounding areas.
- If you encounter any difficulties during installation or notice any issues with your bathroom faucet, do not hesitate to seek professional help from a plumber.
Frequently Asked Questions
Q1: Is It Necessary to Regularly Clean My Bathroom Faucet?
A1: Yes, regular cleaning is important for maintaining the appearance and functionality of your bathroom faucet. It also helps prevent the buildup of bacteria and germs. The frequency of cleaning will depend on how often the faucet is used and whether you have hard water, but a general recommendation is to clean it at least once a week.
Q2: Can I Use Harsh Chemicals to Clean My Bathroom Faucet?
A2: It is not recommended to use harsh chemicals on your bathroom faucet as they can damage the finish and potentially cause leaks. Instead, opt for gentle cleaners specifically designed for faucets or natural cleaning solutions like vinegar and baking soda.
Q3: How Do I Fix a Dripping Bathroom Faucet?
A3: A dripping faucet can be caused by various factors such as worn-out seals or loose parts. To fix it, you will need to turn off the water supply, disassemble the faucet, and replace any damaged parts. If you are unsure or not comfortable with DIY repairs, it is best to call a professional plumber for assistance.
Q4: How Can I Prevent My Bathroom Faucet from Getting Clogged?
A4: One way to prevent your bathroom faucet from getting clogged is by regularly cleaning and maintaining it. This includes removing any build-up of mineral deposits and hair around the aerator and drain area. Using a mesh screen over the drain can also help catch debris before it goes down the drain.

Conclusion
Maintaining your bathroom faucet doesn’t have to be a daunting task. With regular cleaning, timely repairs, and preventative measures, you can ensure its longevity and optimal performance. Remember, a little attention and care can go a long way in avoiding costly repairs or replacements in the future.
If issues persist despite your efforts, don’t hesitate to seek professional assistance to address the problem effectively. A well-maintained faucet not only enhances functionality but also adds to the overall appeal of your bathroom. Thanks for reading this article on how to replace a wall mount bathroom faucet.
About the Author
Adrian Green is a passionate woodworking enthusiast who has dedicated his life to the craft of woodworking. From his early days working alongside his father in the family woodworking shop, Adrian has honed his skills and developed a deep love for creating beautiful, functional pieces with his hands. As the voice behind The Woodenify Blog, he shares his knowledge, tips, and inspiration with fellow woodworkers of all skill levels, helping them build confidence in their abilities while learning new techniques.
Professional Focus
- Specializes in DIY woodworking projects, from furniture making to home décor.
- Provides step-by-step guides, tips, and practical tutorials for woodworkers at any skill level.
- Focused on empowering readers with confidence and knowledge through easy-to-follow instructions and hands-on techniques.
- Passionate about building a community where makers can share, learn, and grow together in the world of woodworking.
Education History
University of Craft and Design – Bachelor of Fine Arts (BFA) in Woodworking and Furniture Design
Woodworking Apprenticeships – Gained extensive hands-on experience through various workshops and mentorships with seasoned craftsmen, refining carpentry and furniture-making skills.
Expertise
- DIY woodworking, carpentry, furniture making, and home décor projects.
- Creating clear, accessible tutorials and guides for beginner to advanced woodworkers.
- Helping readers experience the satisfaction and fulfillment of turning raw materials into stunning finished products.