
Removing the cover of a wall heater can seem like a daunting task, but with the right approach and tools, it is a straightforward process. Whether you’re performing maintenance, cleaning, or troubleshooting issues, understanding how to safely and effectively remove the cover is essential. This guide will walk you through the necessary steps of how to remove wall heater cover safely and efficiently.
Why Removing a Wall Heater Cover is Essential
Removing the cover of a wall heater is an important step in ensuring the unit operates efficiently and safely. Over time, dust, dirt, and debris can accumulate inside the heater, which can reduce its efficiency and potentially pose a fire hazard. Regularly cleaning and inspecting the heater’s internal components helps to maintain proper airflow and prevent overheating. Additionally, accessing the interior of the heater is necessary if repairs or part replacements are needed to address issues such as strange noises,
uneven heating, or malfunctioning components. By removing the cover, you can also identify potential wear-and-tear or damage that may require professional attention, ensuring the longevity and safe operation of your wall heater.
Tools and Materials You’ll Need
Before starting the process of removing your wall heater cover, gather the necessary tools and materials to ensure the task goes smoothly. Here’s a list of items you may need:
- Screwdriver (flathead or Phillips, depending on the screws used on your heater)
- Work gloves to protect your hands
- Vacuum cleaner or brush for cleaning dust and debris inside the heater
- Flashlight for better visibility while working
- Drop cloth or tarp to protect the floor from dust and debris
- Replacement parts (if performing repairs or maintenance)
Having these tools on hand before you begin will make the process more efficient and help you complete the task confidently. Always ensure you know the exact model of your wall heater, as the required tools might vary slightly based on the design.
10 Methods How to Remove Wall Heater Cover
1. Ensure the Heater is Turned Off
Before attempting to remove the cover, safety is the number one priority. Make sure the wall heater is turned off and completely cool to the touch. If the heater has been recently used, allow it some time to cool down before working on it. For added safety, consider switching off the power at the circuit breaker if you are working on an electric heater. This will prevent any risk of electrical shock during the removal process, particularly if there is exposed wiring or electrical components.
2. Locate and Identify the Type of Heater Cover
Wall heaters come in various styles, each with its own type of cover. Some heaters feature metal covers, while others may have plastic or composite materials. Identifying the type of cover you are dealing with will help you determine the best approach for removal. Most heater covers are either screwed in place or secured with clips, and some may have a combination of both. Look closely at the edges and corners to identify any screws, clips, or fasteners that may be holding the cover in place.
3. Gather the Necessary Tools
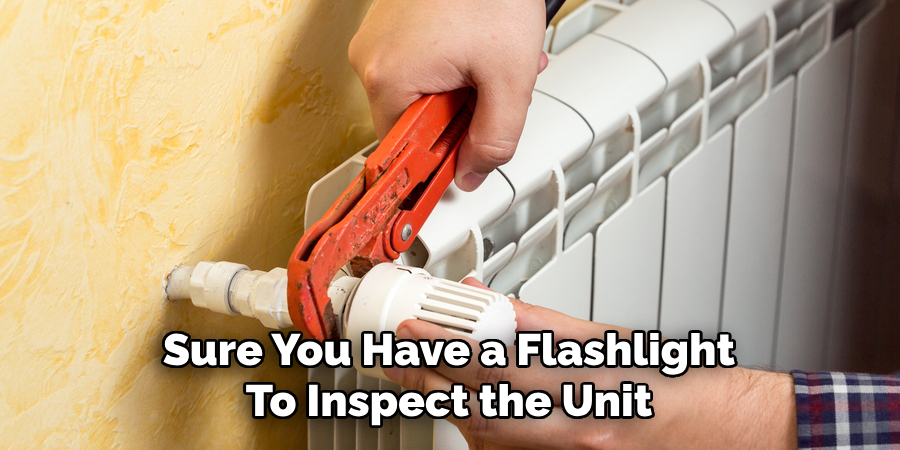
To remove the wall heater cover, you’ll need a few basic tools. Depending on the type of fasteners used, you may require a screwdriver (either flathead or Phillips), a drill, or a wrench. Some wall heater covers may use screws that are hidden beneath decorative panels, so make sure you have a flashlight to inspect the unit thoroughly. For plastic covers, a gentle pry tool or plastic scraper may be necessary to avoid cracking the material.
4. Remove Any Decorative Grills or Panels
Many wall heaters are fitted with decorative grills or panels that cover the screws holding the main cover in place. Start by gently removing these decorative elements. Often, they are attached with small clips or snap-fit mechanisms that can be loosened by applying gentle pressure with your hands or a small flat tool. Take care not to break or damage the plastic or metal, as these parts are often fragile. Once the decorative grill or panel is removed, you will have access to the screws that hold the cover in place.
5. Unscrew the Heater Cover
Once you’ve exposed the screws, use a screwdriver or drill to remove them. It’s important to be mindful of the number and placement of screws, as some may be hidden or recessed. Keep track of the screws as you remove them, using a container or magnetic tray to hold them securely. This will prevent them from getting lost, especially if you need to reattach the cover later. For more stubborn screws, consider using a penetrating oil or lubricant to help loosen them before attempting to unscrew them.
6. Lift or Slide the Cover Off

After removing all the screws, it’s time to remove the cover itself. The method for this will depend on the design of the wall heater. Some covers are designed to simply lift off once the screws are removed, while others may need to be slid upward or sideways. If the cover is heavy or awkward, it’s helpful to have a second person assist with the removal. Gently pull or slide the cover away from the unit, taking care not to damage the surrounding wall or the heater itself. If the cover is stuck due to rust or debris, gently tap it with a rubber mallet to loosen it.
7. Inspect for Any Additional Fasteners
In some cases, there may be additional fasteners or brackets hidden behind the heater cover that are preventing it from coming off easily. If the cover doesn’t come off right away, check along the edges and underneath for any hidden screws, clips, or mounting brackets. Use your flashlight to carefully inspect all areas of the unit to ensure that no fasteners have been overlooked. For covers that are difficult to remove, try using a pry tool to gently lift or dislodge them from their mounting.
8. Take Extra Caution with Older Units
Older wall heaters, especially those installed in homes built decades ago, may have rusted or corroded fasteners that are difficult to remove. In these cases, it’s important to be patient and avoid using excessive force, as you could damage the cover or heater. If you encounter rusted screws, you may need to apply a penetrating lubricant to loosen the rust and make removal easier. In some instances, using a drill with a screw extractor bit may be necessary if screws have become stripped or damaged beyond repair.
9. Check for Electrical Connections (If Applicable)
If you are removing a wall heater cover for maintenance or repair, be sure to check for any electrical connections that may be attached to the cover. Some heaters have thermostats, wires, or other components that are connected to the cover itself. If you see wires or electrical connections, take care when removing the cover to avoid accidentally disconnecting or damaging these components.
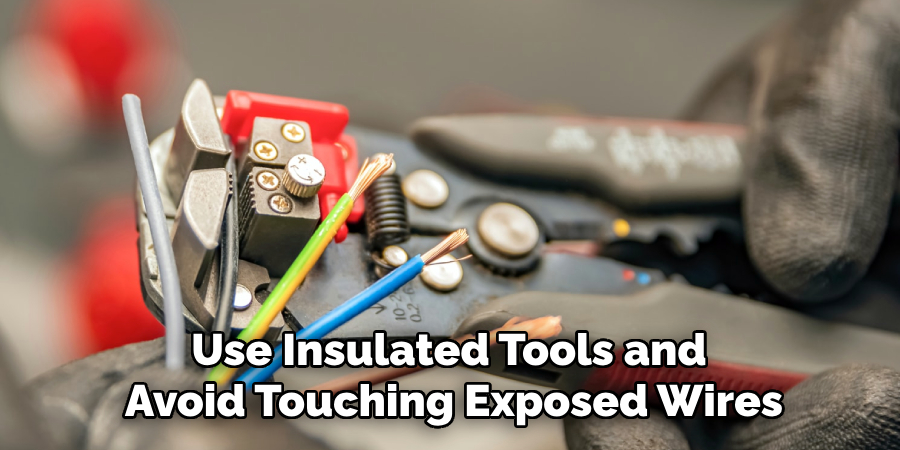
If necessary, use insulated tools and avoid touching exposed wires to reduce the risk of electrical shock. You may also want to consult the heater’s manual or the manufacturer’s guidelines for specific instructions on disconnecting any electrical components.
10. Reinstall the Cover
After completing any necessary maintenance, cleaning, or repairs, reinstall the heater cover by reversing the removal process. Ensure that all screws, clips, or fasteners are securely reattached, and make sure the cover is aligned properly before securing it in place. Check for any gaps or misalignments that could affect the heater’s performance or cause drafts. If you had to disconnect any electrical components, reconnect them carefully, making sure that all connections are secure and that there is no exposed wiring.
Things to Consider When Removing a Wall Heater Cover
Before undertaking the process of removing a wall heater cover, there are several factors to keep in mind to ensure the task is completed safely and effectively. First, always turn off the power to the heater at the circuit breaker to minimize the risk of electrical shock. Double-check that the unit is completely powered down by testing it before proceeding. Second, assess the condition of the heater and its surroundings. If the cover or fasteners appear heavily rusted or damaged, take extra precautions to avoid injury or further damage.
Third, be aware of potential sharp edges on the cover or screws, and consider wearing gloves to protect your hands. Lastly, consult the manufacturer’s instructions or maintenance manual if you are unsure about any step in the process, as different heater models may have unique designs or requirements. Taking these considerations into account will help ensure a smoother and safer removal process.
Conclusion
Removing a wall heater cover is a relatively straightforward task when done with proper care and attention. By following the steps outlined above, you can ensure that the cover is removed safely without causing any damage to the heater or surrounding walls. Whether for cleaning, maintenance, or repair, taking the time to properly remove the cover will help keep your heater running efficiently. Thanks for reading, and we hope this has given you some inspiration on how to remove wall heater cover!
About the Author
Adrian Green is a passionate woodworking enthusiast who has dedicated his life to the craft of woodworking. From his early days working alongside his father in the family woodworking shop, Adrian has honed his skills and developed a deep love for creating beautiful, functional pieces with his hands. As the voice behind The Woodenify Blog, he shares his knowledge, tips, and inspiration with fellow woodworkers of all skill levels, helping them build confidence in their abilities while learning new techniques.
Professional Focus
- Specializes in DIY woodworking projects, from furniture making to home décor.
- Provides step-by-step guides, tips, and practical tutorials for woodworkers at any skill level.
- Focused on empowering readers with confidence and knowledge through easy-to-follow instructions and hands-on techniques.
- Passionate about building a community where makers can share, learn, and grow together in the world of woodworking.
Education History
University of Craft and Design – Bachelor of Fine Arts (BFA) in Woodworking and Furniture Design
Woodworking Apprenticeships – Gained extensive hands-on experience through various workshops and mentorships with seasoned craftsmen, refining carpentry and furniture-making skills.
Expertise
- DIY woodworking, carpentry, furniture making, and home décor projects.
- Creating clear, accessible tutorials and guides for beginner to advanced woodworkers.
- Helping readers experience the satisfaction and fulfillment of turning raw materials into stunning finished products.