
A sulfur smell in your hot water can be unpleasant and may signal underlying issues with your water heater.

This distinct “rotten egg” odor is often caused by hydrogen sulfide gas, which can develop due to chemical reactions within the heater or certain bacteria in the water supply. Removing this odor is essential for improving the quality of your water and ensuring the proper functioning and longevity of your hot water system. Thankfully, there are various methods to address this issue, ranging from routine maintenance to specific treatment solutions.
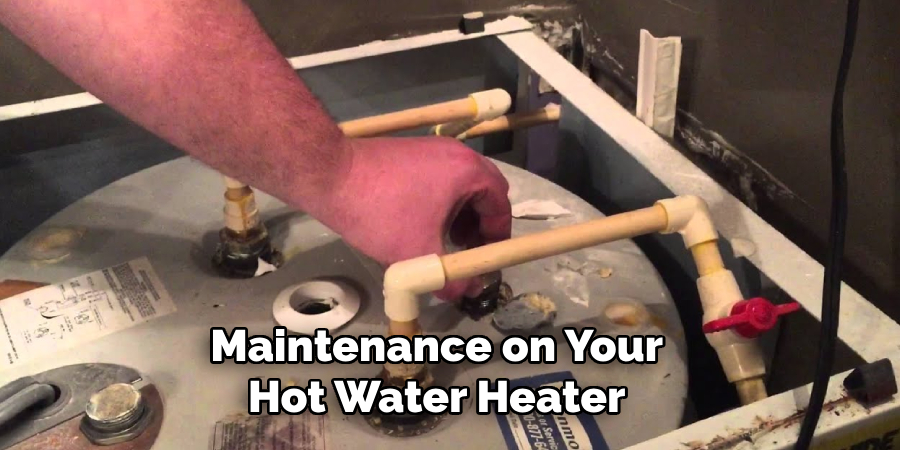
This guide on how to remove sulfur smell from hot water heater will walk you through the steps to effectively eliminate the sulfur smell from your hot water heater.
What Are the Causes of Sulfur Smell in Hot Water Heaters?
Before diving into the solutions, it’s essential to understand the root causes of the sulfur smell in your hot water heater. As mentioned, this odor is typically caused by hydrogen sulfide gas, which can originate from several sources, including:
- Sediment Buildup Within the Tank: Over time, minerals and sediment can accumulate at the bottom of your hot water heater tank. When these substances react with bacteria or chemicals in the water, they can produce hydrogen sulfide gas.
- Anode Rod Corrosion: The anode rod is a key component of your water heater that helps prevent rust and corrosion inside the tank. However, if this rod becomes corroded, it can produce hydrogen sulfide gas as a byproduct.
- Bacteria in the Water Supply: Certain types of bacteria, such as sulfate-reducing or sulfur bacteria, thrive in environments with low oxygen levels and can release hydrogen sulfide gas during their metabolic process. If your water supply contains these types of bacteria, they may be the source of the sulfur smell.
What Will You Need?
To effectively remove the sulfur smell from your water heater, you will need the following materials:
- White Vinegar or Hydrogen Peroxide: Both substances effectively neutralize hydrogen sulfide gas and eliminate odors. You can choose either one depending on what you have readily available at home.
- Baking Soda: Baking soda is a natural deodorizer and can help eliminate unpleasant odors from your water heater.
- Safety Gear: It’s essential to wear protective gloves and goggles while working with cleaning solutions and performing maintenance on your hot water heater.
10 Easy Steps on How to Remove Sulfur Smell From Hot Water Heater
Step 1. Turn Off the Power Supply:
Before starting any maintenance on your hot water heater, safety should be your top priority. If you have an electric water heater, locate the circuit breaker that controls the heater and switch it to the “off” position. For gas water heaters, turn the
gas control valve to the “pilot” setting to prevent any risk of ignition while you work. Make sure to double-check that the power or gas supply is indeed turned off to avoid accidents. Completing this step ensures a safe working environment for the remaining steps.
Step 2. Turn Off the Water Supply:
Turn off the cold water supply valve connected to your water heater. This will prevent new water from entering the tank while you work. Ensure the valve is tightly closed to avoid any leaks. Stopping the water flow is crucial as it allows you to drain and inspect the tank during the cleaning process safely.
Step 3. Drain the Tank:
Attach a garden hose to the drain valve at the water heater’s bottom. Ensure the other end of the hose is directed to a safe drainage area, such as a floor drain or outside space. Open the drain valve to allow the water to flow out of the tank. Be cautious, as the water may still be hot. To speed up the process, you can open a hot water tap in your home to alleviate pressure and help the water drain more efficiently. Once the tank is empty, close the drain valve and proceed to the next step.
Step 4. Remove Sediment Build-Up:
With the tank drained, inspect the inside for sediment build-up. Sediment can accumulate over time, reducing the efficiency and lifespan of your water heater. To remove the sediment, fill the tank partially with fresh water by briefly
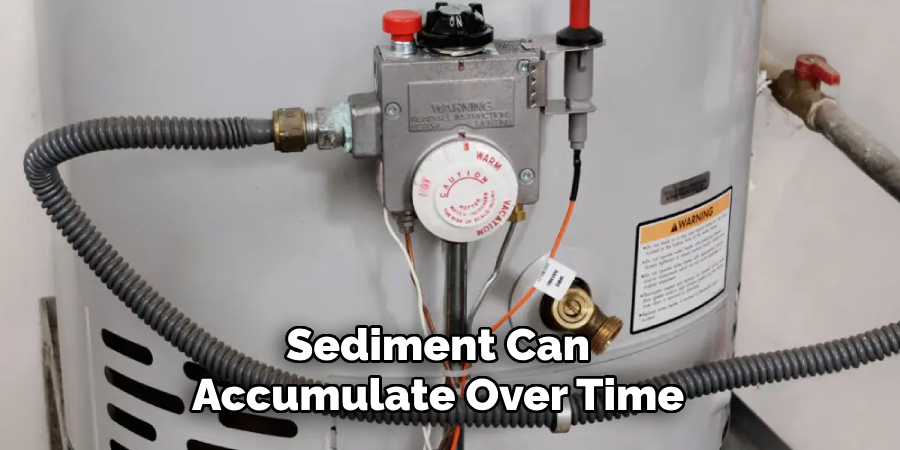
turning on the cold water supply and then draining it again. Repeat this process until the water draining out is clear of debris. For stubborn sediment, you may use a long-handled brush or specialized cleaning tool to scrub the bottom of the tank gently. Once clean, ensure the drain valve is securely closed before proceeding.
Step 5. Refill the Tank:
After ensuring the tank is clean and the drain valve is securely closed, it’s time to refill the water heater. Turn on the cold water supply and allow the tank to fill. Keep a hot water tap in your home open during this process to release trapped air and prevent air pockets from forming. Once water starts flowing steadily from the tap without sputtering, close it. Check for leaks around the drain valve or connections to ensure everything is sealed properly.
Step 6. Restore Power or Gas Supply:
Once the tank is refilled and all connections are secure, restore power to your water heater if it is electric by turning the circuit breaker back on. For gas water heaters, turn the gas supply back on and relight the pilot light if necessary, following the manufacturer’s instructions. Allow the water heater sufficient time to heat the water before using it, and check the thermostat settings to ensure the temperature is appropriate.
Step 7. Perform a Final Check:
After the water heater has had time to heat it, check the temperature and pressure relief valve to ensure it functions correctly. Open the valve briefly to allow some water to flow out, then close it. This ensures the valve is not stuck and
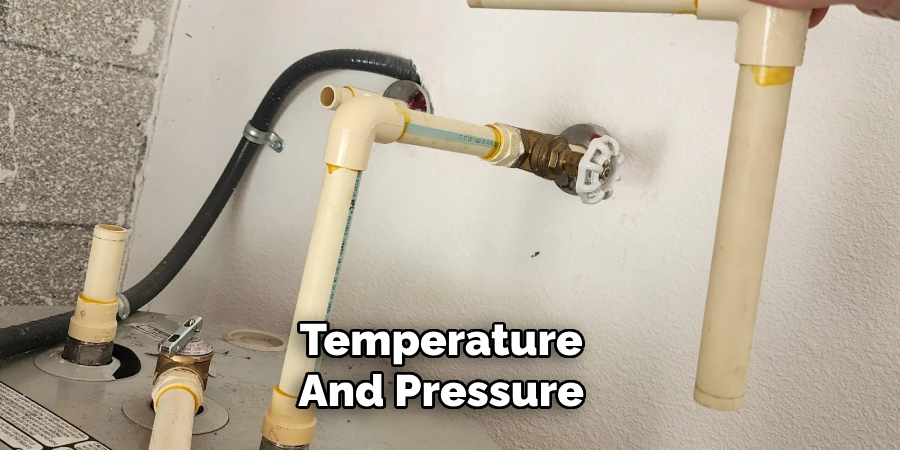
prevents pressure buildup in the tank. Inspect the surrounding area for leaks or unusual noises that might indicate a problem. If everything appears normal, your water heater maintenance is complete and ready for regular use.
Step 8. Schedule Regular Maintenance:
Establish a routine maintenance schedule to ensure the longevity and efficiency of your water heater. Flush the tank annually to remove sediment buildup, inspect the anode rod for corrosion every few years, and periodically test the temperature and pressure relief valve. Keeping up with these maintenance tasks will help prevent potential issues, improve energy efficiency, and extend the lifespan of your water heater. Consider consulting a professional if you are unsure about performing these tasks yourself.
Step 9. Insulate the Water Heater and Pipes:
Consider insulating your water heater tank and the surrounding pipes to enhance energy efficiency and reduce heat loss. Use a water heater insulation blanket designed for your model and wrap the hot water pipes with foam pipe insulation. This can help maintain water temperature longer, reduce energy consumption, and save on heating costs. Ensure the insulation does not cover essential components like the thermostat or burner area, and follow the manufacturer’s guidelines for proper installation.
Step 10. Replace the Water Heater If Necessary:
Despite regular maintenance, water heaters have a limited lifespan, typically 8 to 12 years. It may be time to replace your unit if you notice signs such as a lack of hot water, frequent leaks, unusual noises, or rust-colored water. Look for an energy-efficient model that meets your household’s needs, considering factors like tank size, fuel type, and Energy Star certification. A new water heater can improve energy efficiency, lower utility costs, and ensure a consistent hot water supply. Consult a professional to help install and dispose of the old unit.

By following these steps and implementing regular maintenance, you can ensure your water heater’s proper functioning and longevity.
5 Things You Should Avoid
1. Ignoring the Anode Rod: The anode rod in your water heater significantly prevents corrosion. However, it can also contribute to the sulfur smell when it reacts with certain types of water. Ignoring or failing to inspect the anode rod regularly can worsen the issue.
2. Misusing Bleach: While bleach can effectively kill bacteria causing the sulfur smell, using too much or not flushing it out correctly can damage your water heater and pipes. Proper application and thorough rinsing are crucial to avoid harm.
3. Overlooking Routine Maintenance: Skipping regular water heater maintenance can lead to the buildup of sediment and bacteria that cause the odor. It’s essential to drain and clean your tank periodically to maintain its efficiency and eliminate smells.
4. Neglecting Water Testing: The root cause of the sulfur smell often lies in the water itself. Failing to test your water for high sulfur, iron, or bacteria levels can result in improper treatment methods and unresolved issues.
5. Delaying Professional Help: If DIY solutions fail to resolve the sulfur smell, delaying consultation with a professional can exacerbate the problem. A plumber or water treatment expert can provide tailored solutions to address the issue effectively and prevent further damage.
Conclusion
How to remove sulfur smell from hot water heater requires a combination of proper maintenance, water testing, and, when necessary, professional assistance.
Start by identifying the source of the odor, whether it’s due to bacteria, chemical reactions, or the water supply itself. Regularly clean and flush your tank, replace the anode rod if required, and treat your water appropriately to ensure safety and effectiveness. Addressing minor issues promptly and seeking expert advice when needed can help you maintain a fresh, odor-free water system and extend the life of your water heater.
Remember, staying proactive is key to preventing recurring problems and ensuring water quality in your home.
About the Author
Adrian Green is a passionate woodworking enthusiast who has dedicated his life to the craft of woodworking. From his early days working alongside his father in the family woodworking shop, Adrian has honed his skills and developed a deep love for creating beautiful, functional pieces with his hands. As the voice behind The Woodenify Blog, he shares his knowledge, tips, and inspiration with fellow woodworkers of all skill levels, helping them build confidence in their abilities while learning new techniques.
Professional Focus
- Specializes in DIY woodworking projects, from furniture making to home décor.
- Provides step-by-step guides, tips, and practical tutorials for woodworkers at any skill level.
- Focused on empowering readers with confidence and knowledge through easy-to-follow instructions and hands-on techniques.
- Passionate about building a community where makers can share, learn, and grow together in the world of woodworking.
Education History
University of Craft and Design – Bachelor of Fine Arts (BFA) in Woodworking and Furniture Design
Woodworking Apprenticeships – Gained extensive hands-on experience through various workshops and mentorships with seasoned craftsmen, refining carpentry and furniture-making skills.
Expertise
- DIY woodworking, carpentry, furniture making, and home décor projects.
- Creating clear, accessible tutorials and guides for beginner to advanced woodworkers.
- Helping readers experience the satisfaction and fulfillment of turning raw materials into stunning finished products.