
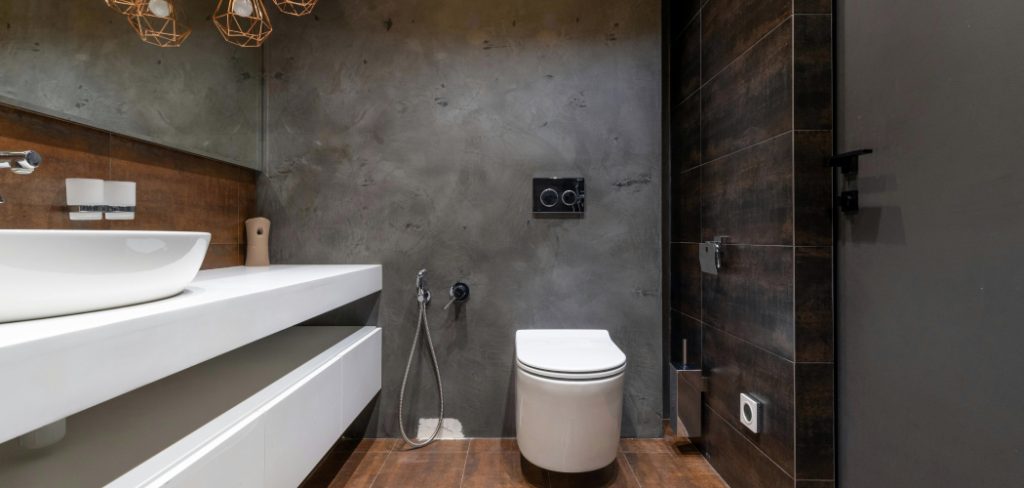
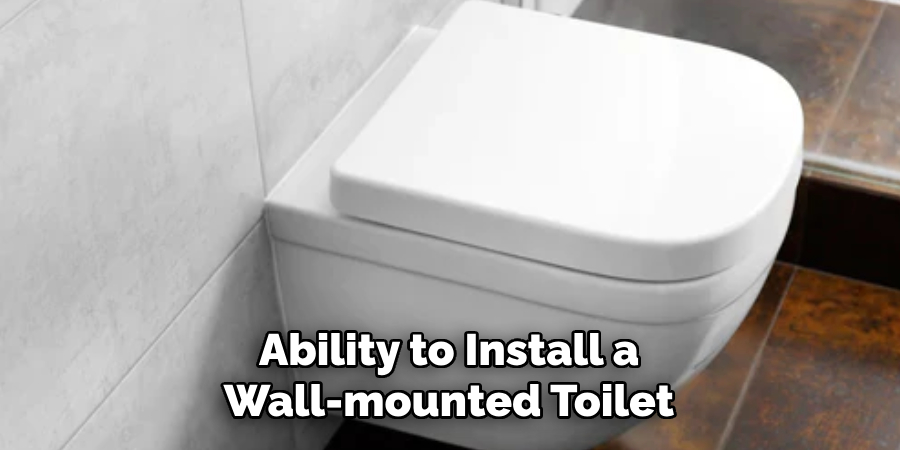
Installing a wall-mounted toilet is an excellent choice for achieving a sleek and modern bathroom design while also saving on floor space. However, plumbing for this type of toilet requires careful planning and execution to ensure proper functionality and durability.
This guide on how to plumb a wall mounted toilet will walk you through the necessary steps, tools, and considerations to set up the plumbing for a wall-mounted toilet efficiently and effectively. Whether you are a seasoned DIY enthusiast or just starting out, following these instructions will help you achieve professional results.
Why Choose a Wall Mounted Toilet?
Wall-mounted toilets have become increasingly popular in recent years due to their space-saving design and modern aesthetic. Unlike traditional floor-mounted toilets, wall-mounted toilets are attached directly to the bathroom wall, making the floor space underneath them easily accessible for cleaning.
Additionally, because the toilet tank is concealed within the wall, it creates a more streamlined and compact look. This can be especially beneficial for smaller bathrooms or those looking to create a more minimalist and open feel.
Needed Materials
Before beginning the plumbing process, gather all necessary materials and tools to ensure a smooth installation. These may include:
Wall-mounted Toilet:
Choose a toilet that fits your style and budget. Be sure to check with the manufacturer for specific installation instructions.
Toilet Tank:
Wall-mounted toilets require a separate tank, which is usually concealed within the wall. Make sure to choose a tank that is compatible with your chosen toilet.
Flush Plate:
This is the mechanism used to activate the flush of the toilet. It is typically installed on the wall above or near the toilet.
Drain Pipe:
The drain pipe will connect the toilet to your home’s plumbing system. Ensure it is properly sized and made from durable materials such as PVC or cast iron.
Water Supply Line:
This connects the water supply to the toilet tank and should be made from flexible, braided stainless steel for durability.
Tools:
Some common tools that may be needed include a drill, saw, level, measuring tape, adjustable wrench, pipe cutter, and pliers.
8 Step-by-Step Guides on how to plumb a wall mounted toilet
Step 1: Measure and Mark the Wall
Start by determining the ideal height and location for the wall-mounted toilet. Standard installation height is typically 15-17 inches from the floor to the top of the toilet seat, but this can be adjusted based on user preferences or accessibility requirements. Using a measuring tape and level, mark the positions on the wall where the toilet frame, tank, and other components will be installed.
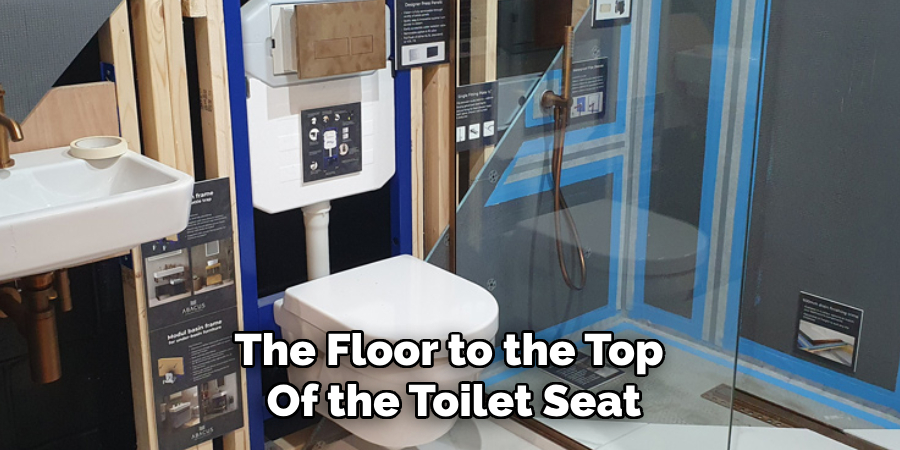
Make sure to align these markings with existing plumbing connections or plan adjustments if necessary. Double-check all measurements to ensure accuracy, as precise placement is crucial for a secure and functional installation.
Step 2: Install the Toilet Frame
Once the wall has been marked, it’s time to install the toilet frame. The frame, often referred to as the carrier, serves as the central support for the toilet and concealed tank. Begin by positioning the frame in alignment with the markings made in Step 1. Ensure the frame is level and properly centered over the drain outlet and water supply line.
Secure the frame to the wall studs and floor using the provided mounting hardware. Most frames come with adjustable legs to help fine-tune the height, so take advantage of this feature to match the desired toilet seat height. Tighten all bolts and screws firmly, but avoid overtightening to prevent damage to the frame or wall structure.
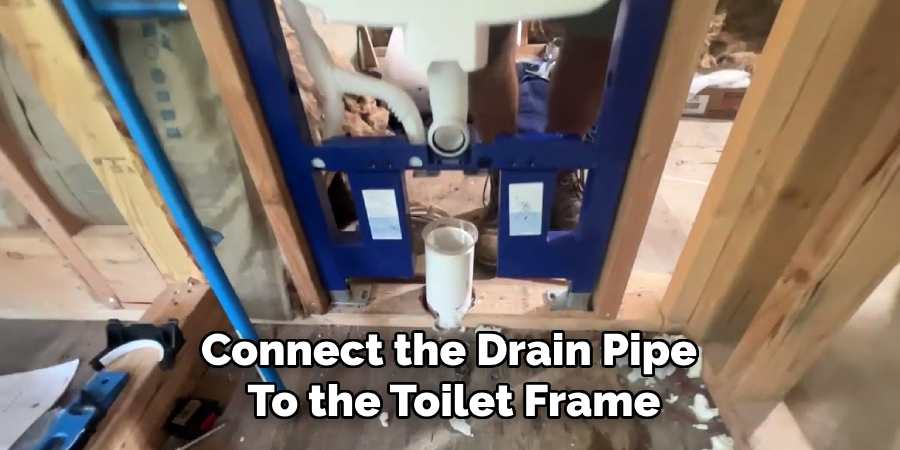
Step 3: Install the Drain Pipe
After securing the frame, connect the drain pipe to the toilet frame. Start by measuring and cutting the drain pipe to fit between the frame’s inlet port and the home’s plumbing system. Use a pipe cutter or saw to make clean, straight cuts on both ends of the pipe.
Connect one end of the pipe to the toilet frame’s inlet and secure it with appropriate fittings. Then, attach a P-trap at the other end of the pipe before connecting it to your home’s drainage system. Make sure all connections are tight and leak-free.
Step 4: Assemble and Install the Toilet Tank
The toilet tank, which will be concealed within the wall, is the next component to install. Begin by assembling the tank as per the manufacturer’s instructions. This often involves attaching the necessary inlet and outlet fittings and ensuring that all seals are in place.
Once assembled, position the tank within the toilet frame, aligning it with the designated mounting points. Secure the tank to the frame using the hardware provided by the manufacturer. Be sure to double-check that the tank is level and properly aligned with the rest of the installation components.
Next, connect the water supply line to the tank’s inlet valve. Use a flexible, braided stainless steel supply line for durability and ease of installation. Tighten connections firmly but avoid over-tightening, which could damage the fittings. Finally, test the tank connections for leaks by briefly turning on the water supply and observing for any signs of drips or moisture at the joints. Address any leaks before proceeding to the next step.
Step 5: Install the Flush Plate
The flush plate, also known as a push button or actuator plate, is used to activate the toilet’s flushing mechanism. Before installation, determine the ideal location for the flush plate based on personal preferences and accessibility needs. It is typically installed either directly above or to the side of the toilet and may require drilling holes in the wall.
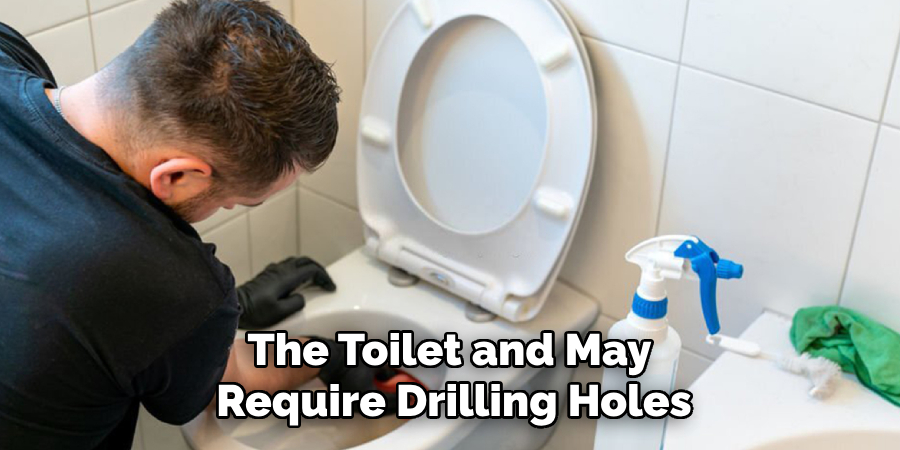
Once positioned, attach the flush plate to the wall using screws provided by the manufacturer. Be sure to follow any specific instructions for your chosen flush plate model. Once secured, test that it operates smoothly and activates both halves of the flush mechanism.
Step 6: Connect the Water Supply Line
After installing all necessary components, it’s time to connect the water supply line to the toilet tank. Start by turning off the main water supply and draining any remaining water from the lines. Then, attach one end of the supply line to the toilet tank’s inlet valve and secure it firmly with a wrench or pliers.
Next, attach the other end of the supply line to your home’s water supply using appropriate fittings. Turn on the main water supply and check for leaks at all connections. Make adjustments as needed.
Step 7: Install Toilet Bowl
The final step is installing the toilet bowl onto the frame and connecting it to both components’ inlet pipes. Begin by placing a wax ring or sealing gasket onto the toilet frame’s outlet pipe. This will help create a watertight seal between the bowl and drain pipe.
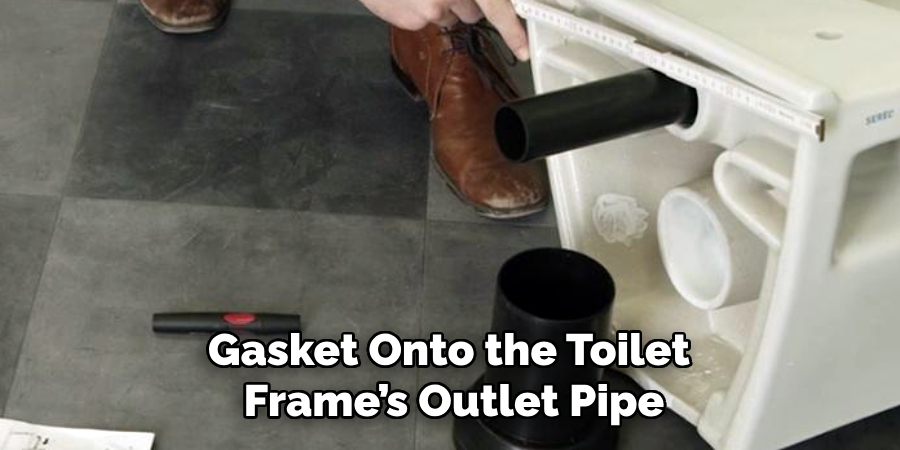
Next, carefully lower the toilet bowl onto the frame’s mounting points, taking care to align the inlet pipes with those on the bottom of the bowl. Secure all connections using appropriate fittings and tighten them firmly. Finally, check for any leaks by flushing the toilet and observing for any water escaping from joints or connections.
Step 8: Finishing Touches
With all components installed and connected, it’s time to add any finishing touches to your wall-mounted toilet installation. This may include caulking around the base of the toilet to ensure a secure seal against moisture and debris. You may also choose to add a toilet seat at this point, following the manufacturer’s instructions for installation.
Finally, test your new wall-mounted toilet for function and comfort. Make any necessary adjustments to ensure proper height and stability before enjoying your newly installed fixture. Remember to regularly check for any potential leaks or issues and address them promptly for a long-lasting, functional addition to your home. Happy flushing!
Additional Considerations When Installing a Wall-Mounted Toilet
While the steps outlined above cover the basics of installing a wall-mounted toilet, there are some additional considerations to keep in mind during the installation process. These include:
Checking Local Building Codes and Regulations:
Before beginning any home improvement project, it’s important to check your local building codes and regulations to ensure that your installation is up to code. This can help ensure safety and prevent any potential issues with your home’s plumbing system.
Properly Anchoring the Frame:
Proper anchoring of the toilet frame is crucial for stability and preventing damage to the wall. If installing on drywall, it is recommended to use toggle bolts or anchors specifically designed for heavy loads. If installing on a stud, use lag screws for added security.
Ensuring Adequate Support:
Wall-mounted toilets require adequate support to bear their weight and withstand daily use. Make sure that the chosen installation location has proper structural support, and consider consulting a professional if you are unsure.
Regular Maintenance:
Just like any other plumbing fixture, it’s important to regularly maintain your wall-mounted toilet. This includes checking for leaks, keeping the flush mechanism clean and free of debris, and addressing any issues promptly to prevent further damage.
Hiring a Professional:
If you are unsure of your ability to install a wall-mounted toilet or have concerns about potential complications, it may be best to hire a professional plumber. They have the necessary experience and expertise to ensure that your installation is done correctly and safely. Remember to always consult professional help if in doubt or facing any difficulties during the installation process.
With proper installation and maintenance on how to plumb a wall mounted toilet, a wall-mounted toilet can provide practicality, space-saving benefits, and a modern style to any bathroom. So, next time you’re considering upgrading or remodeling your bathroom, don’t overlook the option of a wall-mounted toilet! Don’t forget to have fun and enjoy your new fixture. Happy DIY-ing!
Conclusion
Installing a wall-mounted toilet can be a rewarding DIY project that combines functionality, style, and space-saving benefits for your bathroom. By carefully following the outlined steps on how to plumb a wall mounted toilet, checking local regulations, and ensuring proper support and maintenance, you can enjoy a reliable and modern fixture for years to come.
While the process requires precision and attention to detail, the end result is a sleek, efficient, and aesthetically pleasing addition to your home. Whether you tackle the installation yourself or seek professional assistance, a wall-mounted toilet is an excellent choice to elevate your bathroom’s design and functionality.
About the Author
Adrian Green is a passionate woodworking enthusiast who has dedicated his life to the craft of woodworking. From his early days working alongside his father in the family woodworking shop, Adrian has honed his skills and developed a deep love for creating beautiful, functional pieces with his hands. As the voice behind The Woodenify Blog, he shares his knowledge, tips, and inspiration with fellow woodworkers of all skill levels, helping them build confidence in their abilities while learning new techniques.
Professional Focus
- Specializes in DIY woodworking projects, from furniture making to home décor.
- Provides step-by-step guides, tips, and practical tutorials for woodworkers at any skill level.
- Focused on empowering readers with confidence and knowledge through easy-to-follow instructions and hands-on techniques.
- Passionate about building a community where makers can share, learn, and grow together in the world of woodworking.
Education History
University of Craft and Design – Bachelor of Fine Arts (BFA) in Woodworking and Furniture Design
Woodworking Apprenticeships – Gained extensive hands-on experience through various workshops and mentorships with seasoned craftsmen, refining carpentry and furniture-making skills.
Expertise
- DIY woodworking, carpentry, furniture making, and home décor projects.
- Creating clear, accessible tutorials and guides for beginner to advanced woodworkers.
- Helping readers experience the satisfaction and fulfillment of turning raw materials into stunning finished products.