Pex tubing has become a popular choice for plumbing projects due to its flexibility, durability, and ease of installation. Whether you’re working on a home renovation or a new construction project, learning how to install Pex tubing can save you time and money.

This guide will cover the essential tools, materials, and steps needed to successfully install Pex tubing and ensure a reliable plumbing system.
Why Choose Pex Tubing?
Pex tubing, also known as cross-linked polyethylene, has many advantages over traditional plumbing materials such as copper and PVC. Here are some of the reasons why you should consider using Pex tubing for your next project:
Flexibility:
Pex tubing is flexible and can easily bend around corners and obstacles, making it ideal for tight spaces. This eliminates the need for complex and time-consuming pipe bending, making the installation process faster and more efficient.
Durability:
Pex tubing is resistant to corrosion, chemicals, and extreme temperatures. It can withstand freezing temperatures without cracking, making it suitable for both indoor and outdoor use. Pex tubing also has a longer lifespan compared to other materials, reducing the need for frequent replacements.
Cost-Effective:
Pex tubing is generally less expensive than copper or PVC pipes, making it a cost-effective choice for plumbing projects. Its ease of installation also reduces labor costs and overall project expenses.
Easy to Install:
Installing Pex tubing requires minimal tools and skills. With the right equipment and knowledge, even novice DIYers can successfully install Pex tubing.
Tools and Materials Needed
Before starting your Pex tubing installation, it’s essential to gather all the necessary tools and materials. Here’s a list of what you’ll need:
Pex Tubing Cutter or Pipe Saw:
These tools are used to cut the Pex tubing to specific lengths. A pipe saw is a more affordable option, but a Pex tubing cutter provides cleaner and smoother cuts.
Crimping Tool:

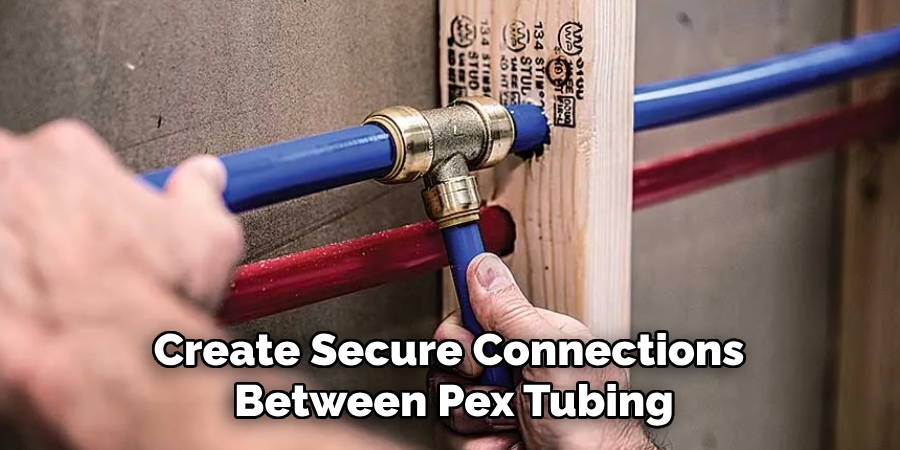
A crimping tool is used to create secure connections between Pex tubing and fittings. It comes in different sizes, so make sure to choose one that matches the size of your Pex tubing.
Fittings:
Fittings are essential for connecting sections of Pex tubing, such as elbows, tees, couplings, and valves. Make sure to choose fittings that are compatible with Pex tubing.
Support Brackets:
Support brackets are needed to secure the Pex tubing and prevent sagging or movement. They can be attached to walls, floor joists, or other structures.
Pex Manifold:
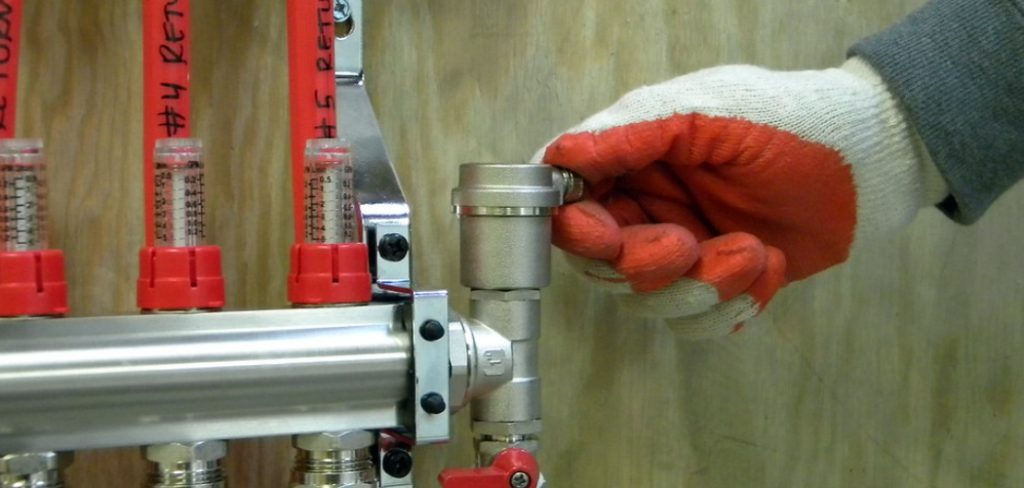
A Pex manifold is a distribution center for your plumbing system. It allows you to control the flow of water to different areas of your home, making it easier to isolate and fix any potential problems.
7 Simple Steps on How to Install Pex Tubing
Step 1: Plan Your Layout

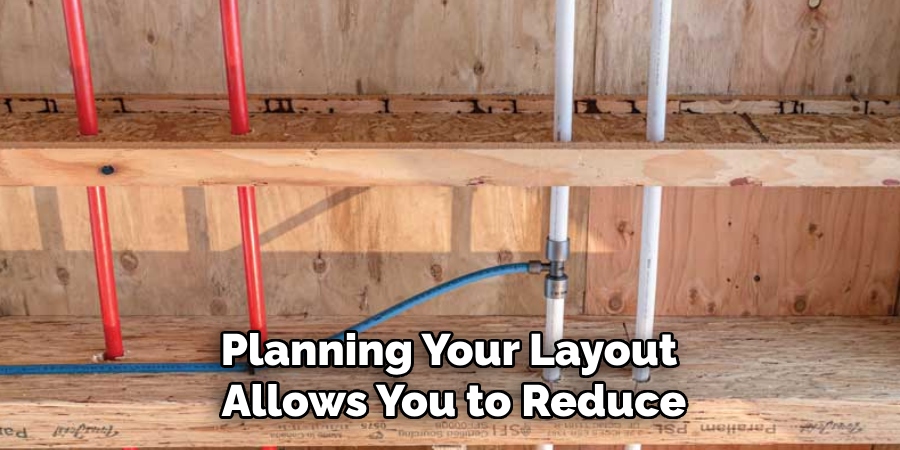
Before beginning the installation, it’s essential to plan your Pex tubing layout carefully. Start by identifying the areas where water will be needed, such as sinks, showers, toilets, and appliances. Create a detailed diagram of your plumbing system, showing the connections between the Pex tubing, fittings, and the Pex manifold.
This step helps you determine the correct lengths of tubing, the number and type of fittings required, and the most efficient routing paths. Additionally, planning your layout allows you to reduce the number of connections and fittings, minimizing potential leak points while ensuring proper water flow throughout your system.
Step 2: Turn Off Water Supply and Drain Existing Lines
Before installing the Pex tubing, make sure to turn off the main water supply and drain any existing lines to avoid flooding or damage. You can do this by opening all faucets and fixtures until no more water comes out.
If you’re replacing old plumbing, make sure to remove and dispose of any old pipes, fittings, and fixtures properly.
Step 3: Cut and Prepare Pex Tubing
Using a cutter or pipe saw, cut the Pex tubing into appropriate lengths according to your layout plan. For connections between the Pex manifold and individual fixtures, add an extra two inches of length to allow for fittings.
Next, use a chamfering tool to smooth out the edges of the cut tubing. This step is essential as it prevents any burrs or debris from interfering with the crimping process.
Step 4: Install Fittings and Valves
Once the Pex tubing is cut and prepared, it’s time to install the fittings and valves. Start by inserting the appropriate fittings, such as elbows, couplings, or tees, into the ends of the tubing. Make sure the fitting is fully seated into the tubing for a secure connection.

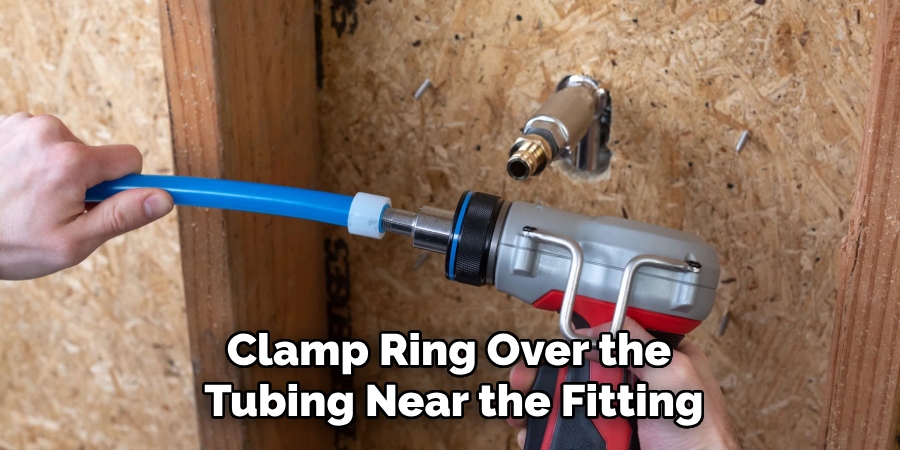
Next, slide a crimp ring or clamp ring over the tubing near the fitting. Use the crimping tool or clamp tool to tighten the ring and secure the connection. Ensure that the ring is placed evenly over the fitting to prevent leaks. Be sure to check the manufacturer’s instructions for the specific distance between the ring and the end of the tubing.
Step 5: Install Pex Tubing
Once all the fittings and valves are installed, begin laying out the Pex tubing according to your plan. Secure the tubing with support brackets every few feet to prevent sagging or movement. Use plastic clips or straps to secure the tubing to walls or structures as needed.
It’s important to avoid sharp bends or kinks in the tubing, as it can restrict water flow and cause issues later on.
Step 6: Connect Pex Tubing to Manifold
When all the tubing is in place, connect one end of each tube to the Pex manifold. Again, make sure to use appropriate fittings and crimp rings for secure connections. Once all connections are made, turn on the main water supply and check for any leaks. If there are any leaks, tighten the crimp rings accordingly.
But if there are no leaks, turn off the water supply and proceed to the final step.
Step 7: Test and Flush
Once everything is connected, turn on all faucets and fixtures in your home. This step helps flush out any debris or air that may have accumulated during installation. After a few minutes, turn off the water supply and check again for leaks or any issues with water flow. If everything looks good, congratulations – you’ve successfully installed Pex tubing!

Following these seven simple steps on how to install pex tubing can help you save time and money on your plumbing project. Pex tubing is a versatile and durable option for your home’s plumbing needs, and with its ease of installation, it’s a practical choice for DIYers or professional plumbers alike.
Additional Tips for Pex Tubing Installation
- Always use manufacturer-approved tools and materials to ensure the best results.
- Follow local building codes and regulations for plumbing installations.
- Consider using a Pex manifold for easier maintenance and troubleshooting in the future.
- For outdoor installations, use UV-resistant Pex tubing to prevent damage from sunlight exposure.
- When connecting Pex tubing to existing copper or CPVC pipes, use appropriate transition fittings and follow the manufacturer’s instructions carefully.
- Regularly inspect your Pex tubing for wear and tear, especially near areas with high water flow or potential damage sources (i.e., sharp edges or extreme temperatures). Replace any damaged sections immediately to avoid leaks or disruptions in water flow.
Common Mistakes to Avoid
- Using the wrong type or size of fittings or crimp rings.
- Not planning the layout carefully results in excess tubing or difficult routing paths.
- Neglecting to turn off the water supply and drain existing lines before installation.
- Improperly securing Pex tubing with support brackets, leading to sagging or movement.
- Over-crimping crimp rings cause damage to the fitting and potential leaks.
- Do not test and flush the system before finalizing installations.
- Ignoring local building codes and regulations for Pex tubing installation.
By following these tips and avoiding common mistakes, you can ensure a successful Pex tubing installation that will provide reliable water flow for years to come.
Frequently Asked Questions
Q1: Can Pex Tubing Be Used for Both Hot and Cold Water?
A1: Yes, Pex tubing is suitable for both hot and cold water applications. However, make sure to use the appropriate type of Pex tubing (PEX-A, B, or C) for each application. PEX-A is the most flexible and compatible with both hot and cold water, while PEX-C is suitable for cold water only.
Q2: What Is the Maximum Length of Pex Tubing That Can Be Installed Without Joints?
A2: The maximum length of Pex tubing that can be installed without joints varies depending on the type and diameter of the tubing, as well as local building codes. Typically, it ranges from 100 to 300 feet for residential applications. Consult a professional plumber or check with your local authorities for specific guidelines.
Q3: Can I Use Push-Fit Fittings with Pex Tubing?
A3: Yes, push-fit fittings can be used with Pex tubing for a quicker and easier installation process. However, make sure to use fittings specifically designed for Pex tubing and follow the manufacturer’s instructions carefully.
Conclusion
Pex tubing is an excellent choice for modern plumbing systems due to its durability, flexibility, and ease of installation. By following the outlined steps, tips, and guidelines on how to install pex tubing, both homeowners and professionals can achieve a reliable and efficient plumbing system.
Avoiding common mistakes and adhering to manufacturer recommendations will further ensure a successful project. Whether you’re upgrading your current plumbing or installing a new system, Pex tubing offers a cost-effective and long-lasting solution that can serve your needs for years to come. PEX tubing projects are an excellent choice for both plumbing and radiant heating systems, offering flexibility, durability, and ease of installation for DIY enthusiasts.
About the Author
Adrian Green is a passionate woodworking enthusiast who has dedicated his life to the craft of woodworking. From his early days working alongside his father in the family woodworking shop, Adrian has honed his skills and developed a deep love for creating beautiful, functional pieces with his hands. As the voice behind The Woodenify Blog, he shares his knowledge, tips, and inspiration with fellow woodworkers of all skill levels, helping them build confidence in their abilities while learning new techniques.
Professional Focus
- Specializes in DIY woodworking projects, from furniture making to home décor.
- Provides step-by-step guides, tips, and practical tutorials for woodworkers at any skill level.
- Focused on empowering readers with confidence and knowledge through easy-to-follow instructions and hands-on techniques.
- Passionate about building a community where makers can share, learn, and grow together in the world of woodworking.
Education History
University of Craft and Design – Bachelor of Fine Arts (BFA) in Woodworking and Furniture Design
Woodworking Apprenticeships – Gained extensive hands-on experience through various workshops and mentorships with seasoned craftsmen, refining carpentry and furniture-making skills.
Expertise
- DIY woodworking, carpentry, furniture making, and home décor projects.
- Creating clear, accessible tutorials and guides for beginner to advanced woodworkers.
- Helping readers experience the satisfaction and fulfillment of turning raw materials into stunning finished products.
