
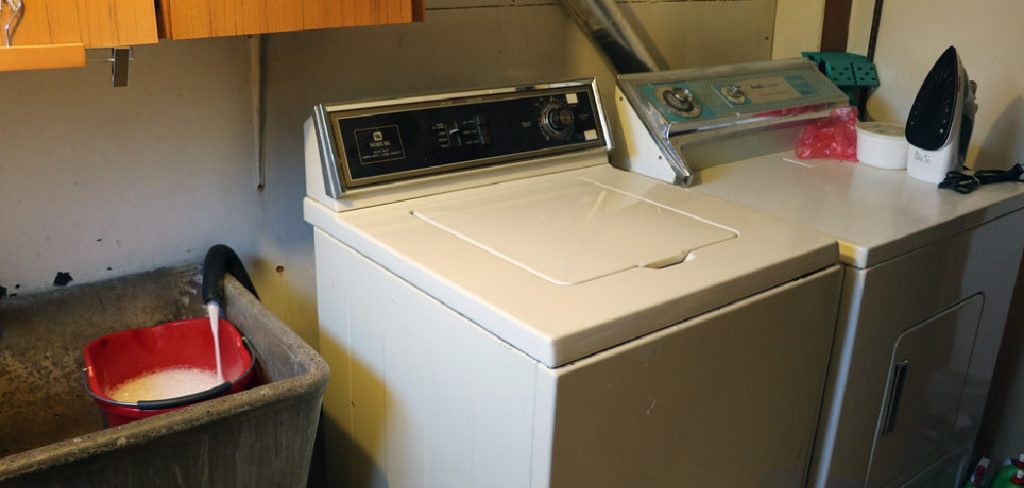
Installing a laundry room sink can be a practical upgrade to your home, offering a convenient space for soaking, scrubbing, and cleaning various household items. Whether you are tackling tough stains or rinsing out paint brushes, a dedicated sink in your laundry area can make these tasks easier and more efficient. This guide will walk you through the process step-by-step process of how to install laundry room sink, ensuring a smooth and successful installation.
The Appeal of Laundry Room with Sink Ideas
A laundry room with a sink is more than just a functional addition—it enhances the overall utility and appeal of the space. Adding a sink creates a designated zone for tasks that require water, reducing mess in other areas of the house, such as the kitchen or bathroom. It also brings an added level of convenience for activities like handwashing delicate fabrics, pre-treating stains, or cleaning up after household projects.
Beyond practicality, a well-designed sink area can complement the aesthetic of your laundry room, blending seamlessly with cabinetry, countertops, and other design elements. By incorporating a sink, you elevate the versatility and attractiveness of the space, making it a more engaging and efficient part of your home.
10 Methods How to Install Laundry Room Sink
1. Choosing the Right Sink and Location
Before starting the installation, select the right sink for your laundry room. Utility sinks come in different materials, such as stainless steel, plastic, or porcelain, each offering unique benefits. Consider the size of the sink and how it will fit within the available space.
The location should be near an existing water supply and a drain for easier installation. If installing a freestanding utility sink, ensure it has enough clearance for plumbing connections. For an undermount or drop-in sink, verify that the countertop has sufficient support for its weight.
2. Gathering Necessary Tools and Materials
Having the right tools and materials will make the installation process more efficient. Common tools required include an adjustable wrench, basin wrench, pipe cutter, Teflon tape, plumber’s putty, a bucket, and a level. Depending on the sink type, you may also need a jigsaw to cut out a countertop hole. Ensure you have the necessary plumbing components, such as water supply lines, a P-trap, and a drain assembly.
3. Shutting Off the Water Supply
Before beginning the installation, turn off the water supply to avoid leaks and flooding. Locate the shut-off valves under the sink or near the laundry room plumbing. If there are no dedicated shut-off valves, turn off the main water supply to the house. Open any nearby faucets to release residual water pressure in the pipes. Place a bucket under the existing plumbing connections to catch any remaining water when disconnecting pipes.

4. Removing the Old Sink (If Applicable)
If you are replacing an old sink, carefully remove it before installing the new one. Start by disconnecting the water supply lines using an adjustable wrench. Next, detach the drain pipe and P-trap, allowing any trapped water to drain into a bucket. For a wall-mounted or freestanding sink, loosen the mounting brackets or screws holding it in place. If the sink is sealed with caulk, use a putty knife to break the seal before lifting it out. Once removed, clean the surrounding area to prepare for the new installation.
5. Assembling and Positioning the Sink
For a freestanding sink, attach the legs or mounting brackets according to the manufacturer’s instructions. Ensure that the sink stands level and does not wobble. If installing a drop-in sink, place the sink into the countertop cutout to check for a proper fit. Use a level to ensure the sink is even, making adjustments if necessary. If the sink requires mounting to a wall, mark the position of the brackets, drill pilot holes, and securely fasten them before placing the sink.
6. Connecting the Water Supply Lines
Once the sink is positioned, connect the water supply lines. Attach flexible supply hoses to the faucet’s hot and cold inlets, wrapping Teflon tape around the threaded ends to prevent leaks. Connect the other end of the hoses to the shut-off valves under the sink. Tighten the connections with an adjustable wrench but avoid overtightening, which can damage the fittings.
7. Installing the Drain Pipe and P-Trap
Proper drainage is crucial for a functional laundry sink. Begin by inserting the sink’s drain assembly, applying plumber’s putty around the drain flange for a watertight seal. Secure the drain with the provided lock nut and washer. Next, connect the drain tailpiece to the P-trap, ensuring all slip-joint nuts are hand-tightened before using a wrench to secure them further. The P-trap should connect to the main drain line in the wall or floor.

8. Sealing and Securing the Sink
If installing a drop-in or undermount sink, apply a bead of silicone caulk around the edges for a secure and watertight seal. For freestanding or wall-mounted sinks, check that all brackets and supports are firmly in place. Tighten any loose bolts or screws to ensure stability. If mounting the sink to drywall, use anchors to provide additional support. Allow the silicone sealant to cure fully before using the sink.
9. Testing the Sink for Leaks and Proper Operation
After installation, turn the water supply back on and test the sink. Run both hot and cold water to check for leaks at the supply line connections and drain assembly. Inspect under the sink for any signs of water dripping from the pipes. If leaks occur, tighten the affected connections or reapply Teflon tape. Also, test the drain system by filling the sink with water and letting it drain completely, ensuring smooth flow without blockages.
10. Performing Final Adjustments and Cleanup
Once you have confirmed that everything functions correctly, make any necessary adjustments to the plumbing connections. Secure any loose pipes using brackets or zip ties to prevent movement over time. Clean up the work area by wiping down the sink, countertop, and surrounding surfaces. Dispose of any old plumbing components and debris properly. If needed, apply a final layer of caulk around the edges of the sink to enhance its appearance and prevent water from seeping into gaps.
Troubleshooting Common Issues
Even with proper installation, issues may arise with a laundry sink over time. Here are some common problems and their potential solutions:
Leaking Connections
If water leaks from the supply lines or drain pipes, check all connections for tightness. Apply additional Teflon tape to threaded fittings or replace worn washers in slip-joint nuts. Ensure that plumber’s putty or silicone sealant is applied correctly for watertight seals around the drain assembly.
Slow Draining Sink
Slow drainage could be caused by a clog in the P-trap or drainpipe. Detach the P-trap and clean out any debris or buildup. If the issue persists, use a plumber’s snake or drain cleaner to clear blockages along the main drain line.
Unstable or Wobbly Sink
For freestanding sinks, check the legs or mounting brackets to ensure they are properly secured. Tighten any loose screws or bolts and adjust the legs for a stable and level position. Use shims if necessary to provide additional support.
Low Water Pressure
If the water flow is weak, inspect the faucet aerator for sediment buildup and clean it if required. Also, check the water supply lines for kinks or blockages. If the problem is with one side only (hot or cold), the shut-off valve may not be fully open or there could be an issue with the plumbing upstream.
Safety Considerations
Installing or maintaining a laundry sink involves working with plumbing components, tools, and possibly electrical connections, all of which can pose safety risks. To ensure a safe and efficient process, consider the following precautions:

- Turn Off the Water Supply: Before beginning any work, shut off the water supply to avoid accidental leaks or flooding. Use the shut-off valves under the sink or the main water supply valve.
- Wear Protective Gear: Use gloves to protect your hands from sharp edges on fittings and tools. Safety goggles are essential when cutting pipes, drilling, or working with caustic drain cleaners.
- Use Tools Properly: Always handle tools such as wrenches, drills, and saws as instructed by the manufacturer. Ensure your workspace is uncluttered to avoid accidents due to misplaced tools.
- Check for Electrical Hazards: If you’re installing a sink near an electrical outlet or appliance, ensure the outlets are protected by a GFCI (Ground Fault Circuit Interrupter) and avoid contact with live wires.
- Ventilate the Area: When using chemicals like plumber’s putty, silicone sealant, or drain cleaners, ensure proper ventilation to avoid inhaling fumes.
- Lift Heavy Objects Carefully: Some sinks, especially large freestanding or cast iron models, can be heavy. Lift with your legs, not your back, and use a helper if necessary to move or position the sink.
- Prevent Slips and Falls: Clean up any water spills or debris promptly to reduce the risk of slipping during the installation process.
Conclusion
Installing a laundry room sink is a practical home improvement project that enhances convenience and functionality. From selecting the right sink to final testing, every step plays a crucial role in achieving a durable and efficient plumbing setup. Thanks for reading, and we hope this has given you some inspiration on how to install laundry room sink!
About the Author
Adrian Green is a passionate woodworking enthusiast who has dedicated his life to the craft of woodworking. From his early days working alongside his father in the family woodworking shop, Adrian has honed his skills and developed a deep love for creating beautiful, functional pieces with his hands. As the voice behind The Woodenify Blog, he shares his knowledge, tips, and inspiration with fellow woodworkers of all skill levels, helping them build confidence in their abilities while learning new techniques.
Professional Focus
- Specializes in DIY woodworking projects, from furniture making to home décor.
- Provides step-by-step guides, tips, and practical tutorials for woodworkers at any skill level.
- Focused on empowering readers with confidence and knowledge through easy-to-follow instructions and hands-on techniques.
- Passionate about building a community where makers can share, learn, and grow together in the world of woodworking.
Education History
University of Craft and Design – Bachelor of Fine Arts (BFA) in Woodworking and Furniture Design
Woodworking Apprenticeships – Gained extensive hands-on experience through various workshops and mentorships with seasoned craftsmen, refining carpentry and furniture-making skills.
Expertise
- DIY woodworking, carpentry, furniture making, and home décor projects.
- Creating clear, accessible tutorials and guides for beginner to advanced woodworkers.
- Helping readers experience the satisfaction and fulfillment of turning raw materials into stunning finished products.