
Gas geysers are popular for households seeking efficient access to instant hot water. Powered by LPG or natural gas, these units are designed to heat water on demand, eliminating the need for large storage tanks. This ensures a continuous supply of hot water and contributes to significant energy and cost savings compared to traditional electric water heaters. Gas geysers are particularly appreciated for their compact size and ability to deliver hot water instantly, making them an ideal choice for bathrooms.
However, properly installing a gas geyser ensures safety, performance, and adherence to local regulations. Installing gas and ventilation systems incorrectly can lead to dangerous situations, such as gas leaks or carbon monoxide buildup. If you’re wondering how to install gas geyser in bathroom, this guide will walk you through the process step-by-step. Always consult a licensed professional to meet safety and regulatory requirements.
Tools and Materials Needed
To successfully install a gas geyser in your bathroom, having the right tools and materials on hand is essential. Below is a list of the key tools and materials needed to complete the installation process efficiently and safely.
Essential Tools
- Drill and masonry bits – Securely mount the geyser unit to the wall.
- Adjustable wrench and pipe wrench – To tightly secure gas and water connections.
- Screwdrivers – Necessary for attaching screws and securing other components.
- Teflon tape – Used to seal pipe threads and prevent leaks.
- Gas leak detector solution (soapy water) – For checking gas connections for potential leaks after installation.
Required Materials
- Gas geyser unit – The primary device being installed, chosen based on your household’s needs.
- Gas pipeline and regulator – To facilitate the safe gas flow to the geyser.
- Water inlet and outlet pipes – Connect the geyser to your home’s plumbing system.
- Exhaust pipe for venting (if required) – Ensures proper ventilation of exhaust gases to maintain safety.
Having these tools and materials ready before installation will help streamline the procedure and ensure a safe, compliant setup. Always follow safety guidelines when using tools and handling gas connections.
Choosing the Right Location for Installation
Selecting the appropriate location for your gas geyser installation is crucial to ensure both safety and efficiency. Here are the key factors to consider when making your decision:

Factors to Consider
- Proper Ventilation: The chosen spot should allow for adequate airflow to prevent gas buildup. Installing the geyser in a well-ventilated area ensures that any exhaust gases are safely dispersed, reducing the risk of harmful fume accumulation.
- Proximity to Water Outlets: Position the geyser as close to water outlets to maximize efficiency and minimize heat loss. This ensures instant hot water delivery and reduces energy consumption.
- Stable Mounting Surface: Ensure the wall or surface selected for installation is strong and stable enough to support the geyser’s weight securely. A solid foundation prevents accidental dislodging or damage to the unit.
Safety Clearance
- Minimum Distances: Maintain a sufficient distance from walls, ceilings, and other structures as stipulated in the manufacturer’s guidelines to reduce heat-related risks.
- Away from Hazards: Avoid placing the geyser in areas exposed to water splashes, moisture, or near flammable materials to ensure safe operation and longevity.
Considering these factors will provide a secure, efficient, and long-lasting gas geyser setup.
How to Install Gas Geyser in Bathroom: Mounting the Gas Geyser on the Wall
Step 1: Mark the Mounting Points
Begin by carefully selecting the mounting location, ensuring it meets all safety clearance guidelines. Use a spirit level to ensure proper alignment; a straight installation is essential for optimal performance. Mark the mounting points on the wall where the brackets or supports for the geyser will be attached.
Ensure these points correspond with the mounting holes on the geyser unit. Once marked, use a drill to make holes at the specified points, and then insert appropriate wall anchors to provide additional support, especially for walls made from softer materials or plaster. Wall anchors help prevent any accidental movement or dislodging of the unit after installation.
Step 2: Secure the Geyser Unit
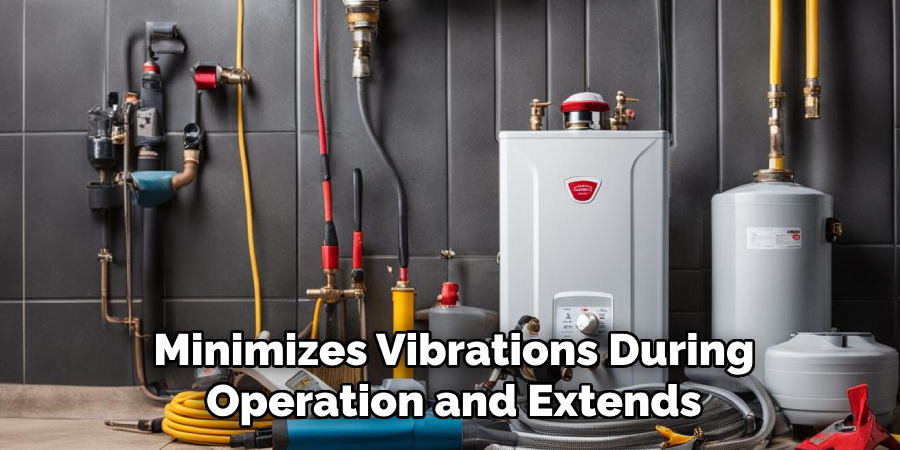
With the mounting points prepared, position the gas geyser unit against the wall, aligning it with the anchors or holes. Attach the geyser firmly using high-quality screws and brackets provided by the manufacturer. Tighten the screws securely to ensure the unit is held in place and does not tilt or budge under normal operating conditions. Double-check that the installation is stable by gently applying pressure to the unit, confirming there is no undue movement. An adequately secured geyser minimizes vibrations during operation and extends its working life by reducing unnecessary wear.
Connecting Water Supply and Gas Line
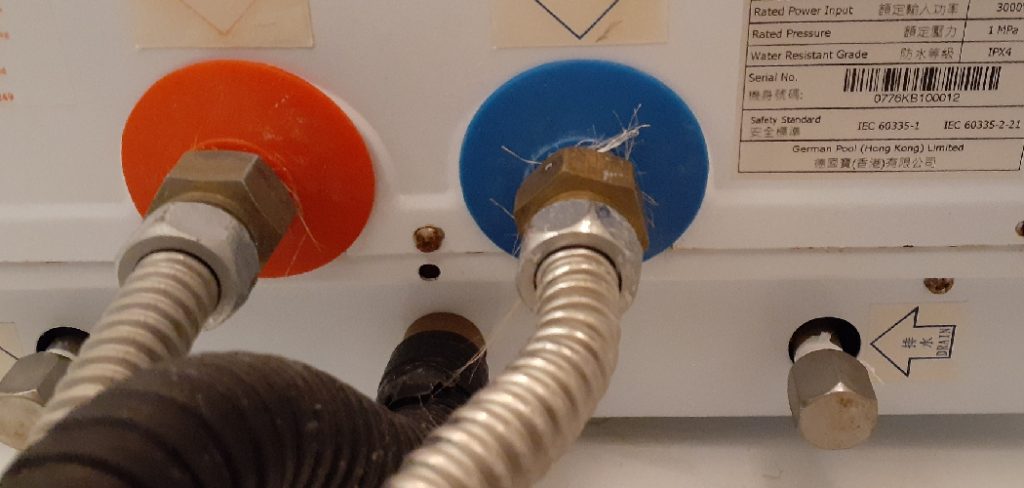
Step 1: Connect the Water Inlet and Outlet
Begin by locating the water inlet and outlet valves on the geyser unit. Attach the cold water supply line to the geyser’s input valve and tighten it securely. Connect the hot water outlet to the house or bathroom plumbing system where the hot water will be supplied. Use Teflon tape on the threads of each connection to ensure a watertight seal and prevent any potential leaks. Once these connections are complete, turn on the water supply briefly to check for leaks and confirm that water flows correctly through the geyser to the connected system.
Step 2: Connect the Gas Line
Locate the gas inlet on the geyser and attach a flexible gas hose to this connection point. Use Teflon tape on the threads of the gas inlet to create a tight seal, ensuring there are no gaps for gas to escape. Next, connect the other end of the gas hose to the gas cylinder or the main gas pipeline using a regulator to control the gas flow.
It is critical to secure the gas line tightly and inspect for potential leaks once connected. A soap water test can be performed around the hose connections to identify any escaping bubbles that indicate gas leakage. Safety is paramount during this process—make sure all valves are properly closed when handling connections. After ensuring there are no leaks, the system is ready for the next step in the installation process.
Installing the Exhaust System
Why Ventilation is Important
Proper ventilation is crucial when installing a gas geyser, as it prevents harmful gas buildup and mitigates the risk of carbon monoxide poisoning. Without adequate ventilation, gases like carbon monoxide, a colorless and odorless compound, can accumulate within enclosed spaces, posing severe health risks. Ensuring that these gases are safely expelled from the system protects both the users and the environment from potential harm.

Installing an Exhaust Pipe (If Required)
If your gas geyser requires an exhaust system, start by locating the exhaust port on the top of the geyser. Securely connect a metal flue pipe to this port, ensuring it fits tightly to avoid leaks. The exhaust pipe must then be routed to lead outside through an existing vent or chimney.
It is essential to check that the outlet provides a clear and unrestricted path for the gases to escape. For installations where no vent exists, consider creating a safe passage through an external wall with the help of a professional. A properly installed exhaust system not only prolongs the lifespan of the geyser but also ensures complete safety for the individuals using it. Always follow manufacturer guidelines and local regulations for ventilation systems.
Testing and Safety Checks
Checking for Gas Leaks
To ensure safety, checking for any gas leaks in the system before using the geyser is vital. Apply a mixture of soapy water to all gas connections and observe closely. If bubbles appear, it indicates a leak. Immediately tighten the fittings and reapply the solution to confirm that the issue is resolved. If leaks persist, discontinue use and contact a professional technician.
Testing Water Flow and Heating
Once the gas connections are secure, turn on the water tap attached to the geyser and ignite the system as per the manufacturer’s instructions. Observe the flame to ensure it is stable and burns cleanly without sputtering or irregularities. Simultaneously, check whether the water is being heated effectively. Any irregularities in heating may indicate a need for adjustment or potential issues with the geyser’s components.
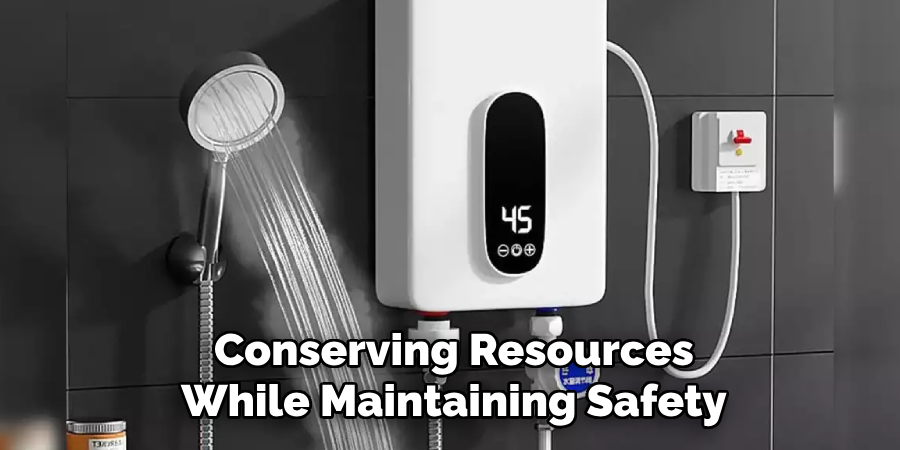
Adjusting Water and Gas Settings
Fine-tune the water flow and gas settings for optimal performance and energy efficiency. Adjust the temperature controls to a comfortable level and regulate the gas flow to ensure the geyser operates efficiently without excessive fuel consumption. Reviewing these settings not only enhances functionality but also helps in conserving resources while maintaining safety.
Conclusion
Installing a gas geyser involves several key steps to ensure safe and effective operation. Begin by securely mounting the unit in a well-ventilated space and carefully connecting the gas and water lines. Testing for safety is crucial—check for leaks, confirm flame stability, and verify proper water heating. Proper ventilation cannot be overstated as it ensures safe usage and prevents hazards. Regular checks and adjustments optimize performance and efficiency. Consult a professional if you are unsure at any stage of the process. This guide addresses the essentials of “how to install gas geyser in bathroom” safely and efficiently.
About the Author
Adrian Green is a passionate woodworking enthusiast who has dedicated his life to the craft of woodworking. From his early days working alongside his father in the family woodworking shop, Adrian has honed his skills and developed a deep love for creating beautiful, functional pieces with his hands. As the voice behind The Woodenify Blog, he shares his knowledge, tips, and inspiration with fellow woodworkers of all skill levels, helping them build confidence in their abilities while learning new techniques.
Professional Focus
- Specializes in DIY woodworking projects, from furniture making to home décor.
- Provides step-by-step guides, tips, and practical tutorials for woodworkers at any skill level.
- Focused on empowering readers with confidence and knowledge through easy-to-follow instructions and hands-on techniques.
- Passionate about building a community where makers can share, learn, and grow together in the world of woodworking.
Education History
University of Craft and Design – Bachelor of Fine Arts (BFA) in Woodworking and Furniture Design
Woodworking Apprenticeships – Gained extensive hands-on experience through various workshops and mentorships with seasoned craftsmen, refining carpentry and furniture-making skills.
Expertise
- DIY woodworking, carpentry, furniture making, and home décor projects.
- Creating clear, accessible tutorials and guides for beginner to advanced woodworkers.
- Helping readers experience the satisfaction and fulfillment of turning raw materials into stunning finished products.