
How to install a septic tank and drain field is a critical process for managing wastewater in areas without access to a centralized sewer system. This system allows for efficient treatment and disposal of household wastewater, helping to protect both human health and the surrounding environment. Proper installation ensures the system functions effectively and has a long lifespan, minimizing potential issues such as leaks or contamination. This guide outlines the essential steps and considerations for installing a septic tank and drain field successfully.
What is a Septic Tank?
A septic tank is a highly efficient underground wastewater treatment system commonly used in areas without centralized sewage systems. It is typically made of concrete, fiberglass, or polyethylene and is designed to temporarily hold household wastewater, allowing solids to settle at the bottom while oils and grease float to the top, forming a layer of scum. Within the tank, naturally occurring bacteria break down organic matter, reducing the volume of waste.
The partially treated liquid, or effluent, then flows out of the septic tank into a drain field for further filtration and absorption into the soil. Septic tanks play a crucial role in protecting the environment and public health by ensuring wastewater is managed safely and effectively.
Legal Considerations and Permits
Installing and maintaining a septic system requires compliance with local, state, and federal regulations to ensure environmental and public health standards are met. Permits are typically required before construction or significant modifications can begin. These permits often involve submitting detailed plans of the proposed system, including its location, capacity, and design, for review by the relevant authorities. Routine inspections may also be mandated to verify the system’s functionality and adherence to regulations. Failure to comply with these legal requirements can result in fines, enforcement actions, or costly system repairs.
Therefore, it is important for property owners to understand the specific laws and guidelines in their area before proceeding with a septic system installation or upgrade.
10 Methods How to Install a Septic Tank and Drain Field
1. Obtain Necessary Permits and Conduct Soil Testing
Before any excavation or installation begins, the first step is securing the proper permits and conducting a percolation (perc) test to assess soil suitability. Septic systems are regulated at the local level, so contact your city or county health department to understand specific guidelines. A certified engineer or soil scientist typically conducts the perc test, measuring how quickly water drains through the soil. This is crucial in determining the type and size of the drain field needed.
If your soil drains too slowly or too quickly, it may not support a standard system, requiring alternative designs. Without this legal and technical groundwork, moving forward risks both regulatory violation and future system failure.

2. Design the Septic System Layout According to Code
Once your site is approved and your soil test results are in hand, the next method involves designing the septic system layout. This includes determining the septic tank size, the length and number of trenches for the drain field, and the location relative to your home. Codes usually require the tank to be a certain distance from the house, water sources, property lines, and wells. It’s also essential to plan for gravity flow, ensuring that wastewater can move from the house to the tank and from the tank to the drain field with minimal pumping. A well-thought-out plan minimizes future maintenance problems and ensures compliance with environmental regulations.
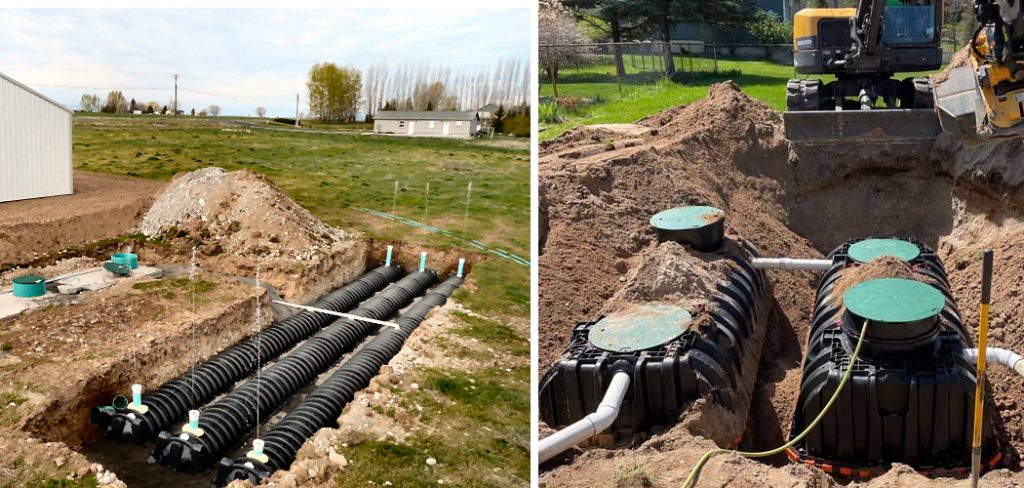
3. Excavate the Site for the Septic Tank
Once the design is finalized and approved, excavation begins. Using heavy equipment, dig a large enough hole to accommodate the septic tank, accounting for the tank’s dimensions, the required depth, and proper slope. The tank must sit level on a bed of compacted gravel or sand to prevent settling and cracking. Typically, the tank is buried so the inlet and outlet pipes align properly with the plumbing in the house and the drain field. Care should be taken to ensure the hole is not too deep, which could make maintenance and access difficult in the future. This step requires precision and equipment expertise.
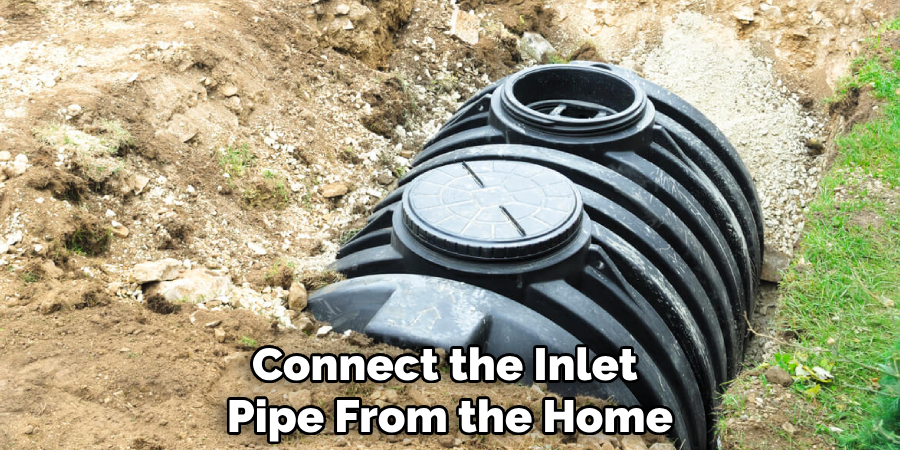
4. Install the Septic Tank and Connect Inlet/Outlet Pipes
With the hole ready, the septic tank can be carefully lowered into place. Whether it’s made of concrete, fiberglass, or plastic, the tank must be perfectly level to function correctly. Once positioned, connect the inlet pipe from the home’s plumbing system to the tank and the outlet pipe to the drain field system. These pipes must have the proper slope—generally 1/4 inch per foot—to maintain smooth flow. Seals and joints should be watertight to prevent leaks that could cause environmental contamination or system failure. Properly connecting the tank is critical for the system’s overall performance and durability.
5. Excavate Trenches for the Drain Field (Leach Field)
The drain field consists of a series of trenches or a bed where effluent from the septic tank can safely percolate into the soil. Based on your design, dig trenches to the specified length, width, and depth—typically 18 to 36 inches deep and spaced several feet apart. These trenches should be level from side to side but slightly sloped lengthwise to allow consistent flow. It’s essential to avoid damaging tree roots, buried utilities, or compacting the soil at the base of the trenches, which could impede drainage. Proper trench formation ensures that wastewater is evenly distributed and absorbed.
6. Lay Down Gravel and Perforated Pipes in the Trenches
Once the trenches are complete, add a layer of washed gravel—typically 6 to 12 inches deep—to serve as a bed for the perforated pipes. Lay 4-inch perforated PVC pipes on top of the gravel, ensuring they’re level or slightly sloped to promote even distribution of effluent. These pipes carry wastewater from the septic tank and allow it to seep slowly into the surrounding soil. Cap the ends of the pipes to keep soil from entering. This method is vital to the drain field’s long-term function, as it creates the proper environment for filtration and natural decomposition of waste.
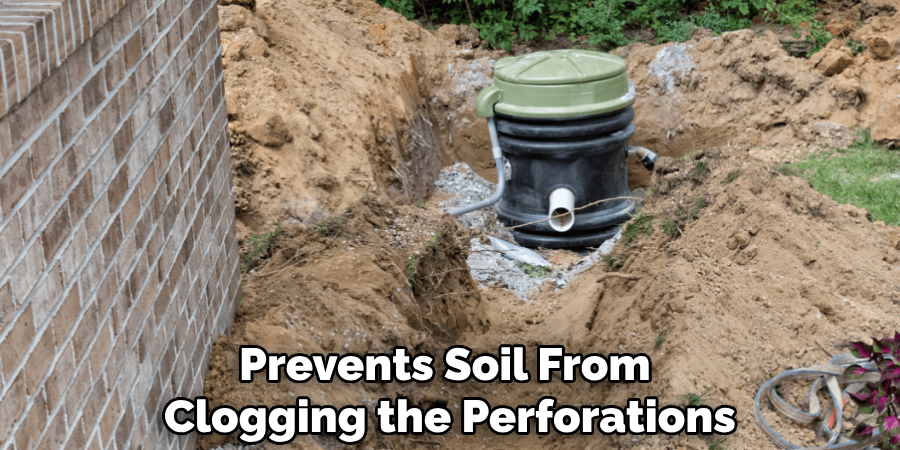
7. Cover the Pipes with More Gravel and Protective Barrier
After installing the pipes, add another 2 to 6 inches of gravel on top, just enough to cover them completely. This layer supports filtration and prevents soil from clogging the perforations. Over the gravel, lay a geotextile fabric or landscape cloth to prevent dirt and roots from entering the gravel bed, which can clog the system and lead to backups. This barrier is breathable, allowing water to pass through while keeping debris out. Skipping this step risks serious maintenance issues later, as invasive roots or sediment can compromise the efficiency and health of the drain field.
8. Backfill the Trenches and Tank Area with Soil
Once the protective layers are in place, it’s time to backfill the drain field trenches and the area around the septic tank with soil. Use native soil, ensuring that it’s free of large rocks or debris. Compact the soil gently to avoid settling but not so tightly that it restricts drainage. Mound the soil slightly above ground level to allow for natural settling over time. Avoid planting deep-rooted vegetation directly over the system. This step not only stabilizes the site but also helps blend the system into the landscape, protecting it from erosion and surface runoff.
9. Install a Riser and Access Ports for Maintenance
To facilitate future inspection and pumping, install risers and access ports to the septic tank’s inlet and outlet openings. These risers bring access points up to ground level, saving you from digging every time maintenance is required. Choose risers with secure, child-resistant lids and mark their locations clearly. This small but critical addition drastically reduces the cost and effort of maintenance, encouraging regular inspection and ensuring long-term system health. Accessible ports also allow professionals to monitor sludge levels and detect any potential blockages or signs of failure early.
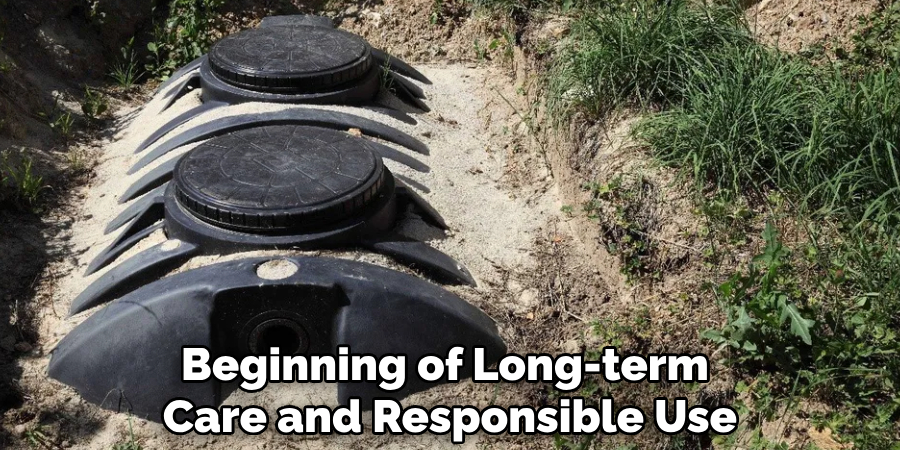
10. Test the System and Finalize Installation
With the entire system installed, it’s essential to perform a thorough test before using it. Fill the septic tank with water to stabilize it and simulate normal usage. Observe how the system handles incoming wastewater from the house and ensure there are no leaks or backups. Local health or building inspectors may also conduct a final check to ensure compliance with code and safety standards. Once approved, you can backfill the rest of the site, reseed the lawn, or restore the landscaping. A successful test marks the end of installation and the beginning of long-term care and responsible use.
Conclusion
Raised septic tank landscaping and drain field is a complex but manageable project when approached methodically and with proper planning. From securing permits and testing the soil to laying gravel, connecting pipes, and ensuring proper drainage, each step is vital to the system’s success. While professionals often handle this job, understanding the process helps homeowners appreciate the value of good installation and maintain their systems properly. So, there you have it – a quick and easy guide on how to install a septic tank and drain field.
About the Author
Adrian Green is a passionate woodworking enthusiast who has dedicated his life to the craft of woodworking. From his early days working alongside his father in the family woodworking shop, Adrian has honed his skills and developed a deep love for creating beautiful, functional pieces with his hands. As the voice behind The Woodenify Blog, he shares his knowledge, tips, and inspiration with fellow woodworkers of all skill levels, helping them build confidence in their abilities while learning new techniques.
Professional Focus
- Specializes in DIY woodworking projects, from furniture making to home décor.
- Provides step-by-step guides, tips, and practical tutorials for woodworkers at any skill level.
- Focused on empowering readers with confidence and knowledge through easy-to-follow instructions and hands-on techniques.
- Passionate about building a community where makers can share, learn, and grow together in the world of woodworking.
Education History
University of Craft and Design – Bachelor of Fine Arts (BFA) in Woodworking and Furniture Design
Woodworking Apprenticeships – Gained extensive hands-on experience through various workshops and mentorships with seasoned craftsmen, refining carpentry and furniture-making skills.
Expertise
- DIY woodworking, carpentry, furniture making, and home décor projects.
- Creating clear, accessible tutorials and guides for beginner to advanced woodworkers.
- Helping readers experience the satisfaction and fulfillment of turning raw materials into stunning finished products.