
Are you looking for an effective solution to prevent water pooling in your yard or basement? A French drain may be just what you need.
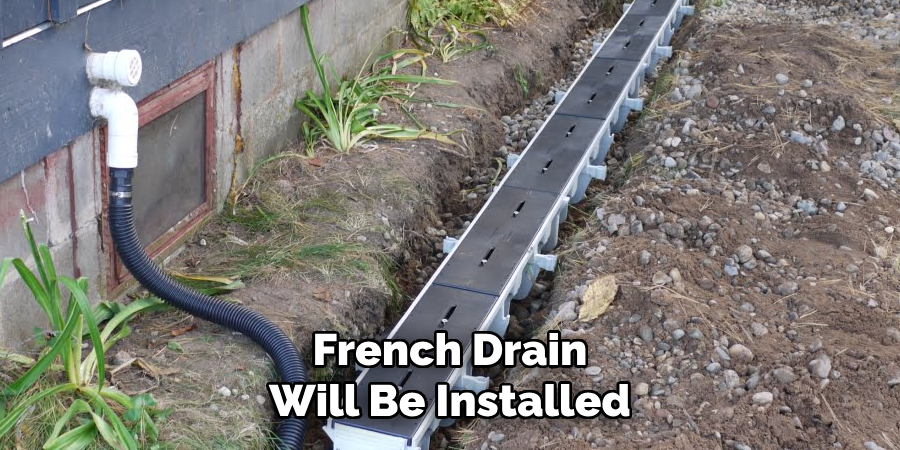
French drain installation is an effective solution for managing water buildup around your property. Whether you’re dealing with a perpetually soggy yard, a wet basement, or other drainage issues, a French drain can help redirect water away from problem areas. This system utilizes a perforated pipe, gravel, and a sloped trench to guide water to a lower, more suitable spot, preventing erosion and water damage. Installing a French drain can be a manageable DIY project with the right tools, materials, and preparation.
This guide on how to install a French drain will walk you through the essential steps to ensure proper installation and long-lasting results.
What Are the Benefits of Installing a French Drain?
Installing a French drain offers several benefits, making it an appealing option for homeowners. Some of the main advantages include the following:
- Preventing Water Damage: The primary purpose of a French drain is to redirect water away from your home’s foundation and any other problem areas. This can prevent water from seeping into your basement or causing erosion around your property.
- Improving Yard Drainage: If you have low spots in your yard that tend to collect water, a French drain can help by providing an outlet for the excess water to flow towards. This can also prevent standing water, attracting pests and creating muddy areas.
- Long-lasting Solution: When properly installed and maintained, a French drain can last for many years, providing a long-term solution to drainage issues. This can save you money in the long run compared to constantly having to deal with water damage or hiring professionals for temporary fixes.
- Versatile: French drains can be used in various settings, including residential and commercial properties, as well as on different types of terrain. They can also be incorporated into landscaping designs and hidden under decorative rocks or gravel.
What Will You Need?
To install a French drain, you will need the following materials:
- Shovel or excavator
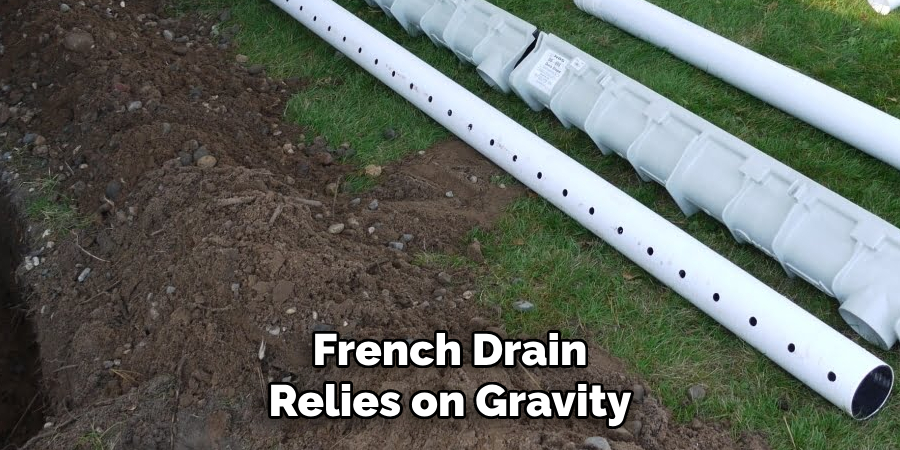
- Perforated corrugated pipe (usually 4 inches in diameter)
- Landscape fabric
- Drainage gravel or crushed stone
- PVC couplers and adhesive (if using PVC pipes)
- Hand saw or hacksaw (if using PVC pipes)
- Trenching shovel (if digging by hand)
Once you have gathered all the necessary materials, you can begin the installation process.
8 Easy Steps on How to Install a French Drain
Step 1: Plan and Mark the Drainage Path
Carefully plan where the French drain will be installed by identifying low-lying areas or spots where water accumulates. Use stakes and string or spray paint to mark the exact path of the drainage system. Remember that the trench should slope downward at a gradient of at least 1% (a 1-foot drop per 100 feet of length) to ensure proper water flow.
The starting point of the drain should be at the problem area, and the endpoint should lead to a suitable drainage outlet, such as a dry well, storm drain, or a lower elevation area away from structures. Proper planning is crucial at this stage to prevent potential water pooling or improper drainage in the future.
Step 2: Excavate the Trench
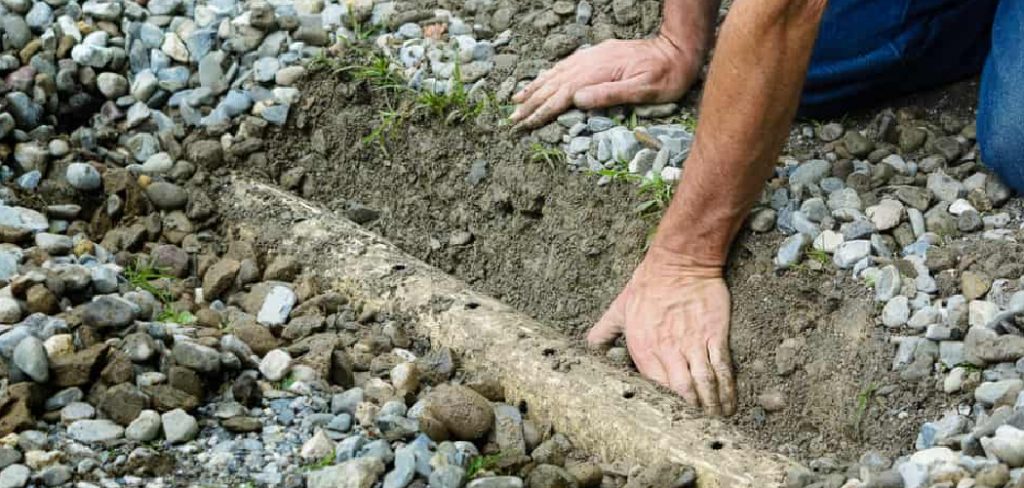
Once the drainage path has been planned, begin excavating the trench along the marked pathway. Use a spade, trenching shovel, or a mechanical trencher, depending on the size and scope of the project. The trench should be at least 6 inches wide and deep enough to accommodate the drainage pipe and a layer of gravel beneath it.
Ensure the trench maintains the appropriate downward slope of at least 1% throughout its length. Regularly check the slope with a level or string line to ensure accuracy. Remove any large rocks, roots, or debris from the trench to provide a smooth and even base for the drainage materials.
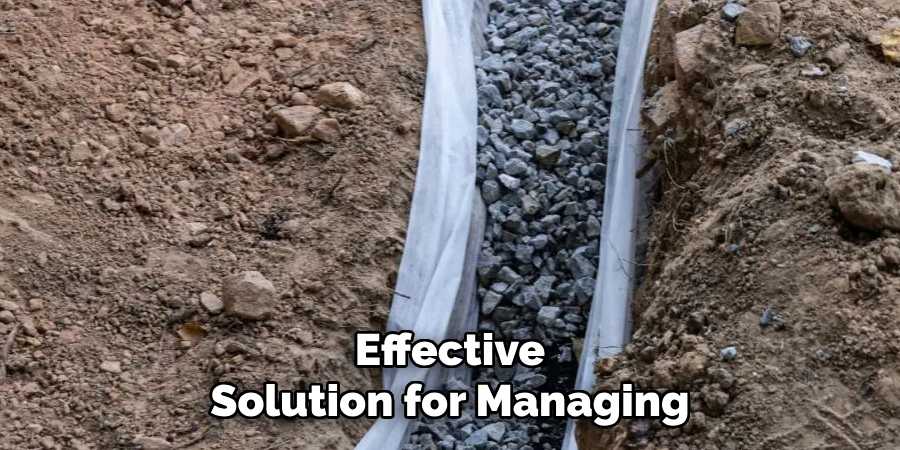
Step 3: Install the Gravel Base
Once the trench is prepared, lay a layer of gravel, typically about 2 to 3 inches thick, along the bottom of the trench. This provides a stable base for the drainage pipe and helps facilitate water flow. Use washed gravel to prevent clogging and compact the layer gently to ensure an even surface. Afterward, double-check the slope to confirm consistency before proceeding to the next step.
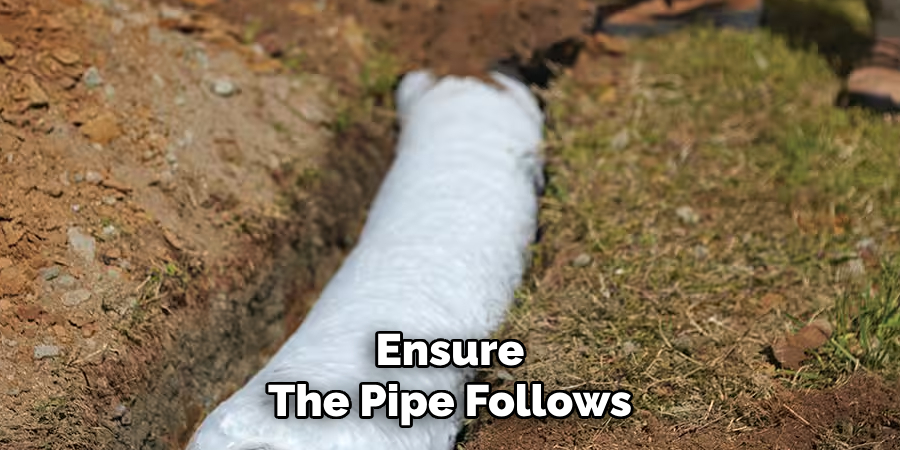
Step 4: Place the Drainage Pipe
Lay the perforated drainage pipe on top of the gravel base with the perforations facing downward. This orientation allows water to enter the pipe more effectively while keeping debris out.
Ensure the pipe follows the slope of the trench to maintain proper water flow. Connect any additional pipe sections using appropriate fittings and secure the connections tightly to prevent leaks. Once the pipe is in place, double-check its alignment and slope before moving on to the next step.
Step 5: Cover the Pipe with Gravel
After placing the drainage pipe, cover it with a layer of gravel to hold it securely in place and assist in water filtration. Ensure the gravel surrounds the pipe evenly, filling the trench up to a few inches below the surface. This step prevents soil from clogging the pipe while allowing water to flow freely into the system. Use a rake or similar tool to level the gravel and ensure a uniform distribution throughout the trench.
Step 6: Add Landscaping Fabric
Once the gravel is evenly distributed, place a layer of landscaping fabric over the gravel. This fabric acts as a barrier to prevent soil and debris from mixing with the gravel while allowing water to pass through. Ensure the fabric covers the entire trench and overlaps slightly at the edges, creating a protective and effective filtration layer. Trim any excess fabric for a neat finish before moving on to the final step.
Step 7: Fill the Trench and Finish
After the landscaping fabric is securely in place, fill the remaining trench with the initially removed soil. Spread the soil evenly and compact it gently to prevent future sinking. If desired, you can top the filled trench with sod, gravel, or decorative stones to blend it seamlessly with the surrounding landscape. This final step completes the installation and ensures a functional and visually appealing drainage solution.
Step 8: Maintenance and Upkeep
Regular maintenance is essential to ensure the longevity and effectiveness of your drainage solution. Periodically inspect the area for any blockages, such as debris or sediment, that may hinder water flow.
Clear any obstructions promptly to keep the system functioning as intended. Additionally, check for signs of erosion or settling around the trench and address these issues as they arise. A well-maintained drainage solution will protect your landscape and prevent future water-related problems.
Following these tips and maintaining your drainage solution can ensure proper water flow and prevent potential issues such as standing water or erosion.
5 Things You Should Avoid
- Skipping the Slope Calculation
A French drain relies on gravity to channel water effectively, so neglecting to calculate an adequate slope is a major mistake. Aim for a slope of at least 1 inch per 8 feet of pipe to ensure proper drainage.
- Using the Wrong Gravel or Backfill Material
Avoid using dirt or fine sand as backfill material, as it can clog the drain over time. Instead, opt for clean, coarse gravel that allows water to flow freely while keeping debris out.
- Forgetting to Use a Perforated Pipe
Using a solid pipe instead of a perforated one can render the French drain ineffective. Always ensure you are using perforated pipes to allow water to be collected evenly along the length of the drain.
- Failing to Add a Landscape Fabric Barrier
Skipping a layer of landscape fabric around the trench can lead to soil intrusion and clogging of the drainage system. Always line your trench with landscape fabric before adding gravel and pipes.
- Not Checking Local Regulations or Utility Lines
Installing a French drain without reviewing local construction regulations or calling to locate underground utilities can result in fines or damage to essential services. Always check with local authorities and utility companies before beginning your project.
What Are the Disadvantages of a French Drain?
There are a few potential drawbacks to consider when considering whether or not to install a French drain on your property.
1. Cost: Installing a French drain can be expensive, especially if you hire professionals to do the work. The cost will depend on various factors, such as the size of your property, the type of soil, and any additional features you may want, such as a sump pump or decorative cover. It’s important to factor in these costs before making a decision.
2. Maintenance: French drains require regular maintenance to continue functioning correctly. This may include cleaning out debris, checking for clogs or blockages, and guaranteeing the slope of the drain is still adequate. It’s essential to consider the time and effort required for maintenance when deciding if a French drain is right for you.
3. Landscaping: Installing a French drain may require significant excavation in your yard, which can impact your landscaping. If you have a beautifully landscaped yard, it’s essential to consider if installing a French drain is worth the potential damage.
4. Permits: Depending on where you live, you may need to obtain permits before installing a French drain. This can add extra time and cost to the overall process.
5. Environmental impact: French drains can redirect water away from your property, which may impact neighboring properties or natural habitats. It’s essential to consider these potential consequences before installing a French drain.
Conclusion
How to install a french drain is an effective solution for managing excess water and preventing potential damage to your property.
By carefully planning and evaluating factors such as location, permits, and potential environmental impact, homeowners can ensure the drain functions efficiently and responsibly. While the process requires time and resources, the long-term benefits of preventing flooding and water damage far outweigh the initial costs.
With proper installation and maintenance, a French drain can serve as a reliable and sustainable drainage solution for years to come.
About the Author
Adrian Green is a passionate woodworking enthusiast who has dedicated his life to the craft of woodworking. From his early days working alongside his father in the family woodworking shop, Adrian has honed his skills and developed a deep love for creating beautiful, functional pieces with his hands. As the voice behind The Woodenify Blog, he shares his knowledge, tips, and inspiration with fellow woodworkers of all skill levels, helping them build confidence in their abilities while learning new techniques.
Professional Focus
- Specializes in DIY woodworking projects, from furniture making to home décor.
- Provides step-by-step guides, tips, and practical tutorials for woodworkers at any skill level.
- Focused on empowering readers with confidence and knowledge through easy-to-follow instructions and hands-on techniques.
- Passionate about building a community where makers can share, learn, and grow together in the world of woodworking.
Education History
University of Craft and Design – Bachelor of Fine Arts (BFA) in Woodworking and Furniture Design
Woodworking Apprenticeships – Gained extensive hands-on experience through various workshops and mentorships with seasoned craftsmen, refining carpentry and furniture-making skills.
Expertise
- DIY woodworking, carpentry, furniture making, and home décor projects.
- Creating clear, accessible tutorials and guides for beginner to advanced woodworkers.
- Helping readers experience the satisfaction and fulfillment of turning raw materials into stunning finished products.