
Are you tired of jiggling the handle on your toilet every time you flush? It’s a common household problem that simple steps can easily fix.
A malfunctioning toilet flush handle diy can be inconvenient, but fortunately, it is typically easy to fix with a few simple tools and basic know-how. Whether the handle is loose, stuck, or no longer flushing correctly, addressing the problem quickly can help you avoid further complications and maintain the functionality of your bathroom.
This guide on how to fix a toilet flush handle will walk you through the steps to identify the issue and perform a straightforward repair, saving you the time and expense of hiring a plumber. Let’s get started!
What Are the Causes of a Faulty Toilet Flush Handle?
There are several potential causes for a faulty toilet flush handle. These include:
- Loose or Disconnected Chain: The chain that connects the handle to the flapper valve can become loose or disconnected, preventing proper flushing when the handle is pushed.
- Bent or Misaligned Arm: The metal arm inside the toilet tank that connects the handle to the flapper valve can become bent or misaligned, causing difficulty in flushing.
- Worn parts: Over time, various parts of the toilet mechanism can wear out and lose effectiveness, resulting in a malfunctioning flush handle.
Once you have identified the issue with your flush handle, you can begin troubleshooting and fixing the problem.
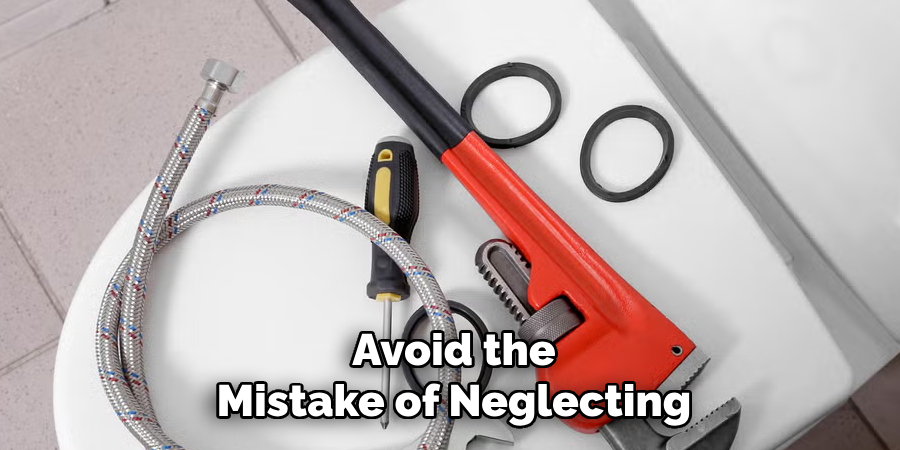
What Will You Need?
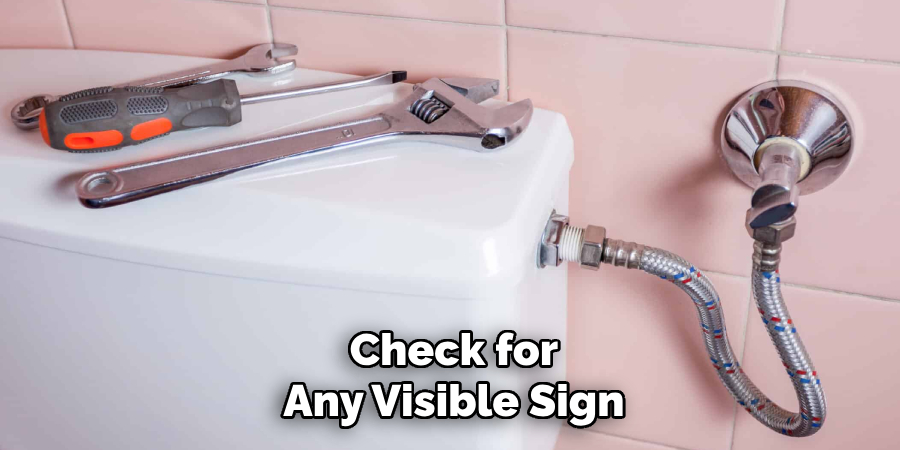
- Adjustable Wrench: This will be handy for loosening and tightening nuts and bolts.
- Replacement Parts: If your flush handle is broken or damaged, you may need a replacement part, such as a new handle or arm.
- Screwdriver: Depending on the type of flush handle you have, you may need a screwdriver to remove screws holding the handle in place.
- Rubber Gloves: It’s always a good idea to wear rubber gloves when working with toilet parts, especially if there is any risk of contact with bacteria or waste.
Once you have gathered the necessary tools and replacement parts, you can replace your toilet’s flush handle.
8 Easy Steps on How to Fix a Toilet Flush Handle
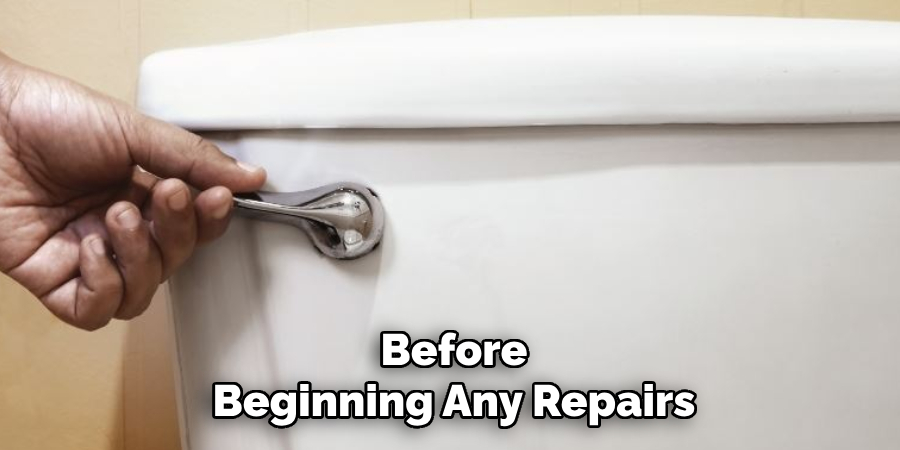
Step 1: Turn Off the Water Supply
Before beginning any repairs on your toilet’s flush handle, the first and most crucial step is to turn off the water supply. Locate the water shut-off valve, which is usually found on the wall behind or near the toilet’s base. Turn the valve clockwise to stop water flow to the bathroom altogether.
This step ensures that no accidental water leakage or flooding occurs while you work. To confirm that the water supply is off, flush the toilet once. The tank should not refill, leaving it mostly empty and making it easier to access the flush mechanism. This precaution will save you from water messes and ensure a smooth repair process.
Step 2: Remove the Toilet Tank Lid
Carefully lift the toilet tank lid and set it aside on a flat, secure surface to prevent it from breaking. The lid is typically heavy and ceramic, so handle it with care.
Removing the lid gives you access to the tank’s internal components, such as the flapper, fill valve, and other mechanisms. This step is crucial for diagnosing and performing the necessary repair work. Ensure the area around the tank is clear to avoid accidentally knocking the lid over.
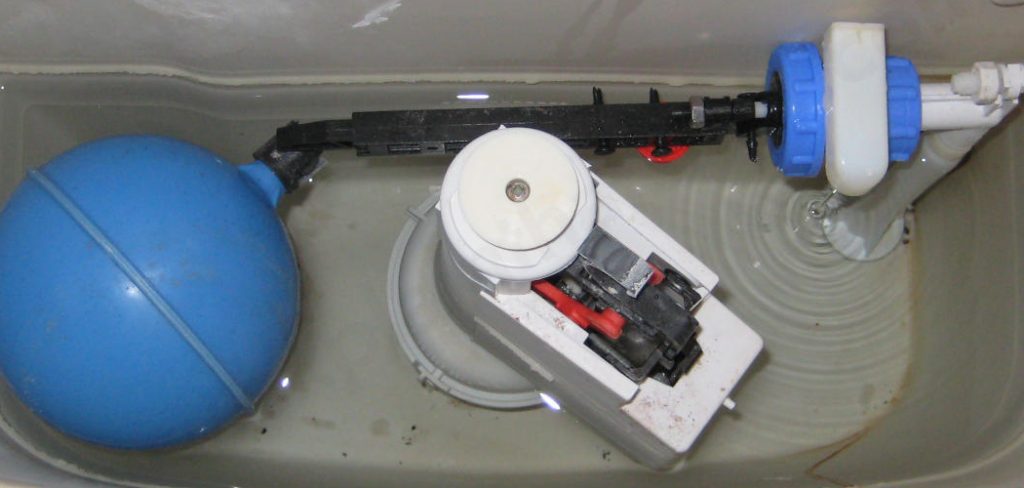
Step 3: Inspect the Flapper
Examine the flapper at the bottom of the tank, as it is a common cause of toilet issues. The flapper controls water flow from the tank to the bowl and may be worn, misaligned, or dirty.
Check for any visible signs of damage, such as cracks, warping, or mineral buildup. If the flapper appears in good condition, ensure it is seated properly over the flush valve opening. Adjust or clean it as needed to maintain a proper seal and prevent water leaks.
Step 4: Check the Fill Valve
The fill valve refills the toilet tank with water after each flush. Inspect the fill valve for any signs of damage, blockages, or improper functioning. Ensure the valve is securely connected and the water supply line is not kinked or leaking.
Adjust the float or fill level as necessary to ensure the water stops flowing when it reaches the correct level in the tank. If the fill valve is faulty, consider replacing it with a compatible part to restore proper function.
Step 5: Check the Flapper and Flush Valve
Inspect the flapper and flush valve for signs of wear or damage. The flapper is a rubber component that seals the opening at the bottom of the tank, allowing water to flow into the bowl during a flush. If the flapper is worn, warped, or not sealing correctly, water may continuously leak into the bowl, leading to wasted water and higher utility bills. Ensure the flapper closes completely after flushing, and replace it if necessary.
Additionally, check the flush valve for any cracks or defects, and make sure it is properly aligned to allow a smooth and efficient flush.
Step 6: Examine the Fill Valve
The fill valve is responsible for refilling the toilet tank after each flush. Begin by removing the lid of the tank and inspecting the fill valve. Look for any signs of wear, corrosion, or damage that may impact its functionality. Ensure the float is set at the correct level to prevent overfilling or underfilling the tank. If the fill valve appears faulty or cannot be appropriately adjusted, consider replacing it with a new one to restore efficient operation.
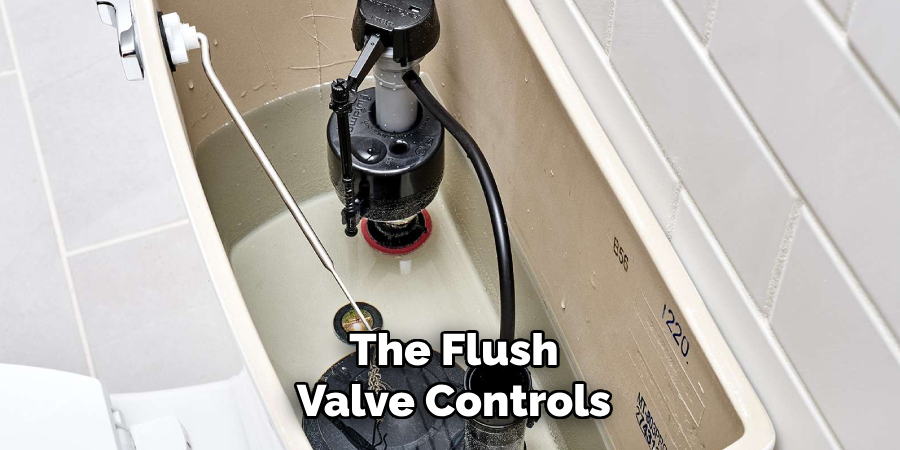
Step 7: Check the Flush Valve
The flush valve controls the release of water from the tank into the toilet bowl during a flush. Inspect the flush valve for any cracks, warping, or buildup of debris that could prevent it from sealing properly.
Pay close attention to the flapper, as a worn or damaged flapper can cause continuous water leakage. If the flush valve or flapper shows signs of wear, replace them to ensure a proper seal and efficient flushing. Be sure to follow manufacturer instructions for installation to avoid improper fitting.
Step 8: Adjust the Fill Valve
The fill valve controls the water level in the toilet tank, ensuring it refills properly after each flush. Begin by checking the water level in the tank; it should be about an inch below the top of the overflow tube. If the water level is too high or too low, adjust the height of the fill valve according to the manufacturer’s instructions.
Most modern fill valves have an adjustment screw or a clip that allows for easy modification of the water level. Proper adjustment of the fill valve not only ensures efficient flushing but also prevents overflow or insufficient water refilling.
By following these simple steps, you can save water and money while still maintaining a properly functioning toilet.
5 Things You Should Avoid
- Forcing the Handle: Avoid using excessive force when operating or fixing the flush handle. Forcing the handle can lead to further damage, such as breaking the handle or internal mechanisms, making repairs more complicated and costly.
- Skipping a Diagnosis: Don’t jump straight into repairs without identifying the exact issue. Whether it’s a loose nut, a broken chain, or a worn-out handle, diagnosing the problem first will save time and prevent unnecessary effort.
- Using the Wrong Tools: Avoid using tools that are not appropriate for the job. This includes wrenches that are too large or screwdrivers that don’t fit properly, as these can cause damage to delicate toilet parts or strip screws and nuts.
- Ignoring the Tank’s Water Supply: Always turn off the water supply to the toilet before making repairs. Skipping this step could lead to water wastage or even flooding, making the situation more challenging to manage.
- Neglecting to Replace Damaged Parts: If a part is visibly damaged, such as a cracked handle or a chain that’s corroded, avoid temporary fixes. Neglecting to replace these parts can lead to repeated malfunctions, costing more time and effort in the long run. Always opt for sturdy, long-lasting replacements for optimal performance.
What are the Signs of a Damaged Toilet Part?
To avoid the mistake of neglecting to replace damaged parts, it is essential to know the signs of a damaged toilet part. Some common signs include:
- Leaks: If you notice water leaking from your toilet, it could be a sign of a damaged seal or flapper.
- Difficulty Flushing: If your toilet struggles to flush properly or requires multiple attempts, it could be due to a faulty handle, chain, or other internal mechanisms.
- Strange Noises: If you hear unusual sounds from your toilet when flushing or filling up the tank, it could indicate a problem with one of its components.
- Visible Damage: This may seem obvious, but if you notice any visible cracks, chips, or other damage on your toilet, it is vital to address it immediately to prevent further issues.
Paying attention to these signs and addressing them promptly to avoid more serious problems is essential. Ignoring these warning signs could lead to costly repairs or even a full toilet replacement.
Conclusion
How to fix a toilet flush handle is a straightforward process that can save time and money.
Begin by identifying the cause of the issue, whether it is a loose handle, a broken chain, or a misaligned lift arm. Tighten any loose components and replace any worn or damaged parts as needed. Be sure to reassemble everything securely, testing the flush to ensure smooth operation. Regular maintenance, such as checking for wear and tear, can help prevent future problems.
By addressing these minor issues promptly, you can keep your toilet functioning efficiently without needing professional assistance.
About the Author
Adrian Green is a passionate woodworking enthusiast who has dedicated his life to the craft of woodworking. From his early days working alongside his father in the family woodworking shop, Adrian has honed his skills and developed a deep love for creating beautiful, functional pieces with his hands. As the voice behind The Woodenify Blog, he shares his knowledge, tips, and inspiration with fellow woodworkers of all skill levels, helping them build confidence in their abilities while learning new techniques.
Professional Focus
- Specializes in DIY woodworking projects, from furniture making to home décor.
- Provides step-by-step guides, tips, and practical tutorials for woodworkers at any skill level.
- Focused on empowering readers with confidence and knowledge through easy-to-follow instructions and hands-on techniques.
- Passionate about building a community where makers can share, learn, and grow together in the world of woodworking.
Education History
University of Craft and Design – Bachelor of Fine Arts (BFA) in Woodworking and Furniture Design
Woodworking Apprenticeships – Gained extensive hands-on experience through various workshops and mentorships with seasoned craftsmen, refining carpentry and furniture-making skills.
Expertise
- DIY woodworking, carpentry, furniture making, and home décor projects.
- Creating clear, accessible tutorials and guides for beginner to advanced woodworkers.
- Helping readers experience the satisfaction and fulfillment of turning raw materials into stunning finished products.