
Are you wondering how to drain a tankless water heater? If so, this guide is for you. In this article, we will explain step-by-step instructions on how to drain tankless water heater, as well as share some important tips and precautions to keep in mind.
Draining a tankless water heater is an essential maintenance task that helps ensure the efficiency and longevity of the unit. Over time, mineral deposits and sediment can build up inside the system, leading to reduced performance and potential damage. Knowing how to properly drain and flush your tankless water heater prevents costly repairs and keeps your appliance running smoothly.
This guide will walk you through the steps to safely drain your tankless water heater, whether it’s for routine maintenance or preparation for long-term storage.
What Are the Causes of Blockages in Tankless Water Heaters?
Before we dive into draining your tankless water heater, let’s first understand what causes blockages inside the unit. The main culprits are mineral deposits and sediment buildup. These can come from hard water, which is high in minerals such as calcium and magnesium. Over time, these minerals can accumulate and clog up the pipes and components of your tankless water heater.
Another common cause of blockages is debris or dirt that may enter the unit through external sources such as insects or animals. This is especially true for outdoor tankless water heaters.
What Will You Need?
You will need a few essential tools and materials to drain your tankless water heater successfully. These include:
- A garden hose
- A bucket or large container
- Pliers or an adjustable wrench
- White vinegar or commercial descaling solution
It’s also recommended to wear protective gear such as gloves and safety glasses during draining.
10 Easy Steps on How to Drain Tankless Water Heater
Step 1: Turn off the Power Supply
Before starting any maintenance on your tankless water heater, ensure the power supply to the unit is completely turned off. For electric water heaters, locate the breaker switch in your home’s electrical panel and switch it to the “off” position. If you use a gas-powered tankless water heater, turn off the gas supply valve to prevent accidental ignition. This step is crucial for your safety and to protect the appliance from potential damage during the draining procedure. Always double-check that the unit is powered down before proceeding.
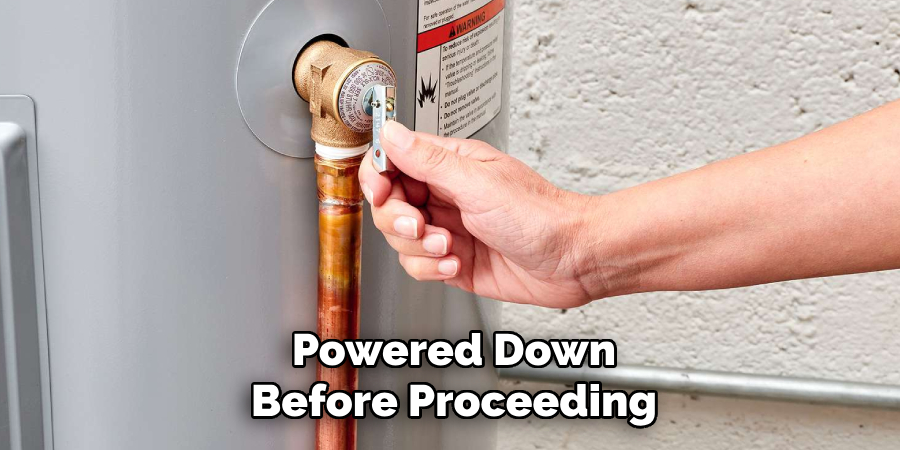
Step 2: Shut off the Water Supply
Locate the water supply valve that feeds water into your tankless water heater and turn it off completely. This ensures no water flows into the unit during the draining process. For safety reasons, double-check that the valve is tightly closed to prevent any unexpected leaks or spills while working on the system.
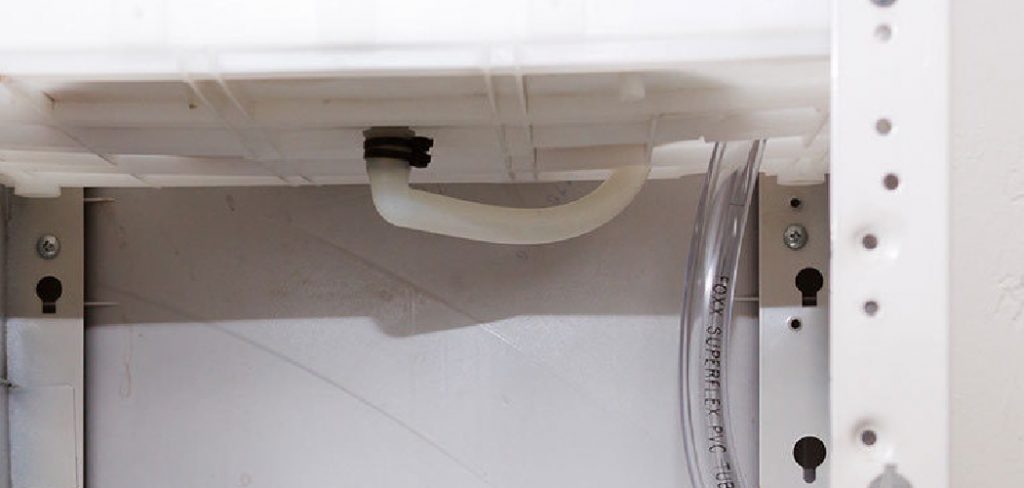
Step 3: Attach a Garden Hose to the Drain Valve
Connect your garden hose securely to the drain valve on your tankless water heater. This valve is typically found at the bottom of the unit. Once attached, direct the other end of the hose to your bucket, large container, or even a safe outdoor area where hot water can drain away without causing a mess. Make sure the hose is fitted tightly to prevent leaks.
Step 4: Open the Drain Valve
Once the garden hose is securely attached, carefully open the drain valve to release the water from the tankless water heater. Be prepared for hot water to flow out rapidly at first, so ensure the hose is appropriately directed into your chosen drainage container or area. Allow the water to drain completely from the unit, and monitor the hose connection throughout the process to ensure there are no leaks. If you notice the water flow slowing or stopping before the unit is empty, you may need to adjust the hose or check for blockages at the valve. This step is crucial to remove any built-up sediment or mineral deposits inside the unit, which could hinder its efficiency.
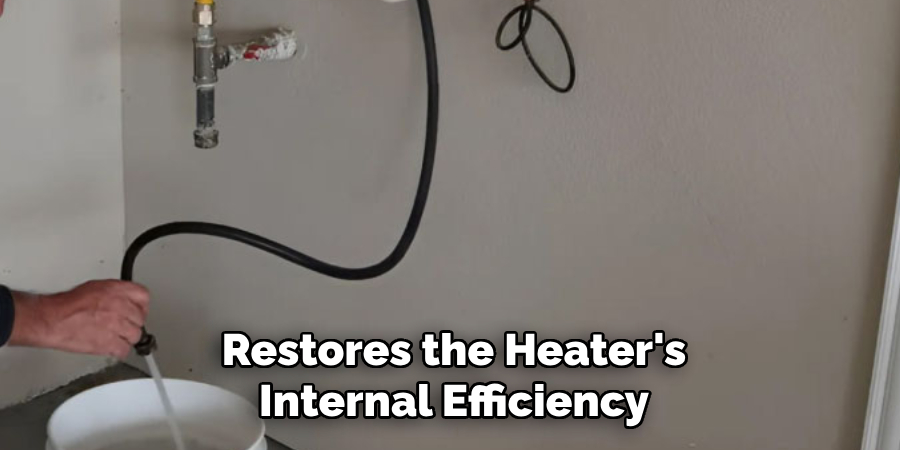
Step 5: Flush the System
After draining the water, it’s time to flush the system to remove any remaining sediment or debris. Connect a vinegar solution to the unit by attaching a submersible pump to the water inlet using a short hose. Place the pump in a bucket filled with white vinegar and ensure the outlet hose feeds back into the bucket to create a closed loop. Turn on the pump and allow the vinegar to circulate through the system for about 45 minutes to an hour. This process helps break down stubborn mineral deposits and restores the heater’s internal efficiency. Once complete, turn off the pump and disconnect the hoses. Make sure to dispose of the used vinegar appropriately.
Step 6: Rinse the System
After completing the vinegar flush, it’s essential to rinse out any remaining solution to ensure the system is clean and safe for use. Reconnect the inlet and outlet hoses to a freshwater source, such as a garden hose. Turn on the water and allow it to flow through the system for 10–15 minutes. This will remove residual vinegar and any loosened debris. Monitor the water exiting the system to ensure it runs clear. Once the rinse is complete, disconnect all hoses off the water supply.
Step 7: Reassemble and Test the System
After rinsing the system thoroughly, carefully reconnect all parts of your water heater, including the inlet and outlet valves. Double-check all connections to ensure there are no leaks. Once everything is secure, turn on the water supply and restore power or gas to the heater. Allow the system to run and monitor for unusual sounds or leaks. Confirm that the water is heating correctly and the system is operating efficiently. If everything is functioning as expected, you have completed the maintenance process.
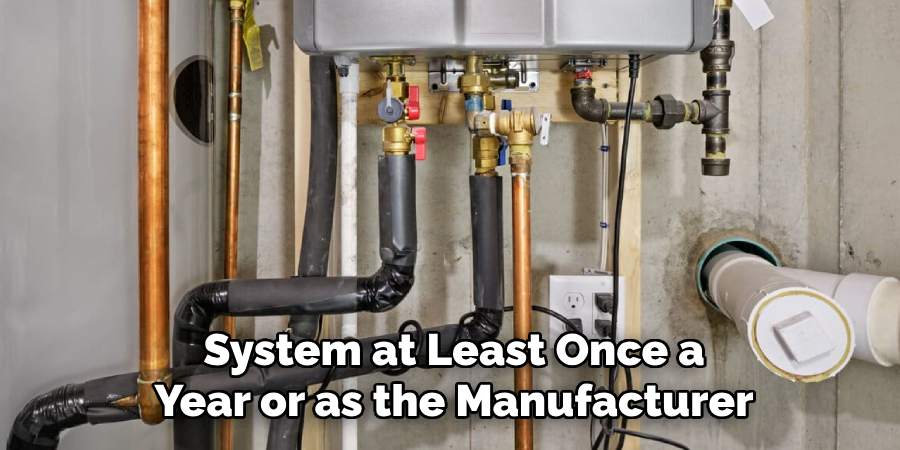
Step 8: Schedule Regular Maintenance
To keep your water heater running efficiently and extend its lifespan, it’s essential to establish a regular maintenance schedule. Plan to flush and clean the system at least once a year or as the manufacturer recommends. Regularly inspect for signs of wear, leaks, or buildup, and address issues promptly to prevent more severe problems. Consistent maintenance will ensure the water heater performs effectively, providing reliable hot water when needed.
Step 9: Know When to Seek Professional Help
While regular maintenance can address many common issues, some problems may require the expertise of a professional. If you notice persistent leaks, unusual noises, insufficient hot water, or any difficulty in operating your water heater, it’s best to contact a licensed technician. Additionally, a professional should handle issues with the thermostat, heating element, or pressure relief valve to ensure safety and proper repair. Knowing when to seek help will protect your system from further damage and ensure its safe operation.
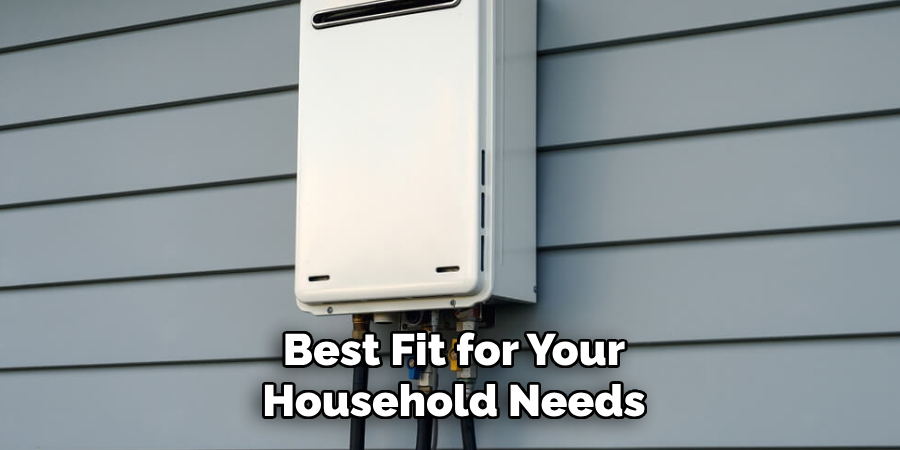
Step 10: Consider Energy-Efficient Upgrades
If your water heater is outdated or nearing the end of its lifespan, consider upgrading to an energy-efficient model. Modern water heaters, such as tankless or solar-powered systems, offer improved energy savings and performance. These models reduce utility bills and minimize environmental impact by consuming less energy. Research different options and consult a professional to determine the best fit for your household needs. Investing in an energy-efficient water heater can provide long-term benefits and improve the overall efficiency of your home.
By following these steps and establishing a routine maintenance schedule, you can ensure your tankless water heater continues to operate effectively and efficiently.
5 Things You Should Avoid
- Skipping the Power Shutoff: Always turn off the power supply to the water heater before beginning the draining process. For electric heaters, this means switching off the circuit breaker, and for gas heaters, turning off the gas supply. Failure to do so can result in serious hazards or damage to the unit.
- Ignoring the Water Supply: Never start draining without shutting off the water supply to the tankless water heater. Leaving the water supply on can cause flooding or unnecessary water waste during the procedure.
- Not Allowing the Unit to Cool Down: Avoid draining the water heater without giving it enough time to cool down. Draining hot water can lead to burns or scalding, which is dangerous if proper precautions are not taken.
- Using the Wrong Tools: Do not attempt to drain the tankless water heater using improper tools or equipment. Ensure you have a bucket, twistable valve, or hose that connects securely to the unit to avoid leaks or spills.
- Neglecting to Check for Leaks Afterwards: One mistake people make is failing to inspect for leaks after completing the draining process. Always check the pipe connections and fittings to ensure the system is properly sealed to prevent future issues.
Conclusion
How to drain tankless water heater is a straightforward process when approached with proper planning and attention to detail.
By following the outlined steps and avoiding common mistakes, you can ensure the longevity and efficiency of your unit. Always turn off the water supply, allow the system to cool down, and use the appropriate tools for the job. Regular maintenance, including a thorough inspection for leaks after draining, will help prevent costly repairs and keep your water heater running smoothly.
Proper care of your tankless water heater enhances its performance and prolongs its lifespan.
About the Author
Adrian Green is a passionate woodworking enthusiast who has dedicated his life to the craft of woodworking. From his early days working alongside his father in the family woodworking shop, Adrian has honed his skills and developed a deep love for creating beautiful, functional pieces with his hands. As the voice behind The Woodenify Blog, he shares his knowledge, tips, and inspiration with fellow woodworkers of all skill levels, helping them build confidence in their abilities while learning new techniques.
Professional Focus
- Specializes in DIY woodworking projects, from furniture making to home décor.
- Provides step-by-step guides, tips, and practical tutorials for woodworkers at any skill level.
- Focused on empowering readers with confidence and knowledge through easy-to-follow instructions and hands-on techniques.
- Passionate about building a community where makers can share, learn, and grow together in the world of woodworking.
Education History
University of Craft and Design – Bachelor of Fine Arts (BFA) in Woodworking and Furniture Design
Woodworking Apprenticeships – Gained extensive hands-on experience through various workshops and mentorships with seasoned craftsmen, refining carpentry and furniture-making skills.
Expertise
- DIY woodworking, carpentry, furniture making, and home décor projects.
- Creating clear, accessible tutorials and guides for beginner to advanced woodworkers.
- Helping readers experience the satisfaction and fulfillment of turning raw materials into stunning finished products.