
Disconnecting a hot water heater can seem like a daunting task, but with the right preparation and tools, it can be done safely and efficiently. Whether you’re replacing your old unit, performing maintenance, or moving to a new home, following a step-by-step process is essential to avoid accidents and ensure the job is done correctly. This guide will walk you through the necessary precautions and steps for how to disconnect a hot water heater.
Why You Might Need to Disconnect a Hot Water Heater
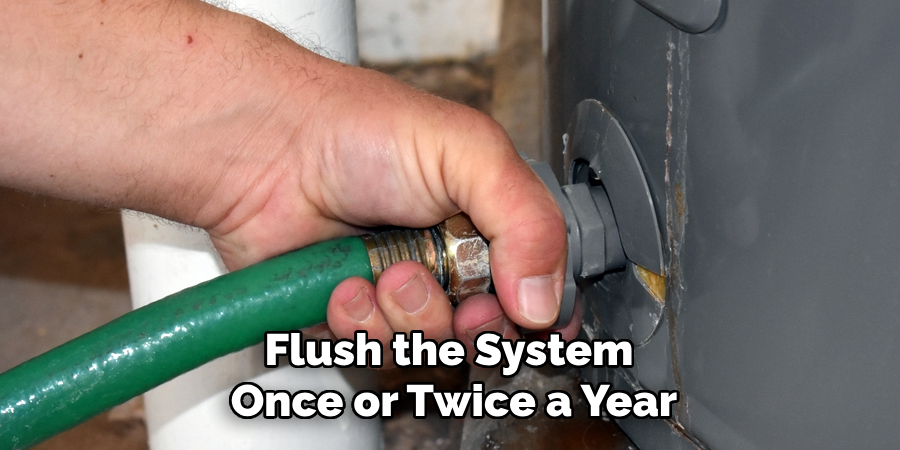
There are several reasons why you might need to disconnect a hot water heater. One common scenario is when the unit has reached the end of its lifespan and needs to be replaced with a newer, more efficient model. Another reason could be for routine maintenance, such as flushing out sediment build-up or repairing faulty components to ensure the system continues to operate effectively. You might also need to disconnect the unit if you are remodeling your home or relocating to a new property where the water heater must be moved.
Additionally, in the case of a major leak or other significant issues, disconnecting the water heater might be necessary to prevent further damage to your home. Understanding the reason for disconnection helps you better prepare for the task and ensures you’re addressing the right problem.
Safety Precautions Before Starting the Process
Before you begin disconnecting your hot water heater, it’s crucial to take several safety precautions to protect yourself and your home. First, ensure that the power supply to the water heater is turned off. For electric units, switch off the appropriate circuit breaker in the electrical panel. For gas-powered units, turn the gas supply valve to the off position. Next, verify that the water supply to the heater is shut off by closing the cold water inlet valve. Allow the water inside the tank to cool for several hours to prevent burns during the process. It’s also a good idea to wear protective gloves and safety goggles to guard against accidental splashes or debris.
Finally, ensure that the working area around the water heater is clear of obstacles to provide sufficient space for maneuvering and performing the necessary tasks safely. Taking these precautions will help minimize risks and set the stage for a smooth disconnection process.
Tools and Materials Needed
Before starting the process of disconnecting your hot water heater, it’s important to gather the necessary tools and materials to ensure the job goes smoothly. Here’s a list of what you will need:
- Adjustable Wrench – For loosening and disconnecting any fittings or connections.
- Screwdriver – A flathead or Phillips screwdriver may be required for removing panels or securing components.
- Pipe Wrench – For handling tight pipe connections or stubborn fittings.
- Bucket – To catch any residual water that may drain from the heater or the pipes.
- Hose – Used to drain water from the tank to a safe location.
- Teflon Tape (Plumber’s Tape) – Handy for sealing threaded connections when reconnecting.
- Protective Gloves and Goggles – To protect yourself from hot water splashes, debris, or sharp edges.
- Voltage Tester – If you have an electric water heater, this tool ensures the unit is completely de-energized before working on it.
- Rags or Towels – Useful for cleaning up any spills during the process.
- Gas Pliers (if applicable) – For safely handling gas line connections on gas-powered units.
Having all these tools and materials at hand beforehand will save you time and help prevent interruptions once you begin working on the water heater.
10 Methods How to Disconnect a Hot Water Heater
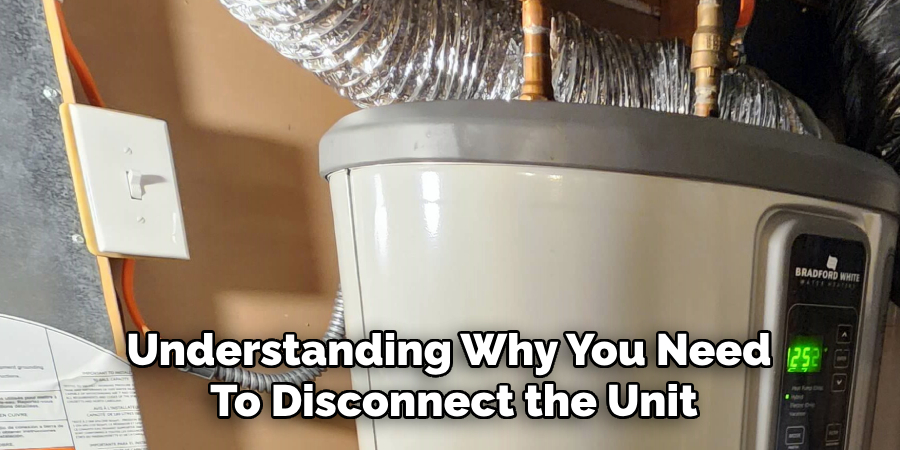
1. Understanding the Need to Disconnect a Hot Water Heater
Disconnecting a hot water heater is necessary for various reasons, including replacement, maintenance, or relocating the unit. Properly disconnecting the heater ensures safety, prevents water damage, and allows for a smooth transition to a new system. Understanding why you need to disconnect the unit helps in preparing adequately and avoiding potential hazards.
2. Turning Off the Power Supply
Safety is paramount when working with any water heater. For electric heaters, turn off the power at the circuit breaker to prevent electrical shock. Gas water heaters require shutting off the gas supply using the valve on the gas line. Confirm that the power or gas is completely off before proceeding.
3. Shutting Off the Water Supply
Locate the cold water inlet valve, typically found at the top of the water heater, and turn it off to stop water from flowing into the tank. If there is no dedicated shut-off valve, you may need to turn off the main water supply to your home. This step prevents water from continuously refilling the tank while you work.
4. Draining the Water Heater Tank
To prevent spills and make handling easier, drain the water heater completely. Attach a garden hose to the drain valve at the bottom of the tank and direct it to a safe drainage area. Open the valve and a nearby hot water faucet to allow air to enter the system, helping the water drain faster. Ensure the tank is fully emptied before proceeding.

5. Disconnecting the Power Supply (Electric Heaters)
For electric water heaters, remove the access panel to expose the wiring connections. Using a voltage tester, verify that there is no electrical current before disconnecting the wires. Carefully unscrew the wire nuts and separate the wires. Secure the wires safely to prevent accidental contact.
6. Disconnecting the Gas Supply (Gas Heaters)
If you have a gas water heater, locate the gas line connection near the control valve. Use a wrench to loosen the gas line fittings carefully. Be sure to turn off the main gas supply before doing this. If you smell gas, stop immediately and ventilate the area before calling a professional.
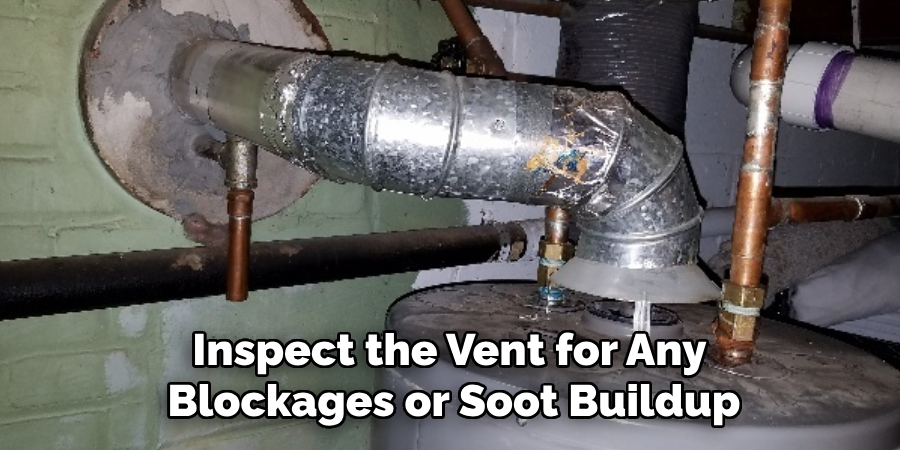
7. Removing the Vent Pipe (Gas Heaters Only)
Gas water heaters require proper ventilation for safety. If your unit has a vent pipe, detach it carefully by loosening any screws or clamps holding it in place. Inspect the vent for any blockages or soot buildup, as these may indicate ventilation issues that should be addressed before installing a new unit.
8. Disconnecting the Water Lines
Use a wrench to loosen the connections on both the hot and cold water pipes. Some units may have flexible hoses, while others are connected using rigid copper pipes. If needed, use a pipe cutter to detach rigid connections. Keep a bucket handy to catch any remaining water in the pipes.
9. Removing the Water Heater from Its Position
Once all connections are detached, carefully move the water heater away from its location. If the unit is large or heavy, consider using a dolly or seeking assistance. Be cautious of any residual water inside the tank that may cause sudden shifts in weight when moving it.
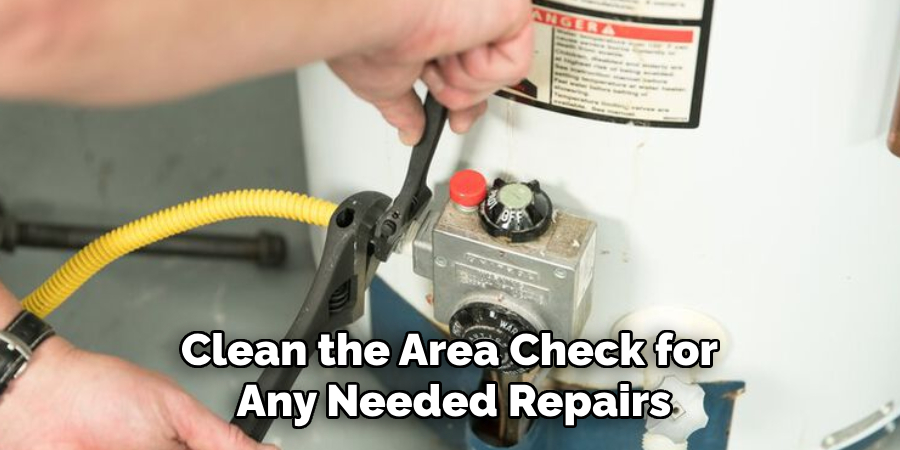
10. Preparing for Installation or Disposal
After disconnecting the water heater, decide whether you are installing a new one or disposing of the old unit. If replacing, clean the area, check for any needed repairs, and ensure all connections are in good condition. For disposal, check local regulations for proper recycling or disposal methods to avoid environmental hazards.
Troubleshooting Common Issues
When disconnecting a hot water heater, you may encounter some common issues. Understanding how to address these problems can save time and ensure a smoother process. Here are some troubleshooting tips:
- Water Won’t Drain Completely – If the water heater tank isn’t draining properly, ensure the drain valve is fully open. Check for blockages in the valve or hose. Sediment buildup at the bottom of the tank can also prevent proper drainage. You may need to carefully use a long-handled tool, like a dowel, to break up the sediment.
- Difficulty Loosening Connections – Over time, fittings and connections can become corroded or stuck. Apply a penetrating oil to stubborn connections and allow it to sit for a few minutes before attempting to loosen with a wrench. Use steady pressure to avoid damage.
- Gas Line Leak (Gas Heaters) – If you notice a gas smell while disconnecting a gas water heater, immediately stop work. Shut off the main gas supply, ventilate the area, and contact a professional. Do not attempt to fix the issue yourself.
- Electrical Issues (Electric Heaters) – If the voltage tester shows a current after turning off the circuit breaker, verify you have switched off the correct breaker. If issues persist, consult a licensed electrician to address potential wiring problems.
- Excessive Water Spills – Despite careful preparation, residual water can spill when disconnecting pipes or moving the heater. Use towels, rags, or a wet/dry vacuum to clean up the area promptly to prevent damage or slipping hazards.
- Vent Pipe Blockages (Gas Heaters) – If the vent pipe has excessive soot or debris, clean it thoroughly before reinstallation. Persistent blockages may indicate a more significant ventilation issue that should be inspected by a professional.
Conclusion
Disconnecting a hot water heater is a task that requires thorough preparation and attention to detail to ensure safety and efficiency. By following the outlined steps, you can successfully disconnect your unit while minimizing risks. Always prioritize safety by turning off power, gas, and water supplies before beginning work, and be mindful of any potential issues such as leaks or blockages. Thanks for reading, and we hope this has given you some inspiration on how to disconnect a hot water heater!
About the Author
Adrian Green is a passionate woodworking enthusiast who has dedicated his life to the craft of woodworking. From his early days working alongside his father in the family woodworking shop, Adrian has honed his skills and developed a deep love for creating beautiful, functional pieces with his hands. As the voice behind The Woodenify Blog, he shares his knowledge, tips, and inspiration with fellow woodworkers of all skill levels, helping them build confidence in their abilities while learning new techniques.
Professional Focus
- Specializes in DIY woodworking projects, from furniture making to home décor.
- Provides step-by-step guides, tips, and practical tutorials for woodworkers at any skill level.
- Focused on empowering readers with confidence and knowledge through easy-to-follow instructions and hands-on techniques.
- Passionate about building a community where makers can share, learn, and grow together in the world of woodworking.
Education History
University of Craft and Design – Bachelor of Fine Arts (BFA) in Woodworking and Furniture Design
Woodworking Apprenticeships – Gained extensive hands-on experience through various workshops and mentorships with seasoned craftsmen, refining carpentry and furniture-making skills.
Expertise
- DIY woodworking, carpentry, furniture making, and home décor projects.
- Creating clear, accessible tutorials and guides for beginner to advanced woodworkers.
- Helping readers experience the satisfaction and fulfillment of turning raw materials into stunning finished products.