
Are you tired of seeing puddles of water in your yard every time it rains? Or perhaps you have a soggy, muddy mess that never seems to dry out. These are signs that your yard may not have proper drainage.
Proper yard drainage is essential to prevent water buildup, soggy lawns, and damage to your property. Excess water can lead to soil erosion, mold growth, and weakened foundations without adequate drainage. Creating drainage in your yard may seem daunting, but with the right approach and tools, you can effectively redirect water and maintain a healthy, functional outdoor space.
This guide on how to create drainage in yard will walk you through practical steps to design and implement a drainage system tailored to your yard’s needs.
What Are the Benefits of Good Yard Drainage?
Before we dive into the steps of creating drainage in your yard, let’s first understand why it is important. Here are some benefits of good yard drainage:
- Prevents Water Damage: Standing water on your lawn can lead to mold growth, damaging plants and grass. It can also cause rotting of wooden structures such as decks or fences.
- Protects Your Home’s Foundation: When water accumulates around the foundation, it can seep into cracks and weaken its structure over time.
- Reduces Soil Erosion: Excess water can wash away topsoil, leaving your yard with bare patches and making it difficult for plants to grow.
- Maintains a Healthy Lawn: Too much water can drown plants and create conditions for pests and diseases to thrive. Proper drainage ensures a healthy environment for your lawn to flourish.
These are just some of the reasons why having good yard drainage is crucial for your property’s well-being.
What Will You Need?
Here are the tools and materials you will need to create drainage in your yard:
- Shovel: A shovel will be helpful in digging trenches and moving soil around.
- Leveling Tool: This can be a rake or a carpenter’s level, which will help ensure the ground is adequately sloped.
- PVC Pipes: These pipes are commonly used for drainage systems as they are lightweight and easy to install.
- Gravel: Gravel is essential to any drainage system as it allows water to flow freely while keeping out debris.
- Perforated Drain Pipe: This type of pipe has small holes, allowing water to enter and flow away.
- Landscape Fabric: This will help prevent soil and debris from clogging the drainage pipes.
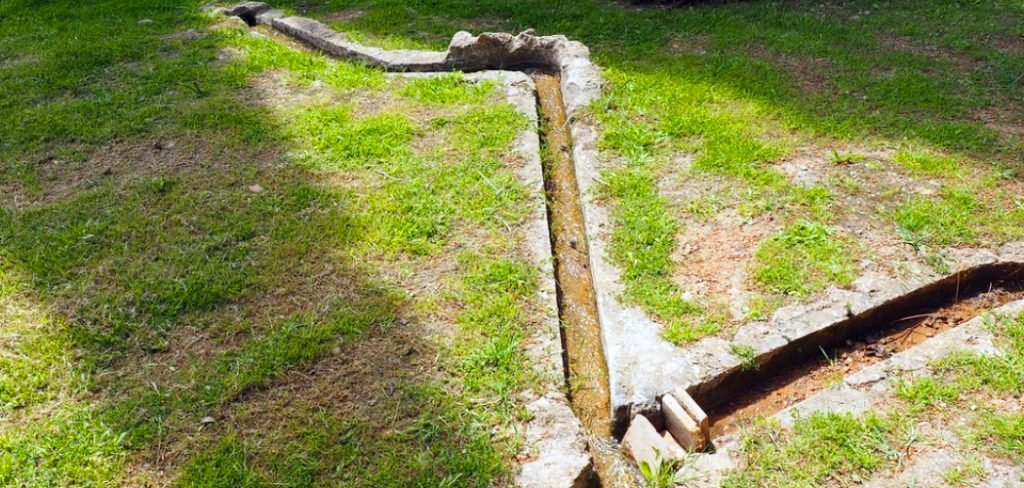
- Cement: You may need cement to create a more permanent drainage solution, such as a French drain.
Once you have gathered all the necessary tools and materials, it’s time to start creating drainage in your yard.
8 Easy Steps on How to Create Drainage in Yard
Step 1: Assess the Problem Area
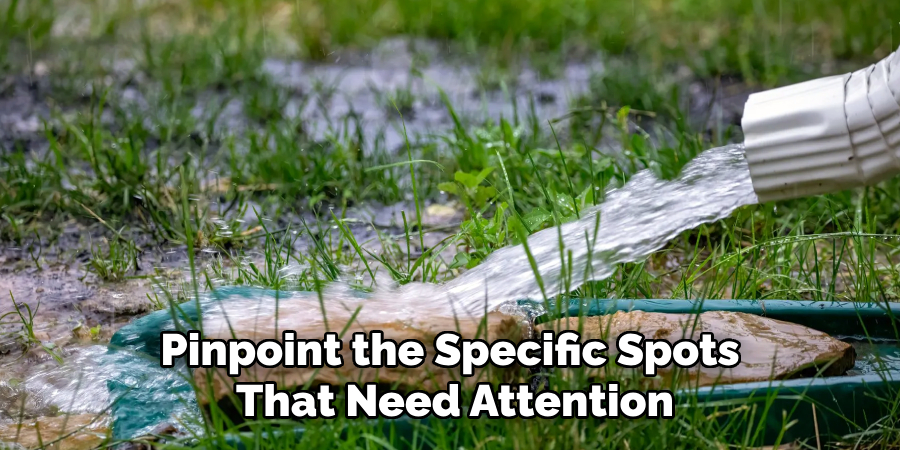
Start by carefully evaluating the area where drainage is a concern. Look for signs of standing water, soggy soil, or excessive runoff after a rainstorm. These clues will help pinpoint the specific spots that need attention. Take note of the slope of your yard, as water naturally flows downhill, and this information is crucial for planning an effective drainage system. Additionally, identify any structures, such as patios, driveways, or foundations, that might be affected by poor drainage. It’s helpful to sketch a rough yard layout, marking problem areas, high and low points, and any obstacles that could impact your solution. A thorough assessment sets the foundation for an efficient and long-lasting drainage fix.
Step 2: Plan Your Drainage System
Once you’ve identified the problem area, plan the layout of your drainage system. Decide where the water will be directed, such as a storm drain, rain garden, or another location with better absorption. Sketch out the path for your drainage solution, ensuring it follows a downward slope to allow gravity to assist water flow. This step is crucial to provide an effective and long-lasting drainage solutions backyard.
Step 3: Gather Your Materials
To successfully create your drainage system, you must gather the appropriate tools and materials beforehand. Common materials include a shovel, a level, a wheelbarrow, landscape fabric, gravel, and perforated drainage pipes. Depending on your specific drainage plan, you may also need additional items, such as a catch basin or a drain grate. Ensure you purchase quality materials that are durable and suited for outdoor use, as this will improve the longevity of your drainage system. Having allthe necessary materials on hand before you start will save you time and help the project run more smoothly.
Step 4: Excavate the Trench

With your materials gathered, it’s time to begin excavating the trench for your drainage system. Use a shovel to dig along the path you marked earlier, ensuring the trench is deep and wide enough to accommodate the drainage pipes, gravel, and other necessary components. A depth of 12 to 18 inches is typically sufficient, but this may vary depending on the planned size of your system. Use a level regularly to maintain a consistent downward slope throughout the trench, which will help the water flow efficiently. Keep the trench free of debris and compact the soil on the bottom to create a stable foundation for your drainage system.
Step 5: Lay the Gravel Base
Once the trench has been excavated, lay a layer of gravel at the bottom to create a stable base for the drainage system. The gravel layer should be about 2 to 3 inches thick and evenly spread across the entire length of the trench. This base helps improve water flow and prevents the pipes from shifting over time. Use a rake to level the gravel and ensure it is evenly distributed. If your drainage system includes a perforated drain pipe, the gravel will also allow water to filter through easily, maximizing the system’s efficiency.
Step 6: Install the Drain Pipe
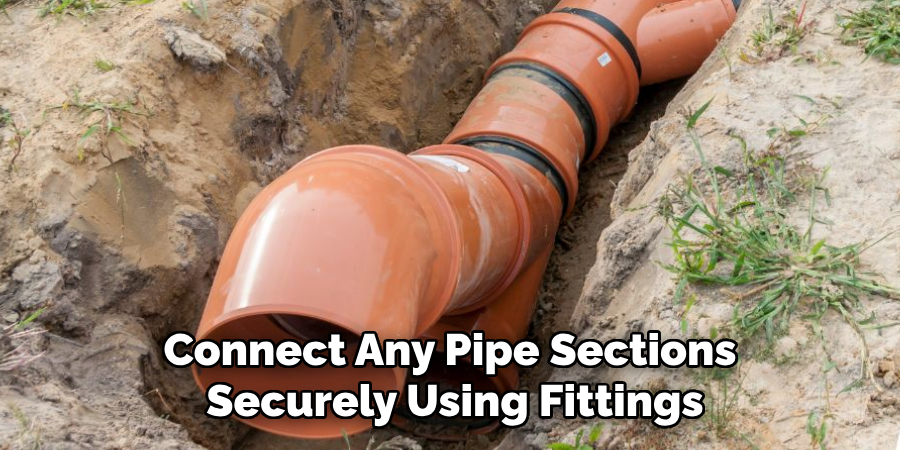
Place the perforated drain pipe on top of the gravel base, ensuring the perforations face downward for optimal water infiltration. Carefully lay the pipe along the entire length of the trench, ensuring it follows the downward slope you created earlier. Connect any pipe sections securely using fittings, and seal the joints if necessary to prevent leaks. Once the pipe is in place, double-check its alignment and slope to ensure the water will flow efficiently through the system.
Step 7: Cover the Pipe with Gravel
Once the drain pipe is securely in place, cover it with an additional layer of gravel. This layer should be thick enough to surround the pipe, typically 2 to 3 inches above the pipe. Make sure the gravel is evenly distributed along the length of the trench. This additional gravel layer helps protect the pipe, promotes proper water flow, and prevents soil from clogging the drainage system. Use a rake to level the gravel and ensure a smooth and consistent layer.
Step 8: Add a Layer of Landscaping Fabric
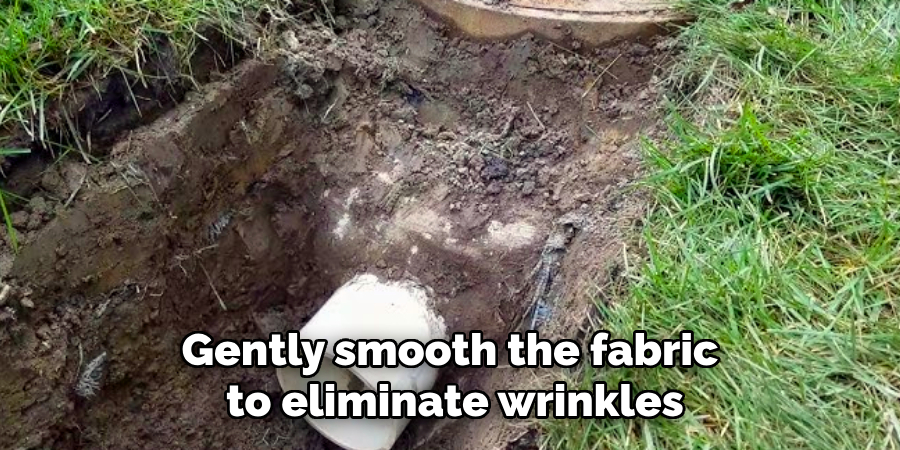
After placing the gravel, lay a layer of landscaping fabric on top of it. This fabric acts as a barrier to prevent soil and debris from mixing with the gravel and clogging the drainage pipe over time. Ensure the fabric extends beyond the edges of the trench to provide ample coverage. Gently smooth the fabric to eliminate wrinkles or gaps, but avoid stretching it too tightly, as this can reduce its effectiveness. Secure the edges by tucking them into the sides of the trench or by pinning them in place with landscaping staples.
By following these steps, you now have a complete and adequate drainage system in your yard. With proper maintenance, this solution will help prevent water buildup, protect against erosion, and improve the overall health of your landscape.
5 Things You Should Avoid
1. Ignoring the Natural Slope of Your Yard: Disregarding the natural slope can lead to water pooling in undesirable locations. Always consider the gradient of your yard to ensure water drains away properly and efficiently.
2. Using Permeable Materials Incorrectly: While permeable materials can help water seep into the ground, misusing them or in the wrong areas can worsen drainage problems. Be strategic about their placement.
3. Failing to Plan for Heavy Rainfall: Underestimating the impact of heavy rain can leave your yard flooded. Design your drainage system to accommodate large volumes of water, even if they occur infrequently.
4. Overloading Gutters and Downspouts: Improperly managing runoff from gutters and downspouts can direct excessive water into your yard, overwhelming your drainage system. Ensure proper redirection of water to avoid this mistake.
5. Neglecting Maintenance of Drainage Systems: Once installed, drainage systems require periodic maintenance to stay effective. Failing to remove debris, repair damages, or clear out blockages can result in poor functionality over time.
By avoiding these common mistakes, you can ensure proper drainage in your yard and prevent unwanted issues such as flooding or erosion.
Conclusion
Creating an effective drainage system in your yard requires careful planning, proper execution, and regular maintenance.
Start by assessing your yard’s unique needs and understanding its topography to determine the best drainage solutions. Implement features such as French drains, dry wells, or swales to redirect water effectively. Avoid pitfalls like poor placement, underestimating heavy rainfall, and neglecting maintenance. You can manage water flow, prevent flooding, and maintain a healthy and functional outdoor space with the right approach.
Hopefully, the article on how to create drainage in yard has provided you with valuable insights and practical steps to help you get started. Happy gardening!
About the Author
Adrian Green is a passionate woodworking enthusiast who has dedicated his life to the craft of woodworking. From his early days working alongside his father in the family woodworking shop, Adrian has honed his skills and developed a deep love for creating beautiful, functional pieces with his hands. As the voice behind The Woodenify Blog, he shares his knowledge, tips, and inspiration with fellow woodworkers of all skill levels, helping them build confidence in their abilities while learning new techniques.
Professional Focus
- Specializes in DIY woodworking projects, from furniture making to home décor.
- Provides step-by-step guides, tips, and practical tutorials for woodworkers at any skill level.
- Focused on empowering readers with confidence and knowledge through easy-to-follow instructions and hands-on techniques.
- Passionate about building a community where makers can share, learn, and grow together in the world of woodworking.
Education History
University of Craft and Design – Bachelor of Fine Arts (BFA) in Woodworking and Furniture Design
Woodworking Apprenticeships – Gained extensive hands-on experience through various workshops and mentorships with seasoned craftsmen, refining carpentry and furniture-making skills.
Expertise
- DIY woodworking, carpentry, furniture making, and home décor projects.
- Creating clear, accessible tutorials and guides for beginner to advanced woodworkers.
- Helping readers experience the satisfaction and fulfillment of turning raw materials into stunning finished products.