
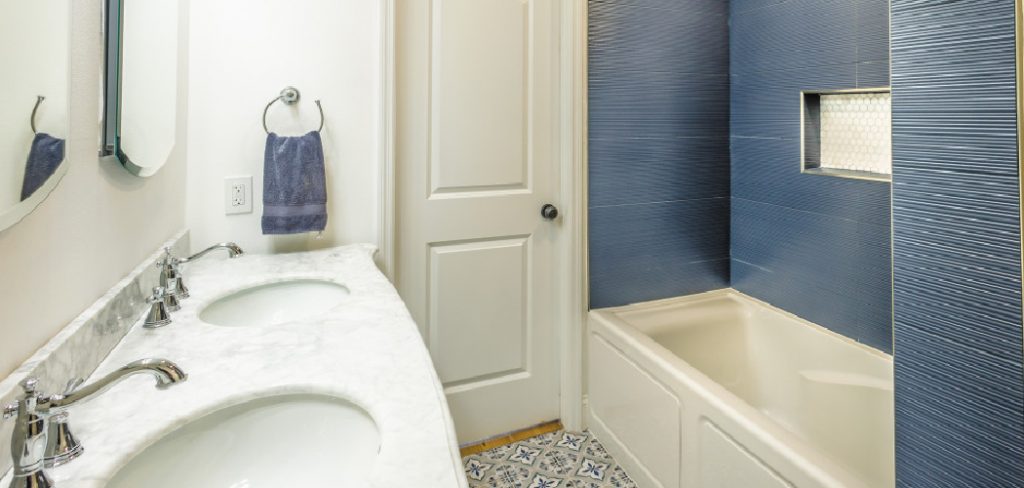
Converting a traditional tub into a walk-in shower is a practical way to modernize your bathroom, enhance accessibility, and maximize space. This transformation not only improves the functionality of your bathroom but can also add value to your home. Whether you’re aiming for a sleek, minimalist design or a more luxurious spa-like experience, transitioning to a walk-in shower is a project that offers both aesthetic and practical benefits. In this blog post, we’ll walk you through the steps on how to convert a tub to a walk-in shower so that you can get back to using it in no time! So grab your tools, and let’s get started!
Tools and Materials You’ll Need
Before you begin your tub-to-shower conversion project, gathering the right tools and materials is essential for a smooth process. Here’s a list to help you prepare:
Tools
- Measuring Tape – To ensure accurate measurements for your shower space.
- Level – To make sure your installation is even and properly aligned.
- Utility Knife – For precise cutting of materials such as caulk or drywall.
- Caulking Gun – To apply sealant around seams and edges.
- Screwdriver and Drill – For removing screws and installing new components.
- Pry Bar – To safely remove the old bathtub and surrounding materials.
- Bucket – For collecting water or debris during the demolition stage.
- Safety Gear – Gloves, safety glasses, and a dust mask to protect yourself during the process.
Materials
- Shower Pan – The base of the new shower, available in various sizes and styles.
- Shower Walls – Prefabricated panels or tiling materials for the enclosure.
- Shower Doors or Curtains – Choose based on your style and space requirements.
- Drain Kit – For connecting the new shower to your home’s plumbing system.
- Waterproofing Membrane – To prevent leaks and protect your walls.
- Sealant/Caulk – For sealing gaps and ensuring a watertight finish.
- Plumbing Fixtures – Showerhead, faucet, and controls to complete the setup.
Having these tools and materials on hand will save you time and help streamline the installation process. Always double-check your supplies before starting, and consult your specific shower kit instructions for any additional requirements.
10 Methods How to Convert a Tub to a Walk-in Shower
1. Evaluate the Existing Layout and Feasibility of Conversion
Before any demolition or construction begins, it’s vital to thoroughly evaluate the existing bathroom layout to determine if converting a tub to a walk-in shower is practical. Start by measuring the bathtub’s dimensions and examining the available space in the room. A standard tub is typically about 60 inches long, which is sufficient for a comfortable shower enclosure. Assess the location of plumbing lines, drainage, and electrical wiring to see if they can be reused or need modification. Take note of nearby fixtures like toilets, vanities, or doors to ensure the new shower won’t interfere with functionality.

Proper planning at this stage helps avoid costly surprises and ensures the new shower fits seamlessly into the existing space.
2. Design Your Shower Space with Function and Style in Mind
Once you’ve established feasibility, it’s time to move into the design phase. Choose between a curbless, low-threshold, or slightly raised walk-in shower depending on your mobility needs and bathroom structure. Consider whether you want a tiled floor with a custom drain or a prefabricated shower pan. Choose wall materials like ceramic tile, acrylic, or solid-surface panels, and don’t forget to plan for built-in features like benches, shelving, and grab bars if accessibility is a goal. The design should complement the rest of your bathroom while meeting your needs for comfort, aesthetics, and maintenance. Take this time to decide whether to install a glass enclosure, open shower concept, or curtain.
3. Shut Off Water Supply and Prepare the Work Area
Before removing any fixtures, turn off the water supply to the tub. This can usually be done at the shut-off valves under the sink or at the main house valve. Lay down protective coverings on the floor and over any adjacent fixtures to prevent damage. Remove any items stored near the tub area, and cover vents or air ducts to reduce dust spread during demolition. If the tub surround is tiled, remove a few tiles carefully to check for hidden wiring or plumbing behind the wall. Preparing your workspace thoroughly will make the upcoming demolition cleaner, safer, and more efficient.
4. Remove the Existing Bathtub and Fixtures
With the water off and the area prepped, begin removing the old bathtub. Start by detaching the tub spout, drain, and overflow cover. If your tub has a tiled surround, remove the tiles or wall panels around the tub down to the studs. Unscrew or cut away any fasteners securing the tub to the wall studs or floor.
Depending on the material, the tub may need to be broken into pieces to get it out the door. Cast iron tubs are especially heavy and often require a sledgehammer for removal. Be cautious during this phase to avoid damaging plumbing or creating structural issues.
5. Assess and Update Plumbing and Drainage
Now that the tub is removed, inspect the plumbing and ensure it’s in good working condition. Tub drains typically sit higher than shower drains, so you may need to lower the drain pipe to accommodate the new shower pan. Depending on local plumbing codes, you might also need to increase the drain size from 1.5 inches to 2 inches to allow for faster water flow. Update the supply lines if necessary and reposition the shower valve and showerhead to your preferred height. This step is critical—poor drainage or improper valve placement can lead to long-term headaches and water damage.
6. Install a Shower Pan or Prepare for a Tiled Base
At this stage, decide whether you’re using a prefabricated shower pan or creating a custom tile base. A prefabricated pan is easier and faster to install—just level the subfloor, place the pan, and secure it with screws or adhesive. For a tiled shower floor, install a sloped mortar bed toward the drain, followed by a waterproof membrane. Both options must be perfectly level and watertight to prevent leaks and ensure durability. Use a leveling tool throughout the installation to check for dips or uneven spots, which could lead to pooling or drainage issues later on.
7. Install Cement Backer Board and Waterproof the Walls
For tiled or solid-wall showers, install cement backer board over the wall studs to create a stable, water-resistant backing. Cut the panels to size and screw them into place, leaving a small gap between each panel to be filled with waterproof tape and thinset. Once the boards are secured, apply a waterproof membrane or liquid sealant over the entire surface, especially around seams and corners. This step is essential to prevent mold and water intrusion into the walls. Let everything dry fully before moving on to tiling or attaching wall panels.
8. Tile the Walls or Install Shower Wall Panels
Depending on your design, begin tiling the walls from the bottom up using tile spacers and a level to keep your rows straight. Use waterproof tile adhesive or thinset, and finish with grout that is also moisture-resistant.
If using acrylic or composite shower wall panels, follow the manufacturer’s instructions to glue or screw them onto the backer board. Be sure to seal all edges and seams with waterproof silicone caulk. Whether using tile or panels, double-check for any gaps or unsealed areas, especially around fixtures, to ensure full protection against moisture.
9. Install the Shower Door or Enclosure (If Applicable)
Many walk-in showers use glass enclosures or doors to contain water while maintaining a modern, open look. Measure your opening carefully, and either install a ready-made glass door kit or hire a professional for custom glass installation. If you prefer a more open or budget-friendly design, install a curved or straight shower rod with a curtain. Be sure to secure the hardware into wall studs or use proper anchors to support the weight. A well-installed enclosure helps keep water in and adds to the overall polished look of your new shower.
10. Finalize Plumbing Fixtures and Test Everything
The final step is to install your shower valve trim, showerhead, and any accessories like grab bars, hand showers, or shelves. Apply plumber’s tape to threaded connections to prevent leaks, and test the system thoroughly. Turn on the water to check the shower’s function, ensuring good pressure, no drips, and efficient drainage. Caulk around all seams, including between the shower base and wall, to ensure everything is sealed. After the area is clean and dry, your new walk-in shower is ready for use. Enjoy the improved accessibility, style, and comfort it brings to your daily routine.
Conclusion
Converting a tub to a walk-in shower is a rewarding home improvement project that adds comfort, accessibility, and value to your home. With careful planning, patience, and attention to detail, each of the ten methods outlined above will guide you through shower and free standing tub. Whether you’re doing it yourself or coordinating with professionals, understanding the full scope of the process empowers you to create a bathroom that’s not only functional but beautifully suited to your lifestyle. So, there you have it – a quick and easy guide on How to Convert a Tub to a Walk-In Shower.
About the Author
Adrian Green is a passionate woodworking enthusiast who has dedicated his life to the craft of woodworking. From his early days working alongside his father in the family woodworking shop, Adrian has honed his skills and developed a deep love for creating beautiful, functional pieces with his hands. As the voice behind The Woodenify Blog, he shares his knowledge, tips, and inspiration with fellow woodworkers of all skill levels, helping them build confidence in their abilities while learning new techniques.
Professional Focus
- Specializes in DIY woodworking projects, from furniture making to home décor.
- Provides step-by-step guides, tips, and practical tutorials for woodworkers at any skill level.
- Focused on empowering readers with confidence and knowledge through easy-to-follow instructions and hands-on techniques.
- Passionate about building a community where makers can share, learn, and grow together in the world of woodworking.
Education History
University of Craft and Design – Bachelor of Fine Arts (BFA) in Woodworking and Furniture Design
Woodworking Apprenticeships – Gained extensive hands-on experience through various workshops and mentorships with seasoned craftsmen, refining carpentry and furniture-making skills.
Expertise
- DIY woodworking, carpentry, furniture making, and home décor projects.
- Creating clear, accessible tutorials and guides for beginner to advanced woodworkers.
- Helping readers experience the satisfaction and fulfillment of turning raw materials into stunning finished products.