
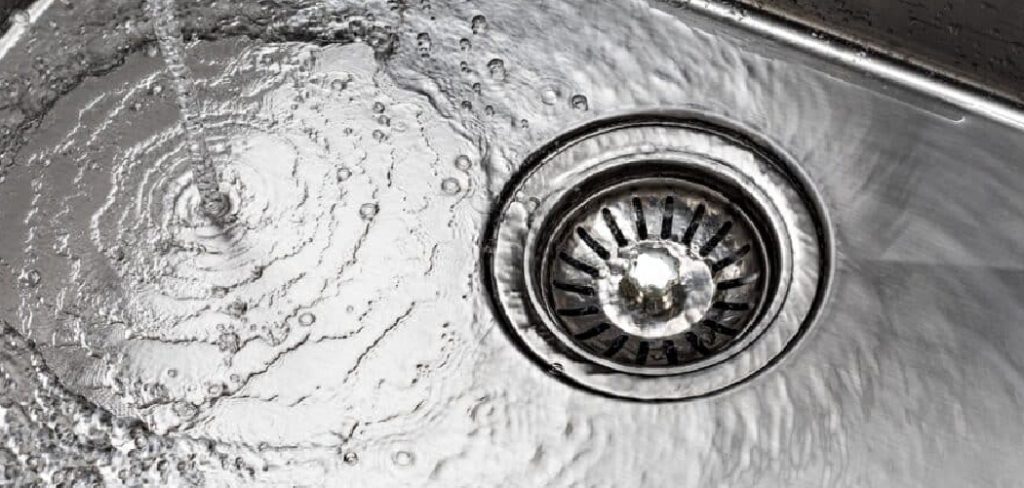
A smelly sink drain can quickly become an unpleasant problem in any household. Over time, food debris, grease, and other residues can accumulate in your drain, leading to unwanted odors. Thankfully, there are effective and simple methods to address this issue without the need for harsh chemicals or expensive products.
By following a few easy steps on how to clean sink drain smell, you can eliminate sink drain smells and keep your kitchen or bathroom fresh and odor-free.
Common Causes of Sink Drain Odor
Several factors can contribute to unpleasant odors coming from your sink drain. One of the most common causes is the buildup of food particles, grease, and soap scum in the drain or pipes, which can create a breeding ground for bacteria and mold. Another frequent culprit is a dry P-trap, which occurs when the water in the trap evaporates, allowing sewer gases to escape into your home.
Additionally, clogs deeper in the plumbing system can cause water to stagnate and emit foul smells. Garbage disposals, if not cleaned regularly, can also harbor leftover food debris that leads to bad odors. Identifying the source of the smell is the first step to addressing the issue effectively.
Safety Precautions and Preparation
Before addressing any odors or performing maintenance on your plumbing system, it’s important to prioritize safety and prepare accordingly. Always wear protective gloves and, if dealing with harsh cleaning agents or potential mold, consider using goggles and a mask to protect your eyes and respiratory system.
Ensure the area is well-ventilated to avoid inhaling fumes from cleaning chemicals. If you’re working near electrical outlets or garbage disposals, make sure to unplug any appliances to minimize the risk of electric shock. Gather all necessary tools and supplies beforehand, such as a bucket, wrench, or cleaning solutions, to streamline the process and avoid unnecessary delays. Taking these precautions will help you address the problem safely and effectively.
Tools and Materials Needed
- Baking Soda
- White Vinegar
- Boiling Water
- Dish Soap
- Old Toothbrush or Small Scrub Brush
- Drain Snake or Plunger (if Needed)
- Lemon Peels or Essential Oils (Optional for Fresh Scent)
9 Step-by-Step Guidelines on How to Clean Sink Drain Smell
Step 1: Remove Any Visible Debris
Start by clearing the sink of any visible food particles, hair, or other debris that may be contributing to the smell. Use gloves if necessary to remove the debris by hand, and ensure that the sink stopper is clean as well.
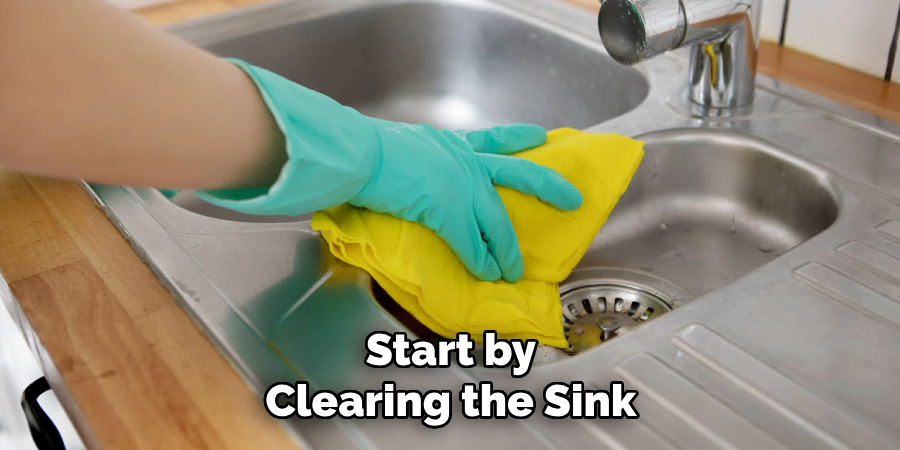
Disposing of these materials properly will prepare the drain for the cleaning process and prevent clogs from worsening.
Step 2: Boil Water
Boil a kettle or a pot of water until it reaches a rolling boil. Carefully pour the hot water directly down the sink drain.
This helps dissolve grease, flush out minor blockages, and kill bacteria that may be causing unpleasant odors. Be cautious while handling the boiling water to avoid spills or burns.
Step 3: Pour Baking Soda into the Drain
Measure out approximately half a cup of baking soda and carefully pour it directly into the drain. Baking soda is a natural and effective cleaning agent that helps break down grime, grease, and residue within the pipes.
Ensure that the baking soda reaches the drain opening and settles inside for maximum effectiveness. Allow it to sit for a few minutes before proceeding to the next step.
Step 4: Add Vinegar
Measure one cup of vinegar and slowly pour it into the drain over the baking soda. The combination of vinegar and baking soda will create a fizzy reaction that helps to loosen clogs and eliminate odors.
Allow the mixture to bubble and fizz inside the drain for about 10-15 minutes to ensure it effectively breaks down any stubborn buildup. Avoid using the sink during this time to allow the reaction to work uninterrupted.
Step 5: Cover and Wait
After pouring the vinegar, cover the drain with a plug or a damp cloth. This will help contain the fizzy reaction within the drain to maximize its effectiveness.
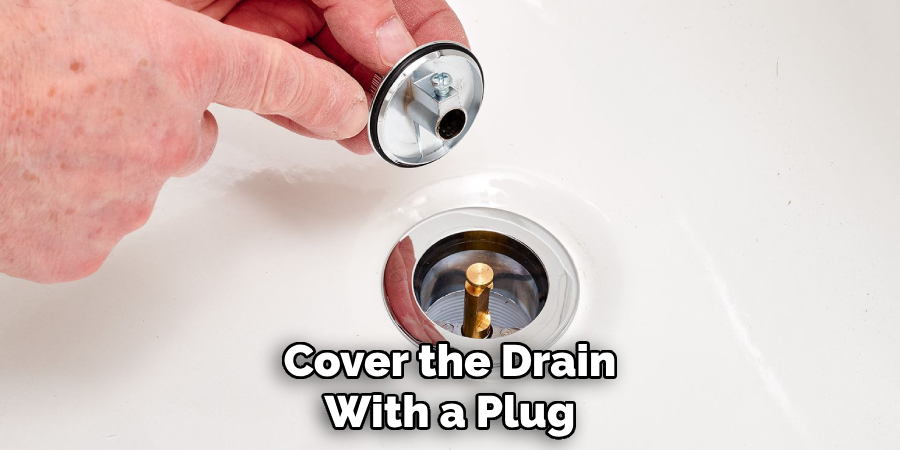
Allow the mixture to sit undisturbed for an additional 10-15 minutes to ensure it breaks down tough clogs and residue thoroughly.
Step 6: Boil More Water
After the waiting period, boil another kettle or pot of water. Once the water reaches a rolling boil, carefully pour it down the drain.
The hot water will help flush out the loosened debris and residue, leaving your drain clean and running smoothly. Repeat this step if necessary to ensure everything is thoroughly cleared.
Step 7: Flush with Hot Water
To complete the process, turn on your hot water tap and allow it to run for a few minutes. This will help rinse away any remaining debris and ensure your drain is completely cleared.
Consistently flushing with hot water can also prevent future buildup, keeping your pipes clean and free-flowing.
Step 8: Repeat if Necessary
If you notice that your drain is still not completely cleared, repeat the cleaning process from the beginning. Stubborn clogs may require multiple attempts to fully break down and flush away.
Patience and consistency are key to ensuring your drain is completely free of any blockages. If the issue persists, consider seeking professional assistance to address more severe plumbing problems.
Step 9: Prevent Future Clogs
To prevent future clogs, it’s important to properly maintain your drains. Regularly pouring boiling water down your drains can help remove any buildup and keep them running smoothly. You can also use a drain catcher to catch any hair or large debris before it enters your pipes.
Following these steps on how to clean sink drain smell and prevent clogs can save you time and money in the long run. It’s important to address any plumbing issues promptly to avoid more serious problems down the line. With regular maintenance, your drains should stay clean and odor-free.
Special Tips for Garbage Disposal Odors
Garbage disposals can sometimes develop unpleasant smells due to food particles getting trapped and decomposing. To keep odors at bay, try grinding a few ice cubes and a handful of coarse salt in your disposal. This combination helps clean the blades and remove residue. Additionally, cutting up a lemon or orange into small pieces and grinding them can leave your disposal smelling fresh and citrusy.

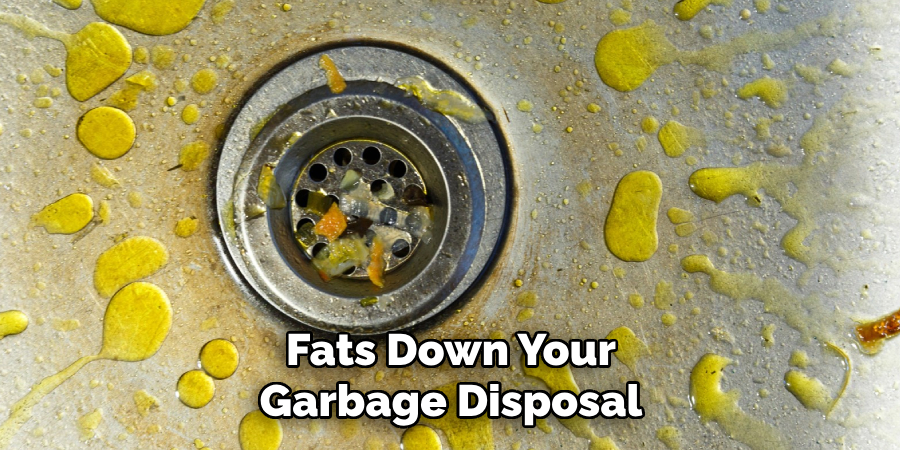
Avoid putting grease, coffee grounds, or fibrous foods like celery into your disposal, as these can contribute to buildup and odors. Running cold water before and after use can also help flush out debris and maintain a cleaner system. Regularly maintaining your garbage disposal ensures it stays efficient and odor-free.
Preventative Maintenance Tips
To keep your garbage disposal functioning optimally, it’s essential to implement a few preventative maintenance practices. First, always run cold water while using the disposal and for a few seconds afterward to assist in flushing out debris. Avoid overloading the disposal by feeding items gradually rather than all at once.
Periodically, grind ice cubes to help sharpen the blades and remove buildup. Consider using a mild dish soap and warm water solution to gently clean the disposal chamber. Lastly, make it a habit to inspect for leaks or unusual noises, addressing any minor issues before they escalate. By following these simple tips, you can extend the life of your garbage disposal and prevent costly repairs.
When to Call a Plumber?
While routine maintenance can handle most minor issues, there are times when calling a professional plumber becomes necessary. For instance, if your garbage disposal is completely unresponsive or frequently trips the reset button, it may indicate a serious electrical or mechanical problem. Persistent foul odors that don’t dissipate after thorough cleaning could suggest a deeper blockage that requires expert tools to resolve.
Additionally, if you notice water leaking from the disposal unit or connecting pipes, it’s crucial to have a plumber address the issue before it causes damage to your kitchen infrastructure. Unusual grinding noises or vibrations may signify internal damage, such as broken blades, that need professional inspection and repair. Don’t hesitate to reach out to a skilled plumber when these issues arise to ensure your garbage disposal continues to function smoothly and safely.
Frequently Asked Questions
Q: How Often Should I Clean My Garbage Disposal?
A: It is recommended to clean your garbage disposal at least once a month. This will help prevent buildup and keep it running efficiently.
Q: What Can I Use to Clean My Garbage Disposal?
A: You can use a combination of ice cubes, lemon or orange peels, and baking soda to clean your garbage disposal. Simply run the mixture through the unit while it is turned on and then rinse with cold water.
Q: Can I Put Grease or Fats Down My Garbage Disposal?
A: No, it is not recommended to put grease or fats down your garbage disposal as they can solidify and clog the unit. Instead, dispose of them in a separate container or wipe them off dishes with a paper towel before washing them.
Conclusion
Maintaining clean and functional drains is essential for a healthy and efficient home. By incorporating simple practices like regular cleaning, using drain catchers, and being cautious about what goes down your drains, you can prevent clogs and unpleasant odors.
Taking the time for proper drain care not only ensures a fresher environment but also helps avoid costly plumbing repairs in the future. A little effort now can save a lot of hassle later! Thanks for reading this article on how to clean sink drain smell. If you’re dealing with slow drainage or unpleasant odors, learning how to clean sink drains effectively can help keep your kitchen and bathroom plumbing in top shape.
About the Author
Adrian Green is a passionate woodworking enthusiast who has dedicated his life to the craft of woodworking. From his early days working alongside his father in the family woodworking shop, Adrian has honed his skills and developed a deep love for creating beautiful, functional pieces with his hands. As the voice behind The Woodenify Blog, he shares his knowledge, tips, and inspiration with fellow woodworkers of all skill levels, helping them build confidence in their abilities while learning new techniques.
Professional Focus
- Specializes in DIY woodworking projects, from furniture making to home décor.
- Provides step-by-step guides, tips, and practical tutorials for woodworkers at any skill level.
- Focused on empowering readers with confidence and knowledge through easy-to-follow instructions and hands-on techniques.
- Passionate about building a community where makers can share, learn, and grow together in the world of woodworking.
Education History
University of Craft and Design – Bachelor of Fine Arts (BFA) in Woodworking and Furniture Design
Woodworking Apprenticeships – Gained extensive hands-on experience through various workshops and mentorships with seasoned craftsmen, refining carpentry and furniture-making skills.
Expertise
- DIY woodworking, carpentry, furniture making, and home décor projects.
- Creating clear, accessible tutorials and guides for beginner to advanced woodworkers.
- Helping readers experience the satisfaction and fulfillment of turning raw materials into stunning finished products.