
Are you tired of looking at your dirty and tarnished brass faucet? A clean and shiny brass faucet can make all the difference in a bathroom or kitchen. Follow these simple steps to learn how to clean your brass faucet.
Brass kitchen faucet add a touch of elegance and charm to any space, but over time, they can lose their luster due to dirt, fingerprints, and oxidation. Regular cleaning not only enhances their appearance but also prolongs their lifespan. Proper care is essential to maintain their shine without damaging the material. Additionally, cleaning brass faucets can be an easy and enjoyable task.

This guide on how to clean brass faucet will walk you through simple and practical steps to clean your brass faucet, ensuring it stays polished and beautiful. Let’s get started!
What Are the Benefits of Cleaning Your Brass Faucet Regularly?
Cleaning your brass faucet regularly has several benefits. Some of them include:
- Maintaining Its Shine: As mentioned earlier, regular cleaning helps to keep the brass faucet looking shiny and attractive.
- Removing Dirt and Grime: Over time, dirt and grime can build up on the surface of your brass faucet, making it look dull and uninviting. Proper cleaning removes this buildup, allowing the material’s natural beauty to shine through.
- Preventing Corrosion: When left uncleaned for extended periods, brass faucets can start to corrode due to oxidation. Regular cleaning prevents this from happening, ensuring your faucet stays in good condition.
- Improving Functionality: A clean faucet operates more smoothly, with less resistance and better water flow. Removing any buildup or debris from the internal mechanisms can help improve functionality and prolong the lifespan of your faucet.
What Will You Need?
To properly clean your brass faucet, you will need the following materials:
- Distilled white vinegar
- Baking soda
- Soft cloths or non-abrasive sponges
- Old toothbrush or small scrub brush
- Lemon juice (optional)
- Mineral oil or brass polish (optional for polishing)
Once you have gathered these materials, you can begin cleaning your brass faucet.
8 Easy Steps on How to Clean Brass Faucet
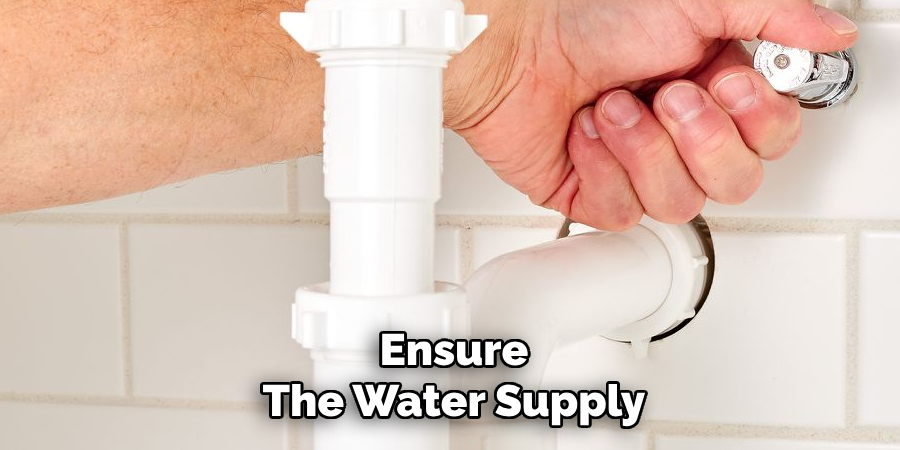
Step 1. Turn Off the Water Supply
To begin, ensure the water supply to the faucet is turned off. Locate the shut-off valves under the sink and turn them clockwise until fully closed. This step will prevent water from running while cleaning the faucet, ensuring a more convenient and mess-free process. Once the water supply is off, turn the faucet handles to release any remaining water from the pipes.
Step 2. Remove Any Surface Dust or Debris
Before you start cleaning, gently wipe down the faucet with a soft, dry cloth to remove any dust or surface debris. This step ensures that no particles will scratch the brass finish while cleaning. Pay close attention to any small crevices or intricate details in the faucet’s design.
You can use a soft brush or an old toothbrush to sweep away debris for hard-to-reach areas. This preliminary step will prepare the surface for deeper cleaning and help you achieve the best possible results.
Step 3. Deep Cleaning
After the initial wipe down, it’s time to move on to deep cleaning your brass faucet. This step will involve using mild soap and warm water to remove any built-up grime or stains.
Mix a few drops of mild liquid soap with warm water in a bowl or bucket to create the cleaning solution. You can also use an all-purpose cleaner if you prefer. Be sure to read the instructions on the cleaner and follow any safety precautions before using it on your brass faucet.

Next, dip a soft cloth into the soapy water and wring out any excess liquid. Gently rub the cloth over the entire surface of the faucet, paying special attention to any areas with visible dirt or grime. For tougher stains, you may need to let the soapy water sit on the surface for a few minutes before scrubbing.
Step 4. Rinse and Dry
After thoroughly cleaning the faucet with soapy water, it’s time to rinse off any remaining residue. Use a clean, damp cloth or a sponge soaked in fresh water to wipe down the entire surface of the faucet. Ensure you go over every area, especially crevices, to remove all traces of soap or cleaner. Avoid leaving any soapy residue behind, as it can dull the shine of the brass over time.
Once rinsed, use a dry, soft microfiber cloth to pat the faucet dry gently. This step is crucial to prevent water spots from forming on the surface. Dry all areas around joints or intricate designs where water may collect. Drying the faucet maintains its polished appearance and helps protect the brass from potential tarnishing caused by lingering moisture.
Step 5. Polish
Polishing is the final step to ensure your brass faucet regains its gleaming and flawless appearance. Begin by selecting a high-quality brass polish, ensuring it is non-abrasive and formulated explicitly for brass surfaces. Apply a small amount of the polish to a soft, lint-free cloth.
Rub the polish onto the faucet’s surface using gentle, circular motions, focusing on areas that appear dull or have a light tarnish. As indicated in the product instructions, allow the polish to sit for a few minutes to work effectively on the metal.
Once the polish has set, use a clean, dry microfiber cloth to buff the faucet until it shines. Care to reach intricate areas, such as decorative carvings or crevices, as these spots often require extra attention. Polishing restores the brass’s lustrous finish and provides a protective barrier against future tarnishing. To maintain the brilliance of your brass faucet, consider polishing it periodically, especially if it is exposed to humidity or frequent use.
Step 6. Regular Maintenance
Regular maintenance is crucial to ensure your brass faucet retains its stunning appearance. Begin by wiping down the faucet weekly with a soft, damp cloth to remove water spots, soap residue, and dust. Avoid using abrasive sponges or harsh cleaning agents, as these can damage the brass surface.
Instead, opt for gentle, pH-neutral cleaners formulated explicitly for brass. Additionally, inspect the faucet periodically for signs of tarnishing or wear. If tarnish begins to form, address it promptly using a brass polish or a homemade vinegar and baking soda solution, as detailed in previous steps.
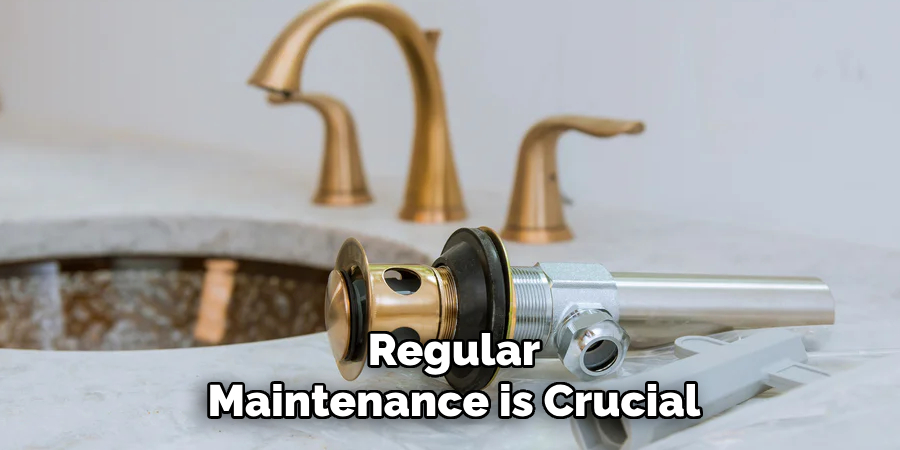
For faucets in high-moisture environments, consider applying a thin coat of clear lacquer after polishing to protect against corrosion. Regular attention to these practices will preserve the faucet’s shine and ensure it remains a focal point of elegance in your space for years to come.
Step 7. Address Stubborn Stains
If you encounter stubborn stains or mineral buildup on your brass faucet that regular cleaning cannot remove, use a paste made from equal parts flour, salt, and vinegar.
Apply the paste to the affected area, gently rub it in with a soft cloth, and leave it for 10-15 minutes. Afterward, rinse thoroughly with warm water and dry the faucet with a clean, soft towel. This method effectively restores the faucet’s natural luster without causing scratches or damage.
Step 8. Keep Your Brass Faucet Shiny
Regular upkeep is essential to maintain the shine of your brass faucet. After each use, take a moment to wipe the faucet dry with a soft microfiber cloth to prevent water spots or mineral deposits from forming. You can also use mild soap and warm water for a quick, gentle clean to remove fingerprints or smudges.
Consider applying a thin layer of clear wax or brass polish designed explicitly for uncoated brass faucets for a deeper shine. Be sure to follow the manufacturer’s instructions for the best results, and avoid abrasive cloths or harsh cleaning products, as these can cause scratches or dullness over time.
By following these simple maintenance tips, you can keep your brass faucets looking shiny and new for years.
5 Things You Should Avoid
- Using Harsh Chemicals
Avoid cleaning products that contain ammonia, bleach, or other harsh chemicals, as they can damage the brass finish and cause discoloration.
- Scrubbing with Abrasive Materials
Do not use steel wool, abrasive sponges, or harsh brushes, as these can leave scratches on the surface of your brass faucet.
- Ignoring Manufacturer’s Instructions
Each brass faucet may have specific care guidelines. Ignoring these instructions can lead to improper cleaning methods that harm the finish.
- Leaving Water Spots Untreated
Allowing water spots or mineral deposits to sit too long can lead to buildup and tarnish, making cleaning more difficult.
- Overusing Acidic Solutions
While natural cleaners like lemon juice or vinegar may be effective in small amounts, overuse can corrode the brass, especially when left on for extended periods. Clean thoroughly and rinse immediately if used.

Conclusion
How to clean brass faucet effectively requires a delicate balance between maintaining its shine and preserving its finish.
You can keep your faucet looking polished and elegant by using gentle, non-abrasive cleaning agents and avoiding harsh chemicals or overzealous scrubbing. Regular maintenance, such as wiping down the faucet to remove water spots and treating it with a suitable brass polish, ensures longevity and a vibrant appearance.
Properly, a brass faucet can remain a timeless fixture in your space.
About the Author
Adrian Green is a passionate woodworking enthusiast who has dedicated his life to the craft of woodworking. From his early days working alongside his father in the family woodworking shop, Adrian has honed his skills and developed a deep love for creating beautiful, functional pieces with his hands. As the voice behind The Woodenify Blog, he shares his knowledge, tips, and inspiration with fellow woodworkers of all skill levels, helping them build confidence in their abilities while learning new techniques.
Professional Focus
- Specializes in DIY woodworking projects, from furniture making to home décor.
- Provides step-by-step guides, tips, and practical tutorials for woodworkers at any skill level.
- Focused on empowering readers with confidence and knowledge through easy-to-follow instructions and hands-on techniques.
- Passionate about building a community where makers can share, learn, and grow together in the world of woodworking.
Education History
University of Craft and Design – Bachelor of Fine Arts (BFA) in Woodworking and Furniture Design
Woodworking Apprenticeships – Gained extensive hands-on experience through various workshops and mentorships with seasoned craftsmen, refining carpentry and furniture-making skills.
Expertise
- DIY woodworking, carpentry, furniture making, and home décor projects.
- Creating clear, accessible tutorials and guides for beginner to advanced woodworkers.
- Helping readers experience the satisfaction and fulfillment of turning raw materials into stunning finished products.