
Are you tired of scrubbing your acrylic bathtub every time you take a shower? Do you want to keep your bathtub looking sparkling clean without using harsh chemicals? How to clean acrylic bathtub may seem like a daunting task, but with the right techniques, it can be an easy and quick process.
Cleaning an acrylic bathtub is essential for its shine, durability, and hygienic condition. Acrylic bathtubs are popular due to their lightweight nature and smooth surface, but they can be prone to scratches and discoloration if not cared for properly. By using the proper techniques and cleaning products, you can easily remove dirt, soap scum, and stains without damaging the surface.
This guide will walk you through simple steps to keep your acrylic bathtub looking as good as new.
What Are the Benefits of Cleaning Your Acrylic Bathtub Regularly?
Regular cleaning of your acrylic bathtub offers several benefits, including:
- Maintaining Its Shine: Over time, dirt and grime can build up on the surface of your acrylic bathtub, making it appear dull and lackluster. Regularly cleaning it can remove these impurities and restore its shine.
- Ensuring Durability: Acrylic bathtubs are designed to last for many years but require proper care to maintain their durability. By keeping it clean, you can prevent damage caused by soap scum buildup or harsh chemicals.
- Promoting Hygiene: The bathroom is where germs thrive, and your bathtub is no exception. Regularly cleaning your acrylic bathtub ensures that you and your family bathe in a clean and hygienic environment.
- Preventing Stains: Acrylic bathtubs are susceptible to staining, especially if not properly cleaned. By regularly wiping down your bathtub, you can prevent discoloration and maintain its pristine appearance.
What Will You Need?
To effectively clean your acrylic bathtub, you will need some basic supplies such as:
- A sponge or soft cloth
- Mild dish soap or a non-abrasive cleaner specifically designed for acrylic surfaces.
- Baking soda
- White vinegar
- Microfiber towels
Once you have gathered your supplies, you can begin the cleaning process.
8 Easy Steps on How to Clean Acrylic Bathtub
Step 1. Rinse the Tub
Begin by thoroughly rinsing the bathtub with warm water. Use the showerhead or a bucket to splash water over the entire surface of the tub. This step is crucial as it helps remove loose dirt, hair, and soap residue, making it easier to target deeper stains and buildup in the following steps. Ensure that all areas are damp, as this will prepare the surface for the cleaning products you will apply next. Rinsing also prevents dry debris from scratching the acrylic surface during scrubbing.
Step 2: Apply Cleaning Solution
Select a non-abrasive cleaner suitable for your bathtub’s material—acrylic, porcelain, or fiberglass. Spray or evenly apply the cleaner across the entire surface, focusing on areas with noticeable stains or soap scum buildup. Allow the solution to sit for 5–10 minutes to break down the grime effectively. During this time, the cleaner will loosen any residue, making scrubbing easier and more efficient. Make sure to follow the product’s instructions for optimal results.

Step 3: Scrub the Surface
Gently scrub the bathtub’s surface using a soft-bristle brush, sponge, or non-scratch scrub pad. Focus on heavily soiled areas and ensure you reach corners and edges, as grime tends to accumulate in these spots. Use circular motions to lift dirt without damaging the material. If needed, reapply a small amount of cleaner to stubborn stains and continue scrubbing until the surface is clean.
Step 4: Rinse Thoroughly
Once the scrubbing is complete, rinse the bathtub thoroughly with warm water to wash away the cleaner and loosened dirt. Use a detachable showerhead if available, or carefully pour water using a container to ensure all traces of cleaner are removed. Pay special attention to crevices and corners where residue might remain. Inspect the surface to confirm it is clean and free of leftover cleaning solution.

Step 5: Dry the Bathtub
After rinsing, use a clean towel or microfiber cloth to dry the bathtub’s surface. Start with the edges and corners, as water often pools in these areas. Drying helps prevent water spots, streaks, and the buildup of mineral deposits, especially in areas with hard water. It also ensures that the bathtub is ready for use and maintains its polished appearance.
If your bathtub is made of a material prone to staining, such as certain types of stone or metal, thorough drying is imperative to preserve its finish. Take a moment to inspect the tub for any leftover streaks or spots, giving them extra attention if needed.
Step 6: Regular Maintenance and Deep Cleaning
Regular maintenance and deep cleaning are essential to keep your bathtub in pristine condition. Plan to clean your bathtub thoroughly at least once a week to remove soap scum, body oils, and any accumulated grime. Use a non-abrasive cleaner suited to your tub’s material to avoid scratches or damage.
Consider a more intensive solution for deep cleaning, like a paste made from baking soda and water or a specially formulated cleaner for tough stains. Always rinse thoroughly after cleaning to remove any residue. By incorporating these practices, you’ll prolong the life of your bathtub and maintain its polished appearance.
Step 7: Use Natural Cleaning Products
Natural cleaning products are excellent for maintaining your bathtub and the environment. Many conventional cleaners contain harsh chemicals that can irritate the skin, harm the respiratory system, or pollute water systems. Opting for natural alternatives helps minimize these risks while still effectively cleaning your tub.
Ingredients like white vinegar, baking soda, and lemon juice are powerful yet gentle on most surfaces, making them ideal for regular use. White vinegar, for example, can be used to dissolve soap scum and mineral deposits, while baking soda works well to scrub away grime without scratching.
Lemon juice cleans and leaves a fresh, natural scent in your bathroom. Furthermore, these natural ingredients are often more affordable and readily available than commercial cleaners, making them a practical and eco-friendly option.
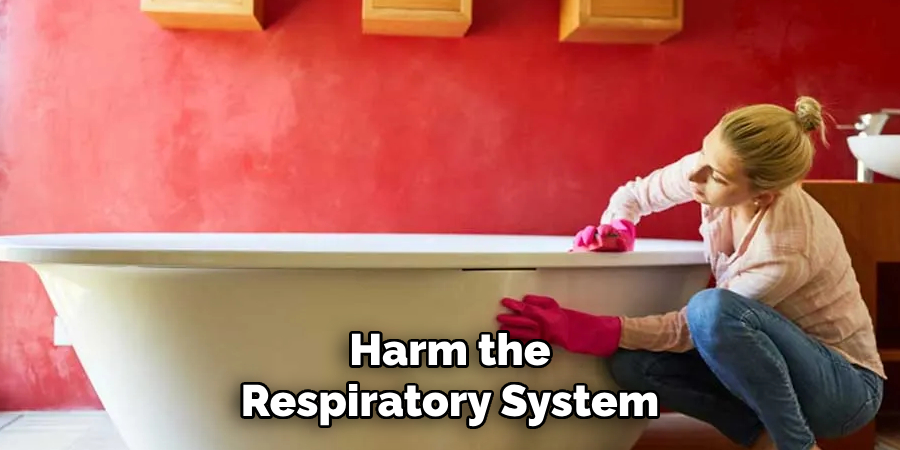
Step 8: Keep Your Bathroom Well-Ventilated
It’s essential to keep your bathroom well-ventilated while cleaning to ensure proper air circulation and prevent any buildup of fumes from cleaning products. Open a window or turn on an exhaust fan to allow fresh and old air out.
In addition, make sure to read the labels on your cleaning products carefully and follow all safety precautions. Some chemicals may require special ventilation or protective gear, such as gloves or masks, when using them.
By following these tips, you can keep your bathroom clean and safe for you and your family.
5 Things You Should Avoid
- Using Abrasive Cleaners: Harsh, abrasive cleaners like scouring powders or rough scrubbing pads can scratch the surface of your acrylic bathtub. Stick to non-abrasive cleaning solutions and soft sponges or cloths to preserve its smooth finish.
- Applying Harsh Chemicals: Avoid heavy-duty chemicals such as bleach, acetone, or ammonia-based products. These substances can cause discoloration or weaken the acrylic material over time.
- Using Metal Tools for Scrubbing: Metal brushes or scrapers should never be used on an acrylic tub. They can leave deep scratches or damage the protective surface, reducing the bathtub’s lifespan.
- Ignoring Manufacturer Instructions: Skipping the cleaning instructions provided by the bathtub manufacturer can lead to improper care. Always follow the guidelines to ensure you’re using appropriate products and methods.
- Leaving Stains Unattended: Allowing stains or grime to sit for an extended period can make them harder to remove and may lead to permanent discoloration. Clean any spots promptly with gentle cleaners to maintain the bathtub’s pristine appearance.
Does Bleach Damage Acrylic?
Bleach is a standard household cleaning product used to disinfect and remove tough stains from bathrooms. However, using bleach may not be the best choice when it comes to acrylic bathtubs.
Acrylic is a plastic material commonly used in bathtubs due to its lightweight and durable properties. It also has a glossy finish that gives bathtubs a sleek and modern look. However, this material is susceptible to damage from harsh chemicals like bleach.
Bleach contains potent oxidizing agents that can break down the chemical bonds in acrylic, causing it to weaken and become brittle over time. This can lead to discoloration, cracks, and even leaks in the bathtub.
To prevent damage to your acrylic bathtub, it is recommended to avoid using bleach or other abrasive cleaning products. Instead, mild soap and water are sufficient for regular cleaning. A mixture of white vinegar and baking soda can be used as a natural alternative for tougher stains.

Conclusion
To maintain the longevity and appearance of your acrylic bathtub, it is essential to use gentle cleaning methods and avoid harsh chemicals.
Regularly cleaning with mild soap and water will prevent the buildup of grime and stains, while natural alternatives like a vinegar and baking soda mixture can tackle tougher spots effectively. By adhering to these guidelines, you can preserve the quality and shine of your acrylic bathtub for years.
Hopefully, this guide on how to clean acrylic bathtub has provided you with the necessary steps and tips to keep your acrylic bathtub in pristine condition.
About the Author
Adrian Green is a passionate woodworking enthusiast who has dedicated his life to the craft of woodworking. From his early days working alongside his father in the family woodworking shop, Adrian has honed his skills and developed a deep love for creating beautiful, functional pieces with his hands. As the voice behind The Woodenify Blog, he shares his knowledge, tips, and inspiration with fellow woodworkers of all skill levels, helping them build confidence in their abilities while learning new techniques.
Professional Focus
- Specializes in DIY woodworking projects, from furniture making to home décor.
- Provides step-by-step guides, tips, and practical tutorials for woodworkers at any skill level.
- Focused on empowering readers with confidence and knowledge through easy-to-follow instructions and hands-on techniques.
- Passionate about building a community where makers can share, learn, and grow together in the world of woodworking.
Education History
University of Craft and Design – Bachelor of Fine Arts (BFA) in Woodworking and Furniture Design
Woodworking Apprenticeships – Gained extensive hands-on experience through various workshops and mentorships with seasoned craftsmen, refining carpentry and furniture-making skills.
Expertise
- DIY woodworking, carpentry, furniture making, and home décor projects.
- Creating clear, accessible tutorials and guides for beginner to advanced woodworkers.
- Helping readers experience the satisfaction and fulfillment of turning raw materials into stunning finished products.