
Changing a water filter is an essential part of maintaining clean and safe drinking water in your home. Over time, filters can become clogged with impurities, reducing their effectiveness and the quality of your water. Knowing how to replace your water filter properly ensures that your filtration system continues to operate efficiently and provides you with fresh, purified water.
This guide on how to change water filter will walk you through the simple steps to change your water filter with ease.
Safety Precautions and Preparation
Before you begin replacing your water filter, it is important to take a few safety precautions and prepare the necessary tools to ensure a smooth process. Start by turning off the water supply to prevent any leaks or spills while working. If your filtration system includes an electric component, make sure to unplug it to avoid the risk of electric shock. Gather all the tools you might need, such as a wrench, bucket, and a towel to catch any excess water during the replacement.
Finally, consult the user manual for your specific filtration system to confirm the correct filter model and replacement instructions. Proper preparation will help make the process efficient and trouble-free.
Tools and Materials Needed
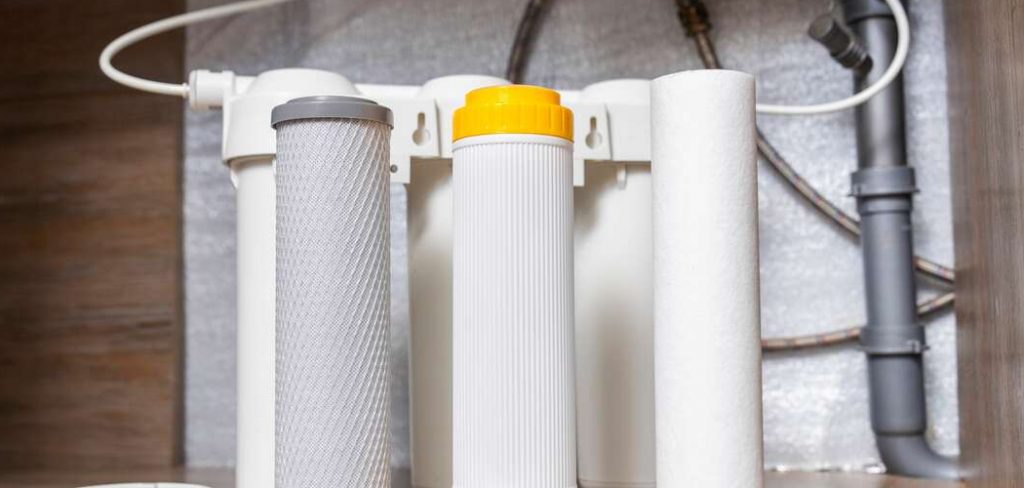
- Replacement Water Filter (Compatible Model)
- Filter Wrench (if Required)
- Bucket or Towel (to Catch Drips)
- Gloves (Optional)
5 Simple Step-by-Step Guides on How to Change Water Filter
Step 1: Shut Off the Water Supply
Before starting the replacement process, locate the water supply valve connected to your filtration system. Turn the valve clockwise to shut off the water flow. This step is crucial to prevent water spillage during the filter change.
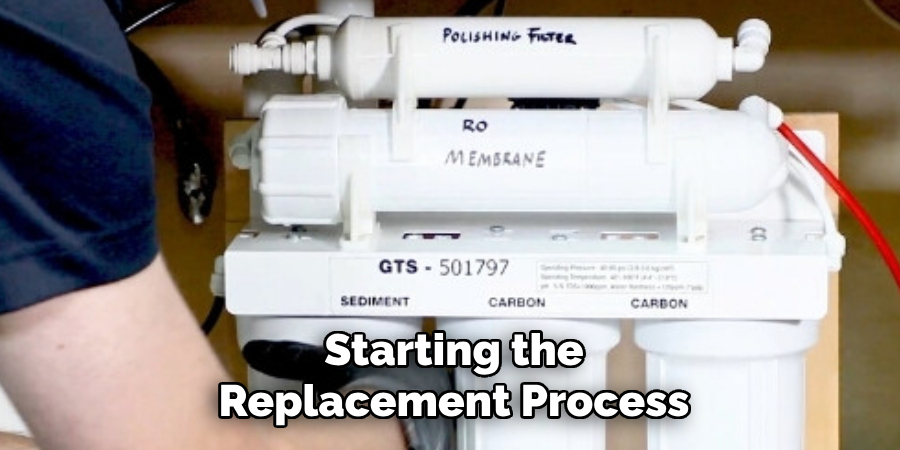
If you’re unsure where the valve is, refer to your system’s user manual for guidance. Once the water is turned off, open a nearby faucet to relieve any pressure in the system.
Step 2: Remove the Old Filter
Next, remove the old filter by turning it counterclockwise. Some filters may have a twist-on design, while others may require you to push and pull to release them. Be sure to follow the specific instructions for your system.
After removing the filter, inspect it for any signs of wear or damage. If the filter looks dirty or clogged, it’s definitely time for a replacement.
Step 3: Clean and Prep the Filter Housing
Before installing the new filter, take a moment to clean the filter housing. Use warm, soapy water and a soft cloth or sponge to remove any dirt, debris, or residue that may have accumulated. Rinse the housing thoroughly to ensure no soap remains, as this could affect the quality of your water.
Once cleaned, inspect the O-ring or gasket for cracks or wear. If it appears damaged, replace it to prevent leaks. Dry the housing completely with a clean towel before proceeding.
Step 4: Install the New Filter
Carefully remove the new filter from its packaging, ensuring it remains clean and free from contaminants. Align the filter with the housing, following any specific orientation indicated by the manufacturer.
Insert the filter firmly into place, making sure it is seated correctly. If your system has a central post or guide, ensure the filter fits securely onto it. Once the filter is properly installed, double-check that it is aligned correctly to avoid any issues during use.
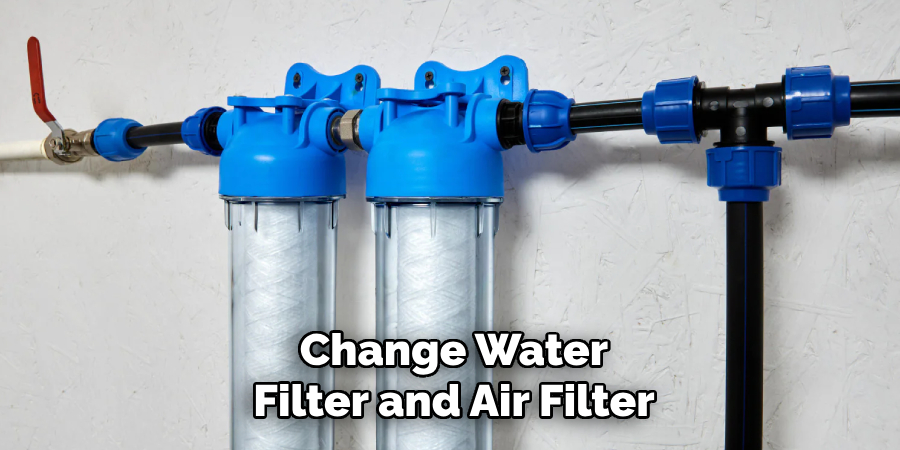
Step 5: Reassemble and Test
Put everything back together in reverse order, following the same steps you took to disassemble. Once everything is reassembled, turn on your system and test that it is working properly. You may notice improved airflow and overall performance with a new air filter.
Regularly replacing your air filters is an important part of maintaining a healthy and efficient HVAC system. It not only helps keep your indoor air clean, but it also prolongs the lifespan of your equipment. Remember to check your air filters every 1-3 months and replace them when they are dirty.
Following these steps on how to change water filter and air filter will ensure that your HVAC system is running smoothly and efficiently. It’s a simple task that can make a big difference in the overall comfort and health of your home.
Additional Tips for Maintaining Your HVAC System
In addition to regularly replacing your air filters, there are other important steps you can take to maintain your HVAC system:
Clean the Outdoor Unit
Over time, debris such as leaves and dirt can accumulate on the exterior of your outdoor unit. Use a garden hose or a soft cloth to gently clean off any buildup.
Schedule Annual Maintenance
A professional HVAC technician can perform routine maintenance on your system every year to ensure it is running efficiently and catch any potential issues before they become major problems. This can also help extend the lifespan of your HVAC system.
Change Air Filters
Regularly changing your air filters is an important part of HVAC maintenance. Clogged or dirty filters can restrict airflow and put strain on your system, causing it to work harder and use more energy. This can also lead to poor indoor air quality.
Use a Programmable Thermostat
Investing in a programmable thermostat allows you to set different temperatures for different times of the day, helping you save energy and money. You can program it to turn off when you’re not home or adjust the temperature when you are sleeping.
Keep Vents Clear
Make sure all vents throughout your home are clear and unobstructed by furniture or other objects. Blocked vents can restrict airflow and make your heating or cooling system work harder than necessary
Replace Air Filters Regularly
Replacing your air filters on a regular basis ensures that your heating and cooling system is running efficiently. Dirty filters can clog up and make your system work harder, resulting in higher energy bills.
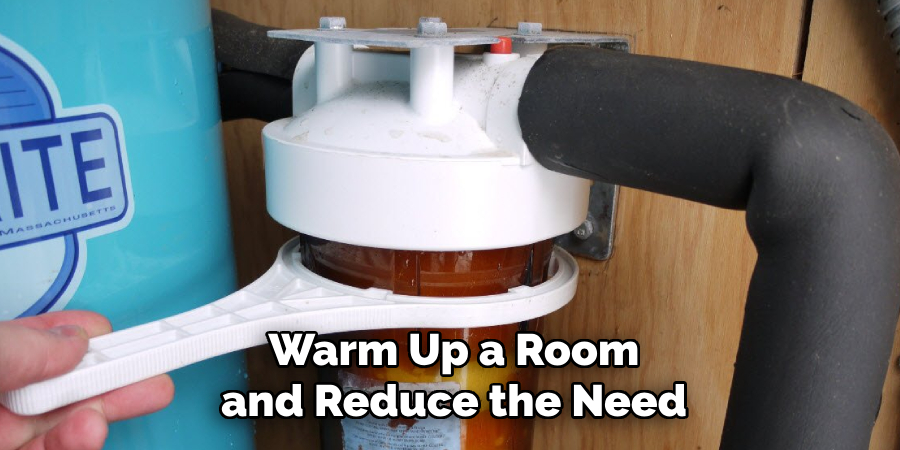
Use Natural Sunlight
Take advantage of natural sunlight by opening up blinds or curtains during the day. This can help warm up a room and reduce the need for artificial lighting, saving you both energy and money.
Common Mistakes to Avoid
Ignoring Regular Maintenance
One of the most common mistakes is neglecting the regular maintenance of your heating and cooling systems. Failing to clean or inspect them can lead to inefficient operation, breakdowns, and higher energy costs.
Overlooking Air Leaks
Air leaks around windows, doors, and vents can significantly impact your home’s energy efficiency. Not sealing these leaks means your heating or cooling systems have to work harder to maintain a comfortable temperature, wasting energy in the process.
Setting the Thermostat Too High or Low
Setting your thermostat too high in the winter or too low in the summer can increase energy consumption unnecessarily. Instead, try to keep it at an optimal and consistent temperature to save energy and reduce costs.
Relying Too Much on Artificial Lighting
Using artificial lighting during the day when natural sunlight is available is a missed opportunity to save energy. Ensure your blinds or curtains are open during daylight hours to make the most out of natural light.

When to Call a Professional?
While many energy-saving practices can be implemented independently, there are times when calling a professional is the best course of action. If you notice irregularities in your energy bills, such as sudden spikes without a clear reason, it may indicate inefficiencies or issues with your HVAC system, insulation, or appliances.
Similarly, if your home struggles to maintain a consistent temperature or if you suspect drafts, a professional energy audit can help identify problem areas and suggest tailored solutions. Professionals can also assess your home’s setup for opportunities like upgrading to energy-efficient appliances or optimizing insulation for better performance. Seeking expert advice ensures you are taking the most effective steps to save energy in the long term.
Frequently Asked Questions
Q: How Can I Save Energy at Home?
A: There are many ways to save energy at home, such as turning off lights when not in use, unplugging electronics when not in use, using energy-efficient light bulbs and appliances, and adjusting thermostat settings. Conducting a home energy audit can also help identify areas for improvement.
Q: What is a Home Energy Audit?
A: A home energy audit is an assessment of your home’s energy usage and efficiency. This typically involves a professional inspecting your home’s insulation, air sealing, heating and cooling systems, lighting, and appliances to determine where improvements can be made to save energy and reduce utility costs.
Q: Are There Any Incentives for Making Energy-efficient Improvements?
A: Yes, there are various incentives available for making energy-efficient upgrades to your home. These can include tax credits, rebates, and financing options offered by government agencies or utility companies. It’s important to research and take advantage of these incentives when planning your home energy audit and upgrades.
Conclusion
Improving your home’s energy efficiency is a smart investment that benefits both your wallet and the environment. Conducting a home energy audit is the first step toward identifying opportunities to reduce energy waste and lower utility bills.
By taking advantage of available incentives and implementing energy-efficient upgrades, you can achieve long-term savings, increase the comfort of your home, and contribute to a more sustainable future. Thanks for reading this article on how to change water filter. Creating a water filter DIY system at home is a practical way to ensure clean drinking water using affordable and accessible materials.
About the Author
Adrian Green is a passionate woodworking enthusiast who has dedicated his life to the craft of woodworking. From his early days working alongside his father in the family woodworking shop, Adrian has honed his skills and developed a deep love for creating beautiful, functional pieces with his hands. As the voice behind The Woodenify Blog, he shares his knowledge, tips, and inspiration with fellow woodworkers of all skill levels, helping them build confidence in their abilities while learning new techniques.
Professional Focus
- Specializes in DIY woodworking projects, from furniture making to home décor.
- Provides step-by-step guides, tips, and practical tutorials for woodworkers at any skill level.
- Focused on empowering readers with confidence and knowledge through easy-to-follow instructions and hands-on techniques.
- Passionate about building a community where makers can share, learn, and grow together in the world of woodworking.
Education History
University of Craft and Design – Bachelor of Fine Arts (BFA) in Woodworking and Furniture Design
Woodworking Apprenticeships – Gained extensive hands-on experience through various workshops and mentorships with seasoned craftsmen, refining carpentry and furniture-making skills.
Expertise
- DIY woodworking, carpentry, furniture making, and home décor projects.
- Creating clear, accessible tutorials and guides for beginner to advanced woodworkers.
- Helping readers experience the satisfaction and fulfillment of turning raw materials into stunning finished products.