
When traveling in your RV, there might be occasions where you need to bypass the water heater. This process is often necessary when winterizing your RV to prevent damage from freezing temperatures or when performing maintenance on the water heater itself. Understanding how to bypass water heater in rv properly can save you time and prevent potential issues in your RV’s plumbing system.
Why Bypassing an RV Water Heater is Important
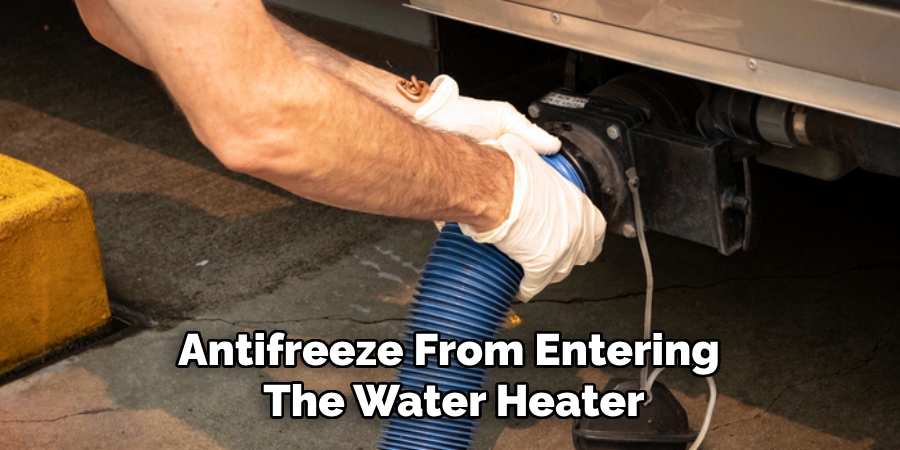
Bypassing the water heater in your RV serves several important purposes, particularly during winterization and maintenance. When preparing your RV for winter, bypassing the water heater prevents antifreeze from entering the tank, saving you money and ensuring effective winterization. Antifreeze can be expensive, and filling the entire water heater tank is unnecessary when a bypass is in place.
Additionally, bypassing the water heater allows you to isolate it from the rest of the plumbing system when performing repairs or cleaning, reducing the risk of damaging the tank or its components. Overall, understanding the importance of bypassing ensures the longevity and efficiency of your RV’s water system.
Understanding the RV Water Heater Bypass System
The RV water heater bypass system is a simple yet essential setup that allows the water flow to circumvent the water heater tank. Most modern RVs come equipped with a built-in bypass system, usually consisting of bypass valves and additional plumbing lines. These valves are typically located near the rear of the water heater, accessible from inside a storage compartment or behind a panel. The bypass system generally includes three valves: one that controls the water entering the heater, one that controls the water exiting it, and a third that redirects water through a bypass line when the system is engaged.
Knowing how to properly operate these valves is crucial to ensure smooth bypassing, whether for winterization or maintenance purposes. Understanding the layout and function of your specific bypass system is the first step toward effectively managing your RV’s water flow.
Tools and Materials Needed
To successfully bypass your RV water heater, you will need a few tools and materials to carry out the process effectively. Here is a list of the essentials:
- Flathead or Phillips Screwdriver – Useful for accessing panels or removing screws around the water heater area.
- Adjustable Wrench – Handy for tightening or loosening any fittings or connections.
- RV Antifreeze (if winterizing) – A non-toxic antifreeze specifically designed for RVs to protect the plumbing system during freezing temperatures.
- Bypass Valve Kit (if not pre-installed) – Includes the necessary valves and fittings to create a bypass system in RVs without one.
- Plumbing Tape (Teflon Tape) – Ensures secure and leak-free connections on valve fittings or pipe threads.
- Rags or Towels – Useful for cleaning up any water spills during the bypass process.
Having these tools and materials ready before starting ensures a smooth and efficient bypass procedure, whether for winterization or regular maintenance. Always refer to your RV’s user manual for additional guidance specific to your model.
10 Methods How to Bypass Water Heater in Rv
1. Understanding the Purpose of Bypassing the Water Heater
Bypassing the water heater in an RV is a crucial step, especially when preparing the vehicle for winterization or maintenance. The process prevents antifreeze from entering the water heater, which can save costs and reduce cleanup efforts. It also helps to isolate the heater when repairs or replacements are needed. Understanding why this step is necessary will help ensure that the process is done correctly without causing damage to the system.
2. Identifying the Type of Bypass System in Your RV
Most modern RVs come equipped with a built-in water heater bypass system, while older models may require a manual setup. The three main types of bypass systems include single-valve, two-valve, and three-valve systems. Identifying which system your RV has will determine how you should approach the bypass process. If your RV does not have a factory-installed bypass, you may need to install one before proceeding with winterization or maintenance.
3. Locating the Water Heater and Its Plumbing Connections
Before attempting to bypass the water heater, locate it within you RV. The water heater is typically found on the exterior of the RV behind a vented panel. Inside, you will see the cold water inlet, hot water outlet, and bypass valve(s). The positioning of these connections is important, as you will need to adjust them properly to redirect water flow away from the heater.
4. Turning Off the Water Supply and Power to the Heater
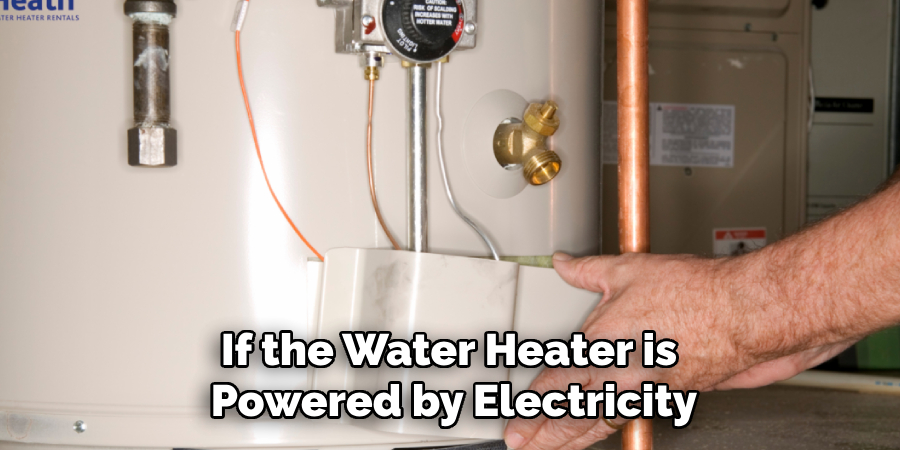
For safety and effectiveness, turn off the RV’s water supply before making any adjustments. If the water heater is powered by electricity or propane, ensure that the power or gas supply is also turned off to prevent accidental activation during the bypass process. This step is especially critical if the heater has been in use recently, as it can still contain hot water.
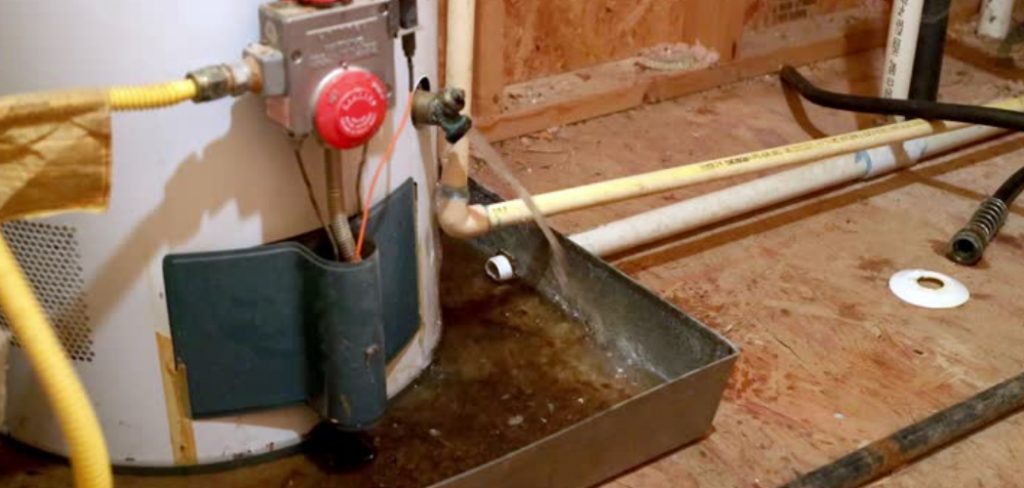
5. Draining the Water Heater Before Bypassing
To avoid any pressure buildup or water spillage, drain the water heater before initiating the bypass. Locate the drain valve or anode rod at the bottom of the unit and release the remaining water. Opening a nearby faucet can help relieve pressure and speed up the draining process. Ensuring the heater is empty will make bypassing smoother and prevent residual water from interfering with winterization efforts.
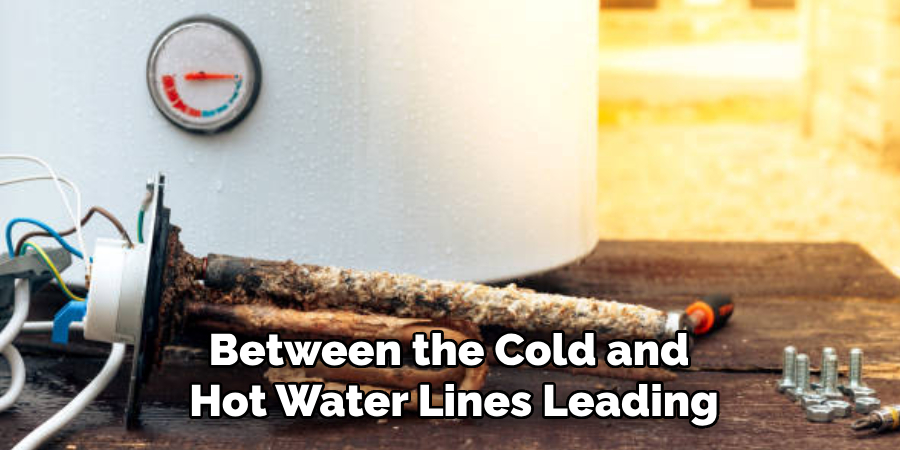
6. Activating the Bypass Valves in a Single-Valve System
If your RV has a single-valve bypass system, the process is straightforward. Locate the single bypass valve, typically found between the cold and hot water lines leading to and from the heater. Turn this valve to the bypass position, which redirects water flow away from the heater and directly through the RV’s plumbing system. Check the manufacturer’s manual for specific instructions if needed.
7. Adjusting the Valves in a Two-Valve Bypass System
For a two-valve system, you will need to close the cold water inlet valve and open the bypass valve. This configuration prevents water from entering the heater while allowing it to flow freely through the main water lines. Ensure that the hot water outlet valve remains open to maintain proper circulation. This method is commonly found in mid-range RV models and provides an efficient way to bypass the heater.
8. Using a Three-Valve Bypass System for Maximum Control
A three-valve bypass system provides the most control over water flow. To engage the bypass, turn off the cold water inlet valve, turn off the hot water outlet valve, and then open the bypass valve. This setup completely isolates the water heater, ensuring that no water or antifreeze enters it. The three-valve system is often used in larger or luxury RVs that require precise water management.
9. Installing an Aftermarket Water Heater Bypass Kit
If your RV does not come with a built-in bypass system, installing an aftermarket bypass kit is a viable option. These kits typically include valves and tubing that allow for manual control of water flow around the heater. Follow the manufacturer’s instructions to connect the kit properly to your existing plumbing. Once installed, the bypass can be activated easily for future winterizations or maintenance tasks.
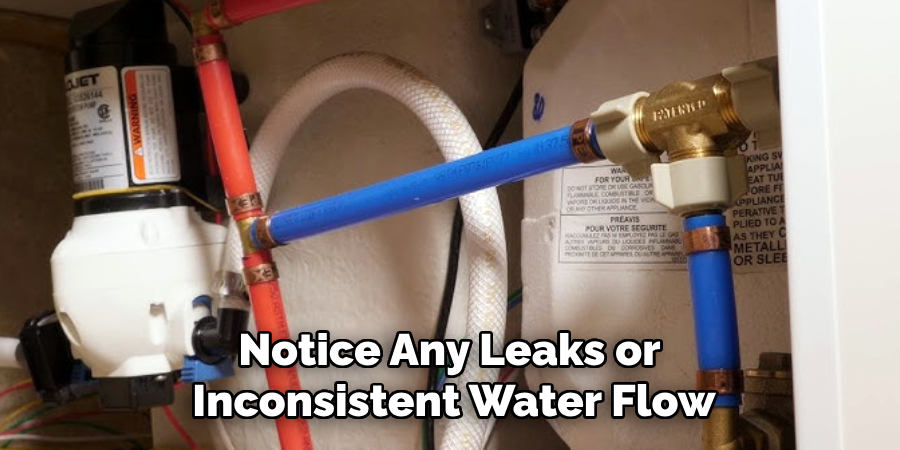
10. Testing the System to Ensure Proper Bypass Operation
After adjusting the bypass valves, turn the water supply back on and check that the water flows through the RV’s plumbing system without entering the heater. Run both hot and cold faucets to confirm that the bypass is functioning correctly. If you notice any leaks or inconsistent water flow, double-check the valve positions and make adjustments as necessary. Ensuring a proper bypass setup will help protect your RV’s water system and improve maintenance efficiency.
Things to Consider When Bypassing a Water Heater in Your RV
When bypassing your RV’s water heater, there are several factors to take into account to ensure a safe and successful process. First, always verify that the heater is completely powered down and drained before making any adjustments to avoid potential hazards. Next, ensure you understand the specific type of bypass system installed in your RV, as the steps will vary depending on whether it is a single-valve, two-valve, or three-valve system. Using the correct tools and referring to your RV’s user manual can prevent accidental damage to the plumbing.
Additionally, consider the age and condition of your RV’s plumbing system—older systems may require more careful handling or replacement parts. Finally, always test the bypass setup once completed to confirm it functions correctly, avoiding complications during subsequent winterization or maintenance procedures.
Conclusion
Properly bypassing the water heater in your RV is an essential step for winterization and routine maintenance. By understanding your RV’s specific bypass system and following the outlined steps, you can efficiently protect your water heater and plumbing system from damage. Always prioritize safety by ensuring the heater is powered down, drained, and the appropriate tools are used during the process. Thanks for reading, and we hope this has given you some inspiration on how to bypass water heater in rv!
About the Author
Adrian Green is a passionate woodworking enthusiast who has dedicated his life to the craft of woodworking. From his early days working alongside his father in the family woodworking shop, Adrian has honed his skills and developed a deep love for creating beautiful, functional pieces with his hands. As the voice behind The Woodenify Blog, he shares his knowledge, tips, and inspiration with fellow woodworkers of all skill levels, helping them build confidence in their abilities while learning new techniques.
Professional Focus
- Specializes in DIY woodworking projects, from furniture making to home décor.
- Provides step-by-step guides, tips, and practical tutorials for woodworkers at any skill level.
- Focused on empowering readers with confidence and knowledge through easy-to-follow instructions and hands-on techniques.
- Passionate about building a community where makers can share, learn, and grow together in the world of woodworking.
Education History
University of Craft and Design – Bachelor of Fine Arts (BFA) in Woodworking and Furniture Design
Woodworking Apprenticeships – Gained extensive hands-on experience through various workshops and mentorships with seasoned craftsmen, refining carpentry and furniture-making skills.
Expertise
- DIY woodworking, carpentry, furniture making, and home décor projects.
- Creating clear, accessible tutorials and guides for beginner to advanced woodworkers.
- Helping readers experience the satisfaction and fulfillment of turning raw materials into stunning finished products.