
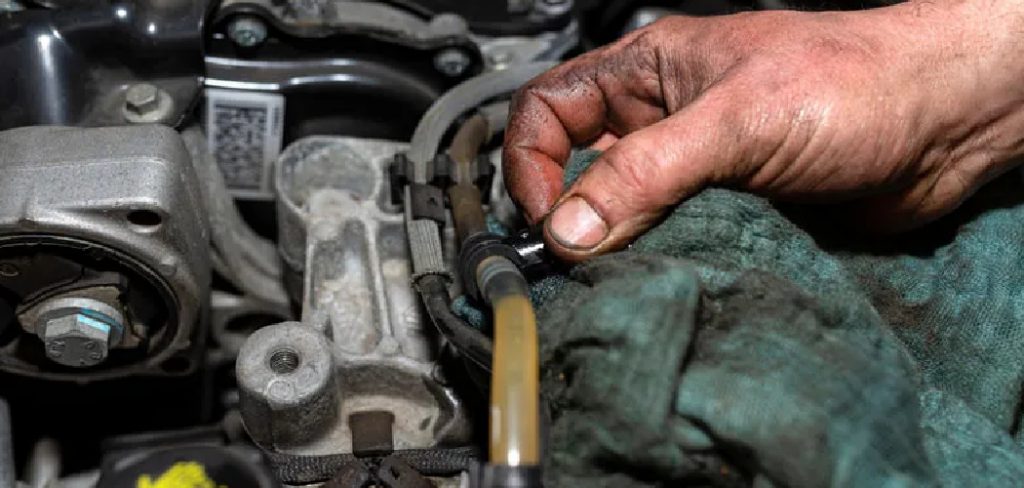
Are you having problems with your car because of air bubbles in the gas line? One solution to this problem is to bleed the gas line.
Bleeding a gas line is essential to ensure the safe and efficient operation of gas-powered appliances. This procedure involves releasing trapped air from the gas line to allow a steady flow of gas through the system. Air in the line can cause sputtering, reduced performance, or igniting failure. Properly bleeding a gas line prevents these problems and minimizes safety risks associated with improper gas flow.
Before beginning, it is crucial to understand the necessary steps, tools, and precautions required to perform the task safely and effectively. Let’s dive into the details of how to bleed a gas line.
What Are the Benefits of Bleeding a Gas Line?
Bleeding a gas line has several benefits, making it an essential maintenance task for any gas-powered appliance. Here are some of the main advantages:
- Improves Performance: Air bubbles in the gas line can disrupt fuel flow and cause issues like sputtering or reduced power output. Bleeding the line ensures a steady flow of gas, leading to improved performance.
- Ensures Safety: Gas leaks due to trapped air in the line can be hazardous, causing fire or explosion risks. By bleeding the line, you reduce these safety concerns.
- Saves Money: A properly bled gas line is more efficient and reduces fuel waste, saving you money on your gas bill.
Once you have understood the benefits, let’s look at the step-by-step process of bleeding a gas line.
What Will You Need?
To bleed a gas line, you will need the following tools:
- Wrenches: Depending on your appliance’s make and model, you may need an adjustable wrench or a wrench of a specific size to loosen and tighten the necessary fittings.
- Rags: Have some old rags handy to clean up any spills or mess during the process.
- Container: You will also need a container to collect any excess fuel or air that comes out of the line while bleeding it.
10 Easy Steps on How to Bleed a Gas Line
Step 1: Turn Off the Gas Supply
Before starting bleeding, ensure the gas supply is completely turned off. This critical safety step prevents gas leaks or accidental ignition during the procedure. Locate the main gas valve, which is typically found near your gas meter or appliance, and turn it to the “off” position. Double-check that the valve is fully closed by attempting to turn on the appliance; no gas should flow. Taking this precaution reduces the risks of exposure to gas and ensures a safer working environment. Remember also to inform anyone in your household of the process to avoid unintentional interference.
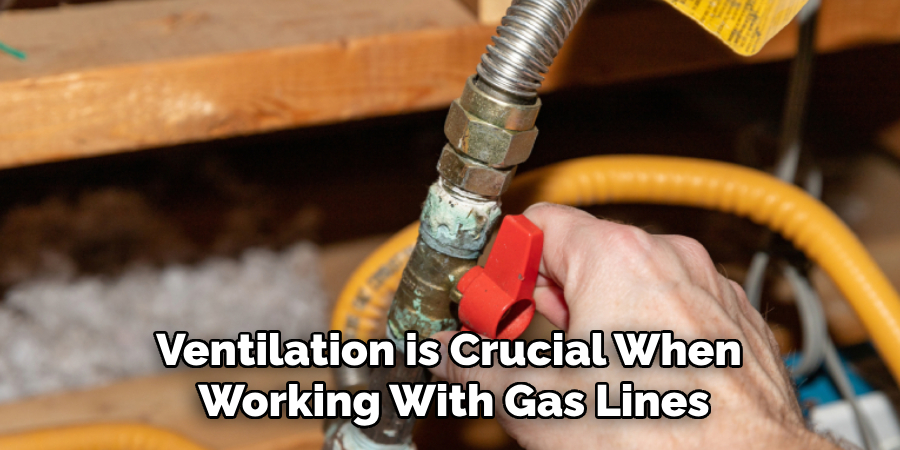
Step 2: Ventilate the Area
Proper ventilation is essential when working with a gas line to prevent gas buildup in case of accidental leaks—open windows and doors where you will be working to allow fresh air to circulate. If working in an enclosed space, consider using a fan to create airflow and ensure adequate ventilation. This step further reduces the risk of inhaling gas fumes and helps to maintain a safe environment while bleeding the gas line.
Step 3: Gather Necessary Tools and Equipment
Before proceeding, ensure you have all the tools and equipment to bleed the gas line safely. Commonly required items include an adjustable wrench, a bucket or container to catch any excess gas or liquids, a soapy water solution to check for leaks, and protective gloves. Having everything prepared in advance ensures a smoother process and minimizes the need to pause mid-procedure. Additionally, confirm that any tools you use are non-sparking to prevent accidental ignition in the presence of gas.
Step 4: Turn Off the Gas Supply
Locate the main gas valve and turn it off before beginning the process of bleeding the gas line. This step is crucial to prevent gas from flowing while you work, reducing the risk of leaks or accidents. Ensure the valve is fully closed by turning it in a clockwise direction. Once the supply is shut off, double-check all connected appliances or systems to confirm they are no longer receiving gas. Taking this precaution helps maintain a safe working environment and is essential for successfully completing the task.
Step 5: Release the Gas in the Line
Locate the bleeder valve on the gas line to release the trapped gas. Place your bucket or container beneath the valve to catch any liquids, and slowly open the valve using the adjustable wrench. Allow the gas to escape gradually, being mindful of any unusual sounds or resistance. Use the soapy water solution to check for leaks by applying it around the valve and observing for bubbles, which indicate escaping gas. Once the gas has been released, close the valve tightly and inspect for any residual leaks to ensure the system is secure before proceeding.

Step 6: Detach the Gas Line
With the gas safely released, you can now detach the gas line. Use the appropriate wrench to loosen the gas line’s fittings to the appliance or system. Turn the wrench in a counterclockwise direction to carefully unscrew the connections. Keep a cloth or rag handy to wipe away any debris or residue that may be present around the fittings. Ensure all connections are completely detached, and inspect the ends of the gas line for any signs of wear or damage. Dispose of any damaged components appropriately and set aside the gas line for later use or replacement. Always handle the gas line cautiously to prevent unnecessary strain or bending during detachment.
Step 7: Seal the Gas Line
After detaching the gas line, sealing the open ends is crucial to prevent contamination or unintended gas exposure. Use approved gas line caps or plugs to seal the ends securely. Ensure the caps or plugs are of the correct size and fit tightly to avoid any gaps. Additionally, consider using a sealant or thread tape specifically designed for gas fittings to enhance the seal’s effectiveness. Once capped, double-check the seals for a snug fit and store the gas line safely away from heat sources or heavy objects until it is ready for reuse or disposal. This step is essential to maintaining safety and cleanliness during the process.

Step 8: Inspect for Gas Leaks
Before proceeding further, inspecting the area for any potential gas leaks is vital to ensure safety. Use a gas leak detector or a soapy water solution to carefully check all fittings, connections, and capped ends of the gas line. Apply the soapy water around the sealed areas and observe for any bubbling, which indicates a leak. If a leak is detected, tighten the fittings further or replace the seal if necessary. This inspection step is critical to prevent hazardous situations and ensures the work area is secure before moving on to the next steps.
Step 9: Keep the Area Well-Ventilated
As you prepare to reconnect the gas line, maintain proper ventilation in the area. Open windows and doors and use fans to circulate fresh air. This step helps to prevent a buildup of gas fumes, reducing any potential risks or hazards during the final stages of bleeding a gas line.
Step 10: Reconnect and Test the Gas Line
With all previous steps completed, it is time to reconnect the gas line. Use an adjustable wrench to carefully attach each fitting back into place in a clockwise direction. Ensure all connections are tight and secure before testing for functionality. Turn on the main gas valve and test your appliance or system by attempting to turn it on and off. Observe for any signs of gas leakage or unusual noises, which may indicate potential issues with the reconnected gas line. Use the soapy water solution to check for leaks and tighten loose fittings if necessary. Once satisfied, close all windows and doors in the area and confirm that your appliance or system is functioning correctly.
By following these steps, you can safely and effectively bleed a gas line in your home or workplace.
5 Things You Should Avoid
- Skipping Safety Precautions: Never start bleeding a gas line without first turning off the main gas supply and ensuring proper ventilation in the area. Failing to follow basic safety measures dramatically increases the risk of gas exposure or accidents.
- Using Open Flames or Sparks Nearby: Avoid using flames, matches, or sparks while working with a gas line. Even a tiny spark can ignite gas in the air, potentially causing fires or explosions.
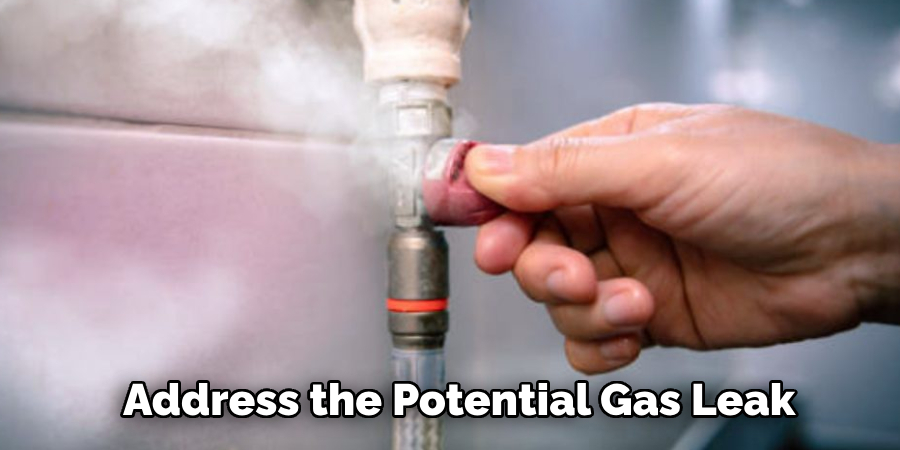
- Ignoring Signs of a Gas Leak: If you notice the gas smell or hear any hissing sounds while working, stop immediately and address the potential gas leak. Ignoring these signs can lead to dangerous situations.
- Overtightening the Connections: While secure fittings are essential, overtightening can damage threads and compromise the integrity of the gas line. Always use moderate pressure and avoid excessive force when reconnecting the line.
- Proceeding Without Proper Tools and Knowledge: Attempting to bleed or repair a gas line without the right tools or understanding of the process can result in mistakes, increasing the likelihood of accidents. If you are unsure or inexperienced, always consult a professional.
Conclusion
How to bleed a gas line is a task that requires careful preparation and attention to safety. By following proper procedures, such as turning off the gas supply, ensuring ventilation, and using appropriate tools, you can minimize risks and complete the process successfully.
Always remain vigilant for signs of gas leaks and avoid common mistakes like overtightening connections or working near open flames. If you feel uncertain or lack experience, seeking help from a licensed professional is always wise.
Prioritizing safety at every step will ensure the job is done effectively and without unnecessary hazards.
About the Author
Adrian Green is a passionate woodworking enthusiast who has dedicated his life to the craft of woodworking. From his early days working alongside his father in the family woodworking shop, Adrian has honed his skills and developed a deep love for creating beautiful, functional pieces with his hands. As the voice behind The Woodenify Blog, he shares his knowledge, tips, and inspiration with fellow woodworkers of all skill levels, helping them build confidence in their abilities while learning new techniques.
Professional Focus
- Specializes in DIY woodworking projects, from furniture making to home décor.
- Provides step-by-step guides, tips, and practical tutorials for woodworkers at any skill level.
- Focused on empowering readers with confidence and knowledge through easy-to-follow instructions and hands-on techniques.
- Passionate about building a community where makers can share, learn, and grow together in the world of woodworking.
Education History
University of Craft and Design – Bachelor of Fine Arts (BFA) in Woodworking and Furniture Design
Woodworking Apprenticeships – Gained extensive hands-on experience through various workshops and mentorships with seasoned craftsmen, refining carpentry and furniture-making skills.
Expertise
- DIY woodworking, carpentry, furniture making, and home décor projects.
- Creating clear, accessible tutorials and guides for beginner to advanced woodworkers.
- Helping readers experience the satisfaction and fulfillment of turning raw materials into stunning finished products.