
Are you having trouble with your water heater? Does it leak or make strange noises? One solution to these problems could be to air-lock your water heater. In this guide, we will explain what an airlock is, the signs that indicate you have one, and how to fix it.
Air locking a water heater is a necessary process that prevents unwanted water flow during maintenance or repairs. This technique is beneficial for replacing components, addressing leaks, or conducting inspections. By creating an air pocket within the system, you can safely isolate the water supply, reducing the risk of damage or accidents.
Whether you are a homeowner or a professional, understanding how to air lock a water heater will ensure a smoother and more efficient procedure.
What Are the Benefits of Air Locking a Water Heater?
Air locking is an essential safety measure that allows you to work on your water heater without worrying about potential hazards. Introducing air into the system creates a barrier between yourself and the water supply, reducing the risk of electrocution or burns.
Moreover, air locking helps preserve your plumbing system by preventing any additional damage caused by further water flow. It also significantly reduces the time and effort required for repairs or maintenance, making it a cost-effective solution in the long run.
What Will You Need?
Before starting the air locking process, ensure you have all the necessary tools and equipment. Here is a list of items you will need:
- A wrench or pliers
- Teflon tape
- A bucket or container
Once you have these items, you are ready to begin the process of air-locking your water heater.
9 Easy Steps on How to Air Lock a Water Heater
Step 1. Turn Off the Water Heater
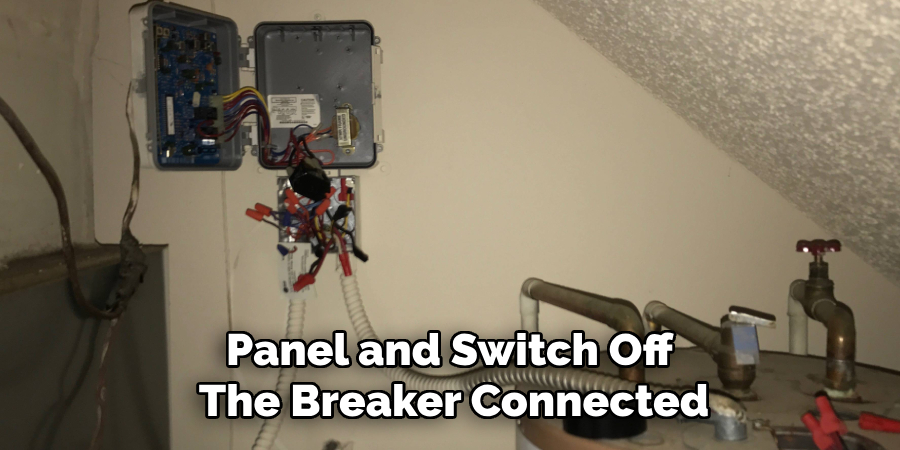
Before initiating the air locking process, ensuring your water heater is completely turned off is crucial. This step is vital for your safety as it eliminates the risk of electrical hazards or burns during the procedure. If you have an electric water heater, locate the circuit breaker panel and switch off the breaker connected to the water heater. For gas water heaters, turn the gas valve to the “OFF” position. Double-check that the power or gas supply has been successfully shut off before moving forward. This precaution prevents unintended accidents and ensures a safe working environment.
Step 2. Shut Off the Water Supply
Locate the main water supply valve connected to your water heater and turn it off completely. This step is essential to prevent water from flowing into the heater during the air-locking process. Typically, the water supply valve can be found near the top of the unit where the cold water line enters. Turn the valve clockwise until it stops, ensuring no water can enter the system. Double-check that the water supply is turned off by testing a nearby faucet; no water should flow if the valve is properly shut.
Step 3. Drain the Water Heater
Attach a garden hose to the drain valve at the water heater’s bottom. Place the other end of the hose in a safe draining area, such as a floor drain or an outdoor space. Open the drain valve to allow the water to flow out of the tank. To speed up the draining process, you can open a hot water faucet in your home to relieve pressure and allow air to enter the tank. Ensure the tank is empty before proceeding to the next step. Remember to handle the water carefully, as it may still be hot.
Step 4. Break the Air Lock
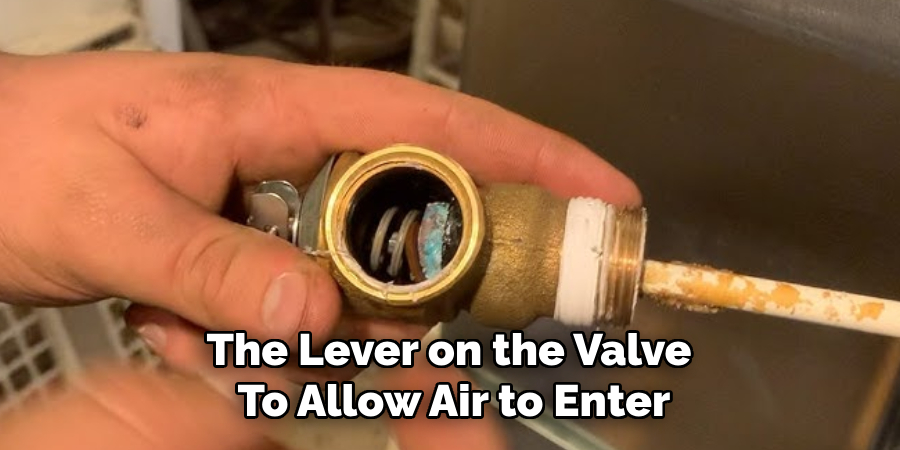
To initiate the air locking process, locate the temperature and pressure relief valve (T&P valve) near the top of the water heater. Carefully lift the lever on the valve to allow air to enter the tank. This will help prevent a vacuum from forming inside the heater, ensuring a smooth airlock. Make sure to perform this step cautiously, as residual pressure or water may present. Once the air is flowing freely into the tank, close the T&P valve by lowering the lever back into its original position.
Step 5. Flush Out Sediment
With the tank fully drained, it’s time to flush out any sediment that may have accumulated at the bottom of the water heater. Attach a garden hose to the drain valve if not already connected, and open the cold water supply to the tank while keeping the drain valve open. This will allow fresh water to enter the tank and dislodge any remaining sediment. Continue flushing until the water flowing out of the hose is clear and debris-free. Once finished, close the drain valve and disconnect the hose carefully.
Step 6. Refill and Check for Leaks
Once the tank is clean and sediment-free, close the drain valve securely and ensure the garden hose is entirely disconnected. Turn on the cold water supply to refill the tank. Open a hot water faucet in your home to allow air to escape as the tank fills. When a steady stream of water flows from the faucet, close it. Finally, check the tank and connections for any signs of leaks. If everything appears secure, turn the power or gas supply back on to restore the water heater to regular operation.
Step 7. Perform Routine Maintenance Checks
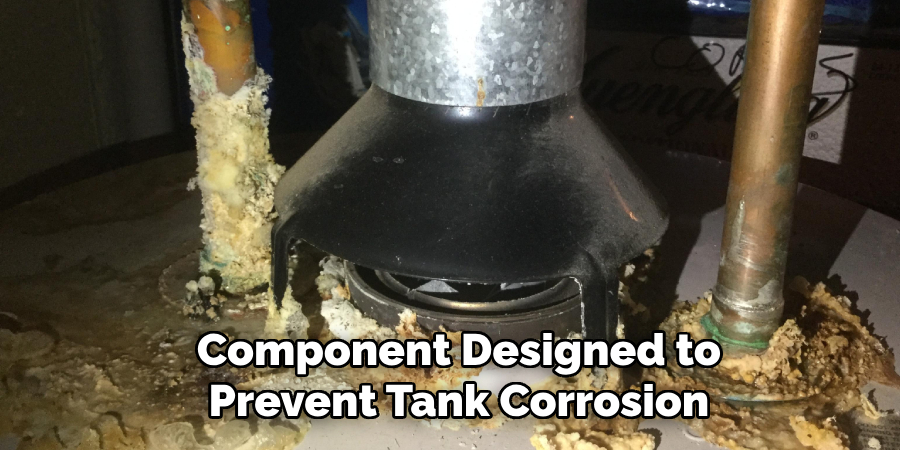
To ensure the longevity and efficiency of your water heater, it’s essential to perform routine maintenance checks. Inspect the anode rod, a component designed to prevent tank corrosion, by unscrewing it from the top of the tank and checking for excessive wear. Replace the rod if it appears significantly corroded or reduced in size. Additionally, verify the proper functioning of the temperature and pressure relief valve by lifting its lever slightly and ensuring water flows out and stops when you release it.
Regularly repeating these maintenance steps will help prolong the life of your water heater and maintain optimal performance.
Step 8. Flush the Tank Annually
To maintain the efficiency of your water heater and minimize sediment buildup, it’s crucial to flush the tank at least once a year. Begin by turning off the power or gas supply to the water heater and shutting off the cold water inlet valve. Attach a garden hose to the drain valve at the tank’s base and direct the other end to a safe drainage area. Open the drain valve and allow the water to flow out, flushing out accumulated sediment.
Once the tank is empty, close the drain valve, remove the hose, and reopen the cold water inlet valve to refill the tank. Finally, the power or gas supply must be restored. This routine step helps prevent inefficiencies and potential damage caused by excessive sediment in the tank.
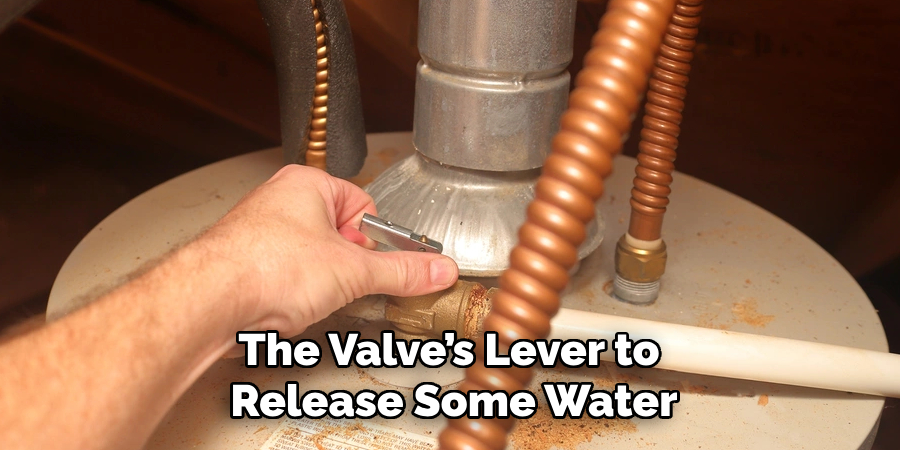
Step 9. Check the Pressure Relief Valve
The pressure relief valve is a critical safety feature on your water heater, designed to release excess pressure and prevent potential damage or explosions. To ensure it functions properly, place a bucket under the discharge pipe connected to the valve. Carefully lift the valve’s lever to release some water; you should see water flow out and stop when you release the lever. If the valve does not release water or continues to leak after testing, it may be faulty and should be replaced immediately.
Regularly checking the pressure relief valve can help maintain the safety and efficiency of your water heater.
By following these steps, you can safely and effectively air-lock your water heater to maintain its optimal performance.
5 Things You Should Avoid
- Skipping the Power Shut-Off: Never attempt to perform maintenance on your water heater without first shutting off the power or gas supply. Working on an active unit can lead to electrical shocks, gas leaks, or injury.
- Forgetting to Turn Off the Water Supply: Ensure the water supply to your water heater is completely turned off before starting the process. Failure to do so can cause water to gush out unexpectedly, leading to potential water damage or flooding.
- Using Improper Tools: Using the correct tools and equipment when performing maintenance on your water heater is essential. Using inadequate or incorrect tools can cause damage to the unit, leading to costly repairs.
- Not Checking for Leaks: Always double-check for leaks around the tank and connections before turning the power or gas supply back on. Neglecting this step can result in water damage and potential hazards.
- Ignoring Routine Maintenance Consistently performing routine maintenance checks and flushing the tank annually is crucial for maintaining the optimal performance of your water heater. Neglecting these steps can lead to inefficiencies, increased energy costs, and potential damage to the unit.
By avoiding these common mistakes, you can safely and effectively air-lock your water heater for optimal performance and longevity.
Conclusion
How to air lock a water heater is a critical step to ensure it functions efficiently and safely. By following the proper procedures, such as shutting off the power or gas supply, draining the tank thoroughly, and avoiding common mistakes, you can safeguard your system against unnecessary wear and damage.
This maintenance task not only extends the lifespan of your water heater but also prevents costly repairs and improves its overall performance. Always prioritize safety and consult a professional if you encounter any uncertainties.
These steps will ensure your water heater remains reliable and energy-efficient for years.
About the Author
Adrian Green is a passionate woodworking enthusiast who has dedicated his life to the craft of woodworking. From his early days working alongside his father in the family woodworking shop, Adrian has honed his skills and developed a deep love for creating beautiful, functional pieces with his hands. As the voice behind The Woodenify Blog, he shares his knowledge, tips, and inspiration with fellow woodworkers of all skill levels, helping them build confidence in their abilities while learning new techniques.
Professional Focus
- Specializes in DIY woodworking projects, from furniture making to home décor.
- Provides step-by-step guides, tips, and practical tutorials for woodworkers at any skill level.
- Focused on empowering readers with confidence and knowledge through easy-to-follow instructions and hands-on techniques.
- Passionate about building a community where makers can share, learn, and grow together in the world of woodworking.
Education History
University of Craft and Design – Bachelor of Fine Arts (BFA) in Woodworking and Furniture Design
Woodworking Apprenticeships – Gained extensive hands-on experience through various workshops and mentorships with seasoned craftsmen, refining carpentry and furniture-making skills.
Expertise
- DIY woodworking, carpentry, furniture making, and home décor projects.
- Creating clear, accessible tutorials and guides for beginner to advanced woodworkers.
- Helping readers experience the satisfaction and fulfillment of turning raw materials into stunning finished products.