
Are you tired of spending hot summer days sweating in your home? Don’t worry; adding air conditioning to your house is easier than you think.
Adding air conditioning to a house can significantly enhance comfort, especially during hot summer months. Whether you are outfitting a home that currently lacks a cooling system or upgrading an older unit, there are various approaches to consider. From central air conditioning systems to ductless mini-splits, each option comes with its own set of benefits and challenges.
This guide on how to add air conditioning to a house will provide an overview of the key steps involved, factors to consider, and potential costs to help you make an informed decision about cooling your home effectively and efficiently. Let’s get started!
What Are the Benefits of Air Conditioning?
Before diving into the specific steps of adding air conditioning to a house, it’s essential to understand why it’s worth considering. Here are some key benefits:

- Improved Comfort: The most obvious benefit of air conditioning is improved comfort. Cool air circulating throughout your home lets you stay comfortable even on the hottest days.
- Better Indoor Air Quality: Quality air conditioning systems include air filters that help remove pollutants and allergens, improving indoor air quality.
- Increased Energy Efficiency: While using an AC will inevitably increase your energy consumption, newer units are designed to be more energy-efficient, helping you save on utility bills.
- Added Home Value: Adding central air or a ductless mini-split to your home can increase its resale value, making it a worthwhile investment.
- Flexible Control: With modern air conditioning systems, you have more control over the temperature and humidity of your home, allowing you to create the perfect environment for your needs.
What Will You Need?
The exact materials and tools you’ll need will depend on the type of air conditioning system you choose. For a central air system, you may require:
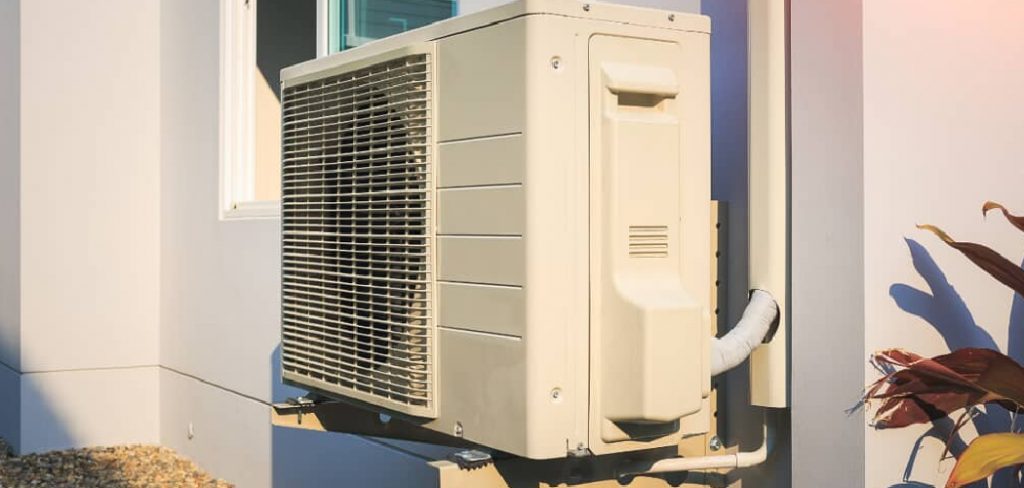
- Outdoor Condenser Unit: This is where the hot air from your home will be transferred to the outside.
- Indoor Evaporator Coil: This component cools and dehumidifies the air before circulating back into your home.
- Ductwork: For central systems, ductwork is necessary to distribute cool air throughout your home. If you’re installing a ductless mini-split, this won’t be needed.
- Power Tools: You’ll likely need essential power tools such as drills and screwdrivers to install the system.
- Piping and Wiring: Depending on the complexity of your cooling system, you may also need piping and wiring for installation.
Once you have gathered all the necessary materials and tools, it’s time to start adding air conditioning to your house.
9 Easy Steps on How to Add Air Conditioning to a House
Step 1: Determine Your Cooling Requirements
Before beginning the installation, assess your home’s cooling needs. This involves calculating the required cooling capacity, measured in BTUs (British Thermal Units), based on the size of your home and its insulation. Use an online BTU calculator or consult a professional to ensure you choose a system with the appropriate capacity for efficient cooling. Misjudging the unit size can lead to inefficiency and higher energy bills.
Step 2: Choose the Right Air Conditioning System
Select the air conditioning system that best fits your needs and home setup. Standard options include central air conditioning, ductless mini-split systems, and window units. Consider factors such as your budget, the layout of your
home, and whether you already have ductwork in place. Each system type has its advantages and limitations, so research thoroughly to make an informed decision.
Step 3: Prepare for Installation
Before installing the air conditioning system, ensure your home is ready for the process. This includes clearing the installation area of any obstructions and checking the structure for compatibility with the chosen system. If installing a ducted system, verify that the ductwork is clean, properly sealed, and in good condition. For ductless or window units, confirm that the installation points are secure and accessible. Additionally, make sure you have any necessary permits or approvals required by local building codes to avoid complications down the line.
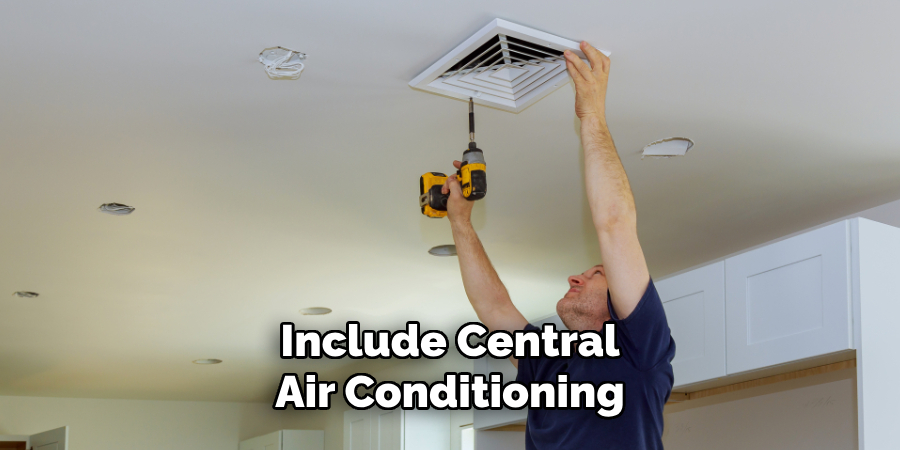
Step 4: Install the System
With preparation complete, it’s time to install your air conditioning system. The installation process will vary depending on the type of system you have chosen. Professional installation is highly recommended for central air conditioning to ensure the system is correctly connected to the ductwork and electrical components. If installing a ductless mini-split system, mount the indoor and outdoor units according to the manufacturer’s instructions, ensuring proper placement for optimal efficiency. For window units, carefully position the unit in the window frame, secure it firmly and seal any gaps to prevent air leaks. Always follow safety guidelines and the manufacturer’s specifications to ensure a smooth and successful installation.
Step 5: Test the System
Once installation is complete, testing your air conditioning system to ensure everything is functioning correctly is crucial. Turn on the system and set the desired temperature. Check that the air is cooling effectively and that there are no unusual noises, vibrations, or leaks. For systems with a thermostat, verify that it accurately controls the temperature. If you encounter any issues, refer to the troubleshooting section of the manufacturer’s manual or contact a professional technician. Proper testing will ensure the system operates efficiently and provides maximum comfort.
Step 6: Perform Regular Maintenance
Regular maintenance is essential to ensure the longevity and efficiency of your air conditioning system. Schedule routine cleaning of air filters, as clogged filters can reduce airflow and strain the system. Inspect the system for any wear and tear,
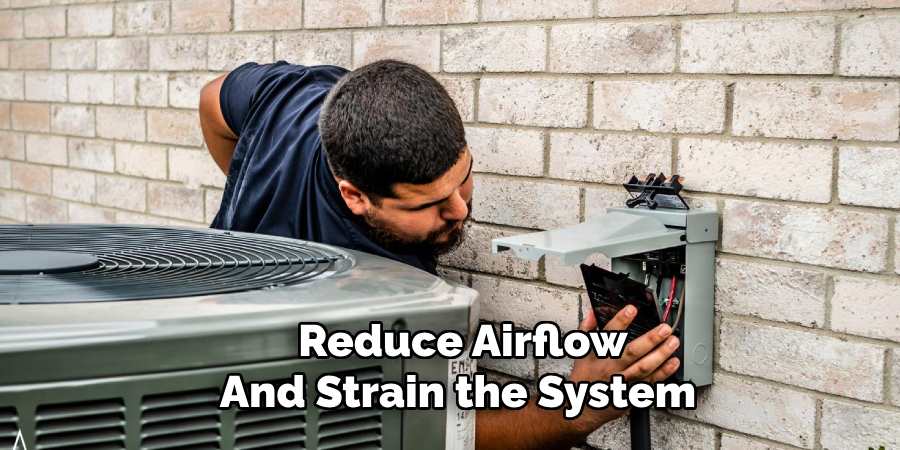
and check for refrigerant leaks or blockages in the ducts. Additionally, clean the condenser coils and evaporator regularly to maintain optimal performance. Following a consistent maintenance schedule will help prevent costly repairs and keep your system running smoothly for years to come.
Step 7: Upgrade or Replace When Necessary
Even with regular maintenance, air conditioning systems have a finite lifespan. Consider an upgrade or replacement if your unit becomes inefficient, requires frequent repairs, or no longer meets your cooling needs. Modern systems often have enhanced energy efficiency, advanced features, and improved environmental standards. Consult a professional to evaluate your current system and determine the best replacement options. Investing in a newer model can save energy costs and provide more reliable performance.
Step 8: Ensure Proper Insulation
Effective insulation is essential for maximizing the efficiency of your air conditioning system. Poorly insulated spaces can allow cool air to escape, forcing your system to work harder to maintain the desired temperature. Check your home for areas needing better insulation, such as doors, windows, and walls. Adding weather stripping or insulation materials as needed can significantly reduce energy waste and enhance overall cooling performance. A well-insulated home works with your air conditioning system to provide consistent comfort while reducing energy costs.
Step 9: Keep Your Home Cool Without Overworking the System
While air conditioning is a great way to keep your home cool, other ways exist to reduce energy consumption and give your system a break. Utilize natural ventilation by opening windows on cooler days or using ceiling fans to circulate air. Close curtains or blinds during peak sunlight hours to keep out heat. Additionally, set your thermostat at a moderate temperature rather than constantly adjusting it, as this can cause unnecessary strain on the system.

Following these steps ensures your air conditioning system is installed correctly and maintained for optimal performance.
5 Things You Should Avoid
- Skipping the Proper Load Calculation: Failing to perform a proper load calculation can result in an air conditioning system that is too large or too small for your home. This can affect energy efficiency, performance, and comfort levels.
- Ignoring Ductwork Condition: Installing a new air conditioning unit without inspecting or upgrading your existing ductwork can lead to inefficiencies, air leaks, and uneven cooling throughout the house.
- Choosing the Cheapest Option: Opting for the lowest-cost system or contractor might save you money initially, but it can result in expensive energy bills, frequent repairs, or a system that doesn’t meet your cooling needs.
- Overlooking Energy Efficiency Ratings: Not considering your system’s SEER (Seasonal Energy Efficiency Ratio) rating can lead to higher energy consumption and costs, especially during peak summer months.
- DIY Installation Without Professional Help: Attempting to install an air conditioning system yourself can lead to mistakes, safety risks, and potential damage to your home’s infrastructure. Always hire a certified HVAC professional for the job.
By avoiding these common mistakes, you can ensure a successful and efficient air conditioning system that will keep your home cool and comfortable for years.
Conclusion
How to add air conditioning to a house is a significant investment that requires careful planning and informed decision-making.
You can ensure optimal performance and long-term energy efficiency by evaluating your home’s cooling needs, choosing the right system, and working with a trusted HVAC professional. Avoid common pitfalls like incorrect sizing, ignoring ductwork issues, or opting for the cheapest solutions, as these can lead to costly repairs and reduced comfort. Prioritize energy efficiency and the expertise of trained professionals to achieve a cooling solution that enhances your home’s comfort while minimizing environmental impact.
Proper installation and maintenance will ensure your air conditioning system remains a valuable asset for years to come.
About the Author
Adrian Green is a passionate woodworking enthusiast who has dedicated his life to the craft of woodworking. From his early days working alongside his father in the family woodworking shop, Adrian has honed his skills and developed a deep love for creating beautiful, functional pieces with his hands. As the voice behind The Woodenify Blog, he shares his knowledge, tips, and inspiration with fellow woodworkers of all skill levels, helping them build confidence in their abilities while learning new techniques.
Professional Focus
- Specializes in DIY woodworking projects, from furniture making to home décor.
- Provides step-by-step guides, tips, and practical tutorials for woodworkers at any skill level.
- Focused on empowering readers with confidence and knowledge through easy-to-follow instructions and hands-on techniques.
- Passionate about building a community where makers can share, learn, and grow together in the world of woodworking.
Education History
University of Craft and Design – Bachelor of Fine Arts (BFA) in Woodworking and Furniture Design
Woodworking Apprenticeships – Gained extensive hands-on experience through various workshops and mentorships with seasoned craftsmen, refining carpentry and furniture-making skills.
Expertise
- DIY woodworking, carpentry, furniture making, and home décor projects.
- Creating clear, accessible tutorials and guides for beginner to advanced woodworkers.
- Helping readers experience the satisfaction and fulfillment of turning raw materials into stunning finished products.