
Winterizing your sprinkler system is an essential step to protect it from freezing temperatures and potential damage during colder months. By properly preparing your system, you can prevent costly repairs, ensure its longevity, and have it ready to go when spring returns.

This guide on how to winterize sprinkler system will walk you through the key steps to safely and effectively winterize your sprinkler system. A sprinkler system DIY project is a cost-effective way to keep your lawn green and healthy while gaining hands-on experience with home irrigation.
Why Winterize Your Sprinkler System?
Before we dive into the steps of winterizing your sprinkler system, let’s first understand why it is necessary. As temperatures drop below freezing, any water remaining in the pipes and components of your sprinkler system can freeze and expand, causing them to burst or crack. This can result in costly repairs and replacements when spring comes.
Winterizing your sprinkler system also helps to prevent potential damage to your lawn and landscape caused by frozen or damaged pipes. By properly draining and blowing out the water from your system, you can avoid soggy spots or uneven watering come spring.
Now that we have covered why it is important to winterize your sprinkler system, let’s discuss how to actually do it.
Tools and Materials Needed
- Air Compressor
- Drain Valve or Drain Plug
- Adjustable Wrench
- Screwdriver
7 Steps on How to Winterize Sprinkler System
Step 1: Shut Off the Water Supply
The first and most crucial step in winterizing your sprinkler system is to shut off the water supply. Locate the main valve that supplies water to your sprinkler system and turn it off completely.

This prevents additional water from entering the system while you work on draining it. If your valve is located outdoors, ensure it is properly insulated to protect it from freezing temperatures. Taking this step helps to safeguard your pipes and other components from potential damage caused by residual water expansion during freezing conditions.
Step 2: Drain the System
After shutting off the water supply, the next step is to drain all the water from the sprinkler system. Begin by opening the drain valves or using a compressor to blow out any residual water from the pipes. Start with the zone located furthest from the main valve and work your way closer to ensure all water is expelled systematically.
Be thorough, as even small amounts of leftover water can freeze and cause cracks or damage in the pipes. If your system has a backflow prevention device, make sure to drain it as well according to the manufacturer’s instructions. Properly draining the system is critical to preventing costly winter damage and ensuring smooth operation when the system is turned back on.
Step 3: Disconnect Hoses and Store Them Indoors
After draining your irrigation system, the next step is to disconnect all hoses attached to outdoor faucets or spigots. Leaving hoses connected during freezing temperatures can trap water in the faucets, leading to cracks or damage. Once disconnected, thoroughly drain the hoses to ensure no water remains inside.
Coil them neatly and store them in a dry, indoor area such as a garage, shed, or basement. Proper storage will help prevent the hoses from becoming brittle or cracked over the winter, extending their lifespan and ensuring they are ready for use in the spring.
Step 4: Shut Off Automatic Timers
If you have an automatic irrigation system or timers attached to your outdoor faucets, be sure to turn them off before winter sets in. Leaving timers active can result in unintended water flow during freezing conditions, which might damage your pipes or sprinkler systems.
Consult the manufacturer’s instructions for your specific timer model to properly shut it off or adjust its settings for the offseason. By doing this, you can help safeguard your system and avoid costly repairs once the temperatures drop.
Step 5: Drain and Winterize the System
Draining your irrigation system is a crucial step to protect it from damage caused by freezing temperatures. Begin by shutting off the water supply to the system and opening all manual drain valves to allow any remaining water to escape. If your system has automatic drain valves, these should activate and empty the lines once the water pressure drops.
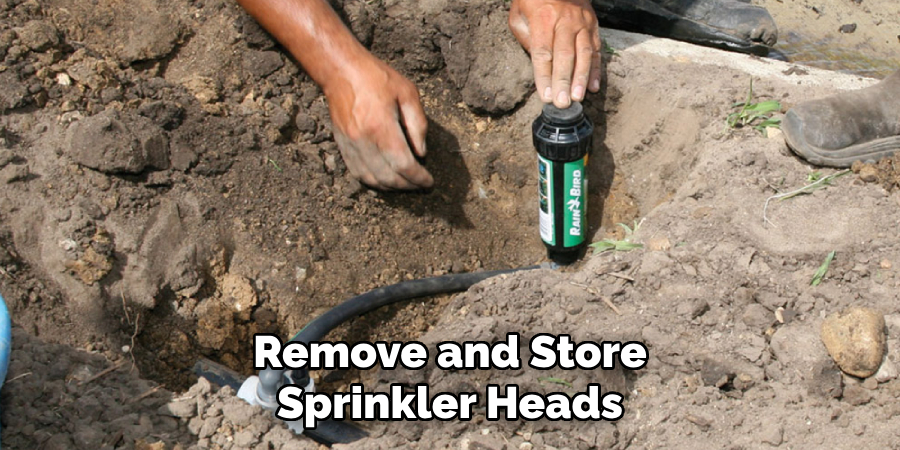
For systems without these features, consider using an air compressor to blow out any residual water, ensuring the pipes are completely dry. Additionally, remove and store sprinkler heads, hoses, and any other detachable components in a dry, frost-free area. Properly winterizing your irrigation system prevents cracks and leaks, saving you time and money on repairs when spring returns.
Step 6: Cover Exposed Pipes or Valves
To protect your irrigation system from freezing temperatures, ensure that all exposed pipes and valves are properly insulated. Use foam pipe covers, insulation tape, or specially designed valve covers to shield these components from the cold.
This will help maintain their integrity throughout the winter and prevent damage caused by freezing and expanding water. Taking this precaution adds an extra layer of protection, ensuring your system remains in good condition for the next season.
Step 7: Consider Professional Maintenance
If you’re unsure about winterizing your irrigation system or want to ensure everything is done correctly, consider hiring a professional maintenance service. Experienced technicians have the tools and expertise to properly drain, insulate, and prepare your system for freezing temperatures. They can also inspect for potential issues, such as leaks or damaged components, that could cause problems later. Investing in professional maintenance can save you time, effort, and costly repairs, giving you peace of mind that your system is ready to withstand the winter season.
Following these steps on how to winterize sprinkler system can help ensure that your system stays in good condition and is ready to use again come springtime. However, it’s also important to stay vigilant during the winter months and keep an eye out for any potential issues that may arise.
Common Mistakes to Avoid
When winterizing your sprinkler system, avoiding common mistakes is key to preventing damage and ensuring a smooth restart in the spring. One frequent mistake is not fully draining the water from the system. Even a small amount of residual water can freeze, expand, and cause pipes or components to crack. Another common error is neglecting to turn off the main water supply to the system, which could lead to leaks or unexpected water flow during freezing temperatures.
Additionally, failing to insulate exposed pipes or backflow preventers can leave the system vulnerable to freezing. Lastly, some homeowners skip hiring a professional for more complex systems, which increases the risk of incomplete winterization. By being thorough and addressing these common pitfalls, you can protect your sprinkler system from costly damages and headaches.
When to Call a Professional?
While many aspects of sprinkler system winterization can be handled through basic preventive measures, there are situations where it’s best to call a professional. If your system is large, complex, or features advanced components like electronic controllers or multiple zones, professional expertise ensures every part is properly prepared for freezing temperatures.
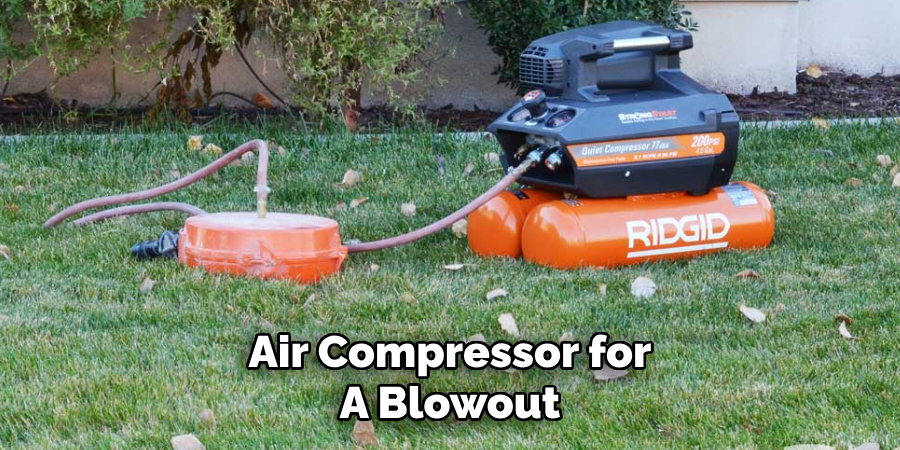
Additionally, if you’re unsure about how to drain your system completely or lack the necessary equipment, like an air compressor for a blowout, a professional can handle the process safely and effectively. Hiring a professional can save you time, effort, and potential repair costs by ensuring your sprinkler system is fully protected throughout the winter months.
Frequently Asked Questions
Q1: How Often Should I Drain My Sprinkler System for Winterization?
A: It is recommended to drain your sprinkler system at least once a year before the onset of freezing temperatures. If you live in an area with harsher winters, it may be necessary to drain the system multiple times throughout the season.
Q2: Can I Do the Winterization Process Myself?
A: While it is possible to do the winterization process yourself, it is highly recommended to hire a professional. They have the necessary expertise and equipment to ensure your sprinkler system is fully protected from freezing temperatures.
Q3: Will Draining My Sprinkler System Prevent Any Potential Damage During Winter?
A: Draining your sprinkler system is the best way to prevent any potential damage during winter. By removing all water from the pipes, you eliminate the risk of freezing and bursting. It is important to ensure that all parts of your system are fully drained to avoid any potential issues.
Q4: Can I Use My Sprinkler System During Winter If I Don’t Fully Winterize It?
A: No, it is not recommended to use your sprinkler system during winter if it has not been fully winterized. Even a small amount of water left in the pipes can freeze and cause damage. It is important to properly winterize your sprinkler system before temperatures drop below freezing.

Conclusion
Properly winterizing your sprinkler system is a crucial step in protecting your investment and ensuring it operates efficiently when spring arrives. By following the recommended steps on how to winterize sprinkler system, such as draining the system completely and preparing it for freezing temperatures, you can prevent costly repairs and prolong the lifespan of your equipment.
Taking the time to winterize your system will give you peace of mind throughout the colder months and help you avoid unexpected issues when it’s time to turn it back on.
About the Author
Adrian Green is a passionate woodworking enthusiast who has dedicated his life to the craft of woodworking. From his early days working alongside his father in the family woodworking shop, Adrian has honed his skills and developed a deep love for creating beautiful, functional pieces with his hands. As the voice behind The Woodenify Blog, he shares his knowledge, tips, and inspiration with fellow woodworkers of all skill levels, helping them build confidence in their abilities while learning new techniques.
Professional Focus
- Specializes in DIY woodworking projects, from furniture making to home décor.
- Provides step-by-step guides, tips, and practical tutorials for woodworkers at any skill level.
- Focused on empowering readers with confidence and knowledge through easy-to-follow instructions and hands-on techniques.
- Passionate about building a community where makers can share, learn, and grow together in the world of woodworking.
Education History
University of Craft and Design – Bachelor of Fine Arts (BFA) in Woodworking and Furniture Design
Woodworking Apprenticeships – Gained extensive hands-on experience through various workshops and mentorships with seasoned craftsmen, refining carpentry and furniture-making skills.
Expertise
- DIY woodworking, carpentry, furniture making, and home décor projects.
- Creating clear, accessible tutorials and guides for beginner to advanced woodworkers.
- Helping readers experience the satisfaction and fulfillment of turning raw materials into stunning finished products.