
Installing a drain pipe for a sink is an essential task for ensuring proper water drainage and functionality in your kitchen or bathroom. Whether you’re replacing an old pipe or setting up a new sink, the process requires careful planning and attention to detail.

With the right tools and a step-by-step approach, you can successfully complete the installation and avoid common plumbing issues such as leaks or clogs. This guide on how to install drain pipe for sink will walk you through the process, making it easy even for beginners to follow. Innovative drain pipe ideas can enhance both the efficiency and aesthetics of your home’s plumbing and landscaping systems.
Why is Proper Drainage Important?
Before we dive into the steps for installing a drain pipe for your sink, let’s first understand why proper drainage is important.
A properly functioning drain system ensures that water and waste are efficiently removed from your kitchen or bathroom, preventing any potential backups or flooding. It also helps to maintain hygiene and prevent unpleasant odors in the room.
Materials and Tools You’ll Need
To install a drain pipe for your sink, you’ll need these materials:
Sink Drain Assembly:
This includes the strainer basket, tailpiece, and other necessary components. Make sure to select a drain assembly that is compatible with your sink and plumbing system.
Drain Pipe:
Also known as the P-trap, this curved pipe is essential for preventing sewer gas from entering your home and maintaining proper water flow. It comes in various materials such as PVC, ABS, or metal.
Plumbers Putty:
This is used to create a watertight seal between the strainer basket and the sink. You can also use silicone caulk for this purpose.
Plumber’s Tape:
Also known as Teflon tape, this thin white tape is used to create a tight seal between threaded pipes and fittings.
Adjustable Wrench:
This versatile tool will come in handy for tightening and loosening various plumbing fittings.
Plunger:
A plunger is a must-have tool for any household. It is used to dislodge clogs in toilets, sinks, and tubs.
Drain Snake:
This flexible tool is used to remove stubborn clogs that cannot be reached with a plunger.
Pipe Cutter:
As the name suggests, this tool is used to cut pipes to specific lengths. It can come in handy when replacing old or damaged pipes.
Hacksaw:
Similar to a pipe cutter, a hacksaw can also be used to cut pipes. However, it can also be useful for cutting through other materials such as metal or plastic.
8 Simple Steps on How to Install Drain Pipe for Sink
Step 1: Turn Off the Water Supply
Before starting the installation process, it’s crucial to turn off the water supply to avoid any leaks or mess. Locate the shut-off valves under the sink and turn them clockwise until they are fully closed.

If individual shut-off valves are not present, you may need to turn off the main water supply to your home. This step ensures a dry and safe working area as you proceed with the installation.
Step 2: Remove Old Drain Pipe (if Applicable)
If there is an existing drain pipe, carefully remove it before installing the new one. Place a bucket or container beneath the pipe to catch any residual water. Use adjustable pliers to loosen the slip nuts connecting the drain pipe to the sink and wall.
Gently twist and pull the pipe sections apart, keeping track of any washers or fittings for reference. Once removed, inspect the area for any debris or buildup and clean it thoroughly to ensure a smooth installation of the new drain pipe.
Step 3: Measure and Cut the New Drain Pipe
Before installing the new drain pipe, take accurate measurements to ensure a proper fit. Align the new pipe with the existing connections, and use a measuring tape to determine the required length. Mark the measurement on the pipe using a marker or pencil. Next, use a hacksaw or PVC pipe cutter to cut the pipe to the marked length.
Make sure to cut straight and evenly to avoid any gaps or improper connections. After cutting, smooth the edges of the pipe with sandpaper or a deburring tool to remove any roughness, ensuring a secure and leak-free installation.
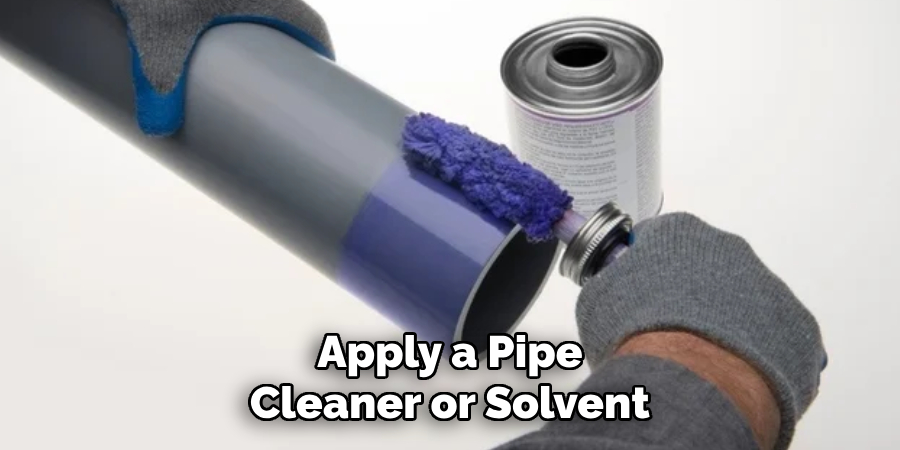
Step 4: Clean and Prepare Fittings
Before attaching the pipe, ensure that all fittings are clean and free from debris. Use a clean cloth or paper towel to wipe the inside of each fitting, removing any dust, dirt, or residue. If necessary, apply a pipe cleaner or solvent specifically designed for the material you are working with, such as PVC or metal, to thoroughly clean the surfaces.
Allow the fittings to dry completely before proceeding to the next step. Properly prepared fittings will help create a strong and reliable seal during installation.
Step 5: Assemble Your Drain Pipe
Begin assembling your drain pipe by connecting the cleaned and dried fittings. Align each pipe section carefully, ensuring they fit snugly without gaps. Apply a suitable adhesive or sealant to the ends of each pipe or fitting as recommended by the manufacturer. Push the pieces together firmly and hold them in place for a few moments to allow the sealant to bond effectively.
If using threaded fittings, wrap the threads with plumber’s tape before screwing them tightly together to prevent leaks. Double-check all connections to ensure proper alignment and a secure fit. This step is crucial for creating a durable and watertight drainage system.
Step 6: Test for Leaks
After assembling the drainage system, it’s important to test for leaks before finalizing the installation. Begin by running water through the system at a moderate flow rate. Inspect each connection point carefully for any signs of dripping or moisture. If a leak is found, tighten the connection or reapply sealant or plumber’s tape as needed, then retest.
Ensure the entire system operates smoothly, and no water escapes from unintended areas. Proper testing ensures the drainage system will function reliably and prevents potential issues in the future.
Step 7: Secure the Drain Pipe to the Wall or Floor
Once the drainage system has been tested for leaks and confirmed to be functioning correctly, the next step is to secure the drain pipe to the wall or floor. Use appropriate brackets or clamps to hold the pipe firmly in place.
Ensure the fasteners are spaced evenly along the pipe to provide consistent support and prevent sagging or movement. When securing the pipe, take care not to overtighten, as this could damage the pipe material. Properly secured pipes will improve the overall stability and longevity of the drainage system.
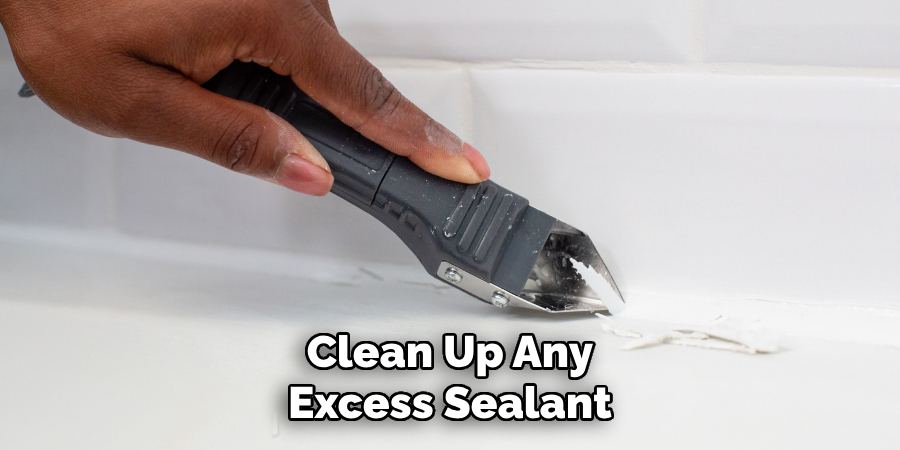
Step 8: Finishing Touches
With the pipe securely in place, inspect the entire drainage system to ensure everything is properly aligned and free of defects. Clean up any excess sealant or adhesive that may have been used during installation. If the drain pipe is part of an exposed system, consider painting or covering the pipe to match the surrounding area for a neater appearance. Finally, run a final water flow test to confirm that the system is operating smoothly and without any leaks. Completing these finishing touches will not only enhance the functionality of the drainage system but also give it a polished, professional look.
Following these steps on how to install drain pipe for sink, you can ensure that your sink has a proper and effective drainage system in place. However, it is important to note that there are different types of drain pipes available in the market, such as plastic, metal, or even copper. It is essential to choose the right type of drain pipe for your sink based on factors such as durability, corrosion resistance, and cost.
Common Mistakes to Avoid
When installing a drain pipe for your sink, there are several common mistakes that can lead to issues down the line. Avoiding these pitfalls will save you time, money, and frustration:
Improper Pipe Sizing:
Using a drain pipe that is either too small or too large can result in poor drainage or leaks. Always ensure the pipe size matches the sink’s outlet and meets plumbing standards.
Skipping a Dry Fit Test:
Failing to test the pipe setup before sealing connections can lead to alignment issues. Always assemble the parts dry to confirm they fit perfectly before applying glue or tightening fittings.
Over-Tightening Connections:
While it’s important to secure the fittings, over-tightening can crack plastic components or damage washers, leading to leaks. Be mindful of the torque applied during installation.
Ignoring Proper Slope:
Drain pipes require a slight downward slope to allow water to flow freely. An incorrect slope can cause water to back up or clog. Make sure the pipe is angled correctly, typically 1/4 inch per foot.
Using the Wrong Sealant:
Using an inappropriate sealant or skipping it altogether can cause leaks. Always select a sealant compatible with the pipe material and create a tight, watertight seal.
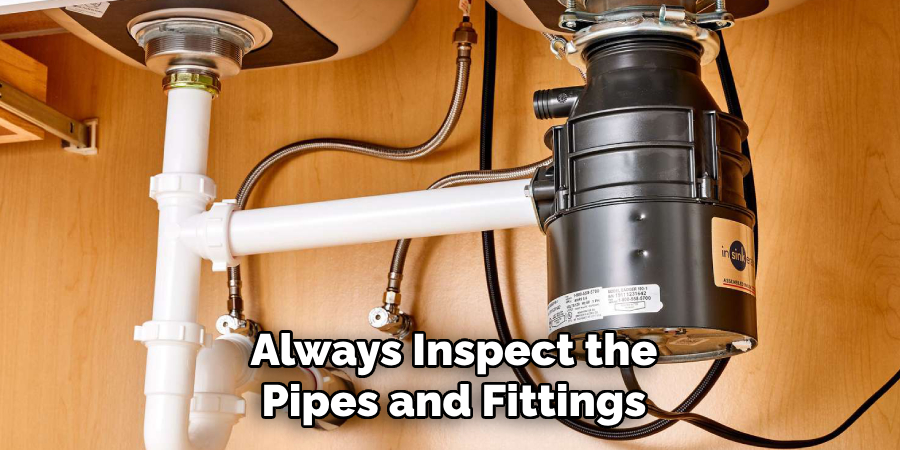
Neglecting to Clean Debris:
Installing a pipe without cleaning out any debris, dirt, or leftover material can result in blockages. Always inspect the pipes and fittings for cleanliness before installation.
By avoiding these common mistakes, you can ensure a smoother installation process and a more efficient drainage system for your sink. Remember to follow manufacturer guidelines and consult professional advice when necessary.
Conclusion
Proper sink installation is critical to ensuring the longevity and functionality of your plumbing system. By understanding potential challenges and avoiding common mistakes, you can significantly reduce the risk of leaks, blockages, or inefficient drainage.
Take the time to prepare, use appropriate tools and materials, and follow best practices to complete the job successfully. If in doubt, don’t hesitate to seek professional assistance. A well-installed sink is a worthwhile investment in the overall efficiency and reliability of your home. Thanks for reading this article on how to install drain pipe for sink.
About the Author
Adrian Green is a passionate woodworking enthusiast who has dedicated his life to the craft of woodworking. From his early days working alongside his father in the family woodworking shop, Adrian has honed his skills and developed a deep love for creating beautiful, functional pieces with his hands. As the voice behind The Woodenify Blog, he shares his knowledge, tips, and inspiration with fellow woodworkers of all skill levels, helping them build confidence in their abilities while learning new techniques.
Professional Focus
- Specializes in DIY woodworking projects, from furniture making to home décor.
- Provides step-by-step guides, tips, and practical tutorials for woodworkers at any skill level.
- Focused on empowering readers with confidence and knowledge through easy-to-follow instructions and hands-on techniques.
- Passionate about building a community where makers can share, learn, and grow together in the world of woodworking.
Education History
University of Craft and Design – Bachelor of Fine Arts (BFA) in Woodworking and Furniture Design
Woodworking Apprenticeships – Gained extensive hands-on experience through various workshops and mentorships with seasoned craftsmen, refining carpentry and furniture-making skills.
Expertise
- DIY woodworking, carpentry, furniture making, and home décor projects.
- Creating clear, accessible tutorials and guides for beginner to advanced woodworkers.
- Helping readers experience the satisfaction and fulfillment of turning raw materials into stunning finished products.