
Installing a linear shower drain can significantly enhance both the functionality and aesthetic appeal of your bathroom. These modern drains offer a sleek, minimalist design that seamlessly integrates into various bathroom styles while ensuring efficient water drainage.
Whether you’re renovating your shower or building a new one, this guide on how to install linear shower drain will walk you through the steps to properly install a linear shower drain, ensuring a waterproof and secure finish.
Tools and Materials Needed
- Linear Drain Kit (With Grate and Channel Body)
- Measuring Tape and Level
- Pvc or Abs Pipes and Fittings (Depending on Your Plumbing)
- Cement Board or Shower Pan Liner
- Mortar, Waterproofing Membrane, and Thin-set
- Saw or Cutting Tools (Tile or Circular Saw)
- Silicone Sealant and Waterproof Tape
- Trowel and Mixing Tools
7 Step-by-Step Guidelines on How to Install Linear Shower Drain
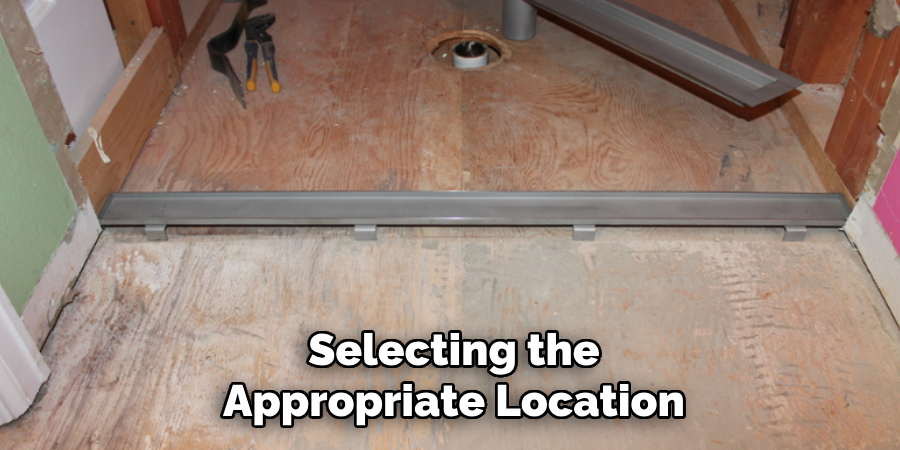
Step 1: Choose the Right Location for Your Linear Drain
The first step in installing a linear shower drain is selecting the appropriate location. Begin by determining the slope of your shower floor, ensuring it directs water flow efficiently toward the drain.
Linear drains are highly versatile and can be installed along one wall, in the center of the shower, or at the shower entrance, depending on your design preference and plumbing layout. Consider accessibility, aesthetics, and functionality when deciding on the placement. Once you have chosen the location, mark the area using a measuring tape and a level to ensure accuracy before moving on to the next step.
Step 2: Prepare the Shower Floor and Substrate
Begin by ensuring the shower floor is clean, dry, and free of debris. Remove any existing flooring or uneven material to create a smooth and stable surface for installation. Next, check the substrate to ensure it is properly sloped toward your chosen drain placement—this slope is essential for effective drainage.
If the slope is insufficient, apply a layer of mortar or self-leveling compound to adjust the gradient. Use a trowel to smooth out the material evenly, and allow it to cure completely according to the manufacturer’s instructions. Take care to double-check the slope with a level to confirm accuracy before proceeding to the next step.
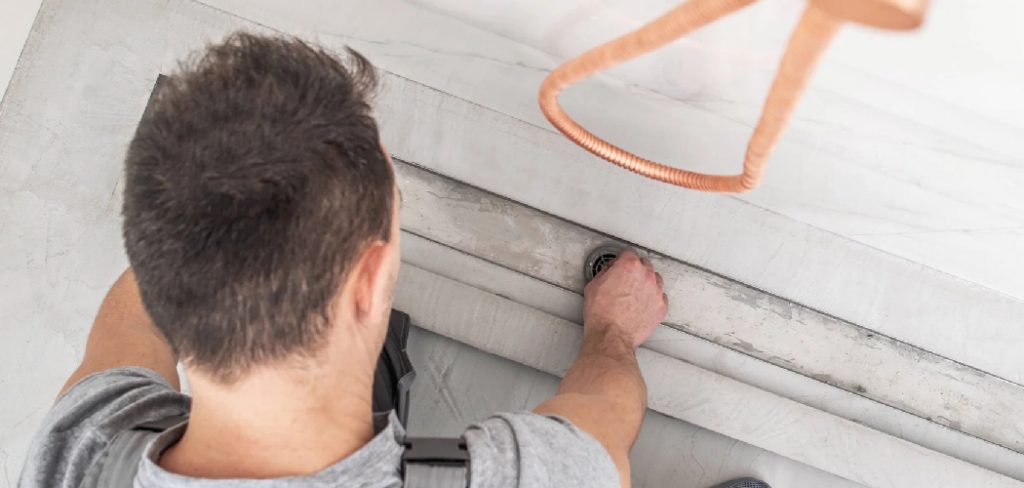
Step 3: Install and Connect Drain Pipes
Begin by positioning the drain pipes to align with your chosen drain placement. Ensure that the pipes fit securely into the drain outlet and check that they follow the proper slope for efficient water flow—typically, a gradient of 1/4 inch per foot is recommended.
Use PVC or ABS cement to make watertight connections between pipe joints, following the pipe manufacturer’s guidelines for application and curing times. Once all connections are made, test for leaks by running water through the system. Inspect each joint carefully and address any leaks immediately before proceeding to the next step.
Step 4: Test and Adjust Drainage
Begin by running water through the entire drainage system to ensure it flows smoothly and efficiently. Observe the water movement and confirm that it follows the intended path without pooling or backing up. Check for any obstructions or irregularities in the flow that might require adjustment. If necessary, reposition the pipes or modify the slope to achieve the recommended gradient of 1/4 inch per foot.
Pay close attention to any areas where water collects, as this could indicate a low spot that needs correction. Finally, ensure all joints remain watertight during the test and address any leaks or loose connections promptly to maintain optimal system performance.
Step 5: Finish Shower Floor
Once the drainage system is successfully tested and any necessary adjustments are made, you can move on to finishing the shower floor. Begin by applying a waterproof membrane over the sloped surface to ensure long-term moisture protection. Carefully follow manufacturer guidelines to properly seal corners and edges.
After the membrane is set, add a layer of mortar to create a smooth, even surface that reinforces the slope toward the drain. Once the mortar cures, install the chosen tile or flooring material, adhering to design and safety preferences. Ensure grout lines are sealed to prevent water seepage, and double-check that the floor maintains the required slope for efficient drainage. This final step completes the foundation for a functional and durable shower space.
Step 6: Maintain Your Linear Drain
Proper maintenance is essential to ensure the long-term functionality of your linear drain. Regularly remove the drain cover and clean out any debris, hair, or soap residue that may accumulate. Use a soft brush or cloth to scrub around the edges and inside the drain channel to prevent clogs and odors. If necessary, rinse the drain with warm water and a mild detergent to keep it clear and hygienic.
Checking for proper water flow periodically is also important to address any issues early. With consistent care, your linear drain will remain efficient, ensuring a clean and hassle-free shower experience.
Step 7: Enjoy Your Modern Shower
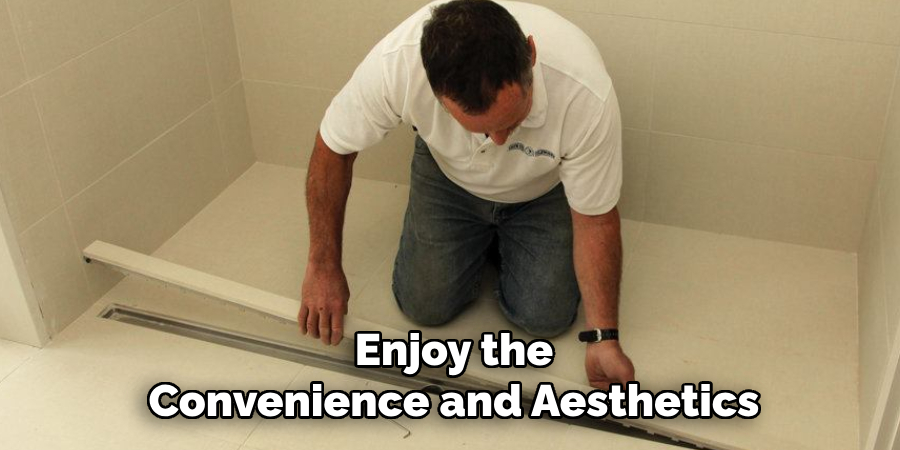
With your linear drain properly maintained, it’s time to fully enjoy the convenience and aesthetics of your modern shower. The sleek design not only adds a contemporary touch to your bathroom but also enhances functionality by providing efficient water drainage. Whether it’s a quick rinse or a relaxing shower experience, your well-maintained linear drain ensures everything runs smoothly, allowing you to focus on comfort and rejuvenation.
Following these steps on how to install linear shower drain will not only ensure a smooth installation process but also guarantee the longevity and optimal performance of your linear drain. With proper maintenance, you can enjoy the benefits of a modern shower for many years to come.
Post-Installation Tips
After successfully installing your linear shower drain, it’s essential to follow a few post-installation tips to maintain its functionality and appearance. Firstly, routinely check for any debris accumulation in the drain to prevent clogs. A quick rinse with warm water can help keep it clean. Secondly, use a mild cleaning solution to remove any soap scum or mineral deposits that may build up over time.
Avoid harsh chemicals, as they can damage the finish. Lastly, periodically inspect the surrounding flooring and waterproofing to ensure there are no leaks or structural issues. Implementing these simple practices will not only improve the efficiency of your drain but also enhance the overall showering experience.
Common Mistakes to Avoid
When it comes to maintaining your shower drain and surrounding areas, there are a few common mistakes that can lead to long-term issues. First, avoid neglecting regular cleaning, as buildup from hair, soap, and debris can cause blockages over time. Another mistake is using harsh chemical drain cleaners too frequently, as they can corrode pipes and damage the drain itself.
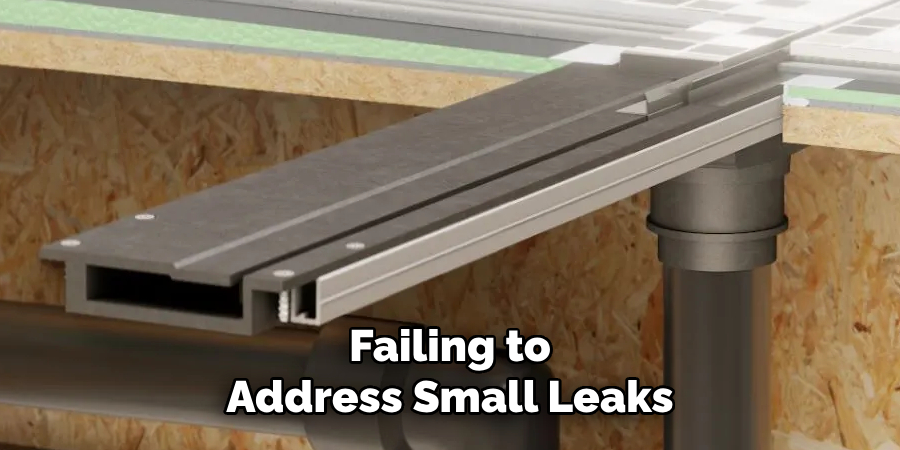
Additionally, failing to address small leaks or cracks in a timely manner can result in hidden water damage and costly repairs. Lastly, ignoring the initial signs of drainage problems, like slow water flow or unpleasant odors, can exacerbate future problems. By steering clear of these errors, you can ensure the longevity and functionality of your shower drain.
When to Call a Professional?
While many shower drain issues can be managed with regular maintenance and minor fixes, there are times when the help of a professional plumber is essential. If you notice persistent clogs that don’t resolve with basic cleaning methods, it may indicate a more severe blockage deep within the pipes.
Also, if water begins to back up consistently or there are unexplained leaks around the shower area, professional expertise is crucial to prevent further damage. Unusual noises, such as gurgling sounds from the drain, can signal issues in the plumbing system that require specialized tools to address. Finally, if you detect a foul odor that persists despite cleaning, it may suggest an underlying problem like a damaged trap or sewer line. Reaching out to a qualified plumber promptly can save time, money, and prevent more extensive repairs in the future.
Frequently Asked Questions
Q: How Often Should I Have My Plumbing System Checked by a Professional?
A: It is recommended to have your plumbing system professionally inspected at least once a year. This can help identify any potential issues before they become major problems and save you money in the long run. If you notice any unusual signs or changes in your plumbing system, it is also important to contact a professional for an inspection as soon as possible.
Q: What Can I Do to Maintain My Plumbing System?
A: Some steps you can take to maintain your plumbing system include:
- Regularly checking for leaks and addressing them promptly
- Avoid putting grease, oils, and other harmful substances down the drain
- Flushing only toilet paper and waste down the toilet
- Using drain covers to prevent hair and debris from clogging drains
- Testing water pressure regularly and adjusting if necessary
Q: What Should I Do if I Have a Clogged Drain?
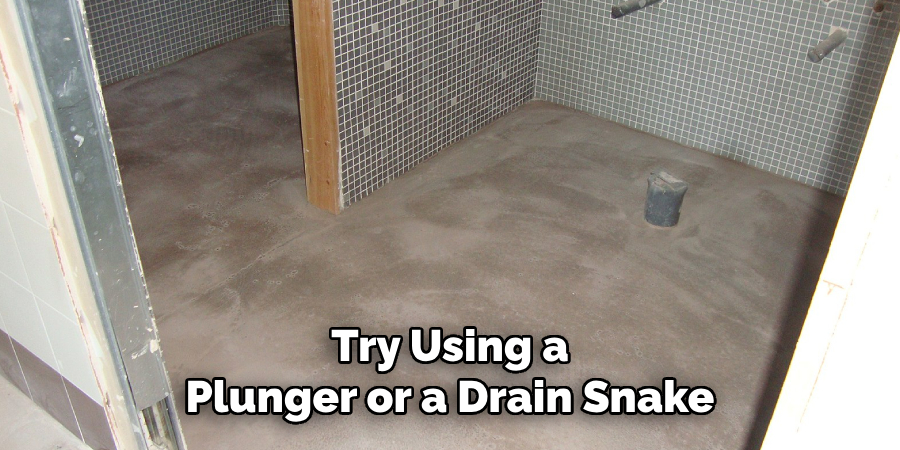
A: For minor clogs, you can try using a plunger or a drain snake to remove the blockage. If these methods do not work, you may need to call a professional plumber who can use specialized tools to clear the clog. It is important to avoid using harsh chemicals, as they can be damaging to both your pipes and the environment.
Conclusion
Proper maintenance and care of your plumbing system can prevent many common issues and save you time and money in the long run. By following the tips on how to install linear shower drain outlined above, such as monitoring water pressure, using drain covers, and addressing minor clogs promptly, you can keep your plumbing in excellent condition.
Remember, when in doubt, consulting a professional plumber is the best course of action to ensure the safety and longevity of your system.
About the Author
Adrian Green is a passionate woodworking enthusiast who has dedicated his life to the craft of woodworking. From his early days working alongside his father in the family woodworking shop, Adrian has honed his skills and developed a deep love for creating beautiful, functional pieces with his hands. As the voice behind The Woodenify Blog, he shares his knowledge, tips, and inspiration with fellow woodworkers of all skill levels, helping them build confidence in their abilities while learning new techniques.
Professional Focus
- Specializes in DIY woodworking projects, from furniture making to home décor.
- Provides step-by-step guides, tips, and practical tutorials for woodworkers at any skill level.
- Focused on empowering readers with confidence and knowledge through easy-to-follow instructions and hands-on techniques.
- Passionate about building a community where makers can share, learn, and grow together in the world of woodworking.
Education History
University of Craft and Design – Bachelor of Fine Arts (BFA) in Woodworking and Furniture Design
Woodworking Apprenticeships – Gained extensive hands-on experience through various workshops and mentorships with seasoned craftsmen, refining carpentry and furniture-making skills.
Expertise
- DIY woodworking, carpentry, furniture making, and home décor projects.
- Creating clear, accessible tutorials and guides for beginner to advanced woodworkers.
- Helping readers experience the satisfaction and fulfillment of turning raw materials into stunning finished products.