
Installing a frost free yard hydrant is an essential project for ensuring access to water year-round, even in freezing temperatures. These hydrants are designed to prevent water from freezing in the pipe, making them ideal for areas with cold climates.
By following a step-by-step installation guide on how to install a frost free yard hydrant process, you can ensure reliable water flow for irrigation, livestock, or other outdoor needs while protecting your system from frost damage. This guide will walk you through the tools, materials, and techniques required to successfully install a frost free yard hydrant.
How a Frost-Free Hydrant Works
A frost-free hydrant is specifically designed to ensure water remains accessible even in freezing temperatures. The key to its functionality lies in its internal structure. Unlike standard hydrants, the frost-free variety has a valve located below the frost line—the depth in the ground where the temperature stays above freezing.
When the hydrant is turned off, water from the vertical pipe drains out through a built-in weep hole near the valve and into the surrounding gravel or soil, leaving the pipe empty and preventing it from freezing. When you turn the hydrant on, the valve opens, allowing water to flow up the pipe and out into the spout. This simple yet effective system makes frost-free hydrants highly reliable for cold-weather applications and ensures continuous use even in harsh climates.
Tools and Materials Needed
To install or repair a frost-free hydrant, you will need the following tools and materials:
Shovel or Post Hole Digger:
For digging the trench and creating a space for the hydrant. A post hole digger is recommended for deeper holes.
Pipe Wrench:
To tighten the fittings and secure the hydrant to the pipe.
Teflon Tape or Pipe Dope:
For sealing the threads of the fittings and preventing leaks.
Plumbing Tools:
If you are not experienced in plumbing, it may be helpful to have additional tools on hand such as a hacksaw, slip-joint pliers, and a tubing cutter.
Sand and Gravel:
To use as backfill around the hydrant once it is installed.
Concrete Mix:
For securing the hydrant in place and creating a stable base.
8 Step-by-Step Guidelines on How to Install a Frost Free Yard Hydrant
Step 1: Locate the Water Source
The first step in installing a frost-free yard hydrant is to identify the water source you will connect to. This is typically an existing underground water line that supplies water to your property.
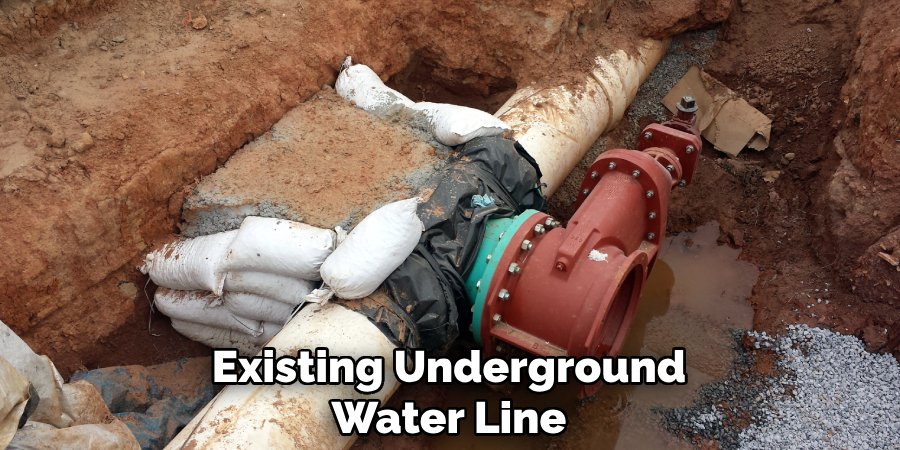
Use utility maps or consult with local utility providers to ensure you are accessing the correct line and to avoid damaging other underground utilities. Mark the location clearly and ensure it is in an area that provides convenient access for the hydrant while meeting local plumbing codes.
Step 2: Digging the Trench
Once the water source is identified and marked, the next step is to dig a trench for the yard hydrant’s supply line. The trench should be deep enough to prevent the water line from freezing, typically below the frost line in your region. Consult local guidelines to determine the minimum depth required.
The trench should also be wide enough to allow easy placement and adjustment of the pipe. Use appropriate tools, such as a trenching shovel or mechanical trench digger, to ensure the trench is uniform and stable. Take time to smooth the bottom of the trench to prevent the pipe from resting on sharp rocks or uneven surfaces that could cause damage over time.
Step 3: Install Shut-off Valve
Installing a shut-off valve is essential for controlling the flow of water and ensuring easy maintenance of the system. Begin by selecting a durable, high-quality shut-off valve designed for outdoor or underground use. Position the valve in an accessible location, preferably near the point where the water line exits the main supply or enters the building.
Use pipe fittings or connectors that are compatible with your pipe material, ensuring a secure and leak-proof connection. Once installed, test the valve functionality by turning it on and off to verify smooth operation. Proper installation of the shut-off valve will help prevent water wastage and simplify future repairs or system modifications.
Step 4: Lay Pipes
Begin by carefully planning the layout of your pipes to ensure efficiency and avoid unnecessary bends or obstructions. Use a measuring tape to accurately determine the required lengths of pipe, cutting them as necessary with a pipe cutter or saw appropriate for the material. Secure the pipes in place using brackets or clips, maintaining proper spacing to prevent sagging and promote stability.
Ensure that all pipe connections are sealed using appropriate fittings and sealants to prevent leaks. When working with underground pipes, consider adding a layer of gravel or sand to cushion and protect the pipes from potential damage caused by shifting soil. Double-check the alignment and connections before proceeding to the next step. Properly laid pipes are essential to the long-term functionality and durability of your water system.
Step 5: Install T-Connector
To install the T-connector, begin by identifying the section of the pipeline where the junction is required. Measure and mark the pipe to ensure accurate placement before cutting. Use a pipe cutter or appropriate tool to make clean, straight cuts at the marked location. Insert the ends of the pipes into the T-connector, ensuring a secure fit.
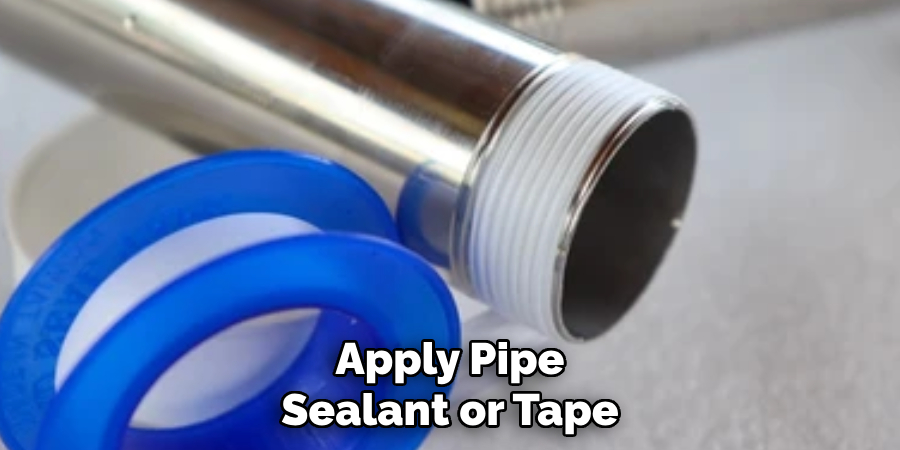
Apply pipe sealant or tape to the joints to prevent leaks, then tighten the connections according to the manufacturer’s specifications. Verify that the T-connector is properly aligned with the rest of the system before proceeding with the next component of the installation.
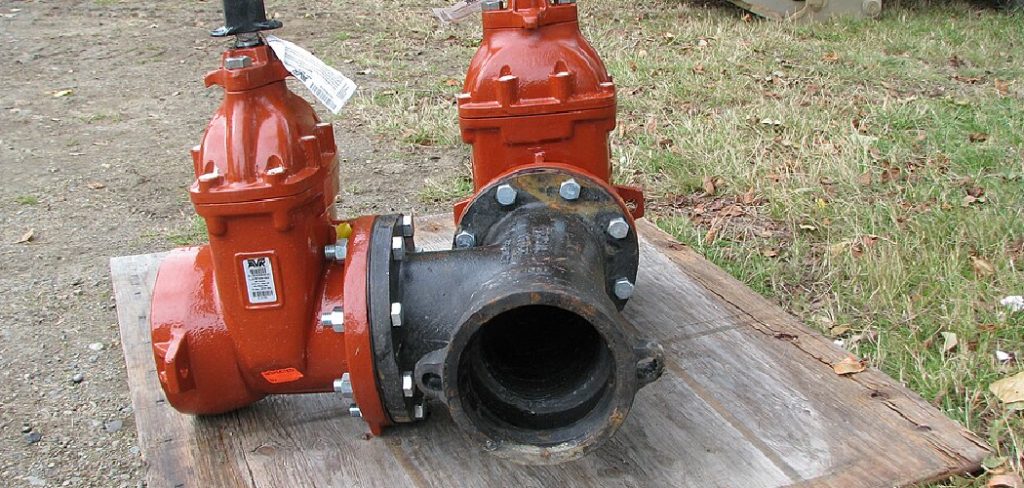
Step 6: Attach Hydrant
Begin by aligning the hydrant with the opening at the top of the T-connector. Ensure that the threads on the hydrant and the connector are clean and free from debris. Apply pipe sealant or thread tape to the threads on the hydrant to create a watertight seal. Carefully screw the hydrant into the T-connector, turning it clockwise until it is hand-tight.
Use a wrench to securely fasten the connection, but avoid overtightening as this can damage the threads. Once properly attached, check that the hydrant is upright and correctly oriented for optimal functionality. Finally, inspect the connection for stability before continuing to the next steps in your installation process.
Step 7: Backfill
After ensuring the hydrant is securely installed and properly oriented, begin the backfilling process. Use the excavated soil to fill in the hole around the hydrant and piping. Add the soil in layers, compacting each layer gently with a tamper or the back of a shovel to prevent future settling.
Be cautious not to disturb or damage the hydrant or piping during this process. Once the hole is completely filled, ensure the surface is level and stable. If necessary, add additional soil to create a slight mound or slope away from the hydrant to encourage proper drainage.
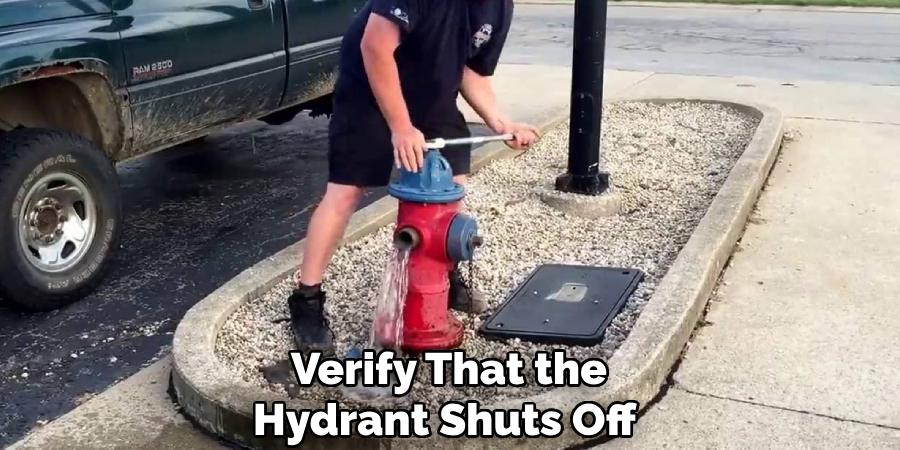
Step 8: Test
After completing the backfilling process, it’s important to test the hydrant to ensure everything is functioning correctly. Slowly turn on the water supply and check for any leaks around the hydrant and piping connections. Allow the hydrant to run for a few minutes to confirm proper water flow and pressure. Additionally, verify that the hydrant shuts off completely and the water drains as expected. If any issues are detected, address them promptly before putting the hydrant into regular use.
Following these steps on how to install a frost free yard hydrant will ensure that the hydrant is properly installed and functioning correctly. It is recommended to periodically check and maintain the hydrant to ensure its continued functionality.
Additional Tips:
- Before starting any installation, make sure to check with your local municipality for any permits or regulations regarding fire hydrants.
- Consider installing a locking mechanism on your fire hydrant to prevent unauthorized use.
- Regularly inspect and maintain your fire hydrants to ensure they are in proper working condition.
- If you notice any issues or malfunctions with your fire hydrant, contact a professional for repairs or replacements.
- Train and educate individuals on how to properly use the fire hydrant to avoid misuse or damage.
- Keep the area around the fire hydrant clear of any obstacles or debris for easy access during emergencies.
- Consider installing multiple fire hydrants in larger properties or areas to ensure adequate coverage and accessibility in case of emergencies.
Frequently Asked Questions
Q1: How Do I Know if My Fire Hydrant is Functioning Properly?
A: Regular inspections and maintenance by a professional can ensure that your fire hydrant is in good working condition. Signs of malfunctioning may include leaks, low water pressure, or difficulty in opening the valve.
Q2: Can I Use a Fire Hydrant for Purposes Other Than Firefighting?
A: No, fire hydrants are specifically designed for firefighting and should not be used for any other purposes. Tampering with or misusing a fire hydrant can cause damage and hinder its effectiveness during emergencies.
Q3: Are There Different Types of Fire Hydrants?
A: Yes, there are several types of fire hydrants, including dry barrel, wet barrel, and flush hydrants. The type of hydrant used depends on location, climate, and water source.
Q4: How Do I Locate a Fire Hydrant?
A: Fire hydrants are usually located along the street or sidewalk in public areas. They are typically painted a bright color such as red or yellow, for easy visibility. If you are unsure where to find a fire hydrant in your area, you can contact your local fire department for assistance.

Conclusion
Fire hydrants are critical components of public safety infrastructure, providing firefighters with the water needed to combat fires efficiently. Understanding the different types of hydrants and their locations can help ensure they are properly utilized and maintained.
Whether you are a public official, property owner, or community member, staying informed about fire hydrant operations and accessibility is essential for maintaining safety in your area. Thanks for reading this article on how to install a frost free yard hydrant.
About the Author
Adrian Green is a passionate woodworking enthusiast who has dedicated his life to the craft of woodworking. From his early days working alongside his father in the family woodworking shop, Adrian has honed his skills and developed a deep love for creating beautiful, functional pieces with his hands. As the voice behind The Woodenify Blog, he shares his knowledge, tips, and inspiration with fellow woodworkers of all skill levels, helping them build confidence in their abilities while learning new techniques.
Professional Focus
- Specializes in DIY woodworking projects, from furniture making to home décor.
- Provides step-by-step guides, tips, and practical tutorials for woodworkers at any skill level.
- Focused on empowering readers with confidence and knowledge through easy-to-follow instructions and hands-on techniques.
- Passionate about building a community where makers can share, learn, and grow together in the world of woodworking.
Education History
University of Craft and Design – Bachelor of Fine Arts (BFA) in Woodworking and Furniture Design
Woodworking Apprenticeships – Gained extensive hands-on experience through various workshops and mentorships with seasoned craftsmen, refining carpentry and furniture-making skills.
Expertise
- DIY woodworking, carpentry, furniture making, and home décor projects.
- Creating clear, accessible tutorials and guides for beginner to advanced woodworkers.
- Helping readers experience the satisfaction and fulfillment of turning raw materials into stunning finished products.