
Properly cleaning the burners on a gas stove is essential to maintain its efficiency and ensure safety in your kitchen. Over time, burners can accumulate grease, food particles, and dirt, which may affect their performance and even lead to uneven cooking. Regular maintenance not only prolongs the life of your stove but also helps prevent potential hazards.
This guide on how to clean the burners on a gas stove will take you through a simple step-by-step process to clean your gas stove burners effectively.
Why Is It Important to Clean Your Gas Stove Burners Regularly?
Keeping your gas stove burners clean is crucial for several reasons:
Efficiency:
As mentioned earlier, build-up on the burners can affect their performance and cause uneven cooking. Cleaning them regularly ensures they function at their best and cook your food evenly.
Safety:
Grease and food particles on the burners can be a fire hazard if left unattended. A thorough cleaning removes any potential risks and keeps your kitchen safe.
Hygiene:
With frequent use, gas stove burners can harbor bacteria and germs that can contaminate your food. Regular cleaning helps maintain a hygienic cooking environment.
7 Step-by-Step Guides on How to Clean the Burners on a Gas Stove
Step 1: Remove Burner Grates and Caps
Start by ensuring your gas stove is completely cool and the burners are turned off. Carefully lift off the burner grates and caps from the stove. These components are typically removable to make cleaning easier.
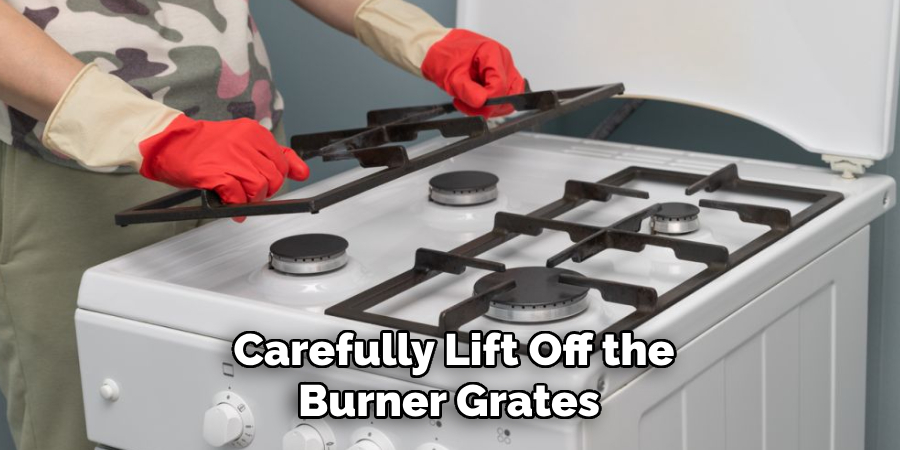
Place them in a sink or on a clean surface to prepare them for washing. Removing the grates and caps exposes the burner heads, making it easier to access and clean any grime, grease, or food debris underneath.
Step 2: Soak in Hot Soapy Water
Fill your sink or a large basin with hot water and add a few drops of dish soap. Place the burner grates and caps into the soapy water and allow them to soak for about 15 to 20 minutes.
This soaking process helps to loosen stubborn grease and grime, making it easier to scrub them clean. Ensure all components are fully submerged for the best results.
Step 3: Remove Burner Heads
Carefully remove the burner heads from the stovetop, referring to your appliance’s manual if necessary. Gently lift them off, taking care not to damage adjacent components or gas openings.
Inspect the burner heads for any clogs or residue, as these can affect the performance of your stove. Once removed, set them aside to clean separately, ensuring they are free from grease and buildup before reassembly.
Step 4: Scrub with a Non-abrasive Cleaner
Using a non-abrasive cleaner, gently scrub the burner heads and other removable components to remove grease, grime, and burnt-on residue. Opt for a soft sponge or brush to avoid scratching or damaging the surfaces.
Pay special attention to any small openings or grooves where buildup might be hiding, and make sure to clean thoroughly for optimal performance. Once cleaned, rinse all components with warm water and allow them to air dry completely before proceeding with reassembly.
Step 5: Rinse with Hot Water
After scrubbing, take each component and thoroughly rinse it under hot running water. The heat helps to remove any remaining residue or cleanser, ensuring the surfaces are completely clean.

Make sure no traces of the cleaning solution are left, as they may affect the burner’s performance or cause odors when heated. Double-check grooves and openings to ensure a complete rinse.
Step 6: Dry Thoroughly
Once all the components have been rinsed, use a clean, dry towel to remove the majority of the water. After towel drying, allow the parts to air dry completely in a well-ventilated area.
Ensuring the components are fully dry is crucial to prevent rust or moisture-related issues when reassembling and using the burner. Patience during this step can help maintain the longevity of your equipment.
Step 7: Reassemble and Test
After all components are completely dry, begin reassembling the burner. Carefully align each part to ensure everything fits correctly and securely in place. Refer to the manufacturer’s manual if needed for proper assembly instructions. Once the burner is fully reassembled, perform a safety check by inspecting connections and seals to verify everything is secure.
After the inspection, conduct a test by turning on the burner in a safe, well-ventilated area. Check for proper functionality and ensure there are no unusual sounds or issues such as uneven flames. If any problems are detected, turn off the burner immediately and review the assembly. Proper reassembly and testing are essential to ensure safe and optimal performance of your burner.
Following these steps on how to clean the burners on a gas stove will not only improve the appearance of your stove but also help maintain its efficiency and safety. Regular cleaning and maintenance can also prolong the lifespan of your gas stove, saving you money in the long run.
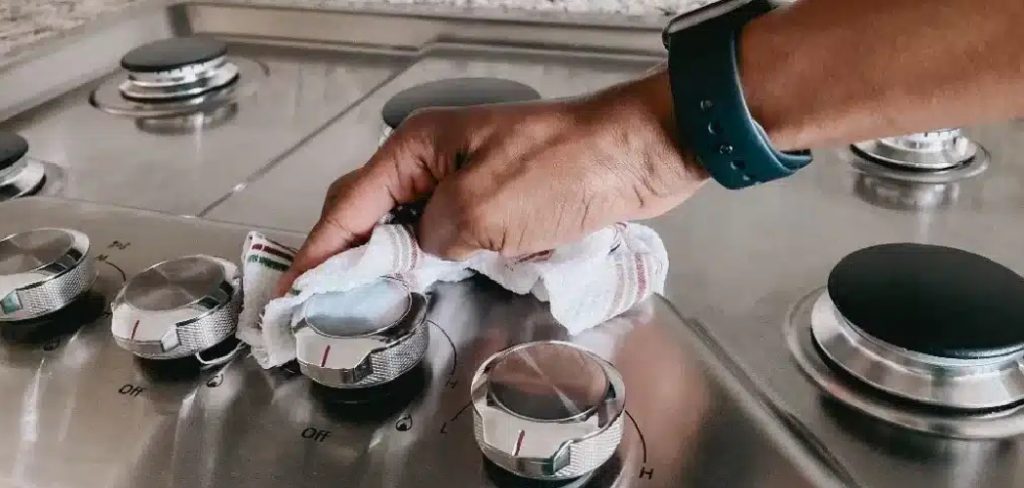
Tips for Maintaining a Clean Stove:
- Wipe down the stovetop after each use to prevent food from hardening and becoming difficult to remove.
- Use a degreaser or vinegar solution regularly to keep your stove looking shiny and new.
- Avoid using harsh chemicals or abrasive cleaners on your stove as they can damage the surface.
- For tough, burnt-on stains, use a mixture of baking soda and water to create a paste. Let it sit for 15 minutes before wiping away with a damp cloth.
- Clean the burners and grates regularly to prevent the buildup of food and grease.
- Check the gas lines and connections periodically for any leaks or blockages that could affect the performance of your stove.
When to Call a Professional?
While routine cleaning and maintenance can keep your stove in good condition, there are times when you should seek professional help. If you notice issues such as gas leaks, a persistent smell of gas, uneven heating, or difficulty igniting the burners, it’s important to contact a certified technician immediately.
Additionally, if the stove’s components, such as the gas lines, burners, or electrical elements, show significant wear or damage, professional inspection and repair are necessary to ensure safety and functionality. Regular professional servicing is also recommended to address any underlying issues and prolong the lifespan of your stove.
How Much Will it Cost?
The cost of repairing or maintaining a gas stove can vary depending on the type of issue and the parts that need replacement. Minor repairs, such as cleaning clogged burners or fixing small gas leaks, may range from $50 to $150. However, more extensive repairs, such as replacing damaged gas lines or electrical components, could cost between $200 and $500 or more.

To get an accurate estimate, it’s recommended to obtain a quote from a certified technician after an inspection. Regular maintenance services, which can help prevent costly repairs, usually cost around $100 to $200, depending on the provider.
Frequently Asked Questions
Q: How Often Should I Have My Stove Serviced?
A: It is recommended to have your stove serviced at least once a year, or more frequently if you notice any issues with its performance. It is also important to have it professionally inspected and serviced if you notice any signs of wear or damage.
Q: Can I Service My Own Stove?
A: It is highly recommended to hire a certified technician for stove servicing as they have the expertise and equipment to properly inspect and repair any potential issues. Attempting to service your own stove can be dangerous and may even cause further damage.
Q: Are There Any Warning Signs That Indicate I Need to Service My Stove?
A: Yes, some common warning signs include an unusual smell of gas, difficulty igniting burners, uneven heating, or visible wear or damage on the stove itself. If you notice any of these signs, it is important to contact a professional for servicing as soon as possible to prevent potential hazards.
It is also important to regularly clean and maintain your stove to ensure it functions properly. This includes cleaning the burners, removing any built-up grease or debris, and checking for any loose or faulty parts.
Q: How Often Should I Service My Stove?
A: It is recommended to have your stove serviced at least once a year, preferably before the start of the busy cooking season. However, if you use your stove more frequently or notice any warning signs, it may be necessary to schedule servicing earlier.

Additionally, regular maintenance such as cleaning and inspecting your stove, can help prevent major issues or breakdowns. It is important to follow the manufacturer’s recommended maintenance schedule for your specific stove model.
Conclusion
Proper care and maintenance of your stove ensure its longevity, safety, and efficiency. By scheduling regular servicing and adhering to the manufacturer’s guidelines, you can prevent potential issues and keep your stove functioning optimally throughout the year.
A well-maintained stove not only enhances your cooking experience but also provides peace of mind, allowing you to focus on creating delicious meals for your family and friends. Thanks for reading this article on how to clean the burners on a gas stove.
About the Author
Adrian Green is a passionate woodworking enthusiast who has dedicated his life to the craft of woodworking. From his early days working alongside his father in the family woodworking shop, Adrian has honed his skills and developed a deep love for creating beautiful, functional pieces with his hands. As the voice behind The Woodenify Blog, he shares his knowledge, tips, and inspiration with fellow woodworkers of all skill levels, helping them build confidence in their abilities while learning new techniques.
Professional Focus
- Specializes in DIY woodworking projects, from furniture making to home décor.
- Provides step-by-step guides, tips, and practical tutorials for woodworkers at any skill level.
- Focused on empowering readers with confidence and knowledge through easy-to-follow instructions and hands-on techniques.
- Passionate about building a community where makers can share, learn, and grow together in the world of woodworking.
Education History
University of Craft and Design – Bachelor of Fine Arts (BFA) in Woodworking and Furniture Design
Woodworking Apprenticeships – Gained extensive hands-on experience through various workshops and mentorships with seasoned craftsmen, refining carpentry and furniture-making skills.
Expertise
- DIY woodworking, carpentry, furniture making, and home décor projects.
- Creating clear, accessible tutorials and guides for beginner to advanced woodworkers.
- Helping readers experience the satisfaction and fulfillment of turning raw materials into stunning finished products.