
A loose shower head can be a common inconvenience, causing water to spray unevenly or leading to unnecessary leaks. Fortunately, fixing this issue is usually a quick and simple task that doesn’t require specialized tools or professional help.

By following a few straightforward steps, you can secure your shower head and restore it to optimal working condition in no time. In this blog post, we’ll walk you through the steps on how to fix a loose shower head so that you can get back to using it in no time! So grab your tools, and let’s get started!
Common Causes of a Loose Shower Head
A loose shower head can be caused by several common issues, many of which develop over time with regular use. One of the most frequent causes is wear and tear on the threads that connect the shower head to the shower arm. Over time, these threads can loosen due to water pressure and repeated adjustments.
Another common cause is the buildup of mineral deposits or debris within the connection, which can prevent the shower head from tightening securely. Additionally, a lack of proper installation or the absence of plumber’s tape on the threads can result in a poor seal, allowing the shower head to become loose. Identifying the root cause is the first step in effectively addressing and fixing the problem.
Tools and Materials Needed
To address a loose shower head effectively, you will need the following tools and materials:
- Adjustable Wrench: Useful for tightening connections without damaging the shower head.
- Plumber’s Tape (Teflon tape): Helps create a watertight seal and ensures a secure fit.
- Cleaning Brush or Toothbrush: Ideal for removing mineral deposits or debris from the threads.
- Vinegar or Descaling Solution: Used to dissolve stubborn mineral buildup.
- Soft Cloth or Rag: Helps protect the shower head finish during adjustments and cleaning.
- Bucket or Container: Handy for soaking parts to remove buildup if needed.
Having these tools and materials prepared will make the repair process smoother and more efficient.
10 Methods How to Fix a Loose Shower Head
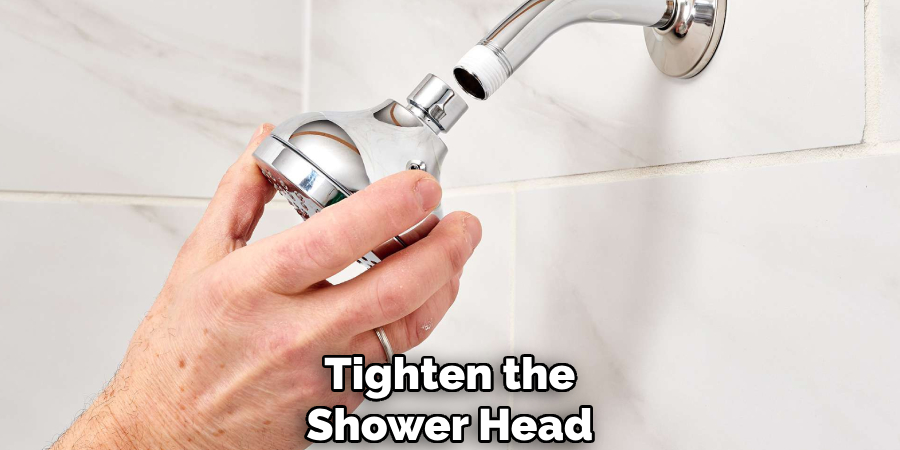
1. Tighten the Shower Head by Hand
The simplest and first step to fix a loose shower head is to attempt tightening it manually. Sometimes, the looseness comes from the shower head just being slightly unscrewed from the shower arm. Grip the shower head firmly and turn it clockwise to tighten. If it doesn’t tighten easily, avoid forcing it to prevent damage. This method works best when the loosening is minor and the threads on the shower arm and head are still intact and clean. Even a slight turn can often stop the wobbling and prevent leaks.
2. Use an Adjustable Wrench or Pliers with Care
If hand tightening isn’t enough, the next step is to use an adjustable wrench or slip-joint pliers to firmly secure the shower head. Before you do so, wrap the jaws of the tool with a soft cloth or painter’s tape to avoid scratching or denting the metal surface of the shower head. Then, carefully grip the base of the shower head where it connects to the shower arm and turn clockwise to tighten. This method provides greater leverage, allowing you to fix more stubborn looseness caused by wear or repeated use. Be cautious to apply only moderate pressure to avoid stripping the threads.
3. Apply Plumber’s Tape (Teflon Tape) to the Threads
A common reason for a loose or leaking shower head is worn or damaged thread seals. Plumber’s tape, also known as Teflon tape, is an inexpensive and effective way to ensure a tight, watertight connection. To do this, first unscrew the shower head completely from the shower arm. Clean the threads on the arm thoroughly to remove any debris or old tape. Wrap the plumber’s tape clockwise around the threads two or three times, pressing it into the grooves. Then screw the shower head back on and tighten by hand or with tools if needed. The tape fills gaps in the threads and prevents loosening caused by water pressure and movement.
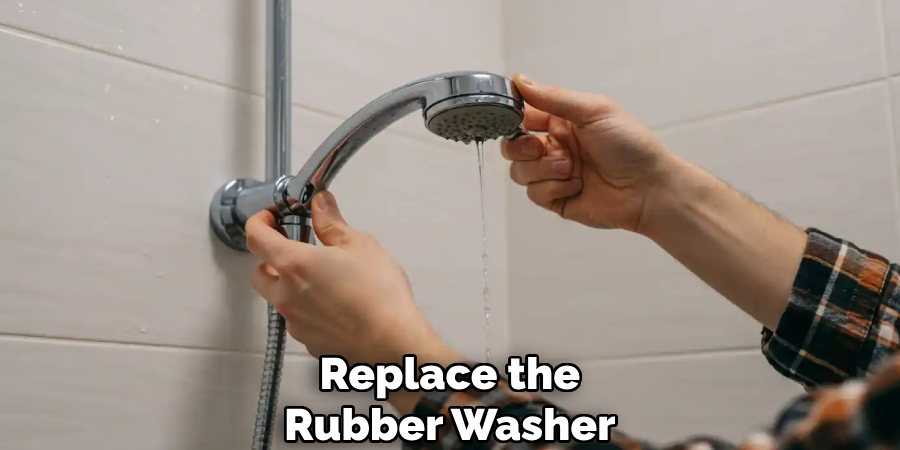
4. Replace the Rubber Washer or O-ring Inside the Shower Head
Sometimes, looseness and leaking occur because the internal rubber washer or O-ring that creates a seal inside the shower head has worn out or degraded. These components are relatively inexpensive and easy to replace. Begin by unscrewing the shower head and locating the washer inside the connection point. Remove the old washer and replace it with a new one of the same size and thickness. Then reattach the shower head with plumber’s tape on the threads for extra security. Replacing the washer not only fixes looseness but also helps eliminate drips and water waste.
5. Clean Mineral Deposits and Debris from Threads
Mineral buildup from hard water is a common culprit that can prevent the shower head from tightening properly. Over time, calcium and lime deposits accumulate on the threads of both the shower arm and the shower head, causing a rough fit and a loose connection. To fix this, carefully remove the shower head and soak it in a vinegar solution for an hour or two to dissolve the deposits. You can also use a small wire brush or toothbrush to scrub away stubborn buildup. Clean the shower arm threads in the same manner. Once clean, dry the threads, apply plumber’s tape, and reinstall the shower head securely.
6. Use a Thread Sealant Compound for Extra Strength
If plumber’s tape alone doesn’t hold the shower head tight, consider using a thread sealant compound. This is a paste-like substance that you apply to the threads before screwing the shower head back on. It creates a stronger and longer-lasting seal than tape alone, preventing loosening from water pressure and vibrations. Thread sealant is especially useful for shower heads that tend to loosen frequently or for older plumbing connections. To use it, remove the shower head, clean the threads, apply a thin layer of sealant, and then tighten the head firmly. Be aware that this sealant is usually permanent and may make future removal more difficult.
7. Check and Tighten the Shower Arm Connection
Sometimes, the looseness is not with the shower head but with the shower arm itself, which connects the pipe inside the wall to the shower head. If the arm is loose, the whole assembly will wobble. Inspect the arm by gently wiggling it. If it moves, you’ll need to tighten it. Turn off the water supply, unscrew the shower arm from the wall pipe, clean the threads, apply plumber’s tape, and screw it back securely using an adjustable wrench. Then reinstall the shower head tightly. Securing the shower arm ensures a stable base and eliminates the root cause of the looseness.
8. Replace a Damaged Shower Arm or Shower Head
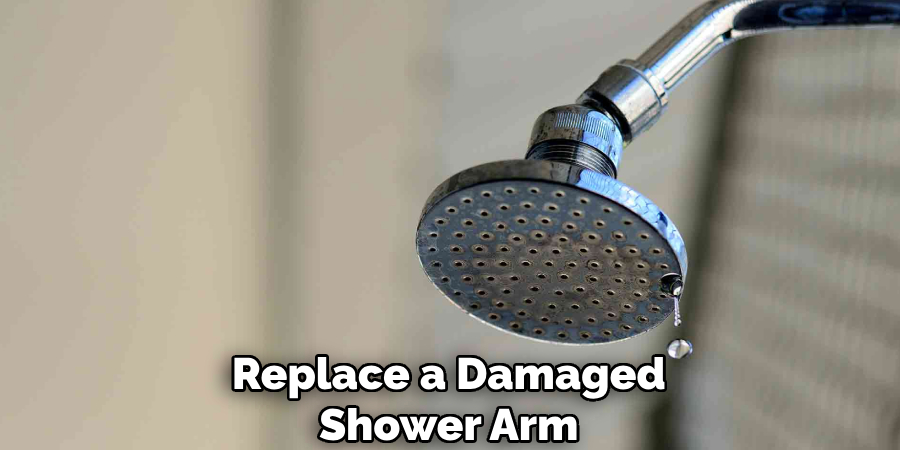
If tightening and cleaning don’t resolve the looseness, the threads on the shower arm or shower head may be stripped or damaged beyond repair. In this case, replacement is the best option. Choose a new shower arm or shower head that matches the existing plumbing’s size and style. Remove the old fixture carefully, clean the pipe threads, and apply plumber’s tape to the new part before installing it. A new, undamaged shower arm or head will fit tightly and maintain stability, preventing future loosening.
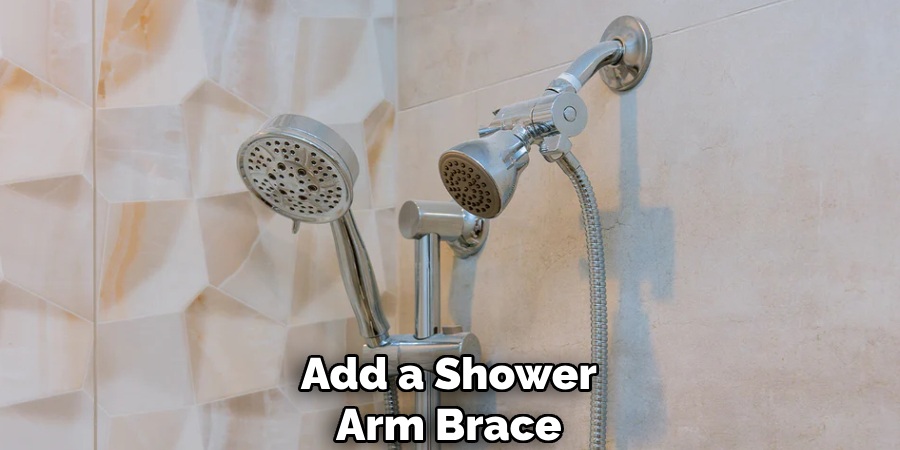
9. Add a Shower Arm Brace or Support
In some cases, the shower arm may be securely fastened but the weight or pull of the shower head causes it to feel loose or wobble. Adding a shower arm brace or support can help. These braces attach to the wall and provide extra stabilization for the arm, reducing movement and stress on the connection. They are available at most hardware stores and are simple to install with basic tools. This method is particularly helpful for heavier, handheld, or multi-function shower heads that place more strain on the plumbing connection.
10. Call a Professional Plumber for Persistent Problems
If you have tried all the above methods and the shower head remains loose or leaks persist, it may indicate deeper plumbing issues such as corroded pipes, improper installation, or damaged internal fittings. At this point, consulting a professional plumber is wise. Experienced plumbers can inspect the entire assembly, identify hidden problems, and make repairs or replacements that ensure lasting results. They also have specialized tools to safely remove stuck shower heads or repair damaged threads without causing further damage to your bathroom plumbing.
Conclusion
A loose diy shower head can be an annoying problem but is usually easy to fix with a few simple steps and some patience. Starting with basic tightening and cleaning and progressing through applying plumber’s tape, replacing washers, or even changing the shower arm, you can restore a firm and leak-free connection.
Regular maintenance, such as cleaning mineral deposits and checking the tightness periodically, will prevent loosening over time. Remember, avoiding harsh chemical cleaners and knowing when to call a professional can save you time, money, and frustration. Thanks for reading, and we hope this has given you some inspiration on how to fix a loose shower head!
About the Author
Adrian Green is a passionate woodworking enthusiast who has dedicated his life to the craft of woodworking. From his early days working alongside his father in the family woodworking shop, Adrian has honed his skills and developed a deep love for creating beautiful, functional pieces with his hands. As the voice behind The Woodenify Blog, he shares his knowledge, tips, and inspiration with fellow woodworkers of all skill levels, helping them build confidence in their abilities while learning new techniques.
Professional Focus
- Specializes in DIY woodworking projects, from furniture making to home décor.
- Provides step-by-step guides, tips, and practical tutorials for woodworkers at any skill level.
- Focused on empowering readers with confidence and knowledge through easy-to-follow instructions and hands-on techniques.
- Passionate about building a community where makers can share, learn, and grow together in the world of woodworking.
Education History
University of Craft and Design – Bachelor of Fine Arts (BFA) in Woodworking and Furniture Design
Woodworking Apprenticeships – Gained extensive hands-on experience through various workshops and mentorships with seasoned craftsmen, refining carpentry and furniture-making skills.
Expertise
- DIY woodworking, carpentry, furniture making, and home décor projects.
- Creating clear, accessible tutorials and guides for beginner to advanced woodworkers.
- Helping readers experience the satisfaction and fulfillment of turning raw materials into stunning finished products.