
Adjusting the height of a shower head can make a significant difference in comfort and usability.
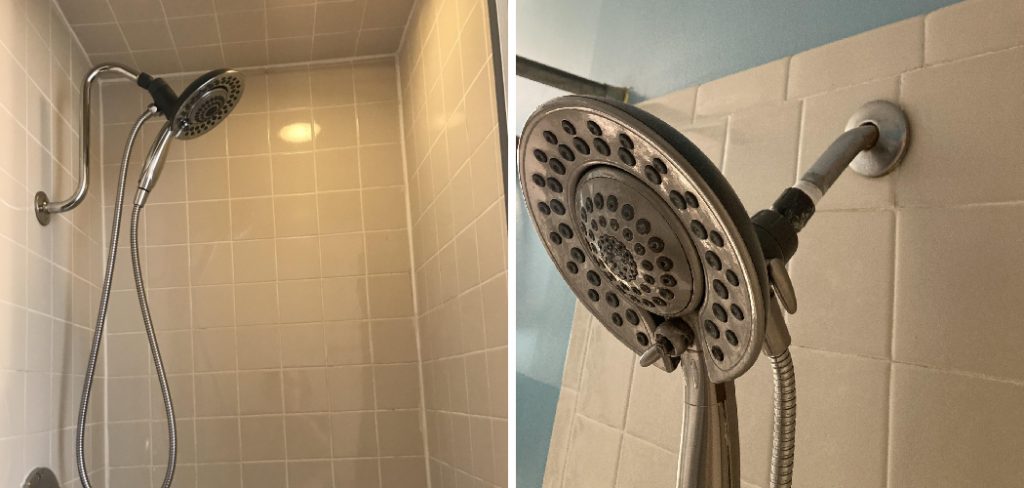
Whether you’re accommodating taller or shorter individuals, modifying the shower head position ensures a more enjoyable and personalized experience. This guide will walk you through the steps of how to lower shower heads, using tools and techniques that are simple and effective.
Reasons to Lower a Shower Head
There are several reasons why you might need to lower a shower head. For households with children, a lower shower head ensures that it is accessible and easy for younger family members to use. Similarly, shorter individuals may find it more convenient and comfortable to have the shower head positioned at a reachable height to eliminate unnecessary strain.
Lowering the shower head can also improve water flow control, as the spray is directed more effectively toward the user rather than scattering elsewhere. Additionally, in cases where water pressure is limited, reducing the height can enhance the overall showering experience by concentrating the spray closer to the user. Adjusting the height ensures inclusivity and comfort for individuals of varying heights and needs.
Tools and Materials You’ll Need
To adjust the height of a shower head effectively, you will need a few essential tools and materials. These include:
- Adjustable wrench – For loosening and tightening connections without damaging fittings.
- Plumber’s tape – To ensure a secure and leak-free connection.
- Step stool or ladder – For safe access to higher shower head installations.
- New shower arm or extension (optional) – If additional height adjustment is required.
- Cleaning cloth – To clean the area and remove debris before installation.
Having these tools and materials at hand will make the process smoother and ensure a properly adjusted shower head.
10 Methods How to Lower Shower Heads
1. Use a Shower Arm with a Lower Bend
One of the simplest and most cost-effective ways to lower a shower head is by replacing the existing straight shower arm with a gooseneck or S-shaped arm that curves downward. This minor swap significantly reduces the shower head’s height without altering the plumbing inside the wall.

To install, unscrew the old shower arm counterclockwise using an adjustable wrench (wrap it in a cloth to protect the finish), apply plumber’s tape to the threads of the new arm, and screw it into the wall fitting. Choose a model with a longer and deeper curve for greater height adjustment. This method is ideal for renters or homeowners who want a reversible, non-invasive change.
2. Install an Adjustable Slide Bar
For a more flexible and long-term solution, consider installing a shower slide bar, which allows you to move the shower head up or down along a vertical track. This is especially useful for households with people of different heights or limited mobility.
Slide bars are mounted with wall anchors and screws, and they typically come with a hand-held shower head that clicks into a holder that slides. Installation requires drilling into tile or drywall, but the result is a custom-height shower every time. Make sure the wall is suitable for anchoring, and use stainless steel screws to prevent rust in a damp environment.
3. Use a Shower Head Extension Arm
If you want to lower your existing shower head without buying a new one, a pivoting or adjustable extension arm is a great choice. These arms attach directly to the existing shower arm and extend downward, often with a telescoping or hinged feature.
They allow you to position the shower head to your exact preference and are especially helpful if your existing arm is too short or placed too high on the wall. Installation is straightforward: remove the current head, attach the extension arm to the shower pipe, and then reattach the head to the end of the extension. Be sure to use plumber’s tape at every joint to prevent leaks.
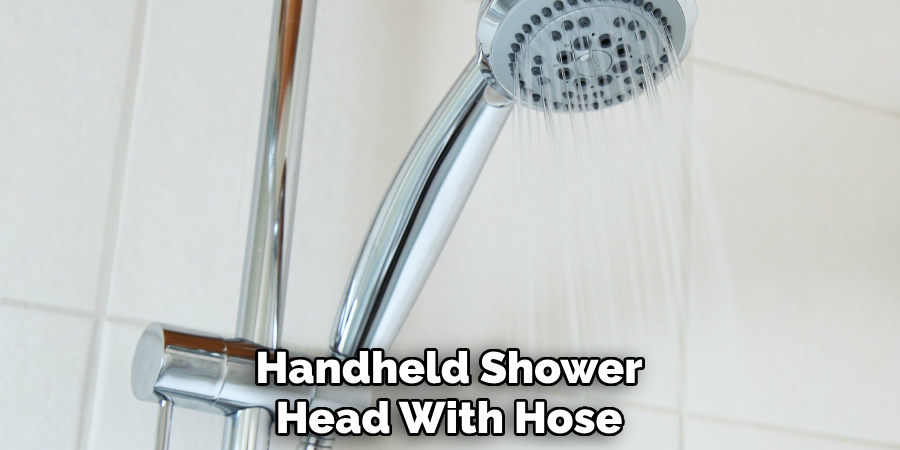
4. Convert to a Handheld Shower Head with Hose
Switching to a handheld shower head with a flexible hose gives you complete freedom over height. Instead of adjusting the mounting, the hose allows the user to control the position manually. Many handheld models come with a bracket that can be mounted lower on the wall or even attached with suction for non-permanent setups.
This is an ideal option for renters, families with young children, or individuals with mobility needs. Ensure the hose is long enough (5 to 6 feet) to be comfortably used from the lowered height and always secure the bracket tightly to avoid sagging.
5. Add a Secondary Shower Arm Diverter
Another approach is to install a diverter valve that splits the water flow between your existing shower head and a second, lower-mounted head. This setup is especially beneficial if the original fixture is too high for comfortable daily use, but you still want to preserve it.
You can install the diverter between the shower arm and the original head, then run a hose or pipe to a second fixture placed lower on the wall. This method involves a bit more hardware and possibly drilling, but it offers dual flexibility and can add luxury spa-like options to your shower experience.
6. Install a Wall-Mounted Shower Head Lower on the Wall
For a more permanent and precise solution, particularly during a bathroom renovation, you can lower the actual wall-mounted plumbing outlet. This requires cutting into the wall to reposition the water supply line and may involve a plumber unless you’re comfortable with basic plumbing tasks.
Once repositioned, a new shower arm can be attached at the desired height. This method gives you the most control over the final placement and aesthetic but also involves the most labor and expense. Make sure the water is turned off and pipes are properly sealed to avoid long-term water damage.
7. Use a Swivel Ball Adapter
If the goal is to slightly lower and angle the shower head downward rather than drastically change its height, a swivel ball adapter might be all you need. This inexpensive and easy-to-install fitting screws between the shower arm and the head, allowing you to adjust the angle. While it won’t lower the height substantially, it helps direct the water flow down toward shorter users. It’s a good supplementary option in combination with other methods like an extension arm or handheld hose.
8. Install a Ceiling-Mounted Shower Arm
If you’re remodeling your bathroom or planning a more luxurious shower upgrade, consider rerouting the shower pipe to drop from the ceiling rather than extend from the wall. This design, often seen in rainfall-style showers, allows complete control over height and can place the shower head at any point that suits the user.

It involves rerouting plumbing inside the wall and ceiling, cutting drywall, and possibly installing ceiling anchors. While more labor-intensive, this method creates an elegant look and is especially practical in bathrooms with very high walls or cathedral ceilings.
9. Use a Portable Shower Head Holder with Suction Mount
For a non-permanent, damage-free option, suction cup shower head holders offer quick and adjustable solutions. These holders can be mounted anywhere on the shower wall and used with handheld heads.
They are perfect for temporary needs such as bathing kids, seated showers, or guest accommodations. However, not all suction holders are created equal—look for ones with strong suction mechanisms and weight ratings suitable for your shower head. This solution is convenient, budget-friendly, and requires no tools or modifications.
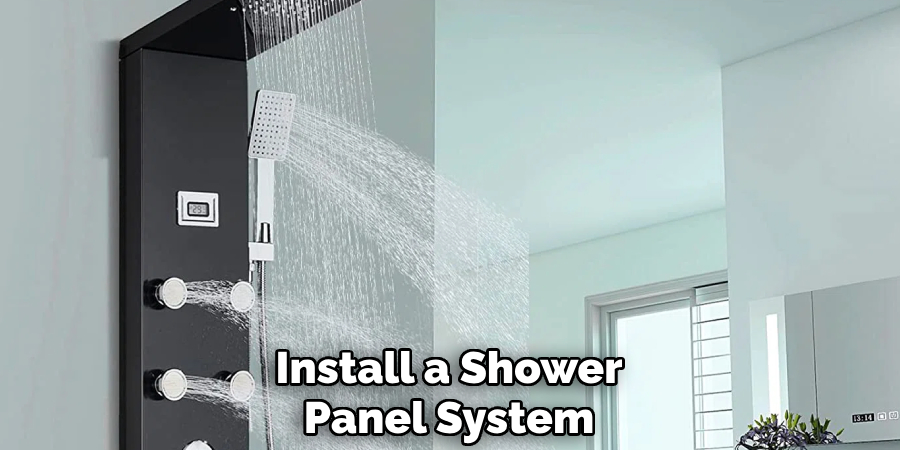
10. Install a Shower Panel System with Multiple Spray Options
A shower panel system includes a variety of spray options—often including an overhead shower, body jets, and a handheld sprayer. These systems are wall-mounted and generally include all necessary fixtures in one vertical unit. You can choose to mount the entire panel lower on the wall if height is a concern.
Some even allow multiple users to choose different functions and levels. Although they may require plumbing adjustments and secure anchoring, shower panels offer a modern and customizable shower experience, suitable for renovations or homeowners looking to upgrade function and style.
Things to Consider When Choosing a Shower Panel
When selecting a shower panel, a few critical factors need to be taken into account to ensure it suits your bathroom and personal preferences. First, consider the water pressure in your home, as some panels may require higher pressure to operate all features effectively. Next, evaluate the size and layout of your shower space to ensure the panel fits comfortably and aligns with your design aesthetic.
Additionally, check the material and finish of the panel for durability and ease of maintenance. Stainless steel and tempered glass are popular choices for their longevity and sleek appearance. It’s also essential to review the installation requirements, as some models may need professional assistance or updates to your plumbing system. Lastly, consider your budget and prioritize the features that matter most to you, such as rainfall heads, massage jets, or temperature control, to maximize comfort and functionality.
Conclusion
Lowering a bathroom shower heads can be as easy or complex as your needs and budget allow. From simple mechanical swaps like bent arms and suction mounts to fully custom installations involving wall plumbing, each method provides a viable solution for different circumstances.
Thanks for reading, and we hope this has given you some inspiration on how to lower shower heads!
About the Author
Adrian Green is a passionate woodworking enthusiast who has dedicated his life to the craft of woodworking. From his early days working alongside his father in the family woodworking shop, Adrian has honed his skills and developed a deep love for creating beautiful, functional pieces with his hands. As the voice behind The Woodenify Blog, he shares his knowledge, tips, and inspiration with fellow woodworkers of all skill levels, helping them build confidence in their abilities while learning new techniques.
Professional Focus
- Specializes in DIY woodworking projects, from furniture making to home décor.
- Provides step-by-step guides, tips, and practical tutorials for woodworkers at any skill level.
- Focused on empowering readers with confidence and knowledge through easy-to-follow instructions and hands-on techniques.
- Passionate about building a community where makers can share, learn, and grow together in the world of woodworking.
Education History
University of Craft and Design – Bachelor of Fine Arts (BFA) in Woodworking and Furniture Design
Woodworking Apprenticeships – Gained extensive hands-on experience through various workshops and mentorships with seasoned craftsmen, refining carpentry and furniture-making skills.
Expertise
- DIY woodworking, carpentry, furniture making, and home décor projects.
- Creating clear, accessible tutorials and guides for beginner to advanced woodworkers.
- Helping readers experience the satisfaction and fulfillment of turning raw materials into stunning finished products.