
Installing bathroom vanity plumbing can seem like a daunting task, but with the right tools and a clear step-by-step guide, it becomes manageable even for beginners.
Whether you’re renovating your bathroom or replacing an old vanity, understanding how to properly connect the plumbing is essential to ensure functionality and prevent leaks. This guide will walk you through how to install bathroom vanity plumbing effectively and with confidence.
Why Proper Plumbing Installation Is Important
Proper plumbing installation is crucial to ensure the long-term functionality and safety of your bathroom vanity. Poorly installed plumbing can lead to leaks, water damage, and even mold growth, which can significantly impact the integrity of your home and incur costly repairs.
Additionally, proper installation ensures efficient water flow, reducing the likelihood of clogs and other issues that could disrupt daily use. By taking the time to correctly install the plumbing, you can also extend the lifespan of your bathroom vanity and maintain a clean, hygienic environment. Remember, investing effort into proper installation upfront can save you time, money, and stress in the future.
Tools and Materials You’ll Need
Before beginning the installation process, it’s essential to gather all the necessary tools and materials to ensure a smooth and efficient workflow. Here’s a checklist to help you get started:
Tools:
- Adjustable wrench
- Screwdriver (flathead and Phillips)
- Tape measure
- Pipe wrench
- Level
- Hole saw or jigsaw (if modifications are needed)
- Caulking gun
Materials:
- Plumbing tape (Teflon tape)
- Silicone sealant
- Flexible water supply lines
- Drain assembly kit
- Properly sized nuts, bolts, and washers
- Wax ring (for toilets, if applicable)
Having all these tools and materials at hand will streamline the installation process and help prevent unnecessary delays.
10 Methods How to Install Bathroom Vanity Plumbing
1. Prepare the Plumbing Layout Before Installation
Before installing the vanity itself, you must confirm that the plumbing rough-ins—specifically the drain outlet and water supply lines—align with the back of your chosen vanity. Most vanities are designed to accommodate standard placements, but custom or vintage units may require adjustments. Use a measuring tape and mark the wall to verify where your supply lines and drain will enter.
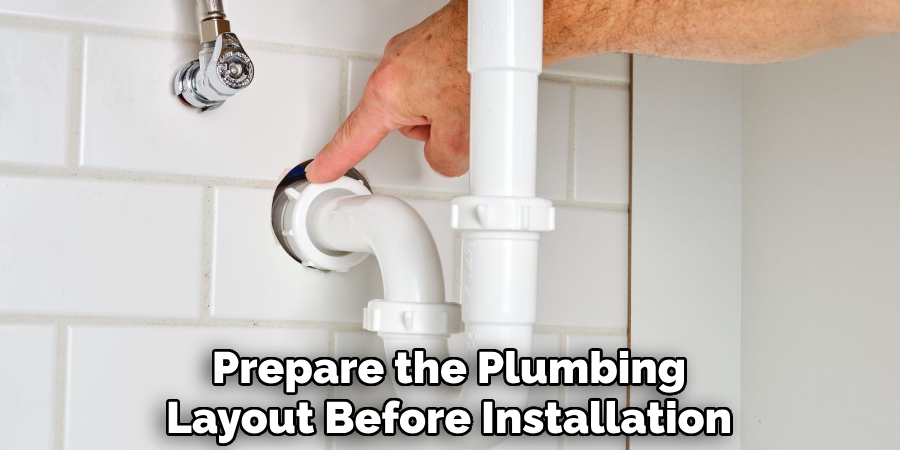
This is also the time to turn off the water at the shut-off valves to avoid flooding. If your vanity has drawers or shelves that might interfere with pipe placement, now is the moment to determine whether holes need to be cut in the rear of the cabinet or whether a more extensive rerouting of plumbing is required.
2. Install or Replace Shut-Off Valves
Shut-off valves (also known as angle stops) control the water supply to your sink and are essential for both safety and maintenance. If your existing valves are old, leaking, or stuck, it’s wise to replace them before installing the vanity.
You’ll first shut off the main water supply, then use a wrench to remove the old valve, applying gentle torque to avoid damaging the pipe. Clean the threads, wrap them with plumber’s tape, and install the new compression or threaded valve, depending on the pipe type. Use an adjustable wrench to tighten until secure, but be careful not to over-tighten, as that may cause leaks or damage.
3. Connect the Supply Lines to the Faucet
Once your shut-off valves are in place, it’s time to install the faucet on your vanity top before setting the top onto the cabinet. With the faucet secured, connect flexible braided water supply lines to the hot and cold ports underneath the faucet. These lines will eventually attach to the shut-off valves.
It’s important to use the correct length so there’s no kinking or excessive bending. Hand-tighten first, then use a wrench for a final snug turn, being careful not to strip the threads. This step ensures a clean connection ready for when you complete the water hookup later in the process.
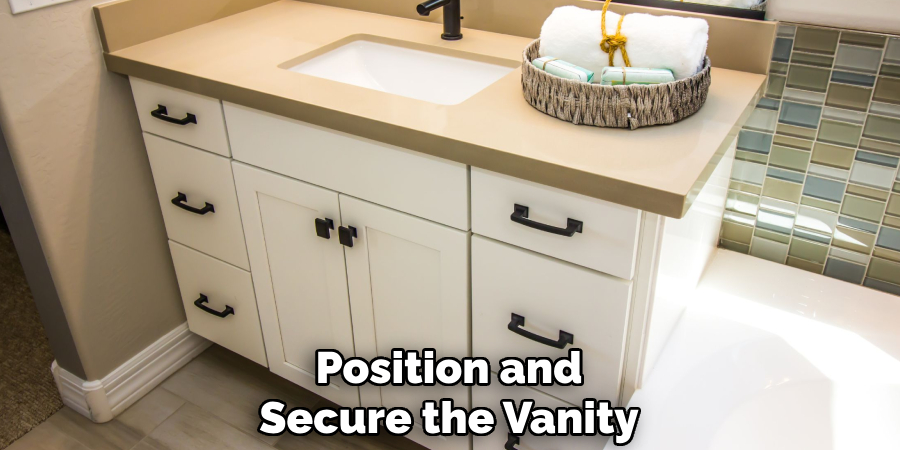
4. Position and Secure the Vanity
Before hooking up the plumbing completely, place the vanity in its final position. Slide it against the wall, aligning the rear cutouts or open back with the existing plumbing. If necessary, use a jigsaw to modify the cabinet backing to accommodate supply lines and the drain. Use a level to make sure the vanity sits evenly on the floor.
Shim where needed to ensure balance. Once level, fasten the vanity to wall studs using screws driven through mounting brackets or the vanity’s rear panel. This anchors the structure securely, especially if it will bear the weight of a heavy countertop or sink.
5. Install the Drain Assembly to the Sink
With the vanity in place and faucet installed, it’s time to fit the drain. Apply plumber’s putty or silicone sealant under the sink flange (the visible metal ring in the basin). Drop the flange into the sink drain hole, then attach the drain body underneath the sink and tighten the mounting nut.
Be sure the gasket or rubber washer is seated properly to prevent leaks. If you’re installing a pop-up drain, make sure the lever arm aligns with the faucet controls. Wipe off excess putty once the assembly is secure, and allow any silicone to cure if used instead.
6. Connect the P-Trap to the Drain Pipe
The P-trap is a curved section of pipe designed to hold water and block sewer gases from entering your home. Slide the trap arm into the wall drain stub-out and connect the trap bend to the tailpiece that extends from the sink drain. Hand-tighten the slip nuts and washers to ensure a snug fit—avoid using tools that might over-tighten and crack plastic fittings.
It’s important that the trap slopes slightly downward toward the wall to ensure proper drainage. If the measurements are slightly off, you may need to trim the tailpiece or use an extension or flexible drain pipe to bridge the gap.
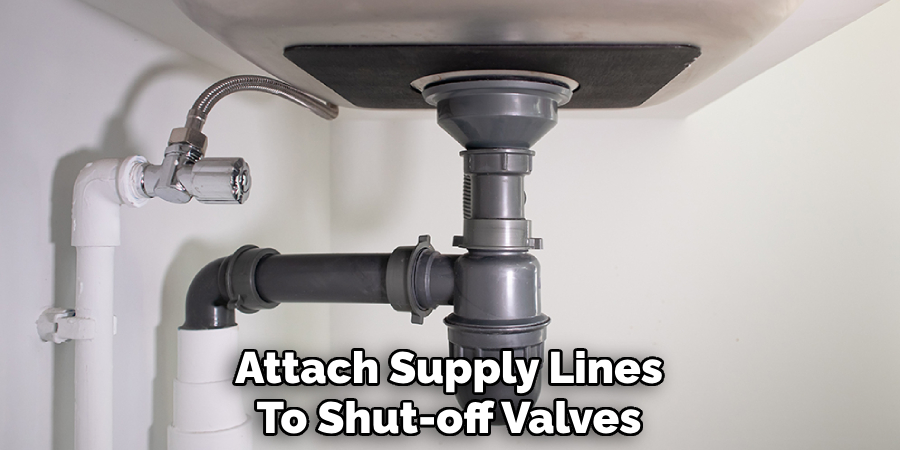
7. Attach Supply Lines to Shut-Off Valves
Now that everything is structurally in place, connect the braided water supply lines to the shut-off valves. Align the connectors and hand-tighten them before giving a final firm twist with a wrench. Use a cloth to protect the chrome finish and avoid overtightening, which can damage the compression fittings.
Once connected, turn the shut-off valves on slowly and check for leaks at both ends of the line. Let the water flow into the faucet briefly to flush out any debris that may have entered the lines during installation.
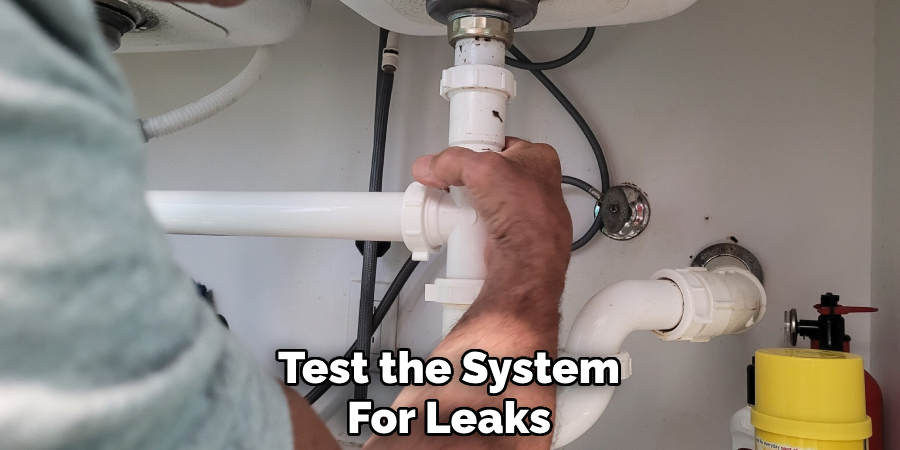
8. Test the System for Leaks
With all connections made, turn on both hot and cold shut-off valves and run the faucet. Check for leaks at every joint—especially under the sink where the tailpiece, P-trap, and supply lines are located. Look for dripping water or moisture around the fittings.
If you find any leaks, shut the valve off and disassemble the affected connection, reseating washers or reapplying plumber’s tape as necessary. Sometimes, simply tightening the nut by a quarter-turn more can resolve minor leaks. Take your time during this step—it’s much easier to fix a small leak now than deal with water damage later.
9. Seal the Vanity Top and Backsplash
Once all plumbing is functional and leak-free, seal any gaps between the vanity top and wall using silicone caulk. Apply a bead along the edges where the countertop meets the backsplash and where the backsplash meets the wall. Use a wet finger or caulk-smoothing tool to create a clean, water-resistant seal. Let the caulk cure fully before using the sink. This prevents water from seeping behind the vanity, which can lead to mold, mildew, or warping of the cabinet over time. Clear or color-matched silicone provides a polished, professional look.
10. Install the Vanity Drawer and Finishing Touches
Finally, if your vanity includes drawers, reattach them after plumbing installation. Make sure the plumbing does not obstruct drawer movement. If it does, you may need to trim the back panels of the drawers or reposition the pipes slightly. Once everything fits, install any decorative hardware, adjust drawer alignment, and clean up dust or sealant residue. Finish by inspecting all connections once more after a few hours of use to ensure nothing has come loose due to water pressure or drawer movement.
Things to Consider When Installing a Bathroom Vanity
Measurement Accuracy
Ensure you measure the space available for your vanity correctly, including the width, depth, and height. Consider extra room for opening drawers or cabinet doors and avoid obstruction by nearby fixtures.
Plumbing Configuration
Check if your vanity’s design aligns with the existing plumbing setup. Mismatched configurations may require adjustments to the pipes, which could delay installation or incur additional costs.
Material Durability
Choose materials that are water-resistant and can withstand the humid environment of a bathroom. Common options include solid wood with proper sealing, MDF, or laminate finishes.
Storage Needs
Assess your storage requirements and compare them with the vanity’s layout. Decide between models featuring cabinets, drawers, or open shelving depending on your organizational preferences.
Tools and Supplies
Before starting, gather all necessary tools and supplies, like sealant, screws, a level, and a drill. Having everything on hand will help make the process smoother and more efficient.
Conclusion
Installing diy bathroom vanity plumbing requires attention to detail, proper alignment, and leak-proof connections. Each of these ten steps—from prepping your layout to installing valves, fittings, and sealing the top—contributes to a functional and long-lasting vanity setup.
While the task may seem daunting, taking it one method at a time ensures a safe and polished result that enhances both utility and design in your bathroom. Thanks for reading, and we hope this has given you some inspiration on how to install bathroom vanity plumbing!
About the Author
Adrian Green is a passionate woodworking enthusiast who has dedicated his life to the craft of woodworking. From his early days working alongside his father in the family woodworking shop, Adrian has honed his skills and developed a deep love for creating beautiful, functional pieces with his hands. As the voice behind The Woodenify Blog, he shares his knowledge, tips, and inspiration with fellow woodworkers of all skill levels, helping them build confidence in their abilities while learning new techniques.
Professional Focus
- Specializes in DIY woodworking projects, from furniture making to home décor.
- Provides step-by-step guides, tips, and practical tutorials for woodworkers at any skill level.
- Focused on empowering readers with confidence and knowledge through easy-to-follow instructions and hands-on techniques.
- Passionate about building a community where makers can share, learn, and grow together in the world of woodworking.
Education History
University of Craft and Design – Bachelor of Fine Arts (BFA) in Woodworking and Furniture Design
Woodworking Apprenticeships – Gained extensive hands-on experience through various workshops and mentorships with seasoned craftsmen, refining carpentry and furniture-making skills.
Expertise
- DIY woodworking, carpentry, furniture making, and home décor projects.
- Creating clear, accessible tutorials and guides for beginner to advanced woodworkers.
- Helping readers experience the satisfaction and fulfillment of turning raw materials into stunning finished products.