
Are you tired of taking cold showers and want to install a water heater gas in your home? Look no further! In this guide, we will walk you through the steps on how to install a water heater gas.
Installing a gas water heater is an essential home improvement task, ensuring a consistent hot water supply for daily needs. While it may initially seem challenging, following the correct steps can make the installation process straightforward and efficient. Proper installation is crucial for the water heater’s performance and ensuring safety and compliance with local regulations.
This guide will walk you through the necessary tools, materials, and step-by-step instructions to successfully install a gas water heater. Whether you’re replacing an old unit or setting up a new one, with some preparation and attention to detail, you can confidently complete this project.
What Are the Benefits of a Gas Water Heater?
Before we dive into the installation process, let’s briefly discuss why you should consider a gas water heater over other types.
- Cost-Efficient: Gas is more affordable than electricity, making a gas water heater more cost-efficient in the long run.
- Faster Heating: A gas water heater can heat water much faster than an electric one, providing hot water on demand.
- Reliable Performance: Gas water heaters have fewer parts and are less complex than electric ones, resulting in a longer lifespan and reliable performance.
- Lower Operational Costs: With lower operating costs than electric or tankless options, a gas water heater can save you money on utility bills.
What Will You Need?
To install a gas water heater, you will need the following tools and materials:
- Gas water heater unit
- Gas connector
- Vent pipe
- Pipe wrench
- Screwdriver
- Pipe cutter or hacksaw
- Teflon tape
- Pipe joint compound
Once you have all the necessary tools and materials, you can begin the installation process.
9 Easy Steps on How to Install a Water Heater Gas
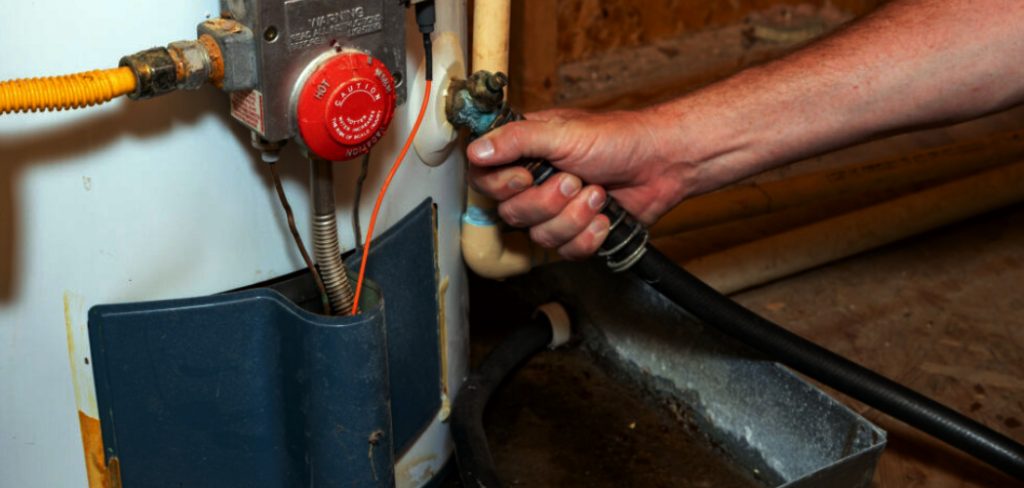
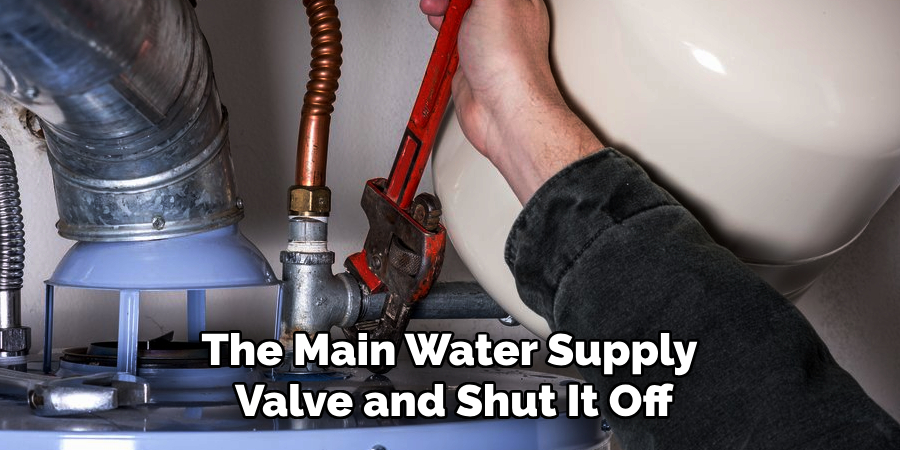
Step 1: Turn Off the Gas and Water Supply
Before initiating the installation process, ensure safety by completely turning off the gas and water supply to your home. Locate the gas shutoff valve, which is typically near your existing water heater or along the gas line, and turn it to the “off” position. Similarly, find the main water supply valve and shut it off to prevent any water from flowing into the pipes during installation. Open a nearby faucet to relieve any residual pressure in the water lines. Taking these precautions reduces the risk of accidents and makes the installation process smoother. Always double-check to confirm that the gas and water supplies are securely turned off.
Step 2: Drain the Old Water Heater
Start by connecting a garden hose to the drain valve of the old water heater. Place the other end of the hose in a suitable drainage area, such as a floor drain or outside, where the water can safely flow away. Open the drain valve and allow all the water in the tank to flow out. For faster draining, open a hot water faucet in your home to allow air to enter the tank. Be cautious, as the water may still be hot. Once the tank is empty, close the drain valve and disconnect the hose. Properly draining the old water heater ensures a safer and cleaner removal process.
Step 3: Disconnect the Old Water Heater
Before removing the old water heater, disconnect it from both the water and energy supplies. Start by detaching the cold and hot water lines connected to the tank. Use a wrench or pliers to loosen the fittings, and be prepared with a towel or bucket to catch any remaining water. If the water heater runs on gas, carefully disconnect the gas line by unscrewing the connection at the shut-off valve. For electric water heaters, ensure the unit is unplugged or disconnect the wiring by removing the access panel and safely capping all exposed wires. Once all connections are safely removed, the old water heater is ready to be removed.
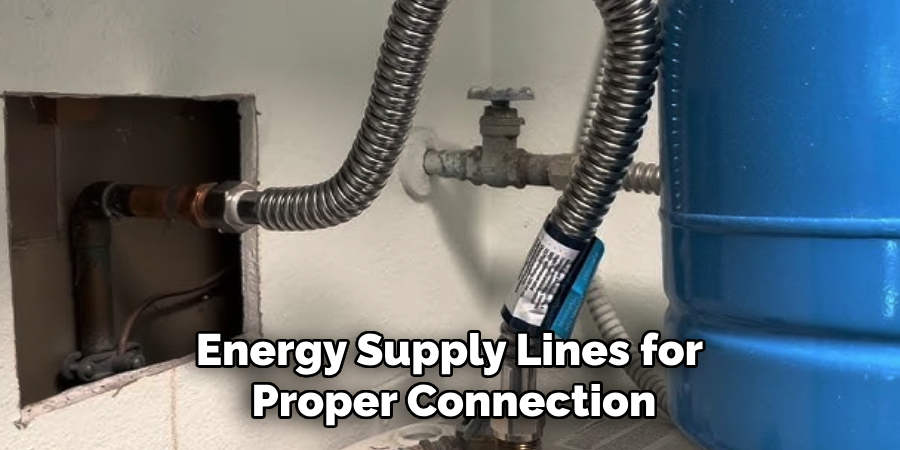
Step 4: Position the New Water Heater
Carefully move the new water heater into place, ensuring it is located in a flat and stable area. Align it with the existing water and energy supply lines for proper connection. If the new unit is taller or of a different size than the old one, adjustments to the plumbing or gas/electric connections may be necessary. Ensure the pressure relief valve is installed correctly, following the manufacturer’s instructions, and double-check adequate clearance around the unit for ventilation and maintenance access.
Step 5: Connect the Water Supply Lines
Attach the cold water supply line to the inlet marked “cold” and the hot water line to the outlet marked “hot” on the new water heater. Use pipe thread sealant or plumber’s tape on threaded connections to prevent leaks. Securely tighten the fittings but avoid over-tightening, which could cause damage. If the supply lines were previously copper, you may need to solder new connections or use flexible hoses for easier installation. Once the connections are complete, open the cold water valve to fill the tank and check for leaks.
Step 6: Connect the Gas or Electrical Supply
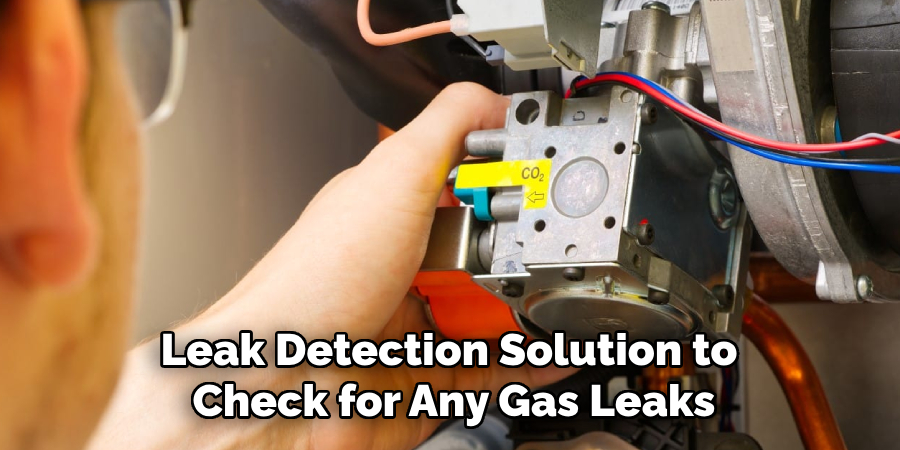
For a gas water heater, connect the gas supply line to the gas control valve on the new unit. Use a wrench to ensure a tight connection and apply a leak detection solution to check for any gas leaks. If bubbles form, turn off the gas supply and re-secure the connection. Connect the electrical wires following the manufacturer’s wiring diagram for an electric water heater. Use wire nuts to secure the connections, ensuring all cables are properly insulated. Double-check all connections to ensure safety and compliance with local building codes.
Step 7: Light the Pilot or Power On the Unit
Follow the manufacturer’s instructions for a gas water heater to light the pilot light. This typically involves setting the control knob to “Pilot” and pressing the ignition button or using a match to ignite the flame. Once lit, adjust the thermostat to your desired temperature setting. For an electric water heater, turn on the circuit breaker to supply power to the unit. Allow the water heater to heat it, which may take a couple of hours, and check that it reaches the set temperature. Ensure everything is operating correctly before completing the installation.
Step 8: Inspect for Leaks and Test the Unit
Once the water heater is operational, carefully inspect all connections for any signs of leaks. Check around the water inlet, outlet, drain valve, and temperature-pressure relief valve. Tighten any fittings if necessary, but avoid overtightening to prevent damage. Allow the unit to run for a sufficient time while monitoring its performance. Test the hot water output at various fixtures to ensure the water is heating correctly and reaching the desired temperature. Address any issues promptly to ensure the water heater functions safely and efficiently.
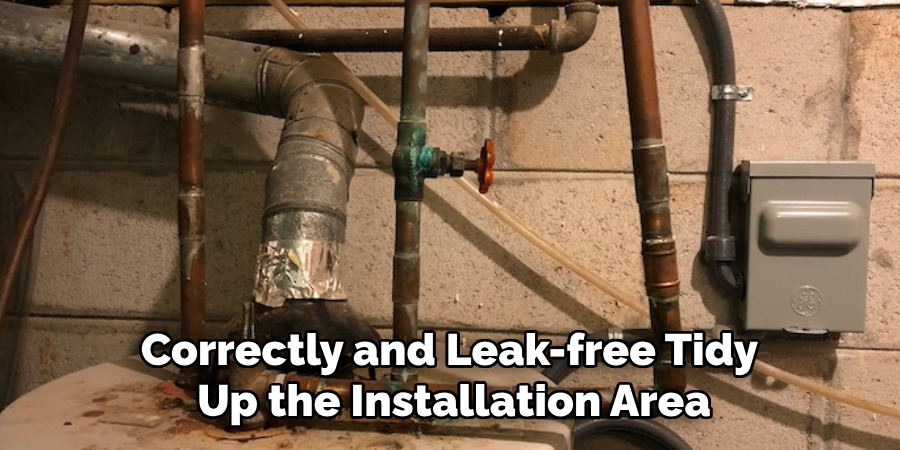
Step 9: Finalize the Installation
After ensuring the water heater is functioning correctly and leak-free, tidy up the installation area. Remove any tools, protective coverings, or debris left from the process. Insulate the hot water pipes to improve energy efficiency and reduce heat loss if required. Review the manufacturer’s instructions to confirm all steps were correctly followed. Finally, household members should be provided with information about the water heater’s operation and maintenance to ensure they use it safely and effectively.
By following these steps, you can safely and successfully install a new water heater in your home. This essential appliance provides hot water for daily use and plays a significant role in maintaining the comfort of your household.
5 Things You Should Avoid
- Skipping the Instruction Manual: One of the biggest mistakes is disregarding the manufacturer’s installation manual. Each water heater model may have specific requirements, which can lead to improper installation or safety hazards.
- Improper Ventilation: Always ensure that the room where the water heater is installed has proper ventilation. Poor ventilation can lead to dangerous gas buildup, putting you and your household at risk of carbon monoxide exposure.
- Using the Wrong Materials: Using incompatible pipes, fittings, or sealants can compromise the efficiency and safety of the installation. Ensure that all materials meet the recommended specifications in the manual and are certified for gas applications.
- Ignoring Local Building Codes: Every locality has specific building codes for gas water heater installation. Failing to comply may result in fines and leave the installation unsafe or non-functional.
- Neglecting to Test for Leaks: After installation, it is essential to test for gas leaks. Skipping this step can result in serious risks, including fire or explosion. Always check connections and use a gas detector or soapy water to identify potential leaks.
Conclusion
How to install a water heater gas requires careful planning, adherence to safety measures, and a thorough understanding of local building codes.
You can ensure a proper and safe installation by avoiding common mistakes such as poor ventilation, using the wrong materials and skipping critical steps like leak testing. Always read and follow the manufacturer’s manual closely; consult a professional plumber or technician if in doubt.
Prioritizing safety and precision will enhance your water heater’s efficiency and protect your household from potential hazards.
About the Author
Adrian Green is a passionate woodworking enthusiast who has dedicated his life to the craft of woodworking. From his early days working alongside his father in the family woodworking shop, Adrian has honed his skills and developed a deep love for creating beautiful, functional pieces with his hands. As the voice behind The Woodenify Blog, he shares his knowledge, tips, and inspiration with fellow woodworkers of all skill levels, helping them build confidence in their abilities while learning new techniques.
Professional Focus
- Specializes in DIY woodworking projects, from furniture making to home décor.
- Provides step-by-step guides, tips, and practical tutorials for woodworkers at any skill level.
- Focused on empowering readers with confidence and knowledge through easy-to-follow instructions and hands-on techniques.
- Passionate about building a community where makers can share, learn, and grow together in the world of woodworking.
Education History
University of Craft and Design – Bachelor of Fine Arts (BFA) in Woodworking and Furniture Design
Woodworking Apprenticeships – Gained extensive hands-on experience through various workshops and mentorships with seasoned craftsmen, refining carpentry and furniture-making skills.
Expertise
- DIY woodworking, carpentry, furniture making, and home décor projects.
- Creating clear, accessible tutorials and guides for beginner to advanced woodworkers.
- Helping readers experience the satisfaction and fulfillment of turning raw materials into stunning finished products.