
Are you tired of your gas water heater not providing the perfect temperature for your shower or bath? Did you know that it could be a problem with your thermostat? Don’t worry. Changing a gas water heater thermostat is easier than you think.
How to change a gas water heater thermostat can seem like a daunting task, but with the right tools and guidance, it is entirely manageable. The thermostat is a critical component of your water heater, responsible for maintaining the water temperature and ensuring it operates efficiently. Over time, thermostats may wear out or malfunction, leading to inconsistent water temperatures or increased energy bills.
This guide will walk you through the process step by step, ensuring safety and precision as you work to replace or adjust your gas water heater thermostat.
What Are the Benefits of Changing a Gas Water Heater Thermostat?
Before diving into changing your gas water heater thermostat, let’s first understand why it is essential.
- Improved Energy Efficiency: A faulty or inaccurate thermostat can cause your water heater to work harder than necessary, increasing energy consumption and higher utility bills. By changing your thermostat, you can ensure that your water heater operates optimally.
- Consistent Water Temperature: If you have ever experienced fluctuating water temperatures while taking a shower or bath, it could be due to a malfunctioning thermostat. Replacing or adjusting the thermostat will help maintain a consistent water temperature, providing a more comfortable bathing experience.
- Cost Savings: By improving energy efficiency and maintaining consistent water temperature, changing a gas water heater thermostat can lead to cost savings in the long run. You will see a decrease in your monthly utility bills, making it a worthwhile investment.
What Will You Need?
Before we get into the steps of changing your gas water heater thermostat, gathering all the necessary tools and materials is essential. Here’s a list of items you will need:
- Replacement thermostat (make sure it is compatible with your water heater)
- Screwdriver
- Adjustable wrench
- Multimeter
You are ready to begin once you have all the required tools and materials.
9 Easy Steps on How to Change a Gas Water Heater Thermostat
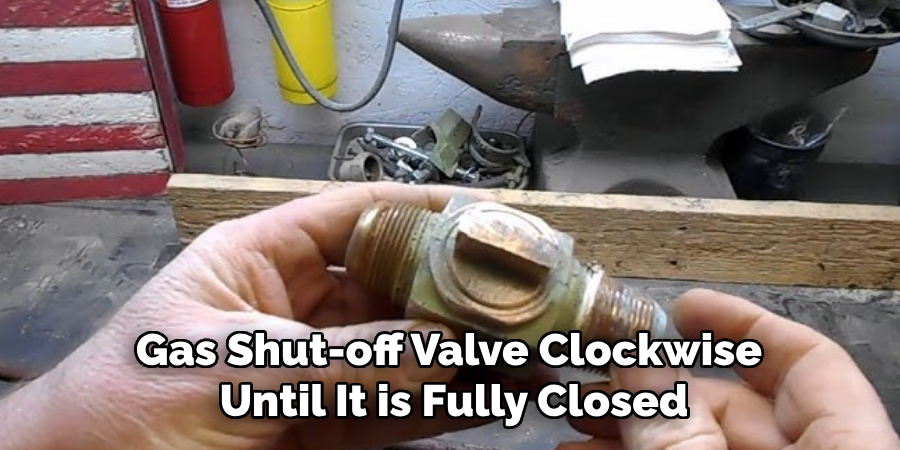
Step 1. Turn Off the Power Supply and Gas Connection
Safety is the first and most crucial step when working on a gas water heater. Begin by turning off the power supply to the water heater. If your water heater is powered by electricity, locate the circuit breaker for the water heater and switch it off. If it runs solely on gas, turn the gas supply off by turning the gas shut-off valve clockwise until it is fully closed. This prevents any accidents caused by gas leakage or electrical interference while working on the unit. Double-check that the power and gas supply are off before moving on to the next step.
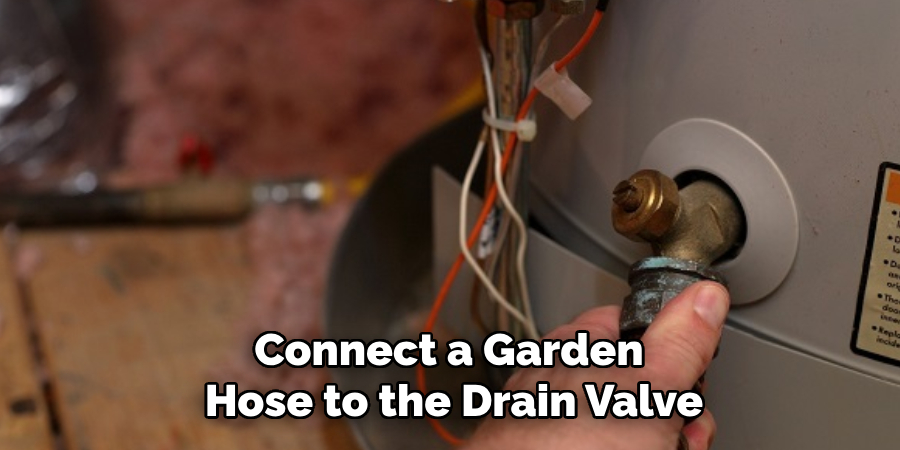
Step 2. Drain the Water Heater
To safely access the thermostat, you will need to drain the water heater. Start by turning off the cold-water supply valve to prevent more water from entering the tank. Connect a garden hose to the drain valve at the bottom of the water heater and direct the other end to a drain or outdoor area. Open the drain valve to allow water to flow out of the tank. You may also turn on the hot water faucet in a nearby sink to assist with air circulation, which will help drain the tank faster. Ensure the tank is empty before proceeding to the next step.
Step 3. Remove the Access Panel
Locate the access panel on the side of the water heater. Using a screwdriver, carefully remove the screws securing the panel in place. Once the panel is removed, you will see insulation and possibly a plastic cover protecting the thermostat and heating element. Pull back the insulation, ensuring you keep it in good condition for reassembly, and remove the plastic cover, if present. This will expose the thermostat and allow you to continue with the repair or adjustment process.
Step 4. Test the Heating Element
Before replacing or adjusting the thermostat, it is essential to test the heating element to ensure it is functioning correctly. Use a multimeter to check for continuity across the heating element terminals. Set the multimeter to the lowest ohms setting and touch the probes to the two screws on the heating element. A zero or no movement reading indicates the element is faulty and needs replacement. If the reading is within the expected range specified in your water heater’s manual, the heating element is functioning correctly, and you can proceed to address the thermostat.

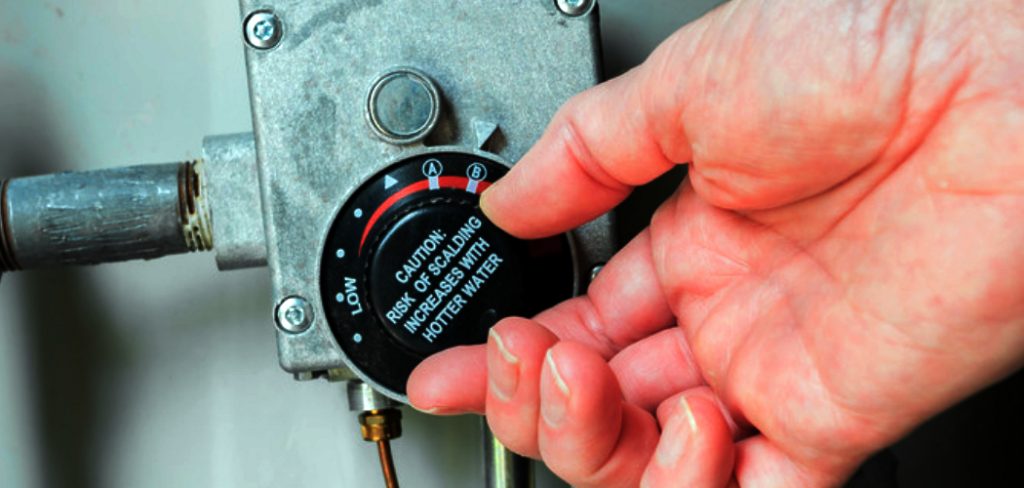
Step 5. Adjust or Replace the Thermostat
If the heating element functions correctly, the thermostat may cause the issue. If applicable, use a screwdriver to adjust the temperature setting on the thermostat to match your desired water temperature. If adjustment does not resolve the problem, the thermostat may need to be replaced. Disconnect the wires connected to the thermostat and remove it from its mounting bracket. Install the new thermostat, ensuring it is securely fixed, and reconnect the cables according to the manufacturer’s instructions. Once complete, reassemble the plastic cover and insulation, then restore power to the water heater to test its functionality.
Step 6. Test the Water Heater
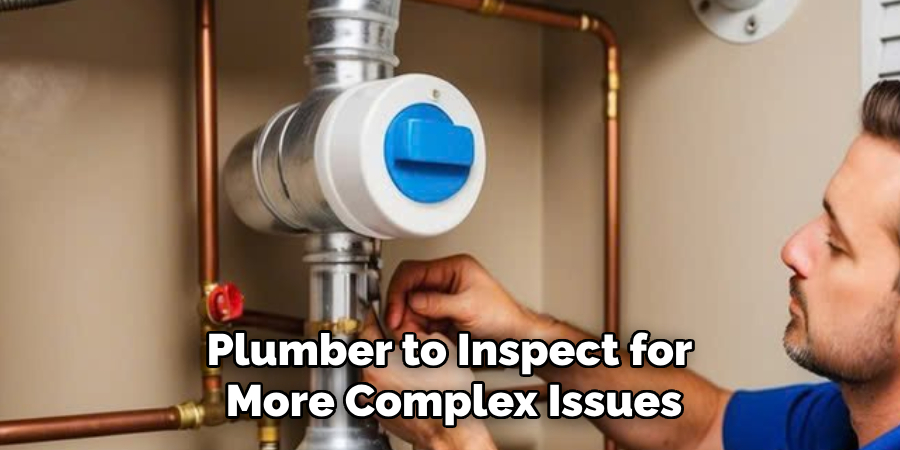
After reassembling the unit and restoring power, allow the water heater some time to reach the set temperature. Test the water from a faucet to ensure it is adequately heated. The repair is complete if the water temperature is consistent with your settings and no further issues arise. However, if the water is still not heating properly, consider consulting a professional plumber to inspect for more complex issues, such as electrical problems or internal damage to the water heater. Regular maintenance and inspections can help prevent such issues in the future.
Step 7. Perform Regular Maintenance
Schedule regular maintenance checks to ensure your water heater operates efficiently and has a long lifespan. Flush the tank periodically to remove sediment buildup, which can reduce heating efficiency and cause damage over time. Inspect the anode rod and replace it if it shows signs of significant wear, as it protects the tank from corrosion. Additionally, the thermostat and heating elements must be checked annually to ensure they function correctly. Proper care and timely maintenance will help avoid costly repairs and ensure consistent access to hot water.
Step 8. Insulate Your Water Heater
Consider insulating your water heater and the surrounding pipes to improve efficiency and reduce energy costs. Use a water heater insulation blanket to wrap the tank, ensuring it retains heat for longer periods. Additionally, insulate the hot water pipes to prevent heat loss as water travels to your faucets. This step is beneficial for older water heaters or those located in cooler environments. Always follow manufacturer guidelines to ensure proper insulation without covering essential components like the thermostat or pressure relief valve.
Step 9. Flush the Tank Regularly
Flushing your water heater tank at least once a year is essential to remove sediment buildup that can reduce efficiency and damage the unit over time. Begin by turning off the power or gas supply to the water heater and allowing the water inside to cool. Connect a garden hose to the drain valve and direct the other end to a safe drainage location. Open the valve and allow the water to flow out, carrying sediment. Once the tank is empty, close the valve, remove the hose, and refill it before turning it back on. Regular flushing will improve performance and extend the lifespan of your water heater.
By following these steps and conducting regular maintenance, you can ensure your water heater operates efficiently and consistently and provides hot water for all your needs.
5 Things You Should Avoid
- Ignoring the Power Supply: Always ensure the gas supply is turned off before starting the replacement process. Working with an active gas line can lead to safety hazards, including gas leaks or fire risks.
- Skipping the User Manual: Avoid neglecting the water heater’s user manual. It contains specific guidelines and instructions for safely replacing the thermostat in that particular model.
- Not Draining the Tank: Failure to drain the water heater tank before replacing the thermostat can result in water spillage and possible damage to surrounding areas or components.
- Using Improper Tools: Do not attempt to use incorrect or makeshift tools for the job. This can damage the thermostat or other water heater parts, complicating the repair process.
- Failing to Test After Installation: Avoid skipping the step of testing the water heater after the thermostat replacement. Ensuring everything functions correctly prevents future issues or potential safety concerns.
Conclusion
How to change a gas water heater thermostat is a task that requires careful preparation, proper tools, and attention to detail.
You can minimize risks and ensure a successful replacement by following safety precautions, such as turning off the gas supply and referring to the user manual. Draining the tank and using the correct tools will help avoid unnecessary complications. Lastly, always test the water heater after installation to verify that the thermostat is functioning correctly.
With these steps completed, your water heater should resume efficient and safe operation.
About the Author
Adrian Green is a passionate woodworking enthusiast who has dedicated his life to the craft of woodworking. From his early days working alongside his father in the family woodworking shop, Adrian has honed his skills and developed a deep love for creating beautiful, functional pieces with his hands. As the voice behind The Woodenify Blog, he shares his knowledge, tips, and inspiration with fellow woodworkers of all skill levels, helping them build confidence in their abilities while learning new techniques.
Professional Focus
- Specializes in DIY woodworking projects, from furniture making to home décor.
- Provides step-by-step guides, tips, and practical tutorials for woodworkers at any skill level.
- Focused on empowering readers with confidence and knowledge through easy-to-follow instructions and hands-on techniques.
- Passionate about building a community where makers can share, learn, and grow together in the world of woodworking.
Education History
University of Craft and Design – Bachelor of Fine Arts (BFA) in Woodworking and Furniture Design
Woodworking Apprenticeships – Gained extensive hands-on experience through various workshops and mentorships with seasoned craftsmen, refining carpentry and furniture-making skills.
Expertise
- DIY woodworking, carpentry, furniture making, and home décor projects.
- Creating clear, accessible tutorials and guides for beginner to advanced woodworkers.
- Helping readers experience the satisfaction and fulfillment of turning raw materials into stunning finished products.