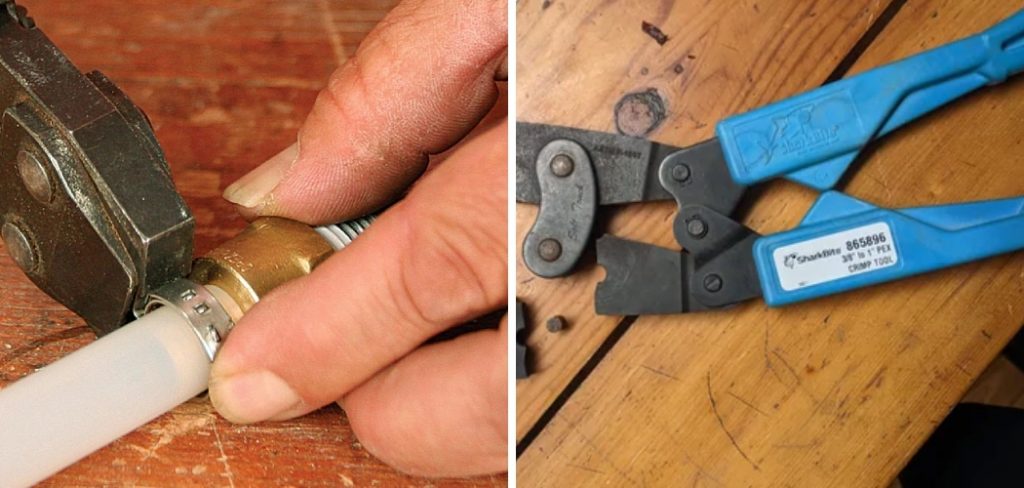
The Pex clamp tool is an essential device for anyone working with Pex tubing systems, and it is commonly used in plumbing and radiant heating installations. It ensures secure and reliable connections by clamping stainless steel rings around the tubing and fittings. Proper use of this tool can help prevent leaks and maintain the integrity of your piping system.

This guide on how to use pex clamp tool will walk you through the steps to effectively and safely use a Pex clamp tool for your projects. A DIY clamp tool can be a game-changer for home improvement projects, providing a cost-effective and efficient way to secure materials while working on plumbing, woodworking, or crafting tasks.
Why Use Pex Clamp Tool?
Pex tubing is a popular choice for plumbing and radiant heating systems due to its flexibility, durability, and cost-effectiveness. However, traditional methods of securing connections with copper or brass fittings can be time-consuming and require additional tools such as soldering equipment.
This is where the Pex clamp tool comes in handy. It allows for quick and easy installation without the need for special skills or equipment.
Tools and Materials Needed
Before getting started, make sure you have the following tools and materials:
Pex Clamp Tool:
There are various types of Pex clamp tools available in the market, including manual and battery-operated ones. Choose one that best suits your needs and budget.
Pex Tubing:
You will need Pex tubing for your projects. Make sure to choose the appropriate size and type for your specific application.
Stainless Steel Clamps:
The Pex clamp tool works by clamping stainless steel rings around the tubing and fittings to secure them together. Make sure you have enough clamps for your project.
Pipe Cutter or Shears:
You will need a pipe cutter or shears to cut the Pex tubing to the desired length.
7 Simple Steps on How to Use Pex Clamp Tool
Step 1: Pex Tubing Preparation

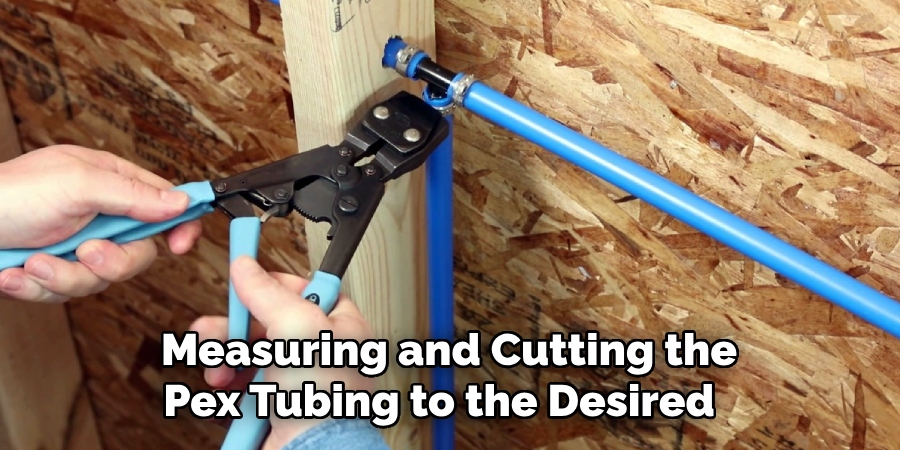
Start by measuring and cutting the Pex tubing to the desired length using a pipe cutter or shears. Ensure the cuts are clean and even provide a proper seal. After cutting, inspect the ends of the tubing for burrs or irregularities and remove them if necessary.
Slide a stainless steel clamp ring onto the tubing, positioning it roughly two inches from the cut end. Make sure the clamp ring moves freely and is not yet secured, as this will be done later in the process. Proper preparation at this stage is crucial for ensuring a reliable and leak-free connection.
Step 2: Pex Fitting Preparation
Select the appropriate fitting for your application, ensuring it is compatible with the size and type of Pex tubing you are using. Insert the fitting into the end of the Pex tubing until it is fully seated. The tubing should fit snugly around the fitting without any gaps or misalignment.
Double-check that the stainless steel clamp ring is still positioned correctly over the tubing, near the fitting, but not yet tightened. Properly preparing the fitting ensures a secure connection and prevents potential issues during the clamping process.
Step 3: Position the Pex Clamp Tool

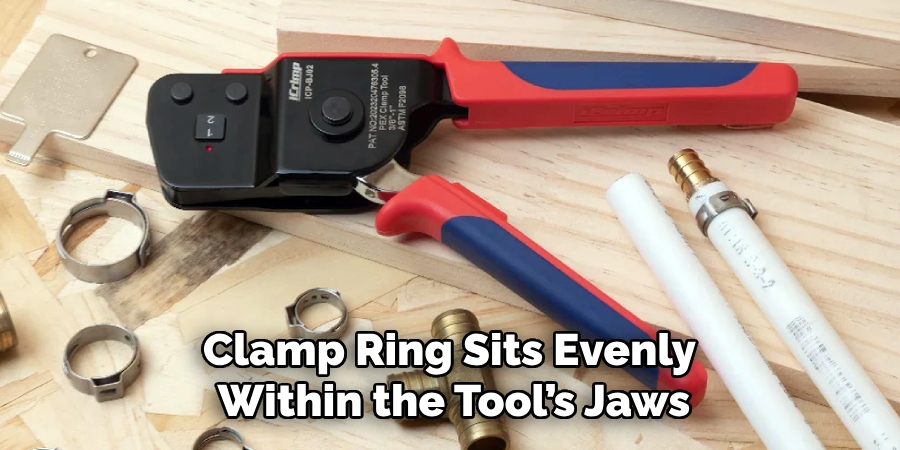
Place the jaws of the Pex clamp tool around the stainless steel clamp ring. Ensure the tool is aligned correctly so that the clamp ring sits evenly within the tool’s jaws. The tool’s alignment is critical to create a uniform compression, reducing the risk of leaks.
Confirm that the clamp ring remains positioned near the fitting and has not shifted during this process. With the tool correctly in place, you are ready to proceed to the clamping step.
Step 4: Tighten the Clamp
Using one hand, hold the Pex clamp tool in place while using your other hand to squeeze the handles together. As you squeeze, you will feel a slight but steady resistance as the jaws of the tool compress the clamp ring evenly. Continue squeezing until you hear a distinct “click” sound, indicating that the clamp is fully compressed and secure. Release the handles and carefully remove the tool from around the tubing and fitting.
Repeat this process for each connection needed for your project. Pay attention to any specific instructions or guidelines provided by your Pex tubing manufacturer or local plumbing codes regarding spacing between connections.
Step 5: Inspect Connections

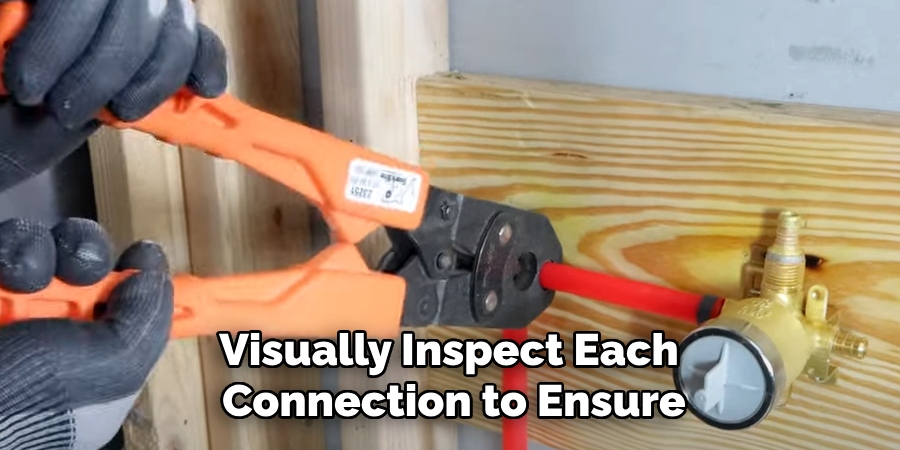
After completing the clamping process, visually inspect each connection to ensure that the clamp ring is securely fastened and there are no visible gaps or misalignments. Any loose connections can lead to leaks and must be corrected before proceeding with your project.
It is also a good idea to perform a pressure test on your system before covering or concealing any connections to ensure there are no leaks.
Step 6: Repeat the Process
Repeat the clamping process for all additional connections in your project. Start by sliding a stainless steel clamp ring onto the next section of Pex tubing, inserting the fitting, and using the Pex clamp tool to secure the connection as outlined in the previous steps.
Ensure consistency in the placement of the clamps and align each connection carefully to maintain uniformity. Taking your time to repeat the steps methodically will help ensure a secure and leak-free piping system. Once all connections are completed, proceed to the final inspection and testing phase.
Step 7: Final Inspection and Testing
After securing all connections with the Pex clamp tool, perform a final visual inspection to ensure all clamps are properly compressed and there are no visible leaks or irregularities in the connections. It is also essential to conduct a pressure test on your piping system before proceeding with any further steps in your project.
Once you have completed these steps, you can have confidence that your Pex tubing connections are secure and leak-free, thanks to the proper use of the Pex clamp tool. With this knowledge, you can confidently tackle future plumbing or radiant heating projects using Pex tubing and clamps.

Following these simple steps on how to use pex clamp tool, you can quickly and easily use the Pex clamp tool to create secure connections with Pex tubing for a variety of applications. With proper preparation and attention to detail, you can save time and money on your plumbing projects while ensuring reliable and long-lasting results. Happy clamping!
Common Mistakes to Avoid
When using a Pex clamp tool, it’s important to be aware of common mistakes that can compromise the quality and reliability of your connections. Here are some frequent errors to avoid:
Improper Clamp Ring Placement:
Ensure the clamp ring is positioned correctly, approximately 1/8 to 1/4 inch from the edge of the fitting’s connection point. Incorrect placement can result in leaks or a weak connection.
Misaligned Fittings:
Double-check that the fittings are correctly inserted into the Pex tubing and evenly aligned. Any gaps or misalignment can cause leaks or difficulty when using the clamp tool.
Insufficient Preparation:
Take the time to properly prepare both the Pex tubing and fittings before clamping. Remove any burrs, clean debris, and ensure a snug fit between the components for a secure connection. Rushing through this step can lead to faulty connections and potential leaks.
Maintenance and Storage Tips for PEX Clamp Tools
To ensure your Pex clamp tool remains in excellent working condition and lasts for years to come, follow these maintenance and storage tips:
Cleaning:
After each use, clean the clamp tool with a damp cloth to remove any debris or residue. You can also use a mild soap solution if necessary. Dry thoroughly before storing.
Storage:
Store your Pex clamp tool in a cool, dry place to prevent any rust or corrosion. Ensure the tool is not exposed to extreme temperatures or direct sunlight. Keep it out of reach of children and pets.
Regular Inspections:
Periodically inspect your Pex clamp tool for any signs of wear or damage. If you notice any issues, discontinue use and replace the tool if necessary. Regular inspections can help identify potential problems early on and prevent accidents or faulty connections.
Frequently Asked Questions
Q: Can I Use Pex Clamp Tools for Both Plumbing and Radiant Heating Projects?
A: Yes, Pex clamp tools are versatile and can be used for a variety of applications, including plumbing and radiant heating. Just ensure you are using the correct size clamps for the Pex tubing and fittings you are using.
Q: How Tight Should I Squeeze the Handles When Using a Pex Clamp Tool?
A: The handles should be squeezed until you hear a distinct “click” sound, indicating that the clamp is fully compressed and secure. Do not over-tighten as it can damage the clamp ring or fitting.
Q: Can Pex Clamp Tools Be Used for All Types of Pex Tubing?
A: No, there are different types of Pex tubing available on the market. It’s essential to use a compatible Pex clamp tool for the specific type of tubing you are working with. Consult your manufacturer or local plumbing codes for guidelines on proper usage.
Conclusion
Using a Pex clamp tool is an easy and effective way to create reliable and leak-free connections with Pex tubing in various plumbing and heating applications. By following these seven simple steps on how to use pex clamp tool and avoiding common mistakes, you can confidently use the Pex clamp tool for your next project.
Remember to always refer to manufacturer guidelines and local plumbing codes for specific instructions and regulations regarding the use of Pex tubing and clamps. With proper preparation and attention to detail, you can save time and money while ensuring a high-quality result that will last for years to come. Happy clamping!
About the Author
Adrian Green is a passionate woodworking enthusiast who has dedicated his life to the craft of woodworking. From his early days working alongside his father in the family woodworking shop, Adrian has honed his skills and developed a deep love for creating beautiful, functional pieces with his hands. As the voice behind The Woodenify Blog, he shares his knowledge, tips, and inspiration with fellow woodworkers of all skill levels, helping them build confidence in their abilities while learning new techniques.
Professional Focus
- Specializes in DIY woodworking projects, from furniture making to home décor.
- Provides step-by-step guides, tips, and practical tutorials for woodworkers at any skill level.
- Focused on empowering readers with confidence and knowledge through easy-to-follow instructions and hands-on techniques.
- Passionate about building a community where makers can share, learn, and grow together in the world of woodworking.
Education History
University of Craft and Design – Bachelor of Fine Arts (BFA) in Woodworking and Furniture Design
Woodworking Apprenticeships – Gained extensive hands-on experience through various workshops and mentorships with seasoned craftsmen, refining carpentry and furniture-making skills.
Expertise
- DIY woodworking, carpentry, furniture making, and home décor projects.
- Creating clear, accessible tutorials and guides for beginner to advanced woodworkers.
- Helping readers experience the satisfaction and fulfillment of turning raw materials into stunning finished products.
