
Adding a toilet in a basement can seem like a challenging project, but with the right planning and tools, it can be a manageable and rewarding upgrade to your home. Whether you’re looking to create a convenient guest bathroom or enhance your basement’s functionality, understanding the steps involved is key.
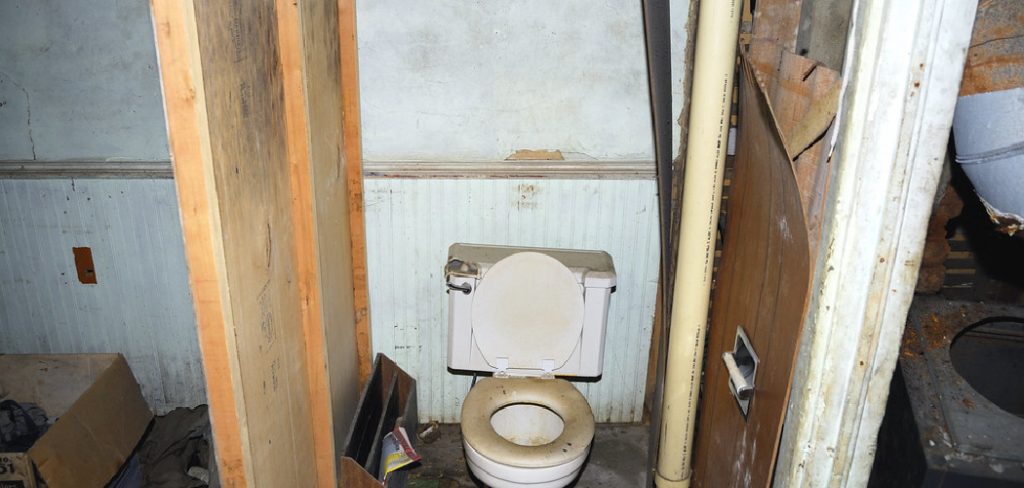
This guide on how to add a toilet in a basement will walk you through the considerations, materials, and processes to ensure a successful installation, even if you’re working with limited plumbing infrastructure.
Why Add a Toilet in a Basement?
Before diving into the logistics of adding a toilet in a basement, it’s important to understand why you may want to undertake this project. Here are some common reasons homeowners choose to add toilets in their basements:
Convenience:
Having an additional toilet can be incredibly convenient for guests or large families, especially if your main bathroom is on another level. It can also be helpful during gatherings or events to have an extra bathroom option.
Increase Home Value:
Adding a toilet in a basement can increase the value of your home, as it adds another functional and desirable feature. This is particularly beneficial if you plan on selling your home in the future.
Better Use of Space:
Basements are often underutilized spaces, and adding a toilet can make them more functional for everyday living. It can also open up opportunities for potential basement renovations, such as converting it into a rental unit or recreational space.
Needed Materials
Before you begin, it’s important to gather all the necessary materials for the installation. Here are some of the key items you’ll need:
Toilet:
Choose a compact toilet that fits your space and complements your overall aesthetic. Consider dual-flush options for water conservation.
Plumbing Materials:
You may need to extend or add new plumbing lines, so make sure you have the appropriate pipes, fittings, and valves on hand.
Tools:
Having the right tools can make all the difference in a successful installation. Some tools include a drill, pipe wrench, hacksaw, and pliers.
Flooring:
Choose flooring that is waterproof and durable for a basement setting. Options like vinyl or tile are ideal.
8 Step-by-step Guides on How to Add a Toilet in a Basement
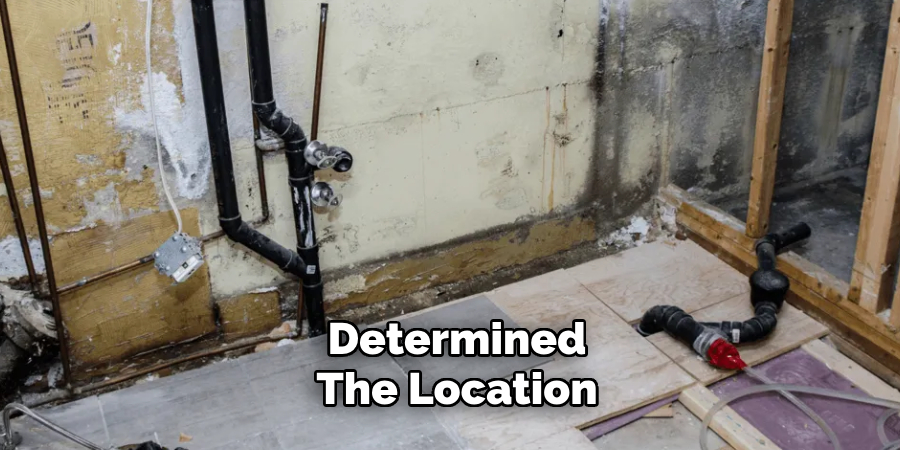
Step 1: Determine the Location
The first step in adding a toilet in your basement is to decide on the ideal location for installation. Consider the proximity to existing plumbing and drainage systems to minimize the complexity and cost of running new pipes. Ideally, the toilet should be placed as close as possible to the main sewer line to reduce the need for extensive excavation or additional piping work.
You should also take into account the layout of your basement, ensuring the location leaves adequate room for other fixtures or future renovations. Finally, verify that the chosen spot complies with local building codes and zoning regulations, which might dictate specific requirements for clearances and accessibility.
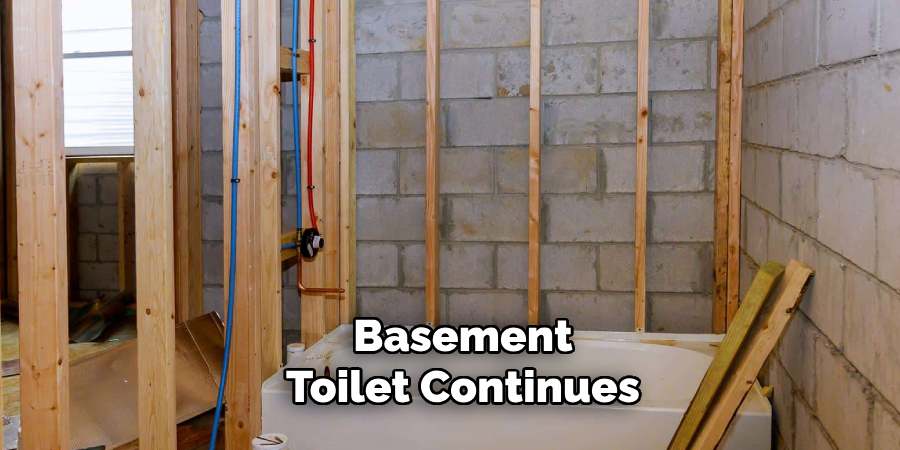
Step 2: Install Drainage Lines
Once you’ve determined the location, the next step is to install the drainage lines for the toilet. Start by marking the spot where the toilet’s drain will connect to the main sewer line. This will often involve cutting into the basement floor to create a trench for the new pipes. Use a concrete saw or jackhammer to carefully break through the floor, ensuring minimal disruption to the surrounding area.
After the trench has been prepared, the PVC pipes for the drainage system are laid. Ensure the pipes are angled properly, with a slight downward slope of at least 1/4 inch per foot, to allow for efficient waste flow. Use appropriate fittings like elbows and couplings to connect the pipes securely, and seal the joints with PVC cement to prevent leakage. Once the drainage lines are in place, cover the trench with concrete and allow it to dry completely before moving on to the next step.
Step 3: Extend Water Supply Lines
If your basement already has a utility sink or laundry area, you may be able to tap into existing water supply lines for the toilet. Otherwise, you’ll need to run new pipes from the main water line. Similar to the drainage lines, use appropriate fittings and sealants when connecting and extending the pipes.
It’s essential to follow building codes and regulations when installing water supply lines, as incorrect installation can lead to costly leaks and damage in the future.
Step 4: Install Vent Pipes
Vent pipes are crucial for allowing air flow within your plumbing system, preventing sewer gas from entering your home. To install a vent pipe for your basement toilet, you’ll need to run a PVC pipe from the main sewer line up through the roof of your home. This step may require professional assistance, as it involves working with structural components of your home.
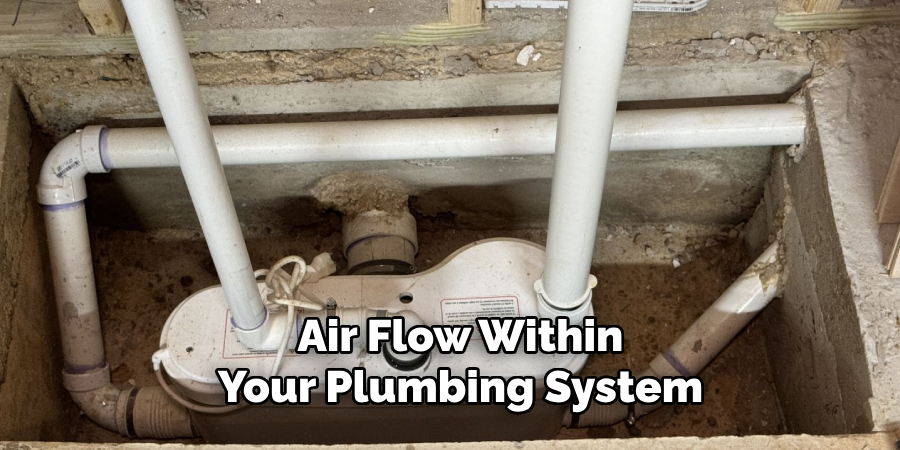
If your basement has a window or other openings, you may be able to install an air admittance valve instead of a traditional vent pipe. This can be an easier and more cost-effective option.
Step 5: Set the Toilet Flange
The toilet flange is a critical component for securing the toilet to the floor and connecting it to the drainage system. Begin by positioning the toilet flange at the location of the drain pipe. Ensure that the flange sits flush against the finished floor and aligns correctly with the existing pipe.
Secure the flange by screwing it into the concrete floor using anchor screws suitable for basement surfaces. If the drain pipe extends beyond the floor level, you may need to trim it down with a hacksaw so that the flange fits properly. Use a wax ring or rubber gasket to create a tight seal between the flange and the toilet base, preventing leaks. You can also use caulking around the base for extra security.
Step 6: Install the Toilet
With the flange in place, you’re ready to install the toilet. Begin by attaching the tank to the bowl according to the manufacturer’s instructions. Next, carefully lower the assembled toilet onto the flange, making sure it sits evenly and securely in place. Use bolts and washers to secure the toilet to the flange and floor.
Lastly, connect the water supply line to the toilet and turn on the water to test for any leaks. Adjust the bolts or gaskets as needed.
Step 7: Finishing Touches
Once the toilet is installed, it’s time to add some finishing touches. Install a toilet seat according to your preference, and caulk around the base of the toilet for a clean and secure seal. If desired, you can also install a privacy wall or partition around the toilet area for added convenience.
The final step is to make sure the toilet is functional and meets all building codes and regulations. If you encounter any issues, it may be necessary to call in a professional plumber for assistance.
Step 8: Regular Maintenance
Regular maintenance is crucial to ensure your new basement toilet continues functioning properly. This includes regularly checking for leaks, cleaning the toilet and surrounding area, and addressing any clogs or issues promptly. With proper care, your basement toilet should provide convenience and functionality for years to come.
Following these step-by-step guides on how to add a toilet in a basement can help you successfully add a toilet in your basement. However, if you’re not experienced in plumbing or construction work, it’s always best to seek professional assistance to ensure the job is done correctly and safely. Remember to always comply with local building codes and regulations to avoid any potential issues or violations. With proper planning and execution, adding a toilet in your basement can be a relatively straightforward and valuable addition to your home. Happy renovating!
Frequently Asked Questions
Q: Can I Install a Toilet in My Basement by Myself?
A: It is possible to install a toilet in your basement without professional assistance, but it requires knowledge and experience with plumbing and construction work. If you are not confident in your abilities or do not have the necessary skills and tools, it is best to hire a professional plumber.
Q: How Much Will It Cost to Install a Toilet in My Basement?
A: The cost of installing a toilet in your basement will depend on several factors, such as the complexity of the project, materials used, and if any plumbing or electrical work is needed. On average, it can cost anywhere from $500 to $2,000.
Q: Do I Need Permits for Adding a Toilet in My Basement?
A: Yes, you will likely need permits before starting any major renovation projects that involve plumbing or structural changes. It’s essential to check with your local building department for specific regulations and requirements.
Q: Can I Use My Existing Septic System for the Basement Toilet?
A: This depends on the capacity and design of your septic system. It is best to consult a professional plumber or septic system specialist to determine if your current system can handle an additional toilet. If not, it may be necessary to upgrade your septic system before adding a basement toilet. Additionally, be sure to check local regulations and obtain any necessary permits before making changes to your septic system.
Conclusion
Adding a toilet to your basement can be a valuable home improvement project that enhances convenience and increases your property’s functionality and value. While the process can be complex, careful planning, adherence to local building codes, and consideration of your plumbing system’s requirements are crucial for a successful installation. For homeowners with the necessary skills, this guide can serve as a helpful resource to tackle the project.
However, those who are uncertain about any aspect of the process should not hesitate to consult with professional plumbers or contractors. With proper execution and regular maintenance, your basement toilet will provide an efficient and practical solution for years to come. Thanks for reading this article on how to add a toilet in a basement.
About the Author
Adrian Green is a passionate woodworking enthusiast who has dedicated his life to the craft of woodworking. From his early days working alongside his father in the family woodworking shop, Adrian has honed his skills and developed a deep love for creating beautiful, functional pieces with his hands. As the voice behind The Woodenify Blog, he shares his knowledge, tips, and inspiration with fellow woodworkers of all skill levels, helping them build confidence in their abilities while learning new techniques.
Professional Focus
- Specializes in DIY woodworking projects, from furniture making to home décor.
- Provides step-by-step guides, tips, and practical tutorials for woodworkers at any skill level.
- Focused on empowering readers with confidence and knowledge through easy-to-follow instructions and hands-on techniques.
- Passionate about building a community where makers can share, learn, and grow together in the world of woodworking.
Education History
University of Craft and Design – Bachelor of Fine Arts (BFA) in Woodworking and Furniture Design
Woodworking Apprenticeships – Gained extensive hands-on experience through various workshops and mentorships with seasoned craftsmen, refining carpentry and furniture-making skills.
Expertise
- DIY woodworking, carpentry, furniture making, and home décor projects.
- Creating clear, accessible tutorials and guides for beginner to advanced woodworkers.
- Helping readers experience the satisfaction and fulfillment of turning raw materials into stunning finished products.