
Keeping your kitchen sink drain clean is essential for maintaining a hygienic and odor-free kitchen. Over time, food particles, grease, and debris can build up, leading to unpleasant smells and even clogging. Regular cleaning not only ensures smooth drainage but also helps prevent the growth of bacteria and mold.
This guide on how to clean kitchen sink drain will walk you through simple and effective steps to clean your kitchen sink drain and keep it in optimal condition.
Why is It Important to Clean Your Kitchen Sink Drain?
Cleaning your kitchen sink drain regularly is crucial for several reasons. First, it helps prevent unpleasant odors caused by decomposing food particles and grease that can accumulate over time. A clean drain also reduces the risk of blockages, which can lead to water pooling in your sink and potential plumbing issues.
Additionally, a dirty drain can become a breeding ground for bacteria, mold, and mildew, posing health risks to your household. By maintaining a clean kitchen sink drain, you ensure a healthier, more functional, and odor-free kitchen environment.
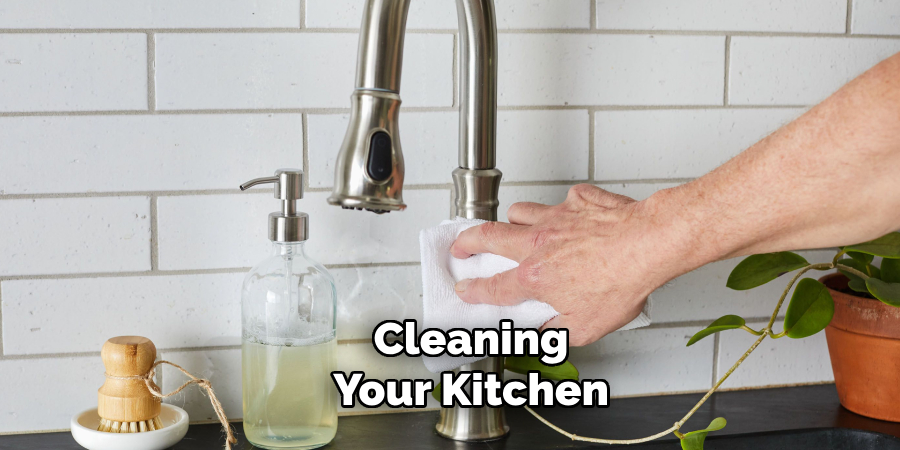
Needed Materials
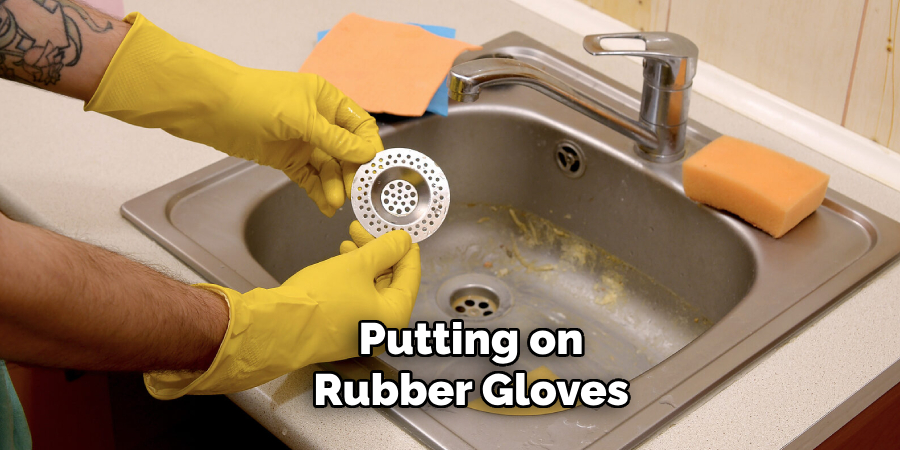
- Rubber Gloves
- Baking Soda
- Vinegar
- Boiling Water
- Plunger (Optional)
9 Steps on How to Clean Kitchen Sink Drain
Step 1: Prepare
Start by putting on rubber gloves to protect your hands from grime and any harsh substances. Ensure the sink is free from dishes, food scraps, or any visible debris. This will give you a clear and clean area to work with and make the cleaning process more effective.
Gather all the necessary materials, including baking soda, vinegar, boiling water, and a plunger if you plan to use one. Having everything ready beforehand will help you clean efficiently without interruptions.
Step 2: Remove Debris
Inspect the drain opening and remove any visible debris or food particles that may be causing blockages. You can use your hands (while wearing gloves) or a small tool like tongs or tweezers to extract items stuck near the surface.
Be thorough in this step, as clearing out the loose debris will allow the cleaning agents to work more effectively in the subsequent steps.
Step 3: Pour Boiling Water
Carefully pour a kettle of boiling water down the drain. This helps to loosen grease or other buildup that might be clinging to the sides of the pipes. Boiling water is especially effective at breaking down fats and oils, which often accumulate in kitchen drains.
Make sure to pour the water slowly and evenly to maximize its impact. Once done, proceed to the next step for a deeper clean.
Step 4: Sprinkle Baking Soda
Sprinkle a cup of baking soda down the drain. Baking soda, also known as sodium bicarbonate, is a natural and safe cleaner that helps absorb odors and break down buildup. It will react with the vinegar in the next step to create a foaming action that aids in cleaning the pipes.
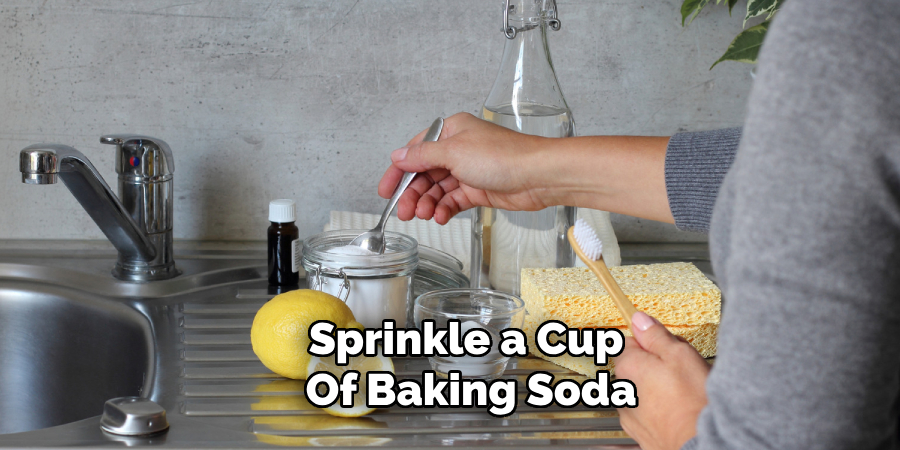
Be generous with the amount of baking soda you use, especially if your drain is particularly dirty or smelly. Let it sit for a few minutes while you prepare for the next step.
Step 5: Pour Vinegar
Slowly pour a cup of vinegar down the drain over the baking soda. The combination of vinegar and baking soda will create a fizzy, bubbling reaction that works to break down grime, grease, and other debris stuck in the pipes.
Allow the mixture to sit and foam for about 10-15 minutes. This reaction not only cleans but also helps neutralize unpleasant odors. While waiting, avoid using the sink to ensure the solution remains undisturbed for maximum effectiveness.
Step 6: Boil More Water
After allowing the vinegar and baking soda mixture to sit for 10-15 minutes, carefully pour another kettle of boiling water down the drain. This step helps flush out the loosened debris and residue from the pipes, ensuring the drain is thoroughly cleaned.
Pour the water slowly and steadily to maximize its effectiveness. If the drain still seems clogged or sluggish, you may repeat this step or move on to using a plunger for further cleaning.
Step 7: Plunge (Optional)
If the drain is still not flowing smoothly, you can try using a plunger to dislodge any remaining clogs. Place the rubber end of the plunger over the drain opening and press down gently but firmly.
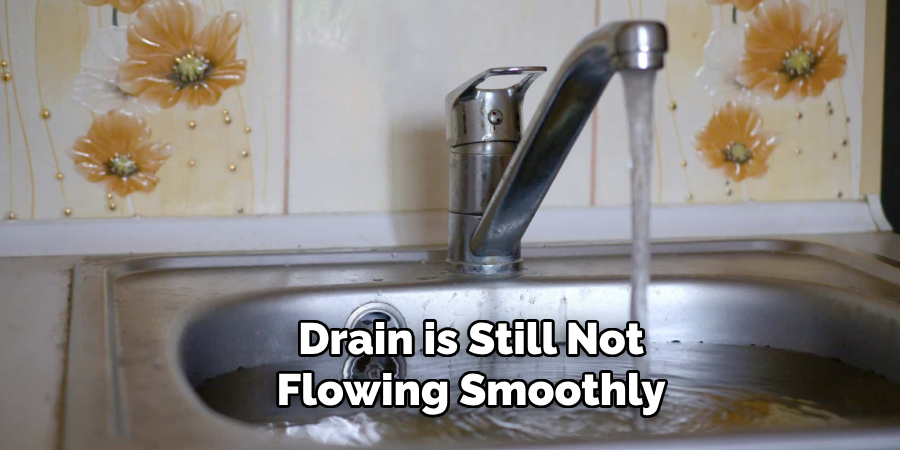
\Then, pull up quickly to create suction and release. Repeat this motion a few times until the water starts draining more easily.
Step 8: Rinse with Hot Water
Once you have successfully unclogged and cleaned your kitchen sink drain, run hot water down the drain for a few minutes. This will help flush out any remaining debris or residue from the cleaning process.
If necessary, you can also use a small tool like a pipe brush to manually scrub the inside of the drain for a deeper clean.
Step 9: Repeat Regularly
To maintain a clean kitchen sink drain, it is recommended to repeat this cleaning process at least once a month or more frequently if you use your sink heavily. Regular maintenance will prevent buildup and keep your drain in optimal condition.
Following these 9 simple steps on how to clean kitchen sink drain will help you achieve a clean and odor-free kitchen sink drain. By making this part of your regular cleaning routine, you can ensure a more hygienic and functional kitchen environment for you and your family. Remember to wear gloves, gather all necessary materials beforehand, and be thorough in each step for the best results. Happy cleaning!
Do You Need to Use Professionals?
While cleaning your kitchen sink drain can often be done effectively with simple household materials and tools, there are situations where calling a professional plumber may be necessary. If you encounter persistent clogs, unpleasant odors that won’t go away, or recurring drainage issues despite your best efforts, it could be a sign of a deeper problem, such as a blockage further down the pipes or damaged plumbing. Professionals have specialized equipment, like drain snakes and hydro-jetting tools, to tackle these complex issues safely and efficiently.
Additionally, if you’re dealing with a more serious problem, such as slow draining throughout the house or water backing up, this could indicate a larger plumbing system issue, like a sewer line blockage, which requires immediate professional attention. When in doubt, it’s always better to consult a trusted plumber to assess and resolve the issue, ensuring your plumbing system remains in great condition.
Additional Tips
Use a Drain Cover or Strainer:
Install a drain cover or strainer over your kitchen sink drain to catch food particles, hair, or other debris before they go down the drain. This simple tool can help reduce clogs and make cleaning easier.
Avoid Pouring Harmful Substances Down the Drain:
Avoid pouring harsh chemicals, oils, or fats down your kitchen sink drain. These substances can cause buildup and damage to your pipes, making it harder to clean and maintain a healthy drain. Instead, dispose of them properly in the trash or recycle bin.
Regularly Clean Garbage Disposal:
If you have a garbage disposal in your sink, be sure to clean it regularly as well. You can use similar ingredients like vinegar and baking soda to freshen up and eliminate odors from your disposal unit.
Seek Professional Help if Needed:
If none of these methods seem to work or if you are uncomfortable handling the task yourself, it may be best to seek professional help. A plumber can assess and fix any underlying issues that may be causing recurring clogs or slow drains. Regular maintenance by a professional can also prolong the life of your kitchen sink drain.
With proper cleaning and maintenance, you can ensure a clean and functional kitchen sink drain for years to come. Happy cleaning!
Frequently Asked Questions
Q1: Can I Use This Method to Clean Bathroom Sink Drains as Well?
A1: Yes, you can use this method for cleaning bathroom sink drains as well. Bathroom sinks often accumulate hair and soap scum, which can be effectively removed with the same ingredients and steps outlined in this guide.
Q2: How Often Should I Clean My Kitchen Sink Drain?
A2: It is recommended to clean your kitchen sink drain at least once a month or more frequently if you use your sink heavily. Regular maintenance will prevent buildup and keep your drain in optimal condition.
Q3: Can I Use this Method for Unclogging Severely Clogged Drains?
A3: While this method can effectively unclog light to moderate clogs, severe clogs may require professional help or more potent methods such as using a plumbing snake or hydrojetting. If the problem persists, it is best to seek assistance from a plumber.
Q4: Can I Use This Method to Clean Garbage Disposal Units?
A4: Yes, you can use similar ingredients and steps outlined in this guide for cleaning garbage disposal units. Regular maintenance of your garbage disposal can help prevent clogs and unpleasant odors.
Conclusion
In conclusion, keeping your kitchen sink drain clean is crucial for maintaining a healthy and functional kitchen. By following these simple steps on how to clean kitchen sink drain regularly, you can prevent unpleasant odors, clogs, and potential plumbing issues.
Remember to wear gloves while cleaning and be cautious when using boiling water. With proper maintenance, your kitchen sink drain will continue to serve you well for years to come. Thank you for reading!
About the Author
Adrian Green is a passionate woodworking enthusiast who has dedicated his life to the craft of woodworking. From his early days working alongside his father in the family woodworking shop, Adrian has honed his skills and developed a deep love for creating beautiful, functional pieces with his hands. As the voice behind The Woodenify Blog, he shares his knowledge, tips, and inspiration with fellow woodworkers of all skill levels, helping them build confidence in their abilities while learning new techniques.
Professional Focus
- Specializes in DIY woodworking projects, from furniture making to home décor.
- Provides step-by-step guides, tips, and practical tutorials for woodworkers at any skill level.
- Focused on empowering readers with confidence and knowledge through easy-to-follow instructions and hands-on techniques.
- Passionate about building a community where makers can share, learn, and grow together in the world of woodworking.
Education History
University of Craft and Design – Bachelor of Fine Arts (BFA) in Woodworking and Furniture Design
Woodworking Apprenticeships – Gained extensive hands-on experience through various workshops and mentorships with seasoned craftsmen, refining carpentry and furniture-making skills.
Expertise
- DIY woodworking, carpentry, furniture making, and home décor projects.
- Creating clear, accessible tutorials and guides for beginner to advanced woodworkers.
- Helping readers experience the satisfaction and fulfillment of turning raw materials into stunning finished products.