
Winterizing outdoor faucets is crucial for homeowners living in regions that experience freezing temperatures. Outdoor faucets are particularly vulnerable to cold weather, and if not properly prepared, they can lead to frozen pipes that may burst, causing significant water damage and expensive repairs. Taking the time to winterize these fixtures safeguards your home’s plumbing system and ensures the faucet remains fully functional once the warmer months return.
The importance of this process cannot be overstated—it helps prevent costly emergencies, protects the integrity of your pipes, and provides peace of mind throughout the winter season. This guide will walk you through a comprehensive, step-by-step process on how to winterize faucets outside, so you can effectively protect your home from winter’s harsh impact and avoid unnecessary repair expenses in the future.
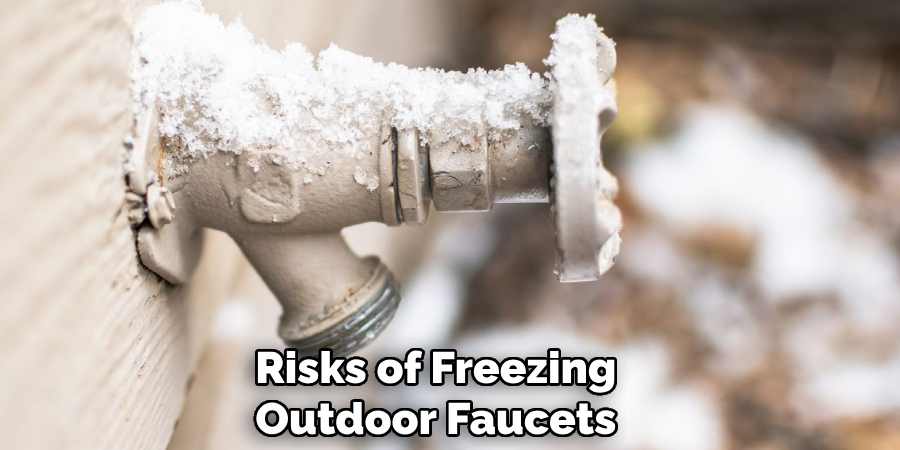
Understanding the Risks of Freezing Outdoor Faucets
How Freezing Temperatures Affect Faucets
Any water left inside outdoor faucets and their connected pipes can freeze and expand when freezing temperatures set in. This expansion exerts excessive pressure, leading to cracks in the pipes or the faucets. Even a small crack can result in significant leaks or total pipe failure, which often goes unnoticed until the damage has already occurred. The freezing and thawing cycle can further worsen the issue, compounding damage with each temperature shift.
Common Problems Caused by Frozen Faucets
Frozen outdoor faucets can lead to several costly and inconvenient problems. Burst pipes are one of the most severe outcomes, often resulting in water flooding and structural damage to walls, ceilings, or foundations. Additionally, unseen leaks can create long-term problems like mold growth or compromised structural integrity. These issues can require expensive repairs, sometimes involving entire plumbing replacements.
Why Winterizing is Necessary
Winterizing outdoor faucets is an essential preventative measure that addresses these risks head-on. Neglecting this task leaves your faucets vulnerable to freezing, often without immediate detection. Proper preparation ensures your outdoor faucets and surrounding plumbing stay protected, helping you avoid costly repairs and preserving your home’s interior and exterior systems during harsh winters.
Tools and Materials Needed for Winterizing
When preparing to winterize your outdoor faucets, having the right tools and materials makes the process efficient and ensures thorough protection. Here’s what you will need:
Essential Tools
- Adjustable Wrench – Useful for loosening or tightening faucet connections.
- Pipe Insulation – Ensures exposed pipes are adequately protected against freezing temperatures.
- Garden Hose – Needed to drain any remaining water from the faucet or spigot.
- Towel – Helps dry the faucet or wipe down any moisture on nearby surfaces.
Materials for Winterizing
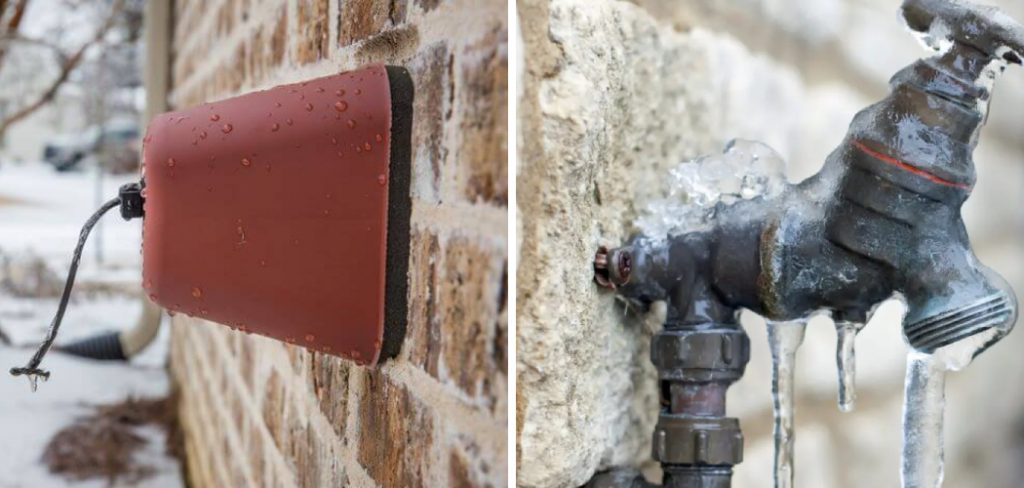
- Pipe Insulation or Foam Faucet Covers – Available at most hardware stores, these provide effective protection for pipes and faucets against the cold.
- Antifreeze for Plumbing – A specialized antifreeze that is safe to use to prevent freezing inside pipes.
- Faucet Cover (Optional) – Adds an extra insulation layer, especially in areas prone to extreme cold.
Safety Gear
- Gloves – Protect your hands from cold temperatures and any sharp tools during the process.
- Protective Eyewear – Essential when working with antifreeze or handling tools to prevent injuries.
Having all these tools and materials ready before starting ensures a smooth winterizing process and optimal results. Always follow safety precautions to secure your home during the colder months.
How to Winterize Faucets Outside: Step-by-Step Guide
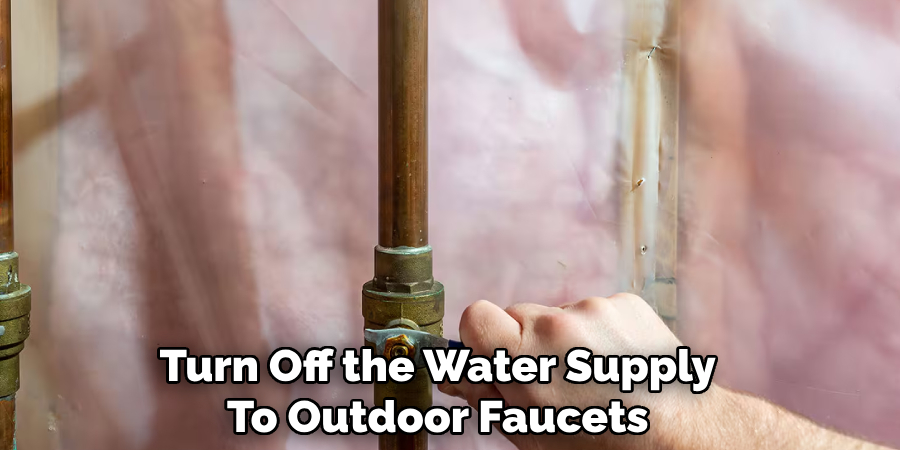
Step 1: Turn Off the Water Supply to Outdoor Faucets
Locate the shut-off valve inside your home, usually found in the basement, crawl space, or garage. Turn off this valve to stop water flow to the outdoor faucet. Ensure the valve is completely closed to prevent any water from continuing into the exterior pipe. This step is crucial for avoiding frozen and burst pipes during winter.
Step 2: Open the Outdoor Faucet
Head to the outdoor faucet and turn the handle to open it fully. This allows any remaining water in the pipe to drain out. Once the faucet is drained, leave it open slightly. Keeping the faucet open relieves pressure and ensures that any small amount of water left won’t freeze and expand, which could lead to pipe damage.
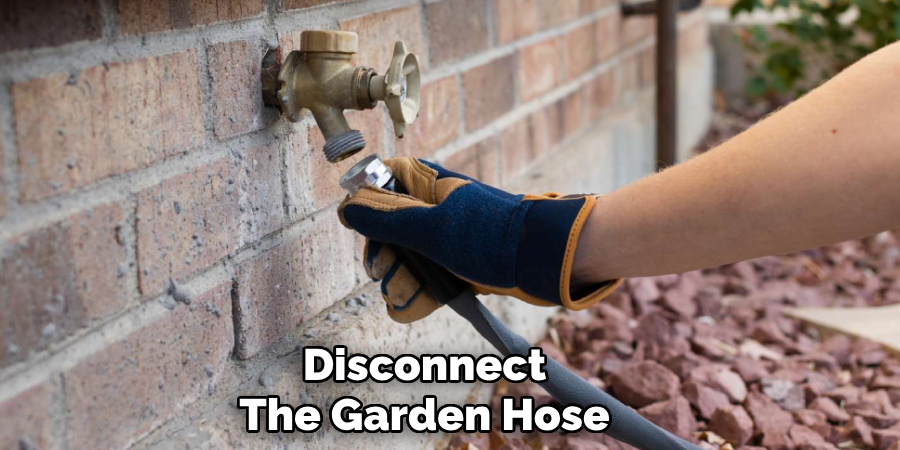
Step 3: Disconnect Hoses and Accessories
Remove any hoses, sprayers, or attachments connected to the outdoor faucet. Leaving these items attached can trap water, which might freeze and cause damage to both the hose and the faucet. Store the disconnected items indoors for the season to keep them in good condition.
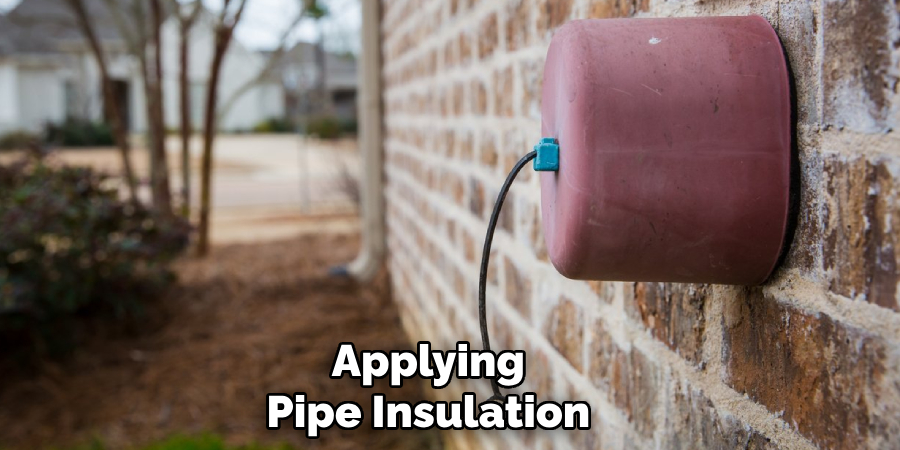
Step 4: Apply Insulation
Use pipe insulation or foam faucet covers to shield the faucet and exposed pipes from freezing temperatures. Secure the insulation tightly to ensure no gaps are left uncovered. You can use a faucet cover for added protection, especially if you’re in an area prone to severe winter weather.
By following these steps, you can effectively winterize your outdoor faucets, protecting your home’s plumbing from potential damage caused by freezing temperatures.
Draining the Pipes and Removing Hoses
Disconnect the Garden Hose
To start, remove any garden hoses or attachments still connected to the outdoor faucet. Leaving hoses attached during cold weather can trap water inside, increasing the risk of freezing and causing damage to both the hose and the faucet. Once removed, thoroughly drain the hoses and store them in a dry, sheltered location, such as a garage or shed, to prevent cracking or deterioration during the winter months.
Drain the Pipes
Draining the pipes connected to your outdoor faucets is essential to avoid freezing and bursting. If your faucet has an automatic drain valve, confirm it functions properly by opening it and allowing any remaining water to drain out completely. For faucets without automatic drainage, you may need to take extra steps. Use a manual drain valve, often located on the shutoff valve inside your home, to release trapped water. Alternatively, you can use an air compressor to blow out excess water from the pipes, ensuring they are empty. Taking the time to drain the pipes thoroughly will provide additional peace of mind and protect your plumbing system from damage during the winter season.
Insulating the Pipes and Faucets
Properly insulating your outdoor pipes and faucets is a crucial step in protecting them from damage caused by freezing temperatures. Follow these steps to ensure your plumbing is safeguarded during the winter months.
Step 1: Applying Pipe Insulation
Use foam pipe insulation or self-adhesive insulation tape to wrap all exposed outdoor pipes. These materials are designed to provide a protective barrier that minimizes heat loss and helps prevent freezing. Begin by identifying all exposed piping sections, including the area from the shut-off valve to the faucet. Secure the insulation tightly, ensuring no gaps where cold air could penetrate.
Step 2: Using Faucet Covers
To further protect outdoor faucets, install a foam faucet cover. These covers are easy to use and highly effective at providing additional insulation against cold weather. Make sure the cover fits snugly and securely over the faucet. This simple addition can significantly reduce the risk of your faucet freezing, saving you from costly repairs.
Step 3 (Optional): Adding Antifreeze
For areas that experience extreme cold, adding non-toxic RV antifreeze can offer additional protection for your pipes and faucets. Begin by pouring a small amount of antifreeze into the faucet and letting it run until it exits. Be sure to follow the manufacturer’s instructions to ensure safe application carefully. This step is beneficial for outdoor plumbing that cannot be fully drained or insulated.
Taking these precautions will help maintain the integrity of your plumbing system throughout the winter season.
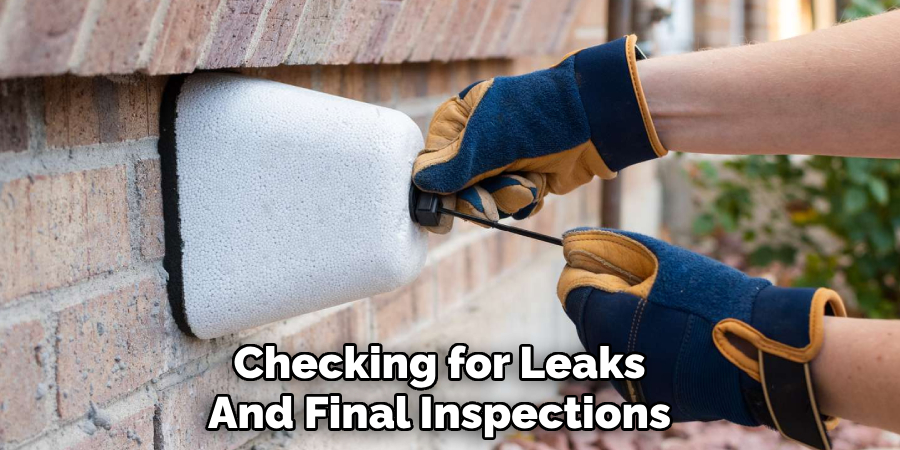
Checking for Leaks and Final Inspections
Inspecting your faucets and pipes for leaks is a critical final step in winterizing your outdoor plumbing. Carefully examine all pipes, fittings, and connections for any signs of leaks, cracks, or corrosion. Even small leaks can lead to significant problems during freezing temperatures, as water can expand and cause further damage. Replace any worn or damaged parts immediately to prevent issues.
Additionally, ensure that all insulation around the pipes is adequately secured. Check that faucet covers are properly installed and tightly fitted. This added layer of protection helps keep cold air out and reduces the risk of freezing. By addressing these final details, you can confirm that your outdoor plumbing is fully prepared to endure the winter months without damage. Regular maintenance and thorough inspections will save you time, money, and stress in the long run.
Tips for Preventing Frozen Faucets in the Future
Turn Faucets On in Extreme Cold
During periods of freezing weather, allowing a small stream of water to flow through your outdoor faucets can help prevent freezing. The moving water is less likely to freeze and can relieve pressure in the pipes that might otherwise build up and cause ruptures.
Install a Frost-Proof Faucet
Upgrading to a frost-proof outdoor faucet is a proactive solution to freezing issues. These faucets are specially designed to extend deeper into the home, keeping the valve and water supply in a warmer environment. This upgrade can greatly reduce the risk of freezing and potential damage.
Check Regularly During the Winter
Routine inspections throughout the winter months are essential. Ensure that faucet covers, insulation and other protective measures remain secure and intact. Address any issues immediately to maintain your system’s integrity and avoid costly repairs caused by freezing.
Conclusion
Winterizing outdoor faucets is essential to prevent costly damage caused by freezing temperatures. Taking steps such as turning off the water supply, draining pipes, insulating exposed areas, and covering faucets can safeguard your plumbing system during harsh winters. By understanding “how to winterize faucets outside,” homeowners can ensure their outdoor water fixtures remain intact and functional. These simple precautions protect against freezing and burst pipes, giving you peace of mind throughout the colder months.
Make it a yearly priority to prepare your outdoor faucets for winter and protect your home from unnecessary repairs.
About the Author
Adrian Green is a passionate woodworking enthusiast who has dedicated his life to the craft of woodworking. From his early days working alongside his father in the family woodworking shop, Adrian has honed his skills and developed a deep love for creating beautiful, functional pieces with his hands. As the voice behind The Woodenify Blog, he shares his knowledge, tips, and inspiration with fellow woodworkers of all skill levels, helping them build confidence in their abilities while learning new techniques.
Professional Focus
- Specializes in DIY woodworking projects, from furniture making to home décor.
- Provides step-by-step guides, tips, and practical tutorials for woodworkers at any skill level.
- Focused on empowering readers with confidence and knowledge through easy-to-follow instructions and hands-on techniques.
- Passionate about building a community where makers can share, learn, and grow together in the world of woodworking.
Education History
University of Craft and Design – Bachelor of Fine Arts (BFA) in Woodworking and Furniture Design
Woodworking Apprenticeships – Gained extensive hands-on experience through various workshops and mentorships with seasoned craftsmen, refining carpentry and furniture-making skills.
Expertise
- DIY woodworking, carpentry, furniture making, and home décor projects.
- Creating clear, accessible tutorials and guides for beginner to advanced woodworkers.
- Helping readers experience the satisfaction and fulfillment of turning raw materials into stunning finished products.