
Struggling with your shower’s temperature control can be a frustrating experience, whether it’s fluctuating unexpectedly, stuck on hot or cold, or not responding as it should. These issues can disrupt your daily routine and leave you feeling uncomfortable or even at risk of scalding. A properly functioning shower temperature control is essential for achieving a comfortable bathing experience, ensuring safety, and conserving water by avoiding waste due to improper adjustments.

This guide is designed to help you understand how to fix shower temperature control issues effectively. It provides a comprehensive overview of potential causes and step-by-step solutions for diagnosing and resolving these problems. Whether you’re dealing with a mechanical dial, digital system, or a more complex setup, this guide will equip you with the knowledge and confidence to address the issue or seek professional help if needed.
Common Causes of Shower Temperature Issues
Understanding the root of shower temperature problems is the first step in resolving them. Here are the most common causes and how they affect your system:
Faulty Thermostatic Mixing Valve (TMV)
The thermostatic mixing valve regulates the proper mixing of hot and cold water to maintain a stable temperature. Over time, it can become clogged with mineral deposits, especially in areas with hard water, leading to inconsistent or unpredictable temperature control.
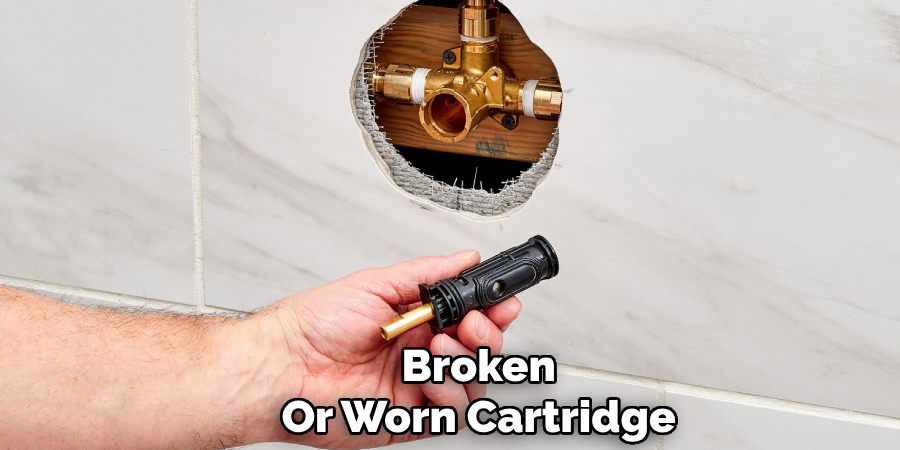
Broken or Worn Cartridge
A cartridge is a key component in single-handle faucets and controls water flow and temperature. When this part is broken, worn, or blocked by debris, it can cause significant temperature fluctuations, making it difficult to achieve a comfortable showering experience.
Water Heater Issues
The water heater plays a critical role in supplying hot water. Problems like incorrect temperature settings, sediment buildup in the tank, or malfunctioning gas or electric heating elements can directly impact the shower’s temperature stability. Regular maintenance and timely repairs are essential to prevent these issues.
Cross-Connection Issues
Cross-connections occur when plumbing lines improperly mix cold and hot water. This problem might be due to faulty installation or worn-out components, resulting in inconsistent water temperatures. Addressing these issues often requires a professional plumber to identify and rectify the cross-connection.
Tools and Materials Needed
Basic Tools
- Adjustable wrench
- Screwdriver
- Pliers
- Hex key (Allen wrench) for some shower models
Replacement Parts (if needed)
- New cartridge
- O-rings
- Mixing valve
Plumber’s Accessories
- Plumber’s grease for lubrication
Cleaning Supplies
- White vinegar for mineral buildup removal
- Soft brush or cloth for cleaning components
How to Fix Shower Temperature Control: Fixing a Faulty Thermostatic Mixing Valve
Signs of a Bad Mixing Valve
A faulty thermostatic mixing valve can significantly disrupt water temperature control in showers and faucets. Some common signs include inconsistent water temperatures—sudden switches between hot and cold—despite no changes to faucet or heater settings. More extreme cases may result in no hot or cold water flowing at all, even when the water heater is functioning correctly. These issues indicate the mixing valve may need repair or replacement to restore proper function.
Step-by-Step Replacement Process
- Shut Off Water
Begin by turning off the water supply to prevent leaks or flooding while working on the valve. Use the main water valve or dedicated shutoff valves for the shower.
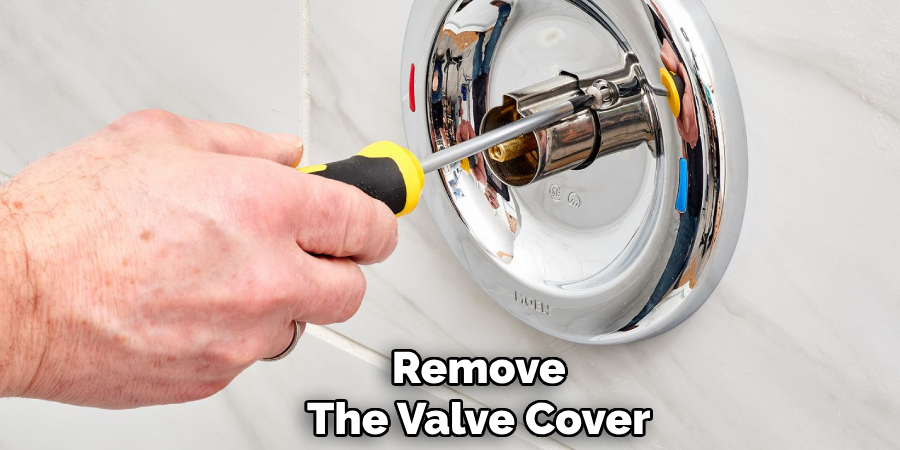
- Remove the Valve Cover
Access the mixing valve by carefully removing the shower handle and any decorative trim or cover plate. Depending on your shower model, use a screwdriver or hex key as needed.
- Detach the Old Thermostatic Valve
Loosen and remove the old mixing valve using an adjustable wrench or pliers. Be cautious when handling the pipe connections to avoid damage. Inspect the area for mineral buildup or debris and clean it with white vinegar and a soft brush if necessary.
- Install the New Valve
Position the replacement thermostatic mixing valve, ensuring it aligns properly with the existing pipe fittings. Securely tighten connections using the appropriate tools. Reapply the plumber’s grease to O-rings if applicable for smooth operation.
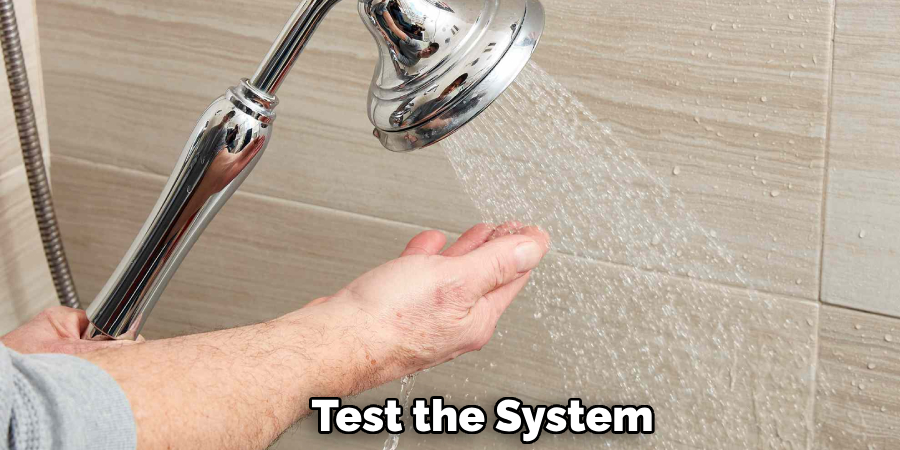
- Test the System
Turn the water supply back on and test the new valve by checking for steady and consistent water temperature. Ensure there are no leaks or unusual fluctuations before reassembling the trim and handle.
Properly replacing the thermostatic mixing valve restores comfort and functionality to your shower system.
Addressing Water Heater-Related Temperature Issues
If replacing the thermostatic mixing valve does not fully resolve water temperature inconsistencies, your water heater may require attention. Below are key steps to diagnose and address water heater-related issues effectively:
Checking and Adjusting Water Heater Settings
Begin by verifying the temperature setting on your water heater. Ideally, the temperature should be set between 120°F and 140°F to ensure safe and consistent water temperature. Adjust the thermostat as needed, and allow the system to stabilize before testing the water again.
Flushing the Water Heater
Over time, sediment can accumulate in the tank, particularly in areas with hard water. This buildup can reduce the efficiency of your water heater and interfere with temperature control. To address this, drain and flush the water heater to remove deposits. Doing so restores optimal performance and prolongs the life of the appliance.
Testing Heating Elements (For Electric Water Heaters)
If you have an electric water heater and temperature issues persist, faulty heating elements may be the cause. Use a multimeter to check the functionality of each heating element. If an element is defective, replace it promptly to restore proper operation.
By ensuring these components are in good working order, you can eliminate water heater-related temperature issues and enjoy consistent hot water.
Preventative Maintenance to Avoid Future Issues
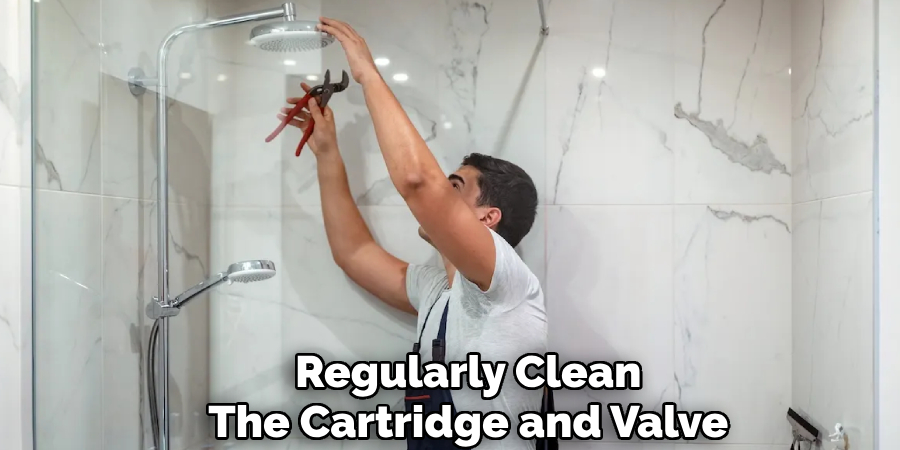
Regularly Clean the Cartridge and Valve
To maintain optimal performance, regularly clean the cartridge and valve of your water heater. Over time, mineral deposits and debris can accumulate, particularly in areas with hard water. This buildup can restrict water flow and cause fluctuations in temperature. Removing and cleaning these components ensures smooth operation and reduces the risk of malfunctions.
Inspect Water Pressure and Pipes
Water pressure plays a significant role in temperature regulation. Low or inconsistent water pressure can lead to temperature imbalances and reduce overall system efficiency. Periodically inspect your home’s water pressure using a pressure gauge and address any issues promptly. Additionally, check for leaks or blockages in your plumbing system that might impact pressure and, in turn, temperature control.
Check for Cross-Connections in Plumbing
Cross-connections in your plumbing system—where hot and cold water lines unintentionally mix—can create unexpected temperature changes. This issue can result from improper installation or wear and tear over time. Inspect your plumbing system for cross-connections to ensure that hot water and cold water stay separate. Correcting such issues stabilizes water temperature and prevents energy waste and inefficiency.
By incorporating these preventative maintenance steps, you can reduce the likelihood of future temperature issues and ensure your water heater operates efficiently for years to come.
Conclusion
By following the troubleshooting steps outlined above, you can gain a clear understanding of how to fix shower temperature control issues effectively. Regular actions like checking water pressure, inspecting for cross-connections, and flushing the water heater are essential for maintaining consistent water temperature and preventing future problems. Routine maintenance ensures the long-term efficiency of your water system, saves energy, and avoids costly repairs.
If DIY fixes do not resolve the issue, don’t hesitate to seek professional help to address more complex plumbing problems. Prioritizing maintenance and expert assistance ensures a comfortable and reliable shower experience.
About the Author
Adrian Green is a passionate woodworking enthusiast who has dedicated his life to the craft of woodworking. From his early days working alongside his father in the family woodworking shop, Adrian has honed his skills and developed a deep love for creating beautiful, functional pieces with his hands. As the voice behind The Woodenify Blog, he shares his knowledge, tips, and inspiration with fellow woodworkers of all skill levels, helping them build confidence in their abilities while learning new techniques.
Professional Focus
- Specializes in DIY woodworking projects, from furniture making to home décor.
- Provides step-by-step guides, tips, and practical tutorials for woodworkers at any skill level.
- Focused on empowering readers with confidence and knowledge through easy-to-follow instructions and hands-on techniques.
- Passionate about building a community where makers can share, learn, and grow together in the world of woodworking.
Education History
University of Craft and Design – Bachelor of Fine Arts (BFA) in Woodworking and Furniture Design
Woodworking Apprenticeships – Gained extensive hands-on experience through various workshops and mentorships with seasoned craftsmen, refining carpentry and furniture-making skills.
Expertise
- DIY woodworking, carpentry, furniture making, and home décor projects.
- Creating clear, accessible tutorials and guides for beginner to advanced woodworkers.
- Helping readers experience the satisfaction and fulfillment of turning raw materials into stunning finished products.