
Installing plumbing for a toilet may seem like a daunting task, but with the right tools and guidance, it can be a straightforward process. Proper installation is crucial to ensure the toilet functions efficiently without leaks or issues.
This guide will walk you through the key steps of how to install plumbing for a toilet, from preparing the installation area to connecting the plumbing components, providing clear instructions on toilet plumbing ideas to help you accomplish the job with confidence.
Importance of Proper Toilet Plumbing
Proper toilet plumbing is essential for maintaining a hygienic and functional bathroom environment. Incorrect installation or faulty plumbing can lead to leaks, water damage, and even costly repairs over time. Additionally, poorly installed plumbing can cause drainage issues or persistent odors, impacting the overall comfort and usability of the space.
Ensuring the plumbing is done correctly also aids in water conservation by preventing unnecessary wastage due to leaks or inefficiencies. Overall, reliable toilet plumbing plays a crucial role in promoting sanitation, preserving the integrity of your home, and enhancing the longevity of your bathroom fixtures.
10 Methods How to Install Plumbing for a Toilet
1. Planning and Measuring the Plumbing Layout
Before beginning the installation, carefully plan the plumbing layout. Start by determining the best location for the toilet based on existing water supply and drainage lines. Measure the rough-in distance, which is the space between the wall and the toilet flange, typically 12 inches but sometimes 10 or 14 inches in older homes. Ensure there is enough space around the toilet for comfortable use. Additionally, check local plumbing codes to ensure compliance with installation requirements, including venting and pipe size regulations.
2. Shutting Off the Water Supply and Removing the Old Toilet (If Applicable)
If replacing an existing toilet, turn off the water supply by shutting the valve near the base of the toilet. Flush the toilet to remove as much water as possible, then use a sponge or towel to absorb any remaining water in the tank and bowl. Disconnect the water supply line using an adjustable wrench. Remove the toilet bolts from the floor and lift the toilet carefully. Place it on an old towel or garbage bag to catch any water drips. Scrape off any remaining wax from the old wax ring using a putty knife.
3. Installing the Drain Pipe and Toilet Flange
The drain pipe carries waste from the toilet to the main sewer line. For new installations, cut a hole in the floor to fit a 3-inch or 4-inch drain pipe, depending on your local code. The pipe should have a slight downward slope (1/4 inch per foot) for proper drainage. Attach a closet bend (elbow fitting) to connect the drain to the main line. Once the drain pipe is in place, install a toilet flange on top. The flange should sit flush with the finished floor to ensure a proper toilet seal. Secure it with screws to the subfloor and dry-fit the toilet to check alignment.
4. Connecting the Vent Pipe to the Drain System
Proper venting is essential to prevent sewer gases from entering the home and to maintain proper drainage flow. The toilet must be connected to a vent pipe that leads outside, usually through the roof. The vent pipe should be at least 1.5 to 2 inches in diameter, depending on local plumbing codes. Connect the vent pipe to the toilet’s waste pipe using a sanitary tee fitting, ensuring the vent rises vertically before connecting to the main vent stack. This setup allows air to enter the system, preventing vacuum suction that can slow drainage.
5. Running the Water Supply Line
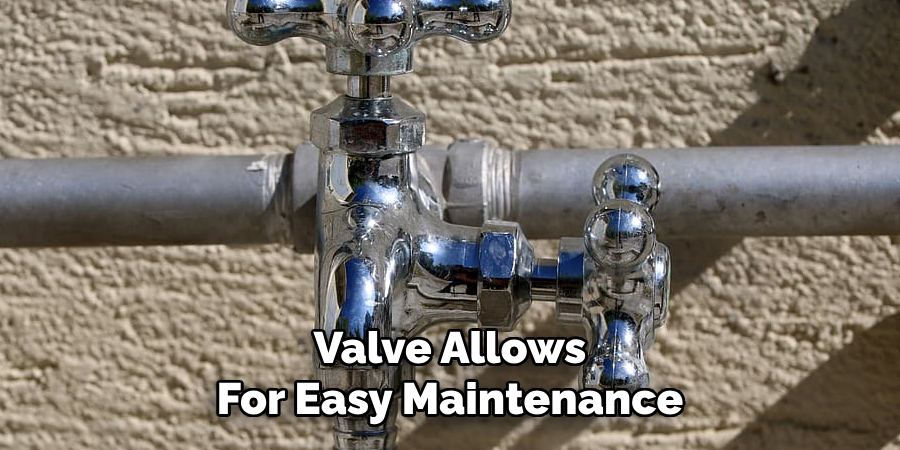
A dedicated water supply line is needed to fill the toilet tank. If a supply line is not already in place, run a cold-water pipe from the main water source to the toilet location. Use 1/2-inch PEX, copper, or CPVC pipe for the supply line. Install a shut-off valve (angle stop) about 6 inches above the floor, aligned with the toilet’s water inlet. This valve allows for easy maintenance and emergency shutoff. Ensure the pipe is securely fastened to wall studs to prevent movement when turning the valve.
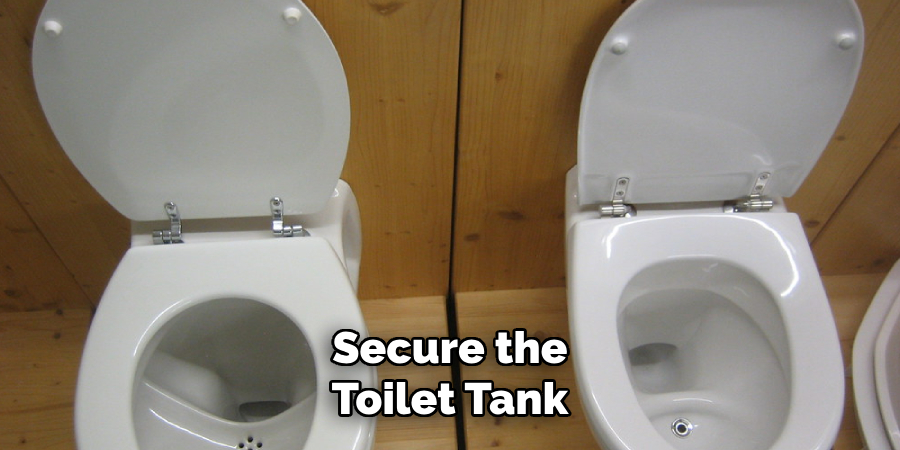
6. Sealing and Securing the Toilet Flange
Once the flange is properly positioned, apply a wax ring or rubber gasket seal on top of it. The wax ring creates a watertight seal between the toilet and the drain, preventing leaks. Center the ring on the flange and press it firmly in place. Ensure the flange bolts are inserted into the slots on either side, as they will secure the toilet to the floor. Double-check that the flange is level, as an uneven flange can cause leaks and instability.
7. Installing the Toilet and Securing It to the Floor
Carefully lower the toilet bowl onto the wax ring, aligning the mounting holes with the flange bolts. Press down firmly to compress the wax ring and create a strong seal. Install washers and nuts onto the flange bolts, tightening them evenly on both sides to secure the toilet to the floor. Avoid overtightening, as this can crack the porcelain. Once the toilet is secure, trim any excess flange bolt length using a hacksaw. Place decorative bolt caps over the bolts for a finished look.
8. Connecting the Water Supply and Filling the Tank
Attach the toilet’s fill valve to the shut-off valve using a flexible supply hose. Hand-tighten the connection, then use an adjustable wrench to ensure a snug fit without over-tightening. Turn on the water supply slowly, allowing the tank to fill. Check for any leaks at the supply line connection. Adjust the float mechanism inside the tank if needed to ensure the correct water level. Most toilets have a marked fill line indicating the ideal water level for efficient flushing.
9. Testing the Toilet for Leaks and Proper Functioning
Before considering the installation complete, test the toilet for leaks and functionality. Flush the toilet several times and check for any water leakage around the base, supply line, and tank connections. Inspect the wax ring seal by feeling around the base of the toilet for moisture. If water leaks from the base, the wax ring may not have sealed properly, requiring a replacement. Ensure that the toilet flushes efficiently and refills correctly without continuous running water.
10. Finishing Touches and Maintenance Tips
Once testing is complete, apply a bead of silicone caulk around the base of the toilet for added stability and to prevent water from seeping under the toilet. Avoid caulking the back side, as this allows leaks to be detected more easily. Secure the toilet tank lid in place and clean the surrounding area. Regular maintenance includes checking for leaks, ensuring the flush mechanism works properly, and occasionally cleaning the fill valve and flapper to prevent clogs and running water issues.
Things to Consider When Installing a Toilet
Local Plumbing Codes
Always check local plumbing codes before beginning the installation process to ensure compliance. Codes may dictate specific requirements, such as pipe sizes, venting configurations, and allowable materials.
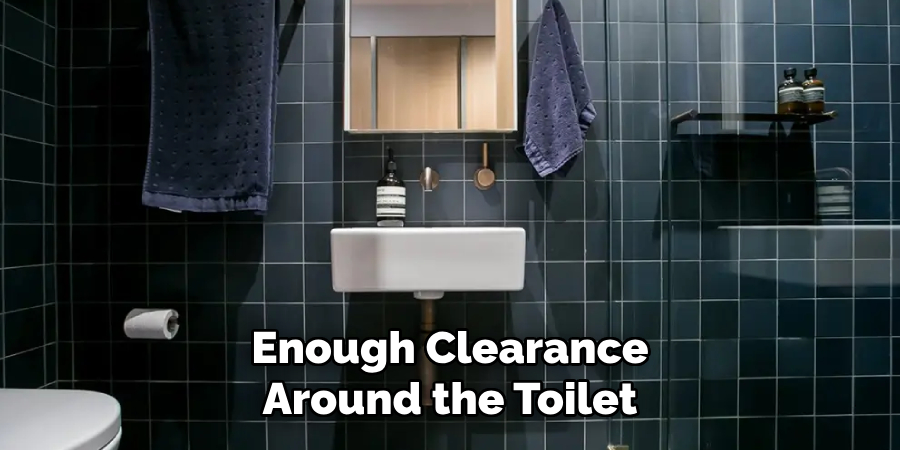
Measurements and Space
Measure the rough-in distance (the distance from the wall to the center of the drain pipe) to ensure the new toilet fits properly. Also, confirm there is enough clearance around the toilet for comfortable use and cleaning.
Type of Toilet
Consider the type of toilet that best suits your needs. Options include one-piece or two-piece designs, elongated or round bowls, and low-flow or dual-flush systems for water conservation.
- Tools and Materials
Gather all necessary tools and materials before starting to avoid interruptions. Common items include an adjustable wrench, screwdriver, putty knife, wax ring, pipe sealant, and a hacksaw.
Water Pressure
Ensure adequate water pressure at your home meets the toilet’s requirements for optimal performance. Low water pressure can lead to insufficient flushing power.
Floor Condition
Inspect the flooring under the toilet for any damage or rot. A solid subfloor is essential for stability and proper sealing during installation.
Maintenance Accessibility
Plan for easy access to shut-off valves, supply lines, and other components for future maintenance. This can save time and effort down the line.
Environmental Factors
When choosing a toilet, consider environmentally friendly options, such as high-efficiency models that reduce water usage and support sustainable living practices.
By keeping these considerations in mind, your installation process can go smoothly, ensuring a functional and durable setup.

Conclusion
Installing plumbing for a toilet involves careful planning, precise measurements, and secure connections to ensure long-term functionality. By following these 10 detailed methods, you can successfully complete the installation while preventing leaks and drainage issues. Proper sealing, venting, and water supply setup are essential for efficient performance.
If you encounter any difficulties, consulting a professional plumber can ensure a safe and code-compliant installation. Follow these simple instructions outlined in this blog post about how to install plumbing for a toilet, and you’ll be able to get the job done with ease.
About the Author
Adrian Green is a passionate woodworking enthusiast who has dedicated his life to the craft of woodworking. From his early days working alongside his father in the family woodworking shop, Adrian has honed his skills and developed a deep love for creating beautiful, functional pieces with his hands. As the voice behind The Woodenify Blog, he shares his knowledge, tips, and inspiration with fellow woodworkers of all skill levels, helping them build confidence in their abilities while learning new techniques.
Professional Focus
- Specializes in DIY woodworking projects, from furniture making to home décor.
- Provides step-by-step guides, tips, and practical tutorials for woodworkers at any skill level.
- Focused on empowering readers with confidence and knowledge through easy-to-follow instructions and hands-on techniques.
- Passionate about building a community where makers can share, learn, and grow together in the world of woodworking.
Education History
University of Craft and Design – Bachelor of Fine Arts (BFA) in Woodworking and Furniture Design
Woodworking Apprenticeships – Gained extensive hands-on experience through various workshops and mentorships with seasoned craftsmen, refining carpentry and furniture-making skills.
Expertise
- DIY woodworking, carpentry, furniture making, and home décor projects.
- Creating clear, accessible tutorials and guides for beginner to advanced woodworkers.
- Helping readers experience the satisfaction and fulfillment of turning raw materials into stunning finished products.