
Are you facing the problem of your hot water coming out brown instead of clear? Don’t worry. This is a common issue that can be easily fixed.
Brown hot water can be an alarming issue in your home, as it looks unappealing and can signal potential problems within your plumbing system. This discoloration is often caused by sediment buildup, rust in your water heater, or corroded pipes. Fortunately, addressing brown hot water doesn’t always require extensive repairs; many solutions can be straightforward and cost-effective.
In this guide on how to fix brown hot water, we will walk you through the common causes of brown hot water and provide step-by-step instructions to help you resolve the issue effectively and restore the clarity of your water.
What Are the Causes of Brown Hot Water?
There are several possible causes for brown hot water, and identifying the source is crucial in determining the appropriate course of action. Some of the most common reasons include:
- Sediment Buildup: Over time, sediment can accumulate inside your water heater tank due to minerals present in hard water. This sediment can discolor your hot water and clog or damage your plumbing system.
- Rusty Water Heater: If your hot water appears brown only when coming from your faucet but not from cold-water taps, then there’s likely rust inside your water heater tank. This could be a sign that your water heater needs to be replaced.
- Corroded Pipes: If the brown hot water issue is present throughout your home, it could be caused by corroded pipes. Old galvanized or iron pipes are prone to corrosion over time, and this can result in rusty water coming out of all your taps.
What Will You Need?
Before you start tackling the problem, it’s essential to gather all the necessary tools and materials. Depending on the cause of your brown hot water, you may require different items. Here are some common items that may be needed:
- White vinegar
- Baking soda
- Garden hose
- Water heater flush kit
- Pipe wrench
Once you have everything ready, you can move on to the steps for fixing brown hot water.
9 Easy Steps on How to Fix Brown Hot Water
Step 1. Turn Off the Water Heater:

Before beginning any work on your water heater, it’s critical to ensure your safety by turning it off completely. If you have an electric water heater, locate the circuit breaker panel in your home and switch off the breaker connected to the water heater. For a gas water heater, turn the gas valve to the “Off” position to stop gas flow to the appliance. This step prevents any potential electrical shock or gas leakage during the troubleshooting or repair. Always double-check to confirm that the water heater is powered off before proceeding to the following steps, as working with an active system can be hazardous.
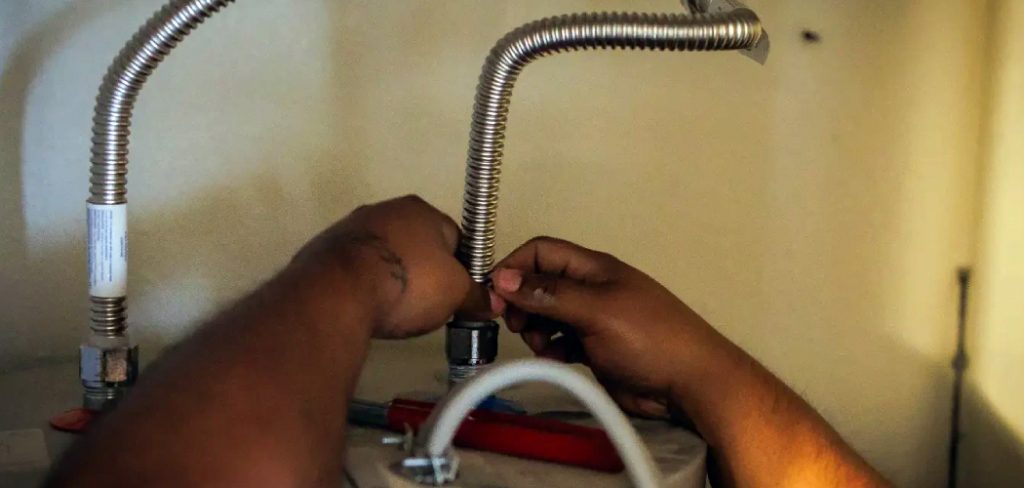
Step 2. Turn Off the Water Supply:
Turn off the cold water supply valve connected to your water heater. This valve is typically found at the top of the water heater, where the cold water pipe enters. Turning off the water supply prevents additional water from flowing into the tank during the process. Ensure the valve is securely closed before moving on to the next step to avoid any accidental water leakage or overflow.
Step 3. Drain the Water Heater:
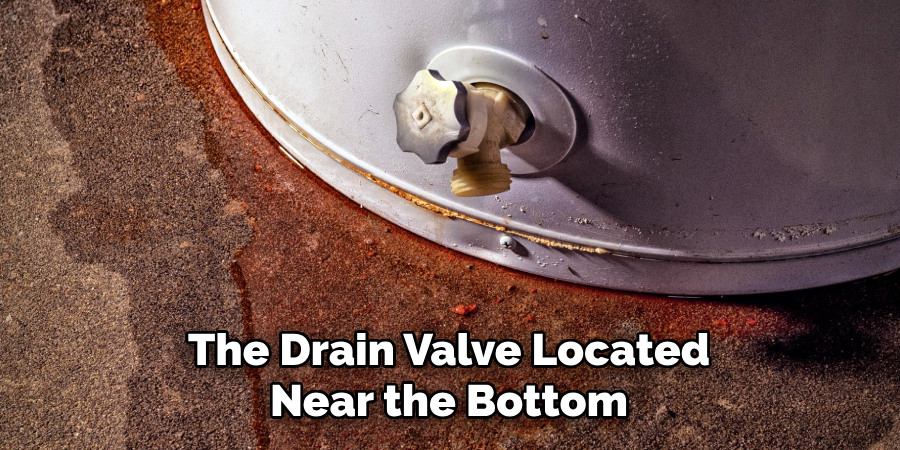
Attach a garden hose to the drain valve located near the bottom of the water heater tank. Place the other end of the hose in a safe drainage area, such as a floor drain, outdoor space, or bucket. Open the drain valve to allow the water to flow out of the tank. To speed up the draining process, you can also open a hot water tap in your home, releasing pressure and allowing air to enter the system. Ensure the tank is completely drained before proceeding to the next step. Be cautious of hot water and handle it safely to avoid burns.
Step 4. Flush the Tank:
Once the tank is drained, turn on the cold water supply for a few minutes to flush out any sediment or debris accumulated at the bottom. This can be done by leaving the drain valve open and allowing the incoming water to push out the sediment through the hose. Continue flushing until the water runs clear, ensuring all buildup has been removed. This step is essential to maintain the efficiency and lifespan of your water heater.
Step 5. Refill the Tank:
After flushing the tank, close the drain valve securely and remove the hose. Ensure that the cold water supply is still turned off before proceeding. Next, turn on a hot water tap in your home to allow air to escape as the tank refills. Slowly open the cold water supply valve and allow the tank to fill completely. Monitor the process to ensure no leaks around the drain valve or other connections. Once the tank is full and water flows steadily from the tap, turn off the tap. This step prepares the tank to resume regular operation.
Step 6. Restore Power or Gas Supply:
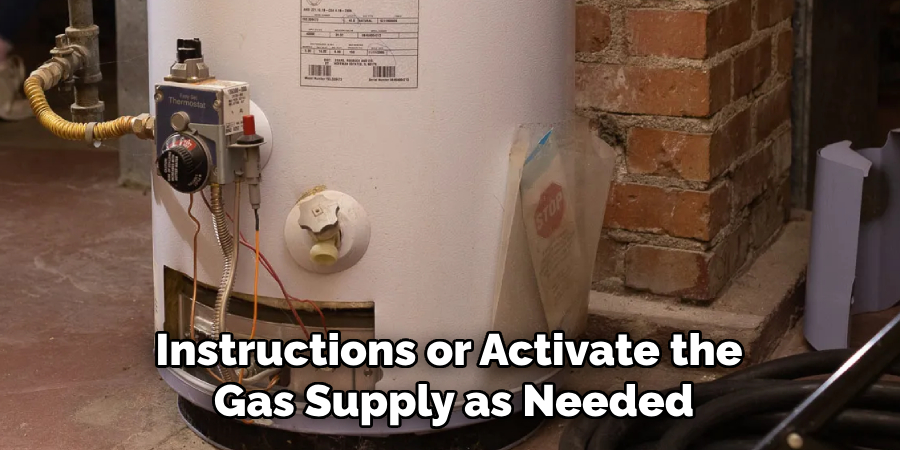
Once the tank is filled and all air has been purged from the system, it’s time to restore the power or gas supply to the water heater. If you have an electric water heater, switch the power back on at the circuit breaker. For gas water heaters, relight the pilot light following the manufacturer’s instructions or activate the gas supply as needed. Allow the water heater some time to heat the water to the desired temperature. Finally, check the thermostat setting to ensure it’s safe and energy-efficient, typically around 120°F. This completes maintenance, ensuring your water heater operates efficiently and reliably.
Step 7. Perform a Final Inspection:
After restoring the power or gas supply, inspect the water heater and the surrounding area. Check all connections, including the drain and pressure relief valves, to ensure no water leaks. Verify that the unit operates correctly by observing if the water is heating as expected. Listen for any unusual sounds and check for error indicators on the control panel, if applicable. Ensuring everything is in proper working order will help maintain the efficiency and longevity of your water heater.
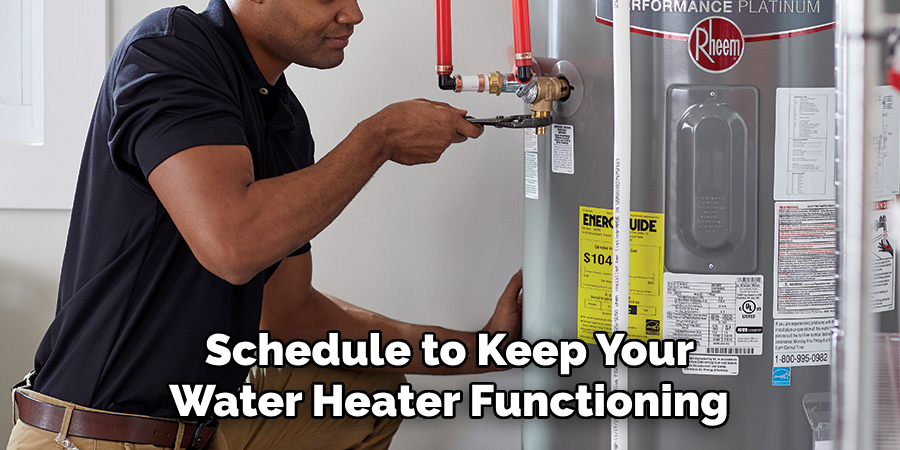
Step 8. Schedule Regular Maintenance:
Establish a routine maintenance schedule to keep your water heater functioning at its best. This includes flushing the tank annually to remove sediment buildup, testing the pressure relief valve, and inspecting the anode rod for corrosion. Regular maintenance improves efficiency and extends the unit’s lifespan, preventing costly repairs or replacements in the future. Keep a log of all maintenance activities to ensure consistent care.
Step 9. Insulate Your Water Heater and Pipes:
Consider insulating your water heater tank and pipes to enhance energy efficiency and reduce heat loss. Use a water heater insulation blanket for the tank, mainly if it is located in an unheated space, and wrap insulation around exposed hot water pipes. This simple step helps maintain the desired water temperature longer, reducing energy usage and utility bills. Ensure the insulation does not block the thermostat or the control panel for safety and accessibility.
By following these steps and staying on top of regular maintenance, you can keep your water heater functioning efficiently for years.
5 Things You Should Avoid
1. Ignoring the Root Cause: One of the biggest mistakes is treating the symptoms without identifying the underlying issue. Brown hot water can be caused by sediment buildup, rusting pipes, or issues in the water heater, and failing to address the root cause can lead to recurring problems.
2. Using Harsh Chemicals: While trying chemical cleaners to resolve the issue might be tempting, these substances can damage your plumbing system and even pose health risks. Always opt for safe and appropriate cleaning methods.
3. Overlooking Regular Maintenance: Neglecting periodic maintenance for your water heater and plumbing system can exacerbate the problem. Sediment in the tank often builds up over time, and without proper upkeep, it can cause brown water and reduce the efficiency of your system.
4. DIY Fixes Without Proper Knowledge: Attempting repairs or flushing your water heater without understanding the process can lead to more damage. Following manufacturer guidelines or consulting a professional is important to avoid costly mistakes.
5. Delaying Professional Assistance: If the issue persists after basic troubleshooting, delaying a call to a plumber can worsen the situation. Rusty pipes or major water heater malfunctions require expert intervention to be resolved effectively and safely.
Conclusion
How to fix brown hot water requires a proactive and informed approach to ensure your plumbing system remains functional and safe.
Start by identifying the root cause, whether it’s sediment buildup, rusty pipes, or issues with your water source. Regular maintenance, such as flushing your water heater and inspecting your plumbing system, can help prevent future problems. Avoid common mistakes, such as using harsh chemicals or attempting repairs without proper knowledge. Most importantly, don’t hesitate to seek professional assistance for persistent issues or complex repairs.
By taking these steps, you can restore clean, clear hot water to your home efficiently and effectively.
About the Author
Adrian Green is a passionate woodworking enthusiast who has dedicated his life to the craft of woodworking. From his early days working alongside his father in the family woodworking shop, Adrian has honed his skills and developed a deep love for creating beautiful, functional pieces with his hands. As the voice behind The Woodenify Blog, he shares his knowledge, tips, and inspiration with fellow woodworkers of all skill levels, helping them build confidence in their abilities while learning new techniques.
Professional Focus
- Specializes in DIY woodworking projects, from furniture making to home décor.
- Provides step-by-step guides, tips, and practical tutorials for woodworkers at any skill level.
- Focused on empowering readers with confidence and knowledge through easy-to-follow instructions and hands-on techniques.
- Passionate about building a community where makers can share, learn, and grow together in the world of woodworking.
Education History
University of Craft and Design – Bachelor of Fine Arts (BFA) in Woodworking and Furniture Design
Woodworking Apprenticeships – Gained extensive hands-on experience through various workshops and mentorships with seasoned craftsmen, refining carpentry and furniture-making skills.
Expertise
- DIY woodworking, carpentry, furniture making, and home décor projects.
- Creating clear, accessible tutorials and guides for beginner to advanced woodworkers.
- Helping readers experience the satisfaction and fulfillment of turning raw materials into stunning finished products.