
Sewer backups can pose serious health risks and cause significant property damage if not handled properly. When wastewater overflows into a home or business, it can contaminate surfaces with harmful bacteria, viruses, and other pathogens. Proper disinfection is crucial to ensure the safety of the affected area and to prevent the spread of illness.

This guide on how to disinfect sewer backup will walk you through the essential steps to safely and effectively disinfect a space after a sewer backup, helping to restore cleanliness and protect your health.
What is a Sewer Backup?
A sewer backup occurs when wastewater from sewer lines flows back into a home or building instead of draining away properly. This can be caused by blockages in the sewer line, tree root intrusions, heavy rainfall overwhelming the system, or damaged pipes.
When a backup happens, it often results in contaminated water flooding basements, bathrooms, or other low-lying areas, posing health and safety hazards. Understanding the causes and risks of sewer backups is the first step in effectively addressing them and preventing future occurrences.
Needed Materials
Before beginning the disinfection process, it is essential to have all the necessary materials on hand. These may include:
Protective Gear
Personal protective equipment (PPE) is crucial in preventing exposure to harmful contaminants during the disinfection process. The minimum PPE recommended includes gloves, goggles or face shields, and a mask.
Cleaning Supplies
- Bleach or Another Epa-approved Disinfectant
- Mops
- Buckets
- Sponges or Rags
- Trash Bags
7 Steps on How to Disinfect Sewer Backup
Step 1: Safety First
Before starting the disinfection process, prioritize safety to protect yourself and others from potential hazards. Begin by ensuring the affected area is well-ventilated by opening windows or using fans to improve airflow and reduce the concentration of harmful fumes. Avoid direct contact with the contaminated water and surfaces by wearing the appropriate personal protective equipment (PPE), including gloves, goggles or a face shield, and a mask.
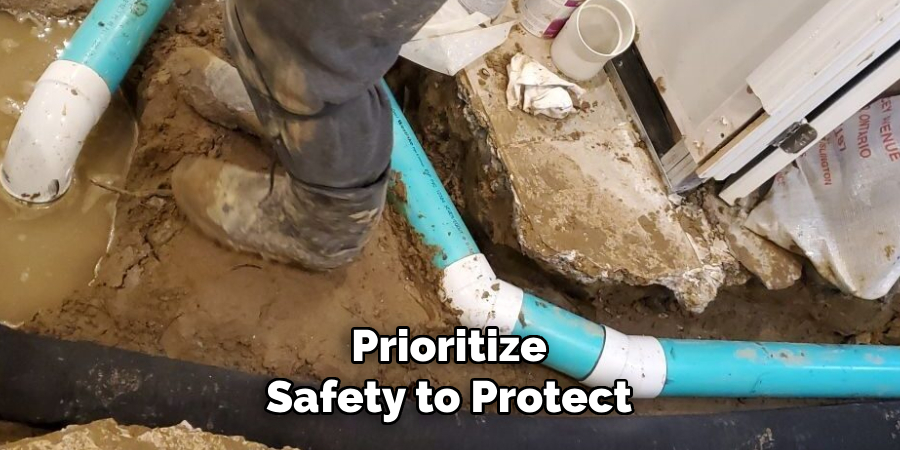
Additionally, ensure that any electrical devices in the area are turned off to prevent the risk of electrical shocks. If the backup is severe or the environment feels unsafe, consider seeking professional assistance. Safety should always come first when addressing a sewer backup.
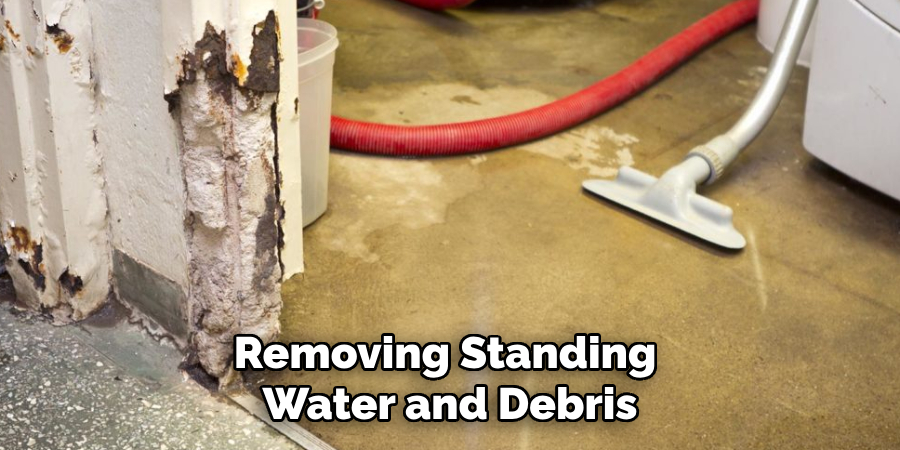
Step 2: Remove Standing Water and Debris
Once safety precautions are in place, the next step is to remove any standing water and debris from the affected area. Use a wet/dry vacuum, sump pump, or buckets to extract the standing water efficiently. Be mindful to dispose of this contaminated water properly, following local disposal guidelines.
After the water has been removed, collect all solid debris, such as dirt, sludge, or damaged materials, using shovels, trash bags, and disposable tools. Place the debris in heavy-duty trash bags and seal them tightly to prevent further contamination. Make sure to discard any porous materials, such as carpeting, upholstered furniture, or insulation, that cannot be thoroughly cleaned and disinfected. Removing water and debris promptly helps prevent the spread of contaminants and prepares the space for cleaning and disinfection.
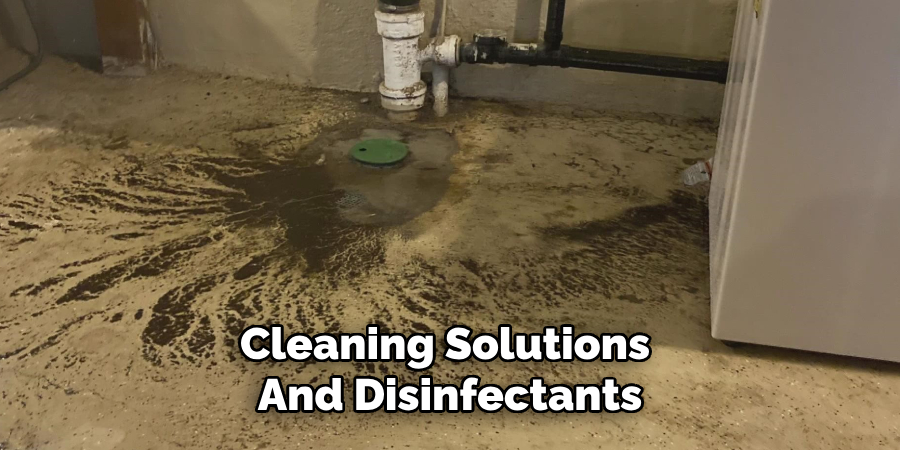
Step 3: Clean and Scrub the Affected Area
After removing standing water and debris, the next step is to clean all affected surfaces thoroughly. Using hot water and a heavy-duty cleaner, such as bleach or another EPA-approved disinfectant, scrub all surfaces that had direct contact with the contaminated water. This includes floors, walls, countertops, appliances, furniture, and any other items in the affected area.
For hard surfaces that can withstand bleach or other strong cleaners, mix one cup of bleach with one gallon of hot water for an effective disinfecting solution. For soft fabrics or materials that cannot be cleaned with bleach, use a suitable alternative recommended by the manufacturer. Thoroughly scrub all surfaces with the cleaning solution, paying extra attention to areas where sewage may have pooled or soaked in. Once cleaned, rinse all surfaces with clean water and dry thoroughly.
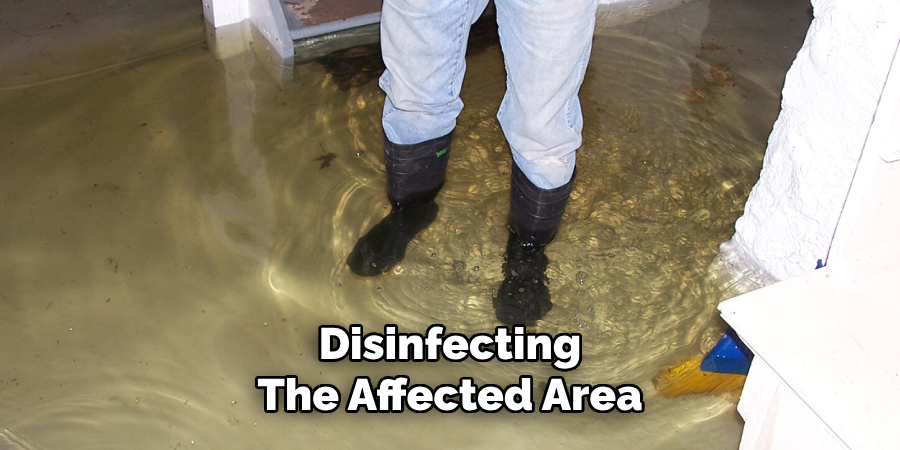
Step 4: Disinfect All Surfaces
After cleaning, it is essential to disinfect all affected surfaces to kill any remaining bacteria and viruses. Use an EPA-approved disinfectant or a bleach solution (one cup of bleach per gallon of hot water) for this step. Apply the disinfectant generously to all surfaces with direct contact with the contaminated water, including floors, walls, furniture, and other items.
Allow the solution to sit for at least ten minutes before wiping it off or letting it air dry. This will ensure that any remaining harmful pathogens are completely eliminated.
Step 5: Disinfect All Cleaning Tools
After disinfecting the affected area, it is equally important to clean and disinfect all tools and equipment used during the process. These items, including mops, buckets, sponges, and protective gear, may have come into contact with contaminated water and can harbor harmful pathogens if not properly sanitized.
Start by rinsing cleaning tools thoroughly with hot water to remove visible dirt and debris. Next, prepare a disinfectant solution, such as one cup of bleach per gallon of hot water, or use an EPA-approved disinfectant. Submerge washable tools like sponges and mop heads in the solution for at least 10 minutes to ensure effective disinfection. For non-submersible items like buckets and shovels, use a cloth soaked in the solution to wipe down all surfaces thoroughly. Once disinfected, rinse all tools with clean water and leave them to air dry.
Step 6: Dispose of Contaminated Materials Properly
After the disinfection process is complete, dispose of any remaining contaminated materials properly. This may include disposable PPE, cleaning tools, and heavily contaminated items like carpeting or upholstery.
Place these items in heavy-duty trash bags and seal them tightly before disposing of them according to local guidelines. Be sure to wash your hands thoroughly after handling any potentially contaminated materials.
Step 7: Ventilate the Area
Proper ventilation is an essential step in ensuring the area is safe and free from lingering odors or harmful fumes after disinfection. Begin by opening all windows and doors to allow fresh air to circulate throughout the space. If weather permits, use fans or air purifiers to help expedite the exchange of air and improve ventilation. Additionally, consider using dehumidifiers to reduce moisture levels and prevent mold growth in the affected area.
Continue ventilating the area for several hours or until the odor of cleaning solutions and disinfectants has dissipated completely. Proper airflow not only helps to eliminate unpleasant smells but also promotes a healthier environment by minimizing the concentration of harmful airborne particles. Ensuring the area is thoroughly ventilated is a crucial final step before allowing normal use of the space.
Following these steps on how to disinfect sewer backup will help you effectively and safely clean up after a sewer backup. Remember to always prioritize safety and use proper protective equipment when dealing with contaminated water and materials. If the backup is extensive or poses a health hazard, consider seeking professional assistance for thorough cleaning and restoration. With prompt action and thorough cleaning, you can restore your space to its pre-backup condition and prevent future issues.
When to Call a Professional
While the steps outlined above can help you manage and clean up minor sewer backups, there are certain situations where calling a professional is the safest and most effective option. You should immediately consider professional assistance if:
The Backup or Contamination is Extensive:
Large-scale damage, widespread flooding, or contamination affecting multiple rooms or levels in a building require advanced tools and expertise to handle effectively.
You Suspect Structural Damage:
If the sewer backup has compromised the integrity of your flooring, walls, or foundation, professionals can assess and address the issue safely to prevent further damage.
Mold Growth is Evident:
If you notice signs of mold, such as discoloration, musty odors, or visible spores, specialized mold remediation services are necessary to safely contain and remove it.
Hazardous Materials Are Involved:
If the sewer backup contains dangerous chemicals, oil, or industrial waste, professionals with specialized training and protective gear should handle the cleanup.
Health Risks Are Severe:
Families with vulnerable individuals, such as young children, pregnant women, the elderly, or those with weakened immune systems, should avoid handling potentially infectious waste themselves.
The Source of the Backup is Unclear:
If the cause of the backup cannot be determined, plumbers or other professionals can diagnose the problem, whether it’s a blockage, collapsed pipes, or other issues in the sewer system.
Hiring licensed professionals ensures that the cleanup is thorough and adheres to health and safety standards.
Frequently Asked Questions
Q1: Is It Safe to Clean Up a Sewer Backup Myself?
A: Yes, you can clean up a minor sewer backup yourself, following proper safety precautions and using appropriate cleaning methods. However, if the backup is extensive or poses health risks, it is best to seek professional assistance.
Q2: How Can I Prevent Sewer Backups?
A: Regularly maintaining and inspecting your sewer lines, avoiding flushing inappropriate items down the toilet, and installing backwater valves can help prevent sewer backups.
Q3: How Long Does It Take to Disinfect After a Sewer Backup?
A: The disinfection process typically takes at least 10 minutes for surfaces to be effectively sanitized. However, it is recommended to leave the solution on for longer or let it air dry for maximum effectiveness.
Q4: Can a Sewer Backup Cause Health Problems?
A: Yes, sewer backups can pose health risks due to exposure to harmful bacteria, viruses, and other contaminants. It is important to take proper precautions and seek professional assistance if necessary.
Conclusion
Dealing with a sewer backup can be a challenging and unpleasant task, but following these steps on how to disinfect sewer backup can help ensure that the affected area is safe and free from harmful contaminants. Remember to always prioritize safety, properly dispose of contaminated materials, and thoroughly clean and disinfect all surfaces to prevent further health risks. If in doubt or dealing with a severe backup, seek professional assistance for proper cleanup and remediation.
With proper precautions and thorough cleaning, your space will be restored to its pre-backup condition. However, if you experience any persistent issues or have concerns about potential mold growth, it is best to consult a professional for further guidance. Stay safe, and take care of your space to prevent future sewer backups.
About the Author
Adrian Green is a passionate woodworking enthusiast who has dedicated his life to the craft of woodworking. From his early days working alongside his father in the family woodworking shop, Adrian has honed his skills and developed a deep love for creating beautiful, functional pieces with his hands. As the voice behind The Woodenify Blog, he shares his knowledge, tips, and inspiration with fellow woodworkers of all skill levels, helping them build confidence in their abilities while learning new techniques.
Professional Focus
- Specializes in DIY woodworking projects, from furniture making to home décor.
- Provides step-by-step guides, tips, and practical tutorials for woodworkers at any skill level.
- Focused on empowering readers with confidence and knowledge through easy-to-follow instructions and hands-on techniques.
- Passionate about building a community where makers can share, learn, and grow together in the world of woodworking.
Education History
University of Craft and Design – Bachelor of Fine Arts (BFA) in Woodworking and Furniture Design
Woodworking Apprenticeships – Gained extensive hands-on experience through various workshops and mentorships with seasoned craftsmen, refining carpentry and furniture-making skills.
Expertise
- DIY woodworking, carpentry, furniture making, and home décor projects.
- Creating clear, accessible tutorials and guides for beginner to advanced woodworkers.
- Helping readers experience the satisfaction and fulfillment of turning raw materials into stunning finished products.