
Are you tired of coming home to a flooded basement or kitchen? Do you worry about potential water damage while you’re away on vacation?
How to install automatic water shut off valve is a practical and essential step to protect your home from potential water damage caused by leaks or burst pipes. These devices are designed to detect water flow abnormalities and automatically shut off the water supply, minimizing the risk of costly repairs and damage.
Whether you’re a homeowner looking to enhance your home’s safety or a DIY enthusiast taking on a new project, this guide will provide simple, step-by-step instructions to install an automatic water shut-off valve. With the right tools and preparation, you can ensure peace of mind and safeguard your property from water-related mishaps.
What Are the Benefits of Installing an Automatic Water Shut Off Valve?
Before we dive into the installation process, let’s first understand the benefits of having an automatic water shut-off valve in your home.
- Prevent Costly Water Damage: The most significant advantage of installing an automatic water shut-off valve is its ability to stop potential water damage before it becomes a considerable problem. These valves can prevent thousands of dollars in repairs and damages by quickly shutting off the water supply.
- Minimize Losses from Leaks or Burst Pipes: Even small leaks or burst pipes can cause significant damage if not detected and addressed promptly. An automatic water shut-off valve can detect these abnormalities and take immediate action to minimize losses.
- Protect Your Home While You’re Away: Whether you’re on vacation or away from home for an extended period, an automatic water shut-off valve can provide peace of mind. It ensures your home is safe from potential water damage, even when you’re not there to address the issue.
What Will You Need?
Before starting the installation process, ensure you have the necessary tools and materials. Here’s a list of items you’ll need:
- Automatic water shut-off valve kit (includes main valve, sensors, controller)
- Pipe cutter
- Wrench or pliers
- Screwdriver
- Measuring tape
- Teflon tape
Once you have all the tools and materials, you’re ready to begin the installation process.
8 Easy Steps on How to Install Automatic Water Shut Off Valve
Step 1. Turn Off the Water Supply:
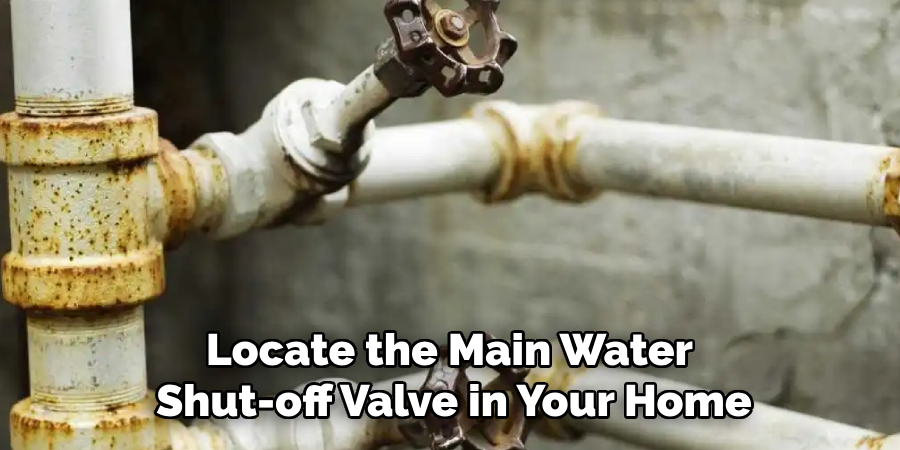
Before starting the installation, turning off the water supply to your home is crucial to avoid any unexpected water flow during the process. Locate the main water shut-off valve in your home, often found near your water meter or where the main water line enters the house. Turn the valve clockwise until it’s fully closed. This step ensures that you can work on the pipe system safely and without causing water damage to your property. Once the water supply is off, open the faucets in your home to release any remaining water pressure in the pipes.
Step 2. Determine the Installation Location:
Identify the ideal location for installing the automatic water shut-off valve. This is typically on the main water line, close to the existing shut-off valve. Ensure enough space to accommodate the valve, sensors, and other components without obstructing access to the pipe. Use the measuring tape to mark the location where the valve will be installed, ensuring it aligns appropriately with the pipe system for a secure and efficient fit.
Step 3. Prepare the Pipe for Installation:
Before installing the automatic water shut-off valve, prepare the pipe by cleaning it thoroughly. Use a pipe cleaner or sandpaper to remove any dirt, rust, or debris from the pipe’s surface to ensure a tight seal when connecting the valve. If you’re working with copper pipes, you may need to cut the pipe to fit the valve. Use a pipe cutter to make precise cuts and smooth out sharp edges with a deburring tool. Ensure the pipe is dry and water-free before installing to avoid complications.
Step 4. Install the Automatic Water Shut-Off Valve:
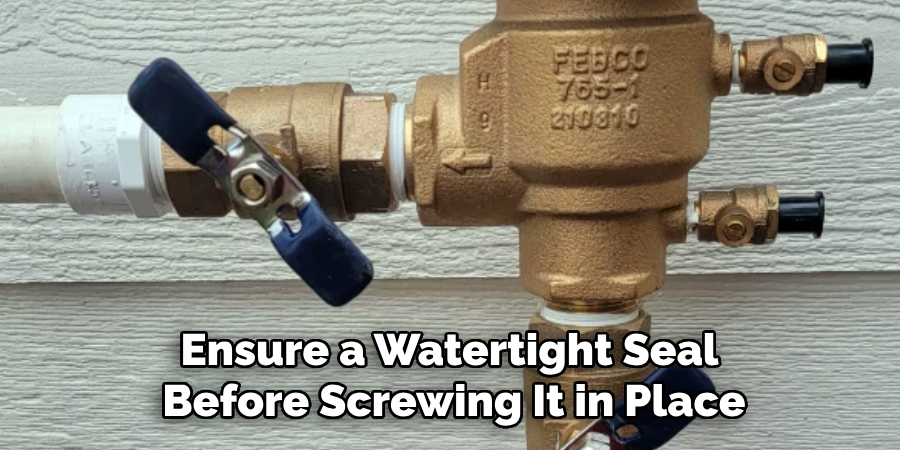
Position the automatic water shut-off valve at the marked location on the pipe. Follow the manufacturer’s instructions to align and secure the valve properly. If the valve uses threaded connections, apply the plumber’s tape to the threads to ensure a watertight seal before screwing it in place. For compression fittings, tighten the nuts firmly with an adjustable wrench while avoiding over-tightening, which could damage the fittings. Double-check that the valve is securely attached and properly aligned with the pipe to prevent leaks.
Step 5. Connect the Valve to the Control System:
Once the automatic water shut-off valve is securely installed, connect it to the control system as per the manufacturer’s guidelines. This may involve wiring the valve to a control panel or syncing it to a wireless system via a smartphone app or hub. Ensure all connections are secure and follow any specified safety precautions during installation. Test the connection to confirm that the valve responds correctly to commands from the control system. Proper integration is essential for the system to function reliably in monitoring and controlling water flow.
Step 6. Test the System for Leaks and Functionality:
After installation and connection to the control system are complete, carefully test the entire setup for leaks and proper functionality. Turn on the water supply and inspect all fittings, joints, and valves for any signs of water escaping. If a leak is detected, immediately turn off the water supply and make the necessary adjustments, such as tightening fittings or applying additional plumber’s tape. Once the system is leak-free, test the automatic shut-off functionality by simulating a water flow issue or using the control system to activate the valve. Ensure the valve operates smoothly and responds accurately to commands. This final step guarantees the system is ready for long-term operation and can effectively prevent water damage.
Step 7. Perform Regular Maintenance and Inspections:
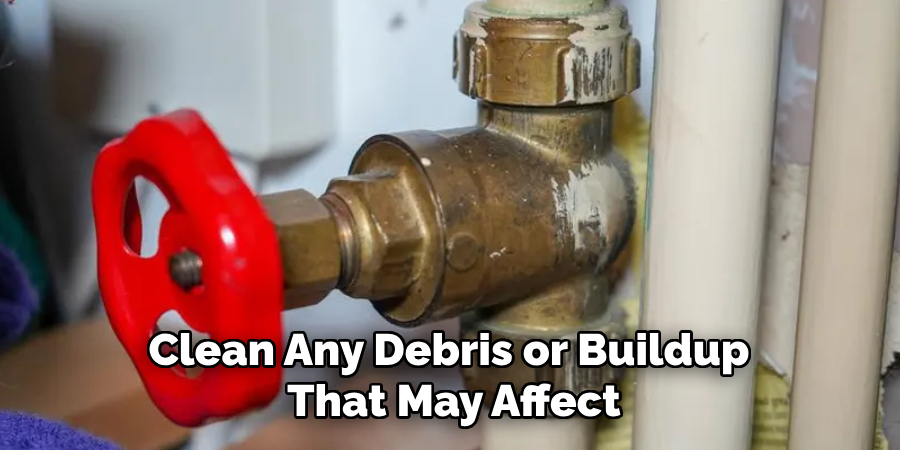
To ensure the long-term reliability and efficiency of the system, establish a schedule for regular maintenance and inspections. For signs of wear, corrosion, or damage, periodically check all components, including the valve, fittings, and control system. Clean any debris or buildup that may affect functionality, and test the automatic shut-off feature to confirm it remains operational. Replace any worn or damaged parts promptly to prevent system failure. Regular upkeep prolongs the system’s life and enhances its effectiveness in safeguarding against water damage.
Step 8. Document System Performance and Maintenance Activities:
Create a detailed log to document system performance, maintenance activities, and any repairs or replacements performed over time. Record dates, actions, and observations to maintain a clear system condition history. This documentation helps identify recurring issues, track the longevity of components, and ensure that all maintenance is consistent and thorough. Keeping organized records also assists in troubleshooting and provides valuable information for future upgrades or replacements.
By following these steps for installing an automatic water shut-off valve, you can effectively protect your home and property from costly water damage.
5 Things You Should Avoid
- Skipping the Manufacturer’s Instructions: Avoid neglecting the specific instructions provided by the manufacturer. Each system may have unique requirements for installation and functionality, and failing to follow these guidelines can lead to improper installation or even system failure.
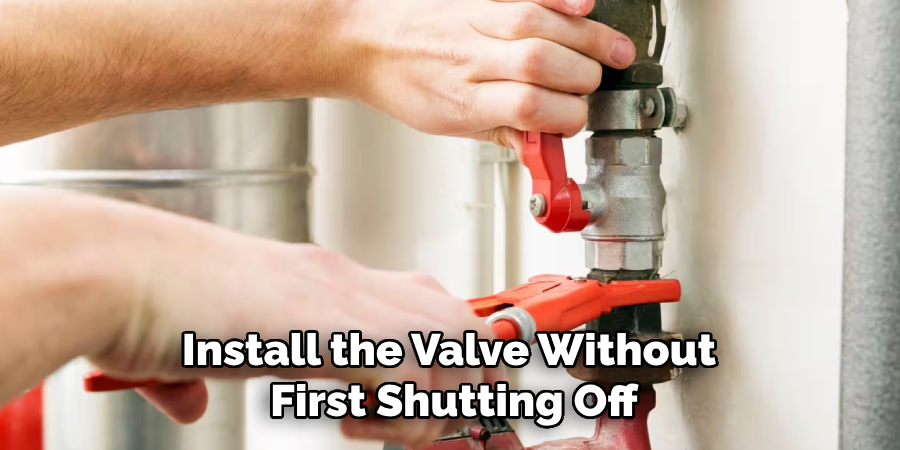
- Installing Without Shutting Off the Water Supply: Never install the valve without first shutting off the main water supply. This can result in accidental water leaks or flooding, causing unnecessary damage and additional repair costs.
- Using Improper Tools or Equipment: Using the wrong tools or equipment during installation can damage the valve or surrounding piping. Ensure you have the appropriate tools, such as pipe wrenches or sealants, to avoid potential issues.
- Ignoring the System’s Placement Requirements: Installing the shut-off valve in the wrong location can hinder its effectiveness. Do not place the valve in hard-to-access areas or where it cannot correctly detect water leaks, as this compromises its purpose.
- Neglecting to Test the System After Installation: Failing to test the shut-off valve after installation can lead to unnoticed issues that may arise later. Always thoroughly check to confirm that the system is working correctly and is prepared to respond to leaks or water flow irregularities.
What is the Best Type of Automatic Water Shut-Off Valve?
The best automatic water shut-off valve type depends on individual needs and preferences. Some factors to consider when choosing a shut-off valve include the size and location of the water supply, budget, and desired features. Some popular types of automatic shut-off valves include ball valves, gate valves, and pressure-sensitive valves. It is essential to carefully research and evaluate different options before ensuring the chosen valve meets all requirements for your specific situation.
It is also recommended to consult a professional plumber for their expert opinion on which type of automatic water shut-off valve would be most suitable for your home or property.
Conclusion
How to install automatic water shut off valve is a straightforward process when approached with proper preparation and attention to detail.
Begin by turning off the main water supply to prevent any leaks during the installation. Next, identify the ideal location for the valve—typically near the main water line. Carefully follow the manufacturer’s instructions for mounting and connecting the valve, ensuring all fittings are secure to avoid future leaks. Once installation is complete, restore the water supply and test the valve to confirm it is functioning correctly. If any issues arise, do not hesitate to consult a professional plumber for assistance.
Proper installation ensures the valve works effectively to protect your home from water damage.
About the Author
Adrian Green is a passionate woodworking enthusiast who has dedicated his life to the craft of woodworking. From his early days working alongside his father in the family woodworking shop, Adrian has honed his skills and developed a deep love for creating beautiful, functional pieces with his hands. As the voice behind The Woodenify Blog, he shares his knowledge, tips, and inspiration with fellow woodworkers of all skill levels, helping them build confidence in their abilities while learning new techniques.
Professional Focus
- Specializes in DIY woodworking projects, from furniture making to home décor.
- Provides step-by-step guides, tips, and practical tutorials for woodworkers at any skill level.
- Focused on empowering readers with confidence and knowledge through easy-to-follow instructions and hands-on techniques.
- Passionate about building a community where makers can share, learn, and grow together in the world of woodworking.
Education History
University of Craft and Design – Bachelor of Fine Arts (BFA) in Woodworking and Furniture Design
Woodworking Apprenticeships – Gained extensive hands-on experience through various workshops and mentorships with seasoned craftsmen, refining carpentry and furniture-making skills.
Expertise
- DIY woodworking, carpentry, furniture making, and home décor projects.
- Creating clear, accessible tutorials and guides for beginner to advanced woodworkers.
- Helping readers experience the satisfaction and fulfillment of turning raw materials into stunning finished products.