
Are you tired of seeing water pooled in your street or driveway every time it rains? A blocked storm drain could be the culprit. Storm drains are an important part of our city’s infrastructure, helping to prevent flooding and damage to roads and buildings.
Blocked storm drains can lead to significant issues, including localized flooding, property damage, and environmental concerns. Clearing a blocked storm drain is essential to ensure the proper flow of water and prevent these potential problems. While the process might seem daunting, following a few simple steps can make the task manageable and safe.
This guide on how to clear a blocked storm drain will walk you through the necessary steps and precautions to effectively unblock a storm drain and maintain its functionality.
What Are the Causes of Blocked Storm Drains?
Before learning how to clear a blocked storm drain, it’s important to understand the common causes of the blockage. Some of the main reasons why storm drains get clogged include:
- Debris Buildup: Leaves, twigs, and other organic materials can accumulate in the storm drain, causing blockages.
- Trash and Litter: Plastic bags, bottles, wrappers, and other garbage items can make their way into the storm drain and create obstructions.
- Grease and Oil: Improper disposal of cooking oils or motor oil can lead to grease buildups that constrict the flow of water through the drain.
- Tree Roots: If there are trees planted near the storm drain, their roots can grow into the pipes and cause blockages.
- Sediment and Dirt: Over time, sediment and dirt can accumulate in the storm drain, reducing its capacity to handle water flow.
These are just some of the common causes of blocked storm drains. Understanding these factors can help you prevent blockages in the future and take the necessary steps to maintain the proper functioning of your local storm drainage system.
What Will You Need?
Before you start clearing a blocked storm drain, gather all the necessary tools and materials. You’ll need:
- Protective Gear: Safety should always be your top priority. Wear rubber boots, gloves, and eye protection to protect yourself from any potential hazards.
- Garden Hose: A garden hose with a spray nozzle can be helpful in dislodging debris and flushing out the drain.
- Plunger: A plunger designed for toilets can also be used to clear blockages in storm drains.
- Auger or Plumbing Snake: These tools are ideal for tackling more extensive blockages caused by tree roots or solid objects lodged in the drain.
- Broom or Shovel: A broom or shovel can be used to remove larger debris from the surface of the drain.
- Bucket: Keep a bucket nearby to collect any debris that you remove from the storm drain.
Once you have all the necessary tools and gear, it’s time to get started on clearing the blocked storm drain!
8 Easy Steps on How to Clear a Blocked Storm Drain
Step 1: Assess the Situation
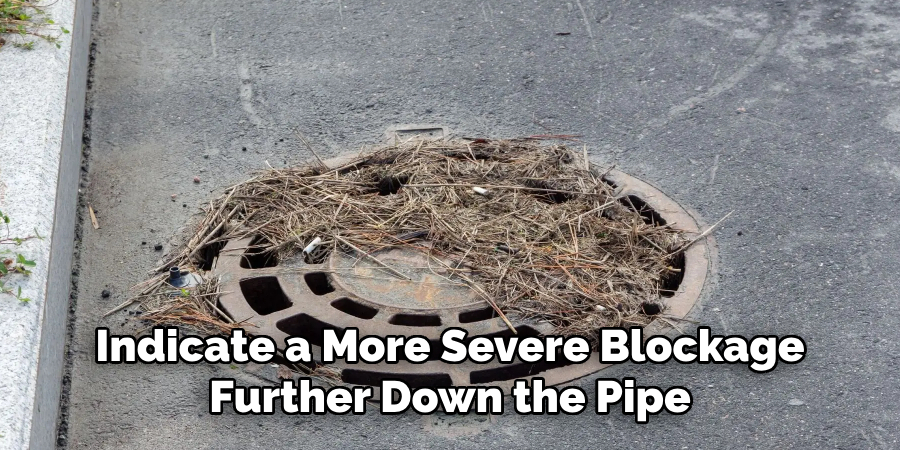
Begin by carefully examining the area around the storm drain to identify the severity and type of blockage. Look for visible signs of debris such as leaves, dirt, or garbage that may be clogging the drain. Check for standing water or water overflowing from the drain, as this can indicate a more severe blockage further down the pipe. Additionally, observe if there’s any unusual structural damage to the storm drain, like cracks or collapsed sections, which may require professional attention. It’s important to understand the scope of the problem before proceeding, as this will help you determine the best tools and methods to use for clearing the blockage safely and effectively.
Step 2: Ensure Safety
Prioritize safety before attempting to clear the blockage. Put on protective gloves to shield your hands from sharp objects and unsanitary materials. If there is standing water, wear waterproof boots to avoid direct contact with contaminated water. Use safety goggles to protect your eyes from splashing debris or water while working. Additionally, ensure that the area around the storm drain is stable and free from hazards like slippery surfaces or sharp objects that could cause injury. If the blockage is near a roadside, set up warning signs or cones to alert others of your presence and maintain a safe working zone. Taking these precautions will help minimize risks while you clear the blocked storm drain.
Step 3: Remove Debris
Begin by manually removing any visible debris blocking the storm drain. Use a rake, shovel, or grabber tool to collect leaves, twigs, trash, and other items that may be obstructing the flow of water. Place the debris in a sturdy garbage bag or container to dispose of properly once the drain is clear. Be thorough yet gentle to avoid damaging the storm drain grates or surrounding structure. If necessary, use a garden hose or bucket of water to flush away smaller particles that are harder to remove by hand. This step lays the groundwork for restoring the storm drain’s functionality effectively.
Step 4: Inspect the Drain for Further Blockages
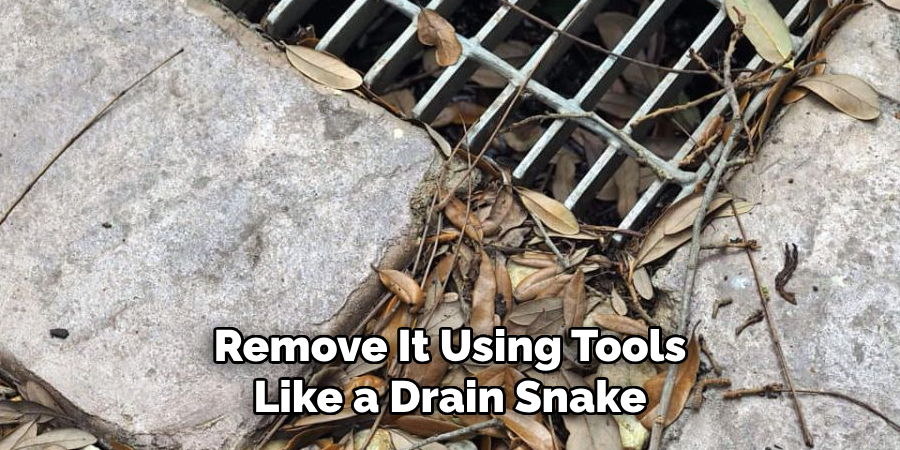
After removing the surface debris, inspect the interior of the storm drain for additional blockages. Use a flashlight to check for any buildup deeper within the drain, such as sediment, small rocks, or compacted debris. If the obstruction is within reach, carefully remove it using tools like a drain snake or a long-handled grabber. For clogs that are more severe or difficult to access, consider contacting local authorities or a professional drainage service for assistance. Ensuring the drain is completely clear will allow water to flow freely and prevent further issues during heavy rainfall.
Step 5: Test the Drain’s Functionality
Once the debris and blockages have been cleared, test the storm drain to ensure it is functioning properly. Slowly pour a bucket of water or use a garden hose to direct water into the drain, observing how it flows. If the water drains quickly and without pooling, the storm drain is effectively cleared. However, if the water drains slowly or backs up, this may indicate an unresolved blockage or a more serious issue within the drainage system. Address these problems promptly to restore full functionality and reduce the risk of flooding during future rainstorms.
Step 6: Perform Regular Maintenance
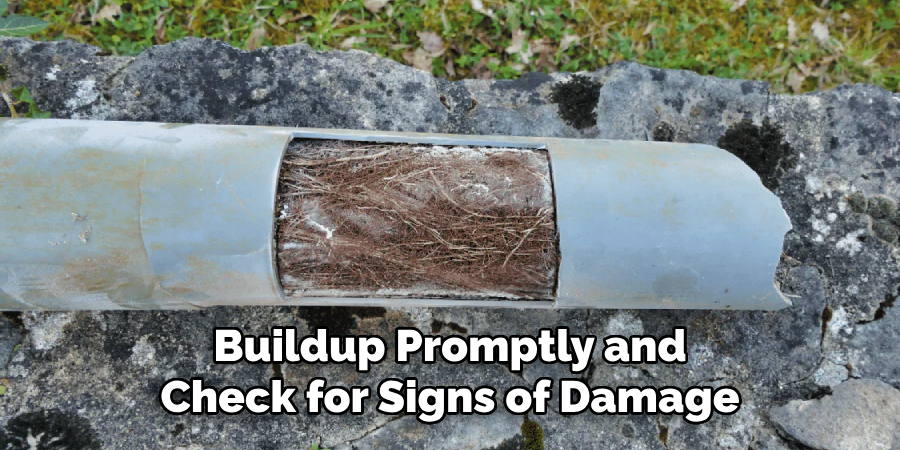
To prevent future blockages and ensure the storm drain remains effective, establish a regular maintenance schedule. Periodically inspect the drain for debris, especially after heavy storms or seasons with falling leaves. Remove any buildup promptly and check for signs of damage, such as cracks or structural wear. Keeping the surrounding area clean and free of litter also helps minimize the chances of clogs forming. Regular maintenance is key to a properly functioning drainage system and reducing the risk of flooding.
Step 7: Seek Professional Assistance When Needed
If you encounter persistent drainage issues or significant structural damage, it’s essential to seek professional assistance. Qualified professionals can use advanced tools and techniques to identify hidden blockages or repair critical damage within the storm drain system. Attempting to address complex problems without the proper expertise may result in further damage or ineffective repairs. By consulting experts, you can ensure the drain is restored to optimal condition and avoid potential hazards during heavy rainfall.
Step 8: Implement Preventative Measures
To ensure the longevity and efficiency of your storm drain system, consider implementing preventative measures. Install gutter guards or screens to keep debris out of the system, and consider landscaping techniques, such as creating permeable surfaces, to reduce water runoff. Additionally, regular educational efforts for the community about proper waste disposal and stormwater management can help prevent pollutants from entering the drains. Preventative actions reduce the strain on the drainage system and help maintain its functionality over time.
By following these steps and implementing preventative measures, you can effectively clear a blocked storm drain and prevent future issues.

5 Things You Should Avoid
- Using Your Bare Hands: Avoid attempting to clear the blockage with your bare hands. Storm drains can be filled with sharp debris, harmful bacteria, or hazardous materials that can cause injuries or infections. Always wear sturdy gloves.
- Ignoring Safety Precautions: Do not neglect safety measures such as wearing protective gear, including goggles and waterproof boots. Stormwater may carry contaminants or present slipping hazards.
- Pouring Chemicals Down the Drain: Refrain from using harmful chemicals to dissolve the blockage. These chemicals can damage the environment and harm aquatic ecosystems when they flow into larger water bodies.
- Forcing Large Tools into the Drain: Avoid inserting oversized or inappropriate tools, as they can damage the drain structure or worsen the blockage. Stick to using appropriate equipment like drain rods or snakes.
- Clearing Drains During Heavy Rain: Do not attempt to clear a storm drain during a heavy rainstorm. The increased water flow can pose serious safety risks, including flooding or being swept away by rushing water. Always wait for safer conditions.
Conclusion
How to clear a blocked storm drain requires a careful and methodical approach to ensure both effectiveness and safety.
Start by assessing the blockage and gathering the appropriate tools, such as gloves, a rake, or a drain rod. Always prioritize wearing protective gear to guard against contaminants and physical hazards. Remove debris gradually and avoid rushing the process, as improperly handled obstructions can worsen the issue. Importantly, refrain from using harmful chemicals or dangerous equipment, instead relying on proper techniques and tools.
By following these precautions and acting thoughtfully, you can successfully restore proper drainage while minimizing risks to yourself and the environment.
About the Author
Adrian Green is a passionate woodworking enthusiast who has dedicated his life to the craft of woodworking. From his early days working alongside his father in the family woodworking shop, Adrian has honed his skills and developed a deep love for creating beautiful, functional pieces with his hands. As the voice behind The Woodenify Blog, he shares his knowledge, tips, and inspiration with fellow woodworkers of all skill levels, helping them build confidence in their abilities while learning new techniques.
Professional Focus
- Specializes in DIY woodworking projects, from furniture making to home décor.
- Provides step-by-step guides, tips, and practical tutorials for woodworkers at any skill level.
- Focused on empowering readers with confidence and knowledge through easy-to-follow instructions and hands-on techniques.
- Passionate about building a community where makers can share, learn, and grow together in the world of woodworking.
Education History
University of Craft and Design – Bachelor of Fine Arts (BFA) in Woodworking and Furniture Design
Woodworking Apprenticeships – Gained extensive hands-on experience through various workshops and mentorships with seasoned craftsmen, refining carpentry and furniture-making skills.
Expertise
- DIY woodworking, carpentry, furniture making, and home décor projects.
- Creating clear, accessible tutorials and guides for beginner to advanced woodworkers.
- Helping readers experience the satisfaction and fulfillment of turning raw materials into stunning finished products.